EA3GCY DB4020 User manual


2
DB4020 SSB Transceiver OPERATINGMANUAL
INTRODUCTION
Using the DB4020 transceiver is very easy. It has no frills. But it has all the necessary functions to enjoy
QRP with a device built in your home.
Efforts have been made to make changes to menu functions as quick and comfortable as possible.
Tuning, step changes, adjustments and all other functions are performed using a rotary encoder with a
built-in push button.
A single knob for all functions!
The “Arduino UNO” module is already programmed at the factory. There are initial values and frequency
settings that will help get you up and running. With the default values, your DB4020 will be able to
start working perfectly. However for each assembly some slight re-adjustments must be made in the
display settings menu.
The default settings are:
MAIN IF OFFSET: VFO = F + IF (Always it has to be that)
MAIN IF = LSB/USB (It changes automatically, not adjustable)
LSB = 4.913.5 MHz. (Almost always correct)
USB = 4.916.7 MHz. (Almost always correct)
CALIBRATE XTAL = 813 (Slightly adjustable according to IC2 SI5351 module Xtal)
CALIBRATE VOLTS = User must adjust.
S-METER function: Off
RIT ON/OFF: OFF

3
DB4020 SSB Transceiver OPERATINGMANUAL
DIAL DISPLAY
On the working dial display, you can see the tuned frequency, the current step, the mode (SSB or CW),
the S-Meter, the current status (RX or TX), the RIT status (ON / OFF) and the supply voltage.
By turning right or left the rotary encoder the frequency respectively increases or decreases by the
current "step". A quick push on the encoder will change the step.
There are two ranges of steps. The default range is 10Hz - 100Hz - 1kHz. To change to the second
range of steps, go to main menu.
The current band, frequency and step are stored in a non-volatile memory automatically every 4 seconds
(only if there has been any change). When you start it, you will always recover the frequency where it
was last time.

4
DB4020 SSB Transceiver OPERATINGMANUAL
MAIN MENU
To enter the main menu, you must push and hold the encoder pushbutton for >1 second. Then, you can
move through the menu lines by turning the encoder. The last line is "EXIT" to exit without change.
Band change:
To change the band, go to main menu and select the line “40M BAND” or “20M BAND” and a short press
on switch encoder.
Step range change:
There are two ranges of steps. The default range is “1kHz - 100Hz - 10Hz”To change to the second
range of steps, go to main menu and select the line "1MHz 100kHz 10kHz" and push switch encoder
again. To return to the previous range, repeat the same operation.
RIT on/off:
To activate the RIT, select the "RIT ON / OFF" line and press the encoder switch. Then, “RIT ON”will
appear on the main screen. If the frequency increases, "RX+" will appear or if it decreases, "RX-" will
appear. If the frequency does not change, "RX=" will appear.
When transmitting, the frequency will always return to the initial one.
To deactivate the RIT, proceed as in activation.
SETTINGS:
Select this line, press push-button to enter the “SETTINGS” menu.
EXIT:
Return to the main tuning screen.

5
DB4020 SSB Transceiver OPERATINGMANUAL
SETTINGS MENU
IF OFFSET:
Here the Intermediate Frequency offset on the DB4020
transceiver is selected.
It should always be VFO = F + IF.
Never change this setting.
6
DB4020 SSB Transceiver OPERATINGMANUAL
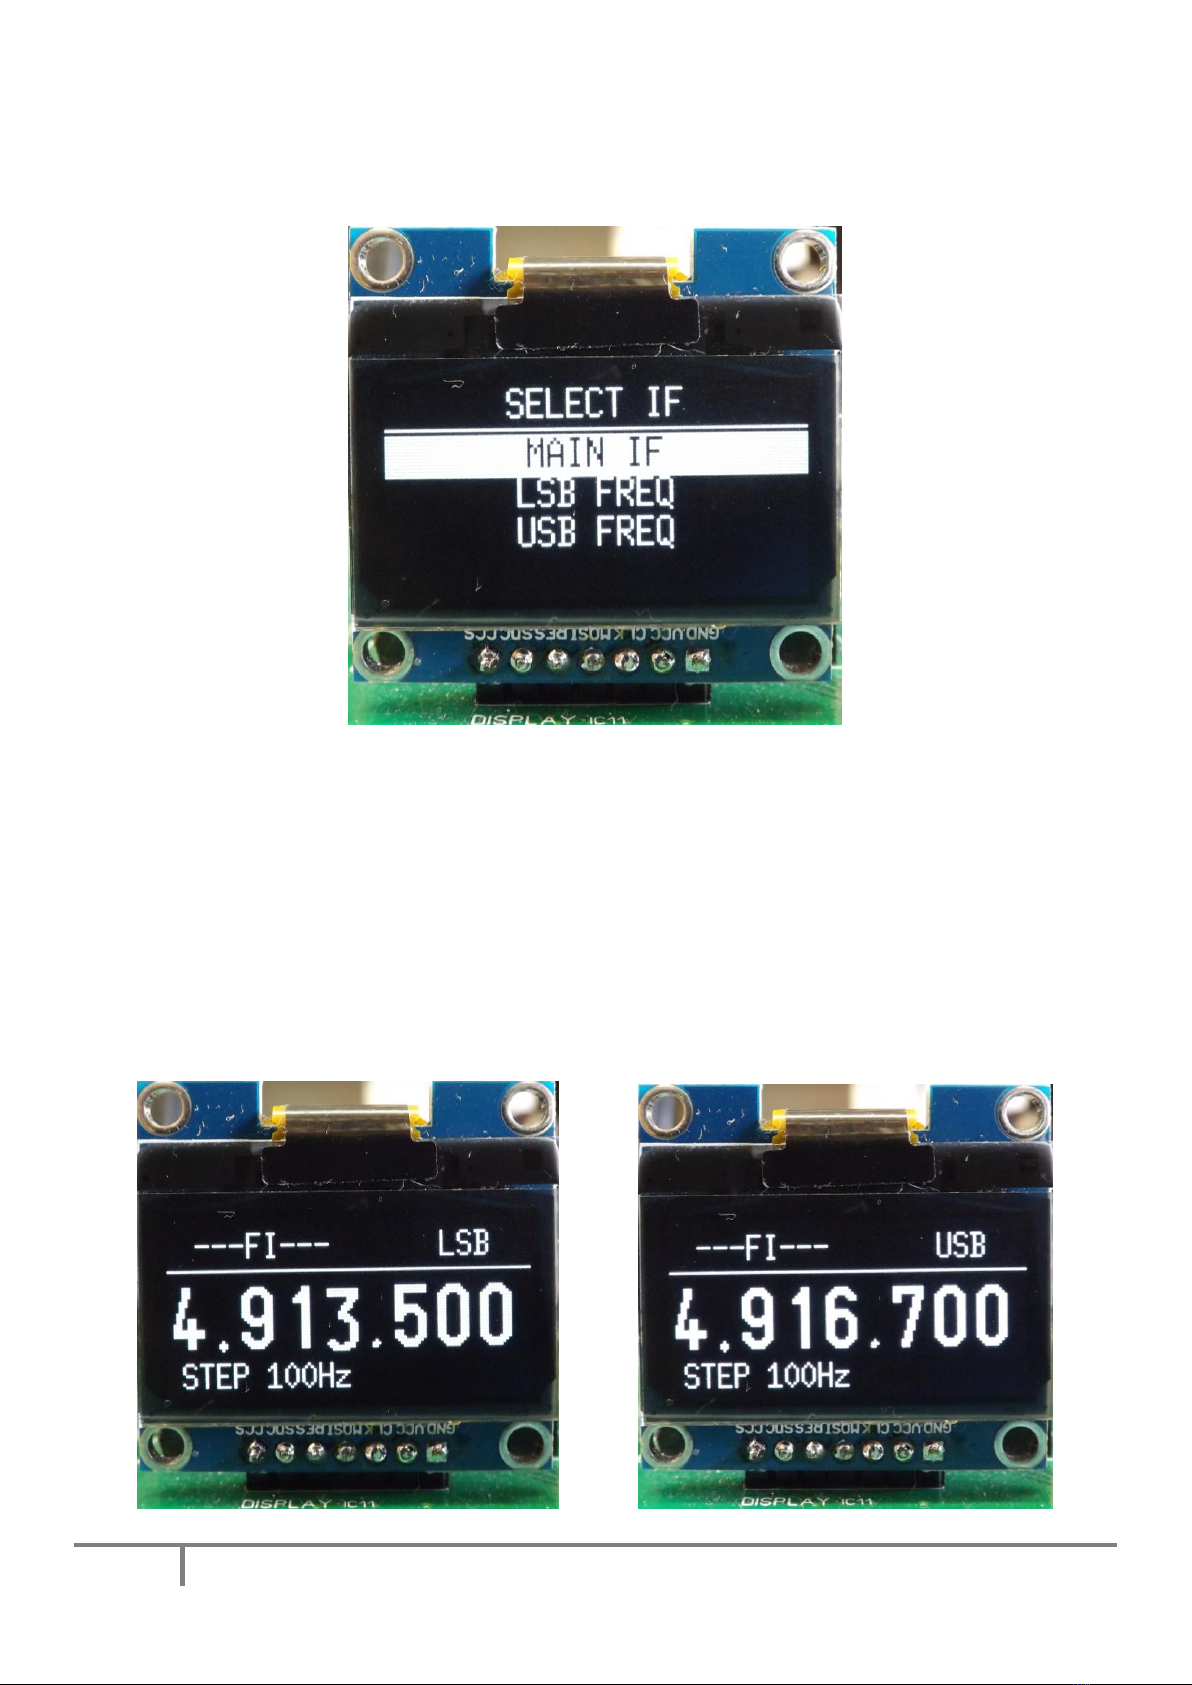
IF FREQUENCY:
Press the push-button to enter “SELECT IF” sub-menu.
The “MAIN FREQUENCY” changes automatically according to the current band, not user
adjustable.
“LSB FREQ” it is by default 4,913,500. This is the correct frequency. If desired, you vary slightly.
To finish, hold > 1sec pressed and "SAVE / CANCEL" will appear, you can change it or leave it
as it was before.
“USB FREQ” it is by default 4,916,700. This is the correct frequency. If desired, you vary slightly.
To finish, hold > 1sec pressed and "SAVE / CANCEL" will appear, you can change it or leave it
as it was before.
Note: A quick push on the encoder will change the step (all steps available from 1Hz to 1MHz).
7
DB4020 SSB Transceiver OPERATINGMANUAL
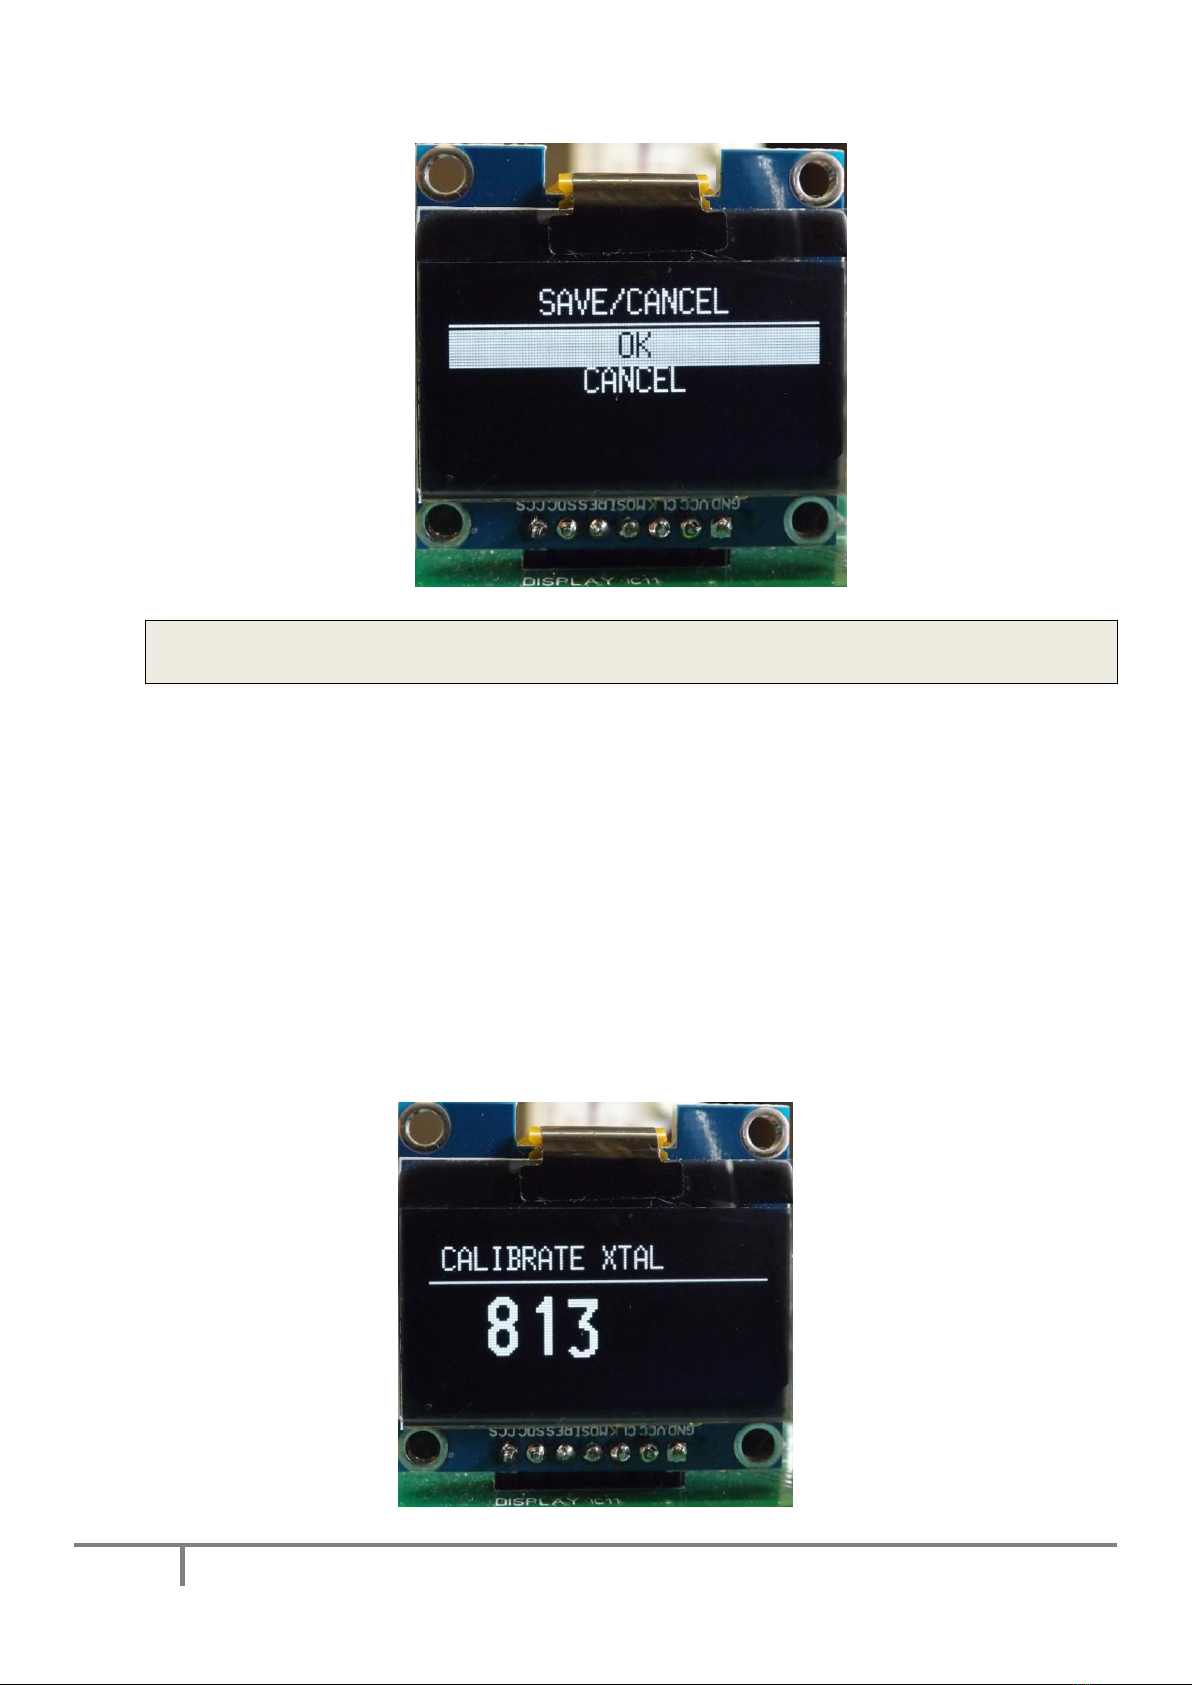
This screen always appears after making a value or frequency adjustment. You can record the
changes “OK” or “CANCEL” them.
CALIBRATE XTAL:
Press the push-button to enter “CALIBRATE XTAL” sub-menu.
You can calibrate the frequency of the clock crystal oscillator of the SI5351 module. It has a margin of
adjustment -2000 to +2000. This value not is Hz and is inverse to the output frequency, that is, when it is
increased, the frequency decreases and vice versa.
In order to make this adjustment you must use a professional frequency meter or a good quality receiver
to read the output frequency of the SI5351 (use CLK0 output on SI5351 module) and make the
adjustment with offset "OFFSET = 0".
This adjustment compensates the tolerances of the crystals of each SI5351 module. Notable differences
are observed in crystals from different manufacturers.
Note: At the end of the adjustment, remember to return to “OFFSET = F + IF”

8
DB4020 SSB Transceiver OPERATINGMANUAL
CALIBRATE VOLTS:
Press the push-button to enter “CALIBRATE VOLTS” sub-menu. You can calibrate the dial display
voltmeter. Use a quality multimeter in the volts function. Measure the input voltage of the DB4020.
Turn the encoder until the same reading is displayed on ARDU-5351 as on the multimeter.
The measurement resolution is 0.1V.
RESET:
If necessary, you can perform a “RESET”to the default values.
Choose the RESET line and then choose "OK" or "CANCEL".
EXIT:
Returns to the previous menu screen.
S-METER ON/OFF function
To enable or disable the S-Meter function turn on the power while holding down pushbutton rotary
encoder. This will invert the state from ON to OFF or vice versa.
The ARDU-5351 will always maintain that status until you change it again.
Other manuals for DB4020
1
Table of contents
Other EA3GCY Transceiver manuals


