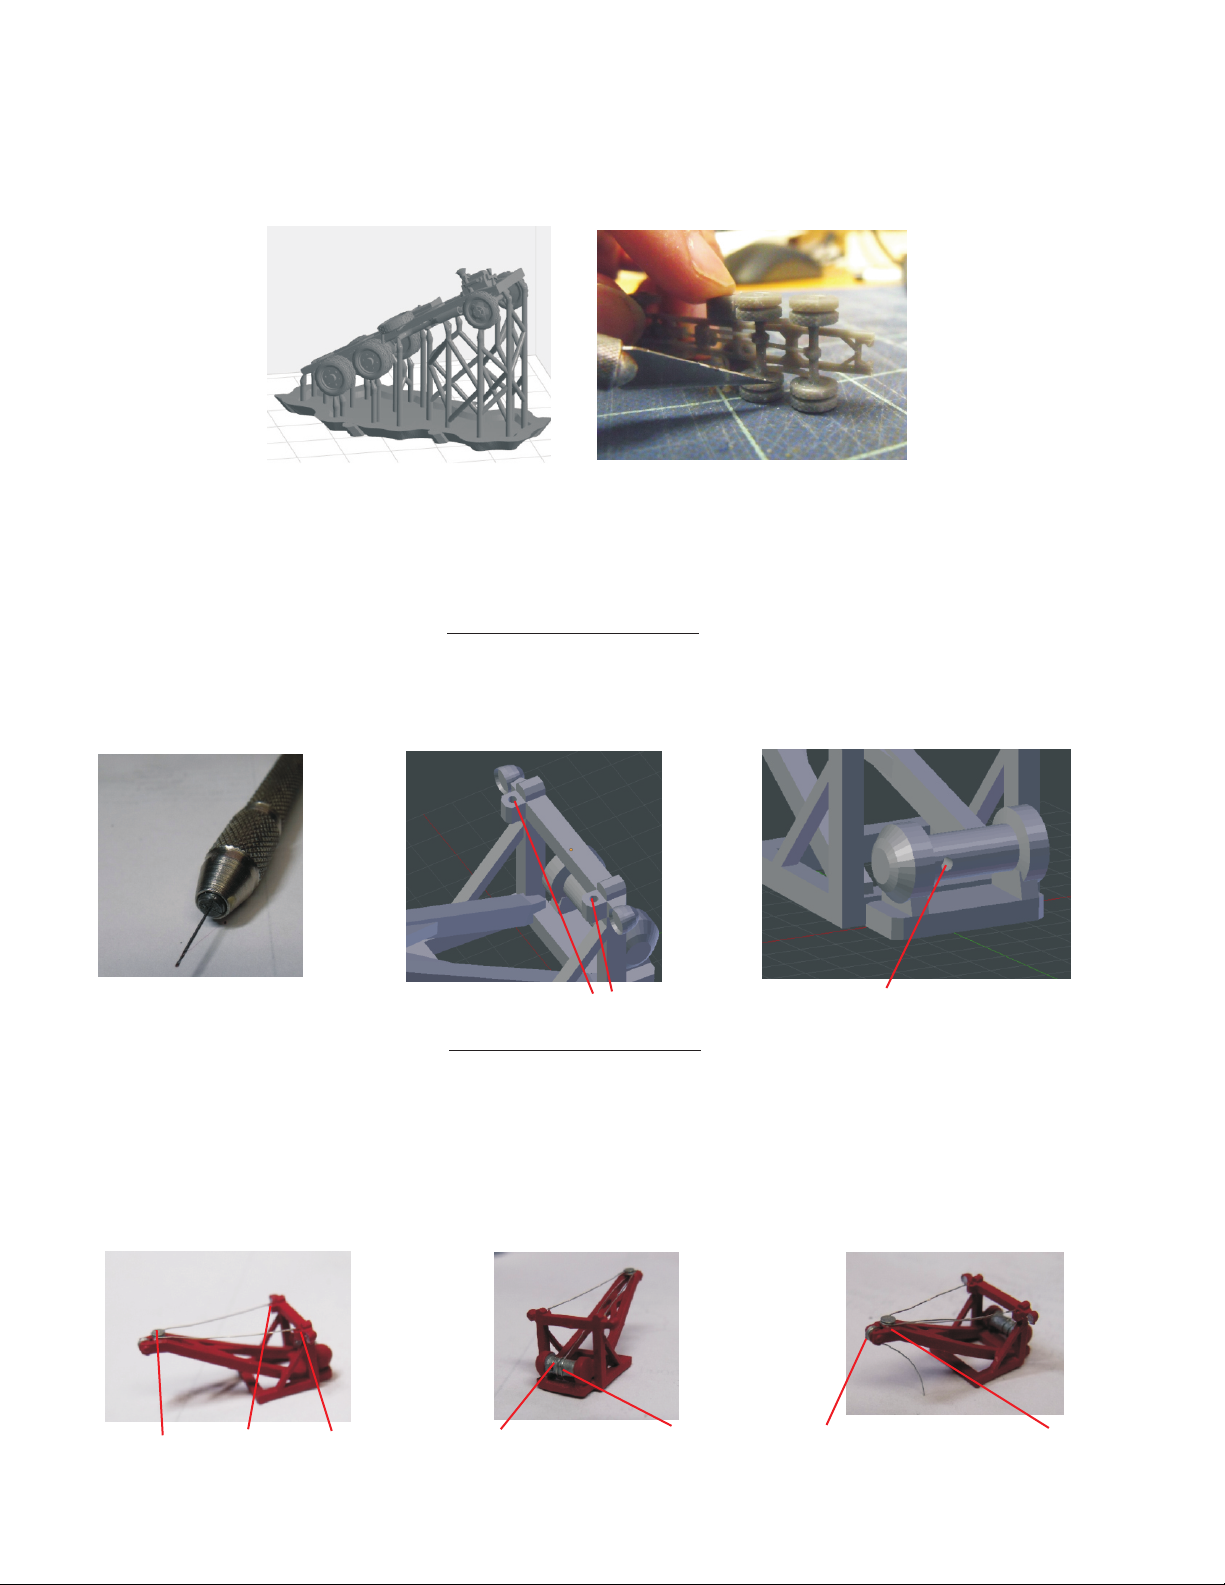
The 3D printing process requires a supporting frame during printing, see below left. The
printed part is cut from the frame using flush cutters and this sometimes leaves small bumps on the
part. Use a knife with a sharp new blade to cut away the bumps. When trimming bumps off the
wheels you should place the wheel on a flat surface as shown below on the right. Putting too much
stress on the wheel can cause the axle to break. For bumps on the cab body, sanding is
recommended.
After cleaning up the bumps, paint the parts and apply the decals as shown on the painting
guide on pages 3 & 4.
When everything is dry, proceed to final assembly. Follow the steps below using CA glue.
Drill Out the Holes on the Hoist: One of the limitations of 3D printing is that very small holes get filled
in during the process. Once the hoist has been painted, you will need to drill out the holes as shown
below. I use a pin vise with a #76 drill bit for this.
Rigging the Hoist: Using the fine wire included in the kit, I form the wire into a V-shape by bending it
around a 1/16” drill bit. Hook the wire around the top pulley then insert the ends into the two upper holes
and pull them tight, place a tiny drop of CA glue into the holes. Cut off any excess wire at the bottom of
the holes. Next CA glue one end of a piece of wire into the hole in the winch drum and let it dry. Then I
wrap a coupe of turns of wire around the drum then thread the wire through the opening under the
upper pulley and around the lower pulley. trim off excess wire so that there is about ½ inch left hanging
from the pulley.
Page 2
www.eaelec.com
Final Assembly - Step 1
Final Assembly - Step 2
Pin Vise with #76 Bit Drill out Holes Here Drill out Hole Here
Wrap wire
around Pulley
Insert wire into
holes and glue
Glue one end
into hole in Drum
Wrap a couple
of turns around
the Drum
Thread wire under upper Pulley
and around lower Pulley


