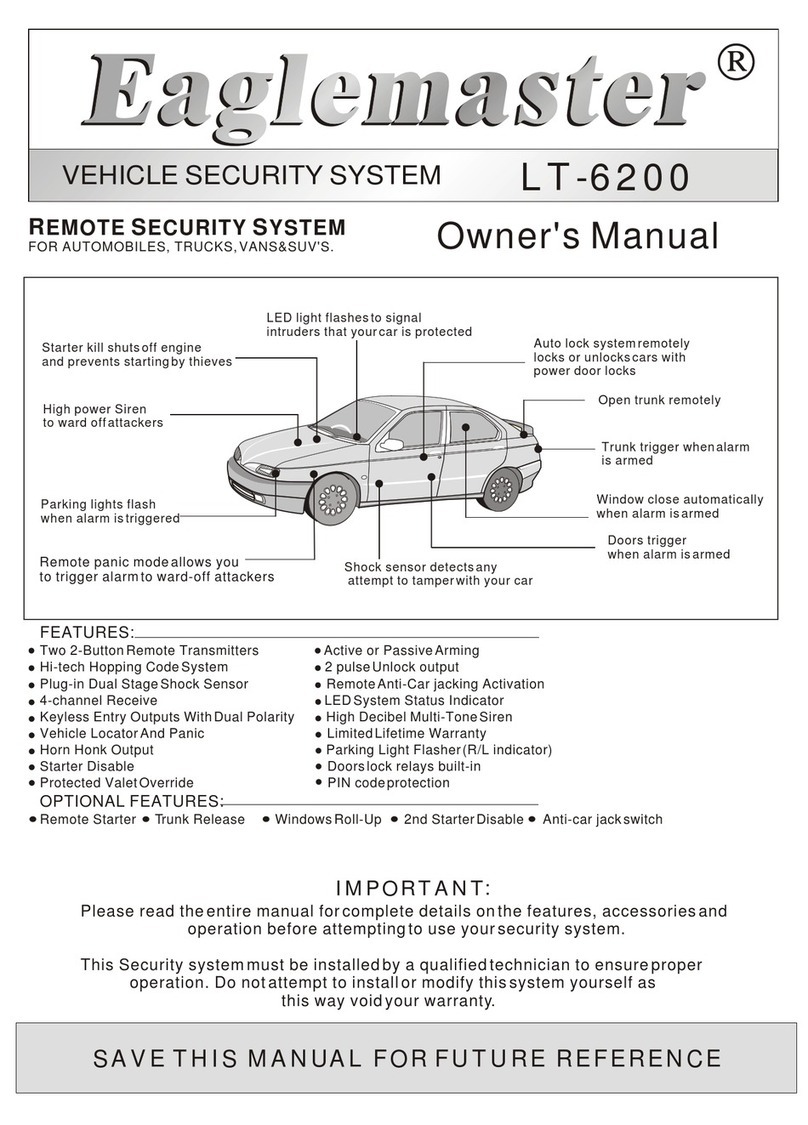
Eaglemaster AS-232T User manual

SYSTEM FEATURES:
1. Two 4-button transmitters
2. Arm/Disarm the system
3. Silent Arm/Disarm
4. Arm connection memory
5. Starter (engine) disable
6. Panic mode
7. Auto-rearming
8. Ignition on safety door lock
9. Plug-in function LED
10. Passive or Active Arm
11. 1 or 2 pulse unlock
12. Passive arming
13. Passive immobilizer
14. Defective zone alert/bypass
15. Trunk release output
16. 2-stage shock sensor
17. Remote sensor bypass
18. User programme mode
19. Parking light flasher
20. Doors lock/unlock relays
21. Code hopping system
22. PIN code protection
23. Alarm triggering counter
24. Valet mode
IMPORTANT:
Please read the entire manual for complete details on the features, accessories and
operation before attempting to use your security system.
This Security system must be installed by aqualified technician to ensure proper
operation. Do not attempttoinstall or modifythissystem yourself as
this way void your warranty.
SAVE THIS MANUAL FORFUTURE REFERENCE
AS-232T
MODEL:
FOR AUTOMOBILES,TRUCKS, VANS&SUV'S.
Instruction Manual
Automotive Security System
12
34

Note: "*" means factory setting before delivery
To enter programme mode and access Feature Change: Disarmed, turn ignition from ON to OFF and
within 2 seconds, simultaneously Pressing and hold + of the transmitter, until siren provide three chirps
to indicate that the system is enter programmable mode.
*Exit programme mode: There are 2 conditions to exit the mode : (1) Turn Acc ON , (2) Within 30 seconds without
any further programming. Siren will chirp twice to confirm the system has been programmed and exit in normal status
PROGRAMMABLE MODE TABLE
Press button Press button Press button
Press + button
PROGRAMME MODE OPERATE:
Ignition safety
door lock Siren chirp
confirm Siren chirp
confirm Siren chirp
confirm
Siren chirp
confirm
Passive
Arming Door unlock
pulse
AUX. Channel
output
WITH
*WITHOUT
*Normal
2 pulse
Chirp Once
Chirp Twice
Chirp Once
Chirp Twice
REMOTE FUNCTION OPERATE:
Functions Step Condition
Press + button
Siren chirp
confirm
Trunk open
&
Remote latched
Chirp Once
Chirp Twice
Arm and door lock
Arm without siren chirp
Disarm and door unlock
Disarm without siren chirp
Trunk open / Latched
Car search mode
All sensor bypass
Valet mode
Arm/Disarm chirp on/off
Auto re-arm on/off
Press once
Press once then within 3sec. press once
Press once
Press once then within 3sec. press once
Press over 2sec. / Press and hold
Press once after 8sec. of armed
Press once within 8sec. of armed
Press together over 2sec.
Press over 5sec. (Prog.)
Press together over 2sec.
Disarmed & ACC off
Disarmed & ACC off
Armed
Armed
Any time
Armed
Armed
ACC ON
ACC ON
ACC OFF-ON within 5sec.
Chirp Once
Chirp Twice
Chirp 3 times
*Without
With
With
Without door lock
With door lock
Press button
Siren chirp
confirm
Passive
Immobilizer
WITH
*WITHOUT
* For trunk open
pulsed 1sec.
Remote latched
Chirp Once
Chirp Twice
+
+
2nd immobilizer
Pager
Chirp Once
Chirp Twice
Chirp 3 times
*Window output

STANDARD FEATURES:
-To ARM the system:
To arm your system within proper operation range, simply press button once (while system in disarmed or
Acc off position) . The system will respond one siren chirp, one lights flash, doors lock, disable engine starter, LED
will begin flashing quickly until all sensor inputs are active - LED will start blinking slowly (flash once per second).
DEFECTIVE ZONE BYPASS: If armed, after 8sec. the system responds with 4 short siren chirps, it indicating that
one of the door is not close properly. 5 short siren chirps, it indicating that hood or trunk is not close properly. The
system will bypass that zone and still protect other zones.
AUTO RESET: If a violation occurs the system will respond by sounding the siren and flashing the lights for
approximately 30sec. before the system resets itself and continues to protect your car. If violation still occurs the
system, siren and lights will working for 8 cycles then the system reset itself and continues to protect other zones.
-Arm without siren chirp :
To arm your system without siren chirp , simply press button once then within 3sec. press button once.
Note: this features is only activated under the system is in disarmed and Acc off position,.
-To DISARM the system :
To disarm your system within proper operating range, simply press button once (while system in arm position).
The system will respond two siren chirp, two light flash, doors unlock, Enable your engine starter, LED off
INTRUSION ALERT:Upon disarming the system, if the vehicle is attempted or intruded, siren and lights will
Indicates 4 chirps and 5 flashes to identify which zone was triggered. LED mode indicates the following different
triggering
.
Quick flash 2 times after a pause Sensor 1st-stage triggered
Quick flash 3 times after a pause Sensor 2nd-stage triggered
Quick flash 4 times after a pause Door switch triggered
Quick flash 5 times after a pause Hood/Trunk switch triggered
Quick flash 6 times after a pause Ignition switch triggered.
-Disarm without siren chirp :
To disarm your system without siren chirp , simply press button once then within 3sec. press button once.
Note: this features is only activated under the system is in armed position,.
-Arm/Disarm siren chirp on/off :(programmable)
The system provide a feature to turn OFF siren chirp when arm/diarm in silent area, disarm the system and turn
ignition to ON position, press and hold button for over 5sec. until siren give 2 short chirps to indicate that the
siren chirp has been turn OFF (disable).
-Automatic REARM: (programmable)
If programmed with the feature, the system is disarmed by remote and a door is not opened within approximately 40
seconds the system will automatically rearm itself. This feature guards against disarming caused by accidental or
unintended operation of the remote transmitter.
To turn OFF the feature: Disarm the system, turn ignition from OFF to ON position and within 5 seconds press and
hold button for over 2 seconds, until siren give 2 shot chirps, the feature now has been turned OFF.
To turn ON the feature again, same condition as above, siren give 1 short chirp to indicate turn ON the feature.
-Trunk open: (programmable)
This negative channel provide 2 ways to active the channel (Trunk open & Remote Latched), a
Note: if trunk has been remote opened in arming position, hood/trunk switch will delay sensing for 20 seconds, and
the shock sensor will be bypassed. the channel
may be activated immediately. However the channel may keep outputting until release the button;
this is particularly designed for extra devices operate.
Note: as long as the channel outputting , the shock sensor will be bypassed , unless button released.
-Dual stage shock sensor:
This device only activates after 8 seconds of arming state; this is preventing from the weak impact caused by the
driver while leaving the car.
The device operates: Light impact will activate the 1st stage sensor by giving 5 warning chirps.
Heavy impact will activate the 2nd stage sensor and trigger the alarm.
NOTE: Adjustments are made via the rotary control above the shock sensor.
On the contrary, press and hold button 5sec. again, siren chirp will turn
ON again, siren will give 1 short chirp.
lternative feature is
available by programmable setting, please see "Programme mode operate".
-Trunk open : if programmed with Trunk open feature, simply press and hold button over 2 seconds, the channel
will output for 1 second pulse , normally for open the trunk.
-Remote latched: if programmed with Remote latched feature, press and hold button , the channel

-Remote sensorby pass :
This system offer 2stage sensoroptional. Within 8sec.after set arming,to press button once , the
system will give3 short chirpsand 3 lightsflash, thus theshock sensor hasbeen turn off (disable).
If press button once again within8sec. of armingthe shock sensorwill turn ONagain (enable).
Note: - if remotesensor bypassed, itwill be detectedagain by nextarming.
- if armedwith silent mode,to operate sensorbypass will onlyindicate by lightsflash.
-Passive immobilizer (programmable):
If set programmewith this function,when turn off ignition switchfor 2 minutesor you openand close the
door, itwill start enginedisable function rightway .The LED willflash twice persecond.
Todisarm this function,simply press button once.
Note: (1). Under thisimmobilizer mode, ifignition force beenturn ON andwithout disarmed, thesystem
will be triggeringafter 10sec. periodtime.
(2).System will re-immobilizerafter 30seconds, oncepress button anda door isnot opened.
-Aux. Channel(-) output(programmable):
This channel "Pinkwire" is anegative (-500mA) outputfeatures, this featurecan be controlledseparately
of the "Window output ", " 2ndimmobilizer" or "Enginekeep running" . Three ofthe features isavailable
by set programmemode.
*Window closeoutput:
If programmed withthe Window outputfeature, this channelwill outputting 40seconds when systemarmed
for window closefeature.
*Pager output:
*2nd immobilizer:
This feature canbe controlled separatelyof the enginedisable. Thisoutput (-500mA) isworking with the
system disarmed. 40Arelay is requiredand go withnormally closed &common output.
-Emergency reset switch:
If the remotehas been lostor damage, orforgot the PINcode number theowner can enterthe car byusing
the key. It willact the alarm.To disarm thealarm turn ignitionon and pressreset switch once, it will
disarm the alarmimmediately.(Please ask yourinstaller this (-)reset switch location).
Note: after this emergencyreset activated, thePIN code willresumed factory settingPIN code"6" .
-Powerdisconnecting memory :
Alarm is builtin memory onmain unit. Generally, after alarmpower is cutoff andreconnect, main unitwill
read back thesedata make thealarm to resume.
When in disarmor arm position,power offthen on ,alarm will readback original position.
-Ignition safetydoor lockselect (programmable):
If set programmedwith this feature,turn Ignition ONafter 10 secondsthe doors willauto locked ,but within
this 10 secondsthe door hasbeen opened thisfeature will becancelled.
When turn IgnitionOFF,the doors willunlock for takeoff service.
-2 stepdisarm:
This system offers 2 stepdisarm. It's afeature that makeit possible tosilence and resetthe system whileit
is triggering, withoutdisarming the system.If the systemis triggered andthe siren hasbeen sounding,
pressing any buttononce on theremote transmitter willstop the triggerand return theunit to thearmed
state.
Pager (-) output can be connectedto alarm pagerto become twoway service.
30
85
86
87a
87
2nd Immobilizer
relay
ALARM CONTROL UNIT
Negative Pulsed outputFor
2nd Immobilizer Pink wire
Cut Existing low
current fuel pump
wire or Startsolenoid
Wire
Connect to Switched (+)
12Volts Ignitionkey on
Wiring for 2nd immobilizer

This programming features is provide the owner to learn the new transmitter or set new PIN code into the system
memory. This system can expand 4 different transmitters, and comes from factory with two transmitters already
programmed into the system memory. The PIN code from 1 ~30 numbers is available to set into the system memory.
Whenever you want to add or delete transmitter code ; or set your own PIN code of the system, the produces are
as following:
1.In Disarmed position, turning ignition switch from ON-OFF for 5 times within 8 seconds and stay in the OFF
position, siren will provide 1-long chirp to indicate that the system is in this programming mode.
2.During step 1. Ignition switch stay in the OFF position:
It's available to learn the new transmitter into the system by press any button once of the new transmitter, siren will
give 1-long and 1-short chirps to indicate the first transmitter code learn into the system memory. To learn the 2nd,
3rd,4th new transmitters, simply press any button once on the each transmitter, the numbers of siren short chirps
is according to the numbers of the new transmitters learn into the system memory .
Note: To exit this programming mode, if there is no new transmitters button been pressed, and ignition not turn
ON, after 8sec. siren will give 2-long and 2-short chirps to indicate that the system has been exit the
programming mode.
3. During step 1 or step 2. Turning ignition switch to the ON position:
It's available to set the new PIN code into the system, siren will give 1-long and 1-short chirps to indicate that the
system is in PIN code setting mode, at the time LED will start flashing, the times of LED flashing is according to the
numbers of the PIN code, let's say you want to set the PIN code " 12", while LED flashing 12 times then turning
ignition switch to the OFF position, thus the new PIN code "12" has been programmed, the siren will give 2-long
and 2-short chirps and then LED will auto flashing 12 times as showing the new PIN code for the owner of final
notification.
Note: During the LED flashing of the counting numbers, if ignition switch not been turn off, the LED will keep
flashing 30times and the system will auto exit this mode, siren will give 2-long and 2-short chirps, thus the
PIN code "30" has been programmed.
Note: During the LED flashing of final notification, alarm will not allow to activated.
How to use your PIN code:
If the remote control has been lost or damaged, you can manually disarm your system by enter your own PIN code .
(The system's factory-set PIN code is "6" ) Turning the Ignition switch from OFF to ON position, LED will start
flashing, the times of LED flashing is according to the PIN code numbers, while LED flash 6 times then turning the
ignition switch to the OFF position , the system will disarmed immediately and siren will give 4-short chirps.
Note: Each cycle of alarm triggering is only provide one time to set PIN code, otherwise the owner must wait next
cycle triggering and then set PIN code again to disarm the system. If the owner forgot the PIN code number, must
use "Emergency reset switch " to reset the alarm system (please see "Emergency reset switch" ), after this
emergency reset switch has been activated, the system PIN code will resume back to the original factory PIN
code "6" .
Transmitter & PIN code programming:
-Valet mode:
If you are going to have your vehicle serviced, parked by a valet or washed you will want to put your security system
Into valet mode. To enter valet mode disarm the system and turn Ignition switch to ON position , then press
button + for over 5 seconds until siren give one chirp and LED light ON to confirm the system is in valet
mode. When the system is in the valet mode it can not be armed. The door lock and unlock will function as keyless
entry system.
To EXIT: Turn Ignition switch to ON position , then press button + for over 5seconds, you will hear siren
provide 2 chirps and LED light OFF to confirm exit this mode and in alarm mode.
Note: While in the Valet mode, each time when Ignition switch has been turn off, the siren will provide 2 chirps for
warning sound.
-Passive arm (programmable):
If set programme mode to "WITH", while turn Ignition OFF, then close the last door ,system will provide 2 siren chirp and
2 light flash and LED flashing fast to indicated that the system is in passive arming mode. After 30sec. The system will
arm by itself and LED flashing slowly to show the system is in arming mode.
This system also provide under passive arming with door lock or without door lock feature (please see "programme
mode" features. ) During the period of 30sec. passive arming, if a door is opened, Led will light on and it will re-passive
arming when the door closed again.
-Car Finder:
The system provide a feature to easy find your car position, simply press button once when in armed after 8sec.
The system will respond by 5 lights flash.

Antenna
Red (+)
Black(-)
2-side parking Lights
Connect to Redfrom Siren
LED
Connect to Chassis
Ground (-)
Connect to (+)12Volts
Constant Battery Sources
15Amp Fuse
10Amp Fuse
9 8 7 6 5 4 3 2 1
10
20 19 18 17 16 15 14 13 12 11
J1
J2
J1
jumper
J2
jumper
With jumper Without jumper
Door lock / unlock
0.8sec.
for normal car.
Door switch arming
delay 0sec. for
normal car.
Door switch arming
delay 30sec. for
Dome light delay
car.
Door lock / unlock
4sec. for air
compressor car.
(-) ground output when armed
Connect to Switched (+)
12Volts Ignition
Yellow(+)
O
C
N
C
A
S
F
T
F
O
30
85
86
87a
87
Orange(-)
Red from
Socket relay
ignition switch side
White from
Socket relay
starter solenoid side
Cut Existing lowcurrent
Start solenoid wire
Connect to
Hood or Trunk
Pin Switch
Connect to
Existing Negative
Door Pin Switch
(GM Type)
Connect to
Existing Positive
Door Pin Switch
(Ford Type)
86
85
87
87a
30
+12V
Optional relay
Trunk
release
solenoid
+12V
(-)Ground
Lock motor
Unlock motor
Clear green/black
Clear green
Clear green/red
Clear blue/black
Clear blue
Clear blue/red
Wiring diagram
Use 6A2 diode
Deep green (-)
Purple (+)
Deep blue (-)
Grey (-)
White (+)
Brown (+)
Plug-in shock sensor
Pink (-)
Immobilizer-1
Note: Disconnect the power from the main control unit
before setting the jumpers .
AUX. Channel programme output
Negative pulsed output
programmable feature.
1. Window close
2. Pager
3. 2nd immobilizer
Emergency reset switch(-)input
Black/white (-) Plug in any OE switch
as long as it negative pulsed

Clean green/black
Clean green
Clean green/red
Clean blue/black
Clean blue
Clean blue/red
Clean green/black
Clean green
Clean green/red
Clean blue/black
Clean blue
Clean blue/red
Clean green/black
Clean green
Clean green/red
Clean blue/black
Clean blue
Clean blue/red
Clean green/black
Clean green
Clean green/red
Clean blue/black
Clean blue
Clean blue/red
MOTOR CONTROL
MOTOR CONTROL
UP
DOWN
MAIN LINE
ORIGINAL
BUILT-IN
CONTROLLER DOOR MOTOR LOCK
(Inside of the front door)
1.) For Factory installed central door lock system
2.) Directly connect to 2 wire Actuator
3.) A built-in Central door lock with electric lock switch(like: CHRYSLER..)
4.) For vacuum type central door lock system (like : Mercedes Benz , AUDI..)
2 WIRE ACTUATOR
+ 12V
(-)GND
ELECTRIC
MOTOR
ELECTRIC
MOTOR
MOTOR LOCK
INSIDE THE
FRONT DOOR
+ 12V
UP
DOWN
AIR COMPRESSOR
+ 12V
DOWN
UP
Note: Door lock active time for 4 secs.
CENTRAL DOOR LOCK WIRING:
Central door lock wiring
LOCK MOTOR
UNLOCK MOTOR
JUMPER SELECTION SETTING:
J1
jumper
J2
jumper
With jumper Without jumper
Door lock / unlock
0.8sec.
For normal car
Door switch arming
delay 0sec.
For normal car
Door switch arming
delay 30sec.
For Dome light
delay car
Door lock / unlock
4sec.
For air compressor
car
This system provide 2jumpers and functions are show at right table, the location
of jumpers are on the side of the main control unit, please see under wiring.
J1
J2
Main control unit
Note: Disconnect the power from the main
control unit before setting the jumpers.
Table of contents
Other Eaglemaster Car Alarm manuals

Eaglemaster
Eaglemaster E4 User manual

Eaglemaster
Eaglemaster E5 User manual

Eaglemaster
Eaglemaster LT-6200 User manual

Eaglemaster
Eaglemaster E1 Plus User manual

Eaglemaster
Eaglemaster E8 User manual

Eaglemaster
Eaglemaster E5 G7 User manual

Eaglemaster
Eaglemaster E2 User manual

Eaglemaster
Eaglemaster CA-168 Safety guide
Popular Car Alarm manuals by other brands

Audiovox
Audiovox 128-7404A owner's manual

NavionTruck
NavionTruck Navion Magnetic Door English Manual

ETLOC
ETLOC ETLOC-50 SECURITY installation manual

Bulldog Security
Bulldog Security 801 Installation and owner's guide

Marksman
Marksman Extreme X3 Installation and owner's manual

Scytek electronic
Scytek electronic PRECISION PRO 5500 product manual