Eaglemaster E2 User manual

IMPORTANT:
Please readthe entire manual for complete detailson thefeatures, accessories and
operation before attempting touse your security system.
This Securitysystem must beinstalled by aqualified technician toensure proper
operation. Do not attempt toinstall or modifythis systemyourself as
this wayvoid your warranty.
2-WAYREMOTECARALARMSYSTEM
Model:
LED type
-A202-

About Your System
NOTE:
Congratulations on yourpurchase of thisstate-of-the-art vehicle securitysystem.
With proper installationthis system willprovide superior protectionand performance for
many years tocome.
What is included:
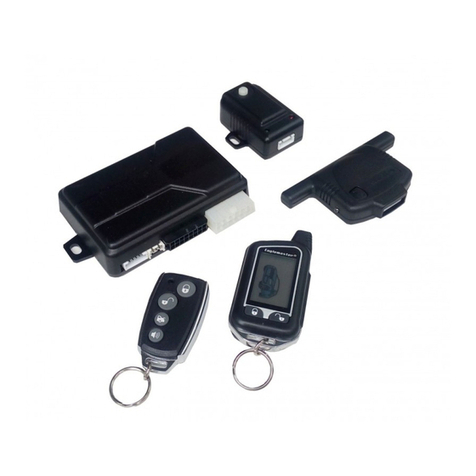
Acontrol module
2-way pager transceiverantenna
One 5-button 2-wayLED remote transmitter
One 3-button or4-button random coderemote transmitter
Dual stage shocksensor
High output 6-tonesiren
Status LED indicator
Valet over-rideswitch
Options andAccessories:
This system includesseveral optional inputsand outputs allowingthe creation ofa
completely personalized securityand convenience systemby offering manyoptional
features such as:
2nd stage doorunlock
Horn honk output
2pulse signal doorunlock
Engine turbo timemode
Check range notification
Arm/disarm chirpon/off
*Many require additionalparts and/or labor, see storefor details
Some of thefeatures described inthis manual mayrequired additional partsand/or
labor, andmay not beincluded as partof the standardinstallation of thisunit.
Additionally, manyfeatures of thissecurity system haveselectable options thatmust be
activated or programmedduring the system'sinstallation. These itemswill be identified
in the followingsections. Please discussthese features andany questions youmay
regarding the installationof this productwith your authorizeddealer.
Window close control
Anti car-jack bydoor switch
Power trunk/hatch release
Glass breakage sensor
Micro-wave detector
Back-up battery sirem
-1-

2-way LEDRemote Transmitter Description
Button 1
Button 2
Button 3
Button 4
Button 5
Arm/Disarm
indicator (Red)
Receive/Transmit
indicator(Blue)
Ignition/immobilizer
indicator (Red)
Shock sensor
indicator (Green)
Hood/Trunk
indicator (Orange)
Door indicator (Yellow)
Low battery
indicator(Red)
Button 1
LED indicator
Button 2
Button 3
System maintenance
This system needsno specific maintenancebeyond 2-wayremote controlbattery
replacement. The 2-wayremote is poweredby a 1.5VAAAbattery.
Low Battery Notification
If the batterybecomes exhausted, theremote will emitextra long beep,and indication
the melody (samemelody while batteryon ). Whilepress any buttonon the remote,few
seconds later the indicator will flashingfor identify.
Battery Replacement
Gently pull theend of thebattery door awayfrom the topof the remotecontrol then
slide the doorup to exposethe battery andremove the expiredbattery. Placethe new
battery into theremote control observingthe correct polarity. When poweris returned
the remote controlwill light allicons and generatemelodies (representing allbeeper
tones).
1-Way RemoteTransmitterDescription (optional 3 &4 button available)
-2-
Button 1 (Arm / Door lock)
LED indicator
Button 2 (Disarm / Door unlock)
Button 3 (Trunk open)
Button 4 (Silent arm mode)
TX-3D TX-4R
TR-4LED
NO: NO:
NO:

1-Way & 2-Way Remote Function Table:
Functions Step Condition
Arm and door lock
Arm without siren chirp
Disarm and door unlock
Disarm without siren chirp
Trunk open
Anti car-jack mode
Panic mode
Car search mode
1st stage sensor bypass
2nd stage sensor bypass
Valet mode
Vehicle status check
Remote button 1.2.3 on/off
Silent arm mode
Vibrate mode on/off
Disable remote receiving
Press once
Press once then within 3sec. press once
Press once
Press once then within 3sec. press once
Press over 2sec
Press over 2sec..
Press over 2sec.
Press once after 8sec. of armed
Press once within 8sec. of armed
Press together over 2sec.
Press once
Press over 2sec.
Press once (press once, 1-way 4button)
Press over 2sec.
Press together over 2sec.
Disarmed & ACC off
Disarmed & ACC off
Armed
Armed
Any time
ACC ON
Armed
Armed
Armed
Armed
ACC ON
Armed & Disarmed
2-way signalpaging features
A pageis the signalthe control modulesends to theremote controls confirmationof
receipt of acommand or alarmsystem status. Whenthe remote controlreceives a page
it will generatea page notificationto the user(notifications are audiblebeeps) and the
LED Icons willdisplay the currentsystem status.
Command Page
When a command(arm/disarm, or auxiliarychannel) from theremote control issent
and received, thesystem will senda command pageback to confirmreceipt.
Display Beeps Vehicle Status
1-flash
2-flash
fast flash every 2sec.
2-flash every 2sec.
2- flash every 2sec.
1-flash per second.
Armed / Door locked
Disarmed / Door unlocked
Trunk opened
Passive immobilizer mode
Turbo mode (Engine running)
Panic mode (activated in disarm position)
1 short
2 short
1 short
1 short
Melody
-3-

Alarm Page
If the alarmsystem is triggeredwhile armed, anAlarm Pagewill be sentto the remote
control. When theremote receives anAlarm Page,the LED iconswill display thealarm
system status informationand the remotecontrol will generatebeeps.
Page Recognition (Acknowledgement)
Toclear a pagealert/notification, quickly pressany button onthe remote control.This
can be performedat any timeduring or afterthe page notificationhas occurred.
The remote controlwill not senda command tothe system atthis time; itwill only clear
future repeats ofthe page notification.The next timea button ispressed on theremote
control it willsend a commandto the system.
Check in-range notification(programmable)
If programmed withthe feature, afterarming the system,main unit systemwill send 5-
signals to 2-Way remote within6~7 minutes. Ifthe 2-Wayremote is out-range,the
remote responds with2 long beepsand indicator flashingslowly .
Disable remote receiving
Youmay turn offthe 2-Wayremote receiving signalfrom the mainunit. Press button
simultaneously for 2sec.until one longbeep is heard.Remote receiving isnow
disabled. To turn onreceiving again, Pressbutton simultaneously untiltwo long
beep is heard,remote receiving isnow enable.
Remote button 1.2.3on/off
For safety purpose,this 2-way remotecan be lockoutthe remote buttonin order notto
mis-touched the buttons.Press button forover 2sec. untilone beep isheard, remote
button is nowlocked. To turn onremote button, pressbutton for over2sec. unitl two
beeps is heard,remote button isnow unlocked.
Vibrate modeon/off (this feature mayapply to themodel "E2-LED-VB")
Press button forover 2sec. the2-way remote willrespond tone &vibrate feature,
the button pressing2sec. will changethe feature, seeunder table:
Display Beeps Vibrations Trigger
1-flash
flash within 20sec.
flash within 20sec.
flash within 20sec.
flash within 20sec.
Sensor warning
Shock sensor triggering
Door switch triggering
Hood / Trunk triggering
Ignition triggering
5 short
Melody 1
Melody 2
Melody 3
Melody 4
1 times
2 times periodically
3times periodically
4 times periodically
5 times periodically
-4-
Programming 2-wayremote
Beeps 2-way remote feature
Vibrations
1-beep
1-beep
1-time
1-time Remote with toneand vibration
Remote with vibrationonly
Remote with toneonly
NOTE: Vibrations features mayapply to themodel No: "E2-LED-VB".

STANDARD FEATURES:
- To ARM the system:
To arm your system within proper operation range, simply press button once (while system
in disarmed or Acc off position) . The system will respond one siren chirp, one lights flash,
doors lock, disable engine starter, LED will begin flashing quickly until all sensor inputs are active
- LED will start blinking slowly (flash once per second) to indicate the system is full armed.
Main unit sends signal to 2-way remote to confirm Arm and indicator will flash once and
give one beep sound.
DEFECTIVE ZONE BYPASS:
AUTO RESET:
If a violation occurs the system will respond by sounding the siren and flashing the lights for
approximately 30sec. before the system resets itself and continues to protect your car. If violation
still occurs the system, siren and lights will working for 8 cycles then the system reset itself and
continues to protect other zones.
- Arm without siren chirp :
To arm your system without siren chirp , simply press button once then within 3sec. press
button once.
Note: this features is only activated under the system is in disarmed and Acc off position,.
- To DISARM the system :
To disarm your system within proper operating range, simply press button once (while
system in arm position). The system will respond two siren chirp, two light flash, doors unlock,
Enable your engine starter, LED off. Main unit sends the signal to 2-way remote to confirm
Disarm and indicator will flash twice and give two beep sound.
INTRUSION ALERT:
Upon disarming the system, if the vehicle is attempted or intruded, siren and lights will Indicates
4 chirps and 5 flashes to identify which zone was triggered. LED mode indicates the following
different triggering.
If the security system is armed at the same time that an input is active (such as a door opening
or hood / trunk opening ), you will hear one siren chirp to indicate arming and after 8 seconds
a second siren chirp to indicate Bypass Notification. A Bypass Notification chirp means that the
security system ignores the input that was active when the system was armed, until that input
ceases.
Defective zone Siren chirps 2-way beeps 2-way LED indicator
Door not closing 3 chirps 3beeps
Hood / Trunk not closing 4 chirps 4beeps
Quick flash2 times after a pause Sensor 1st-stagetriggered
Quick flash 3 times aftera pause Sensor 2nd-stagetriggered
Quick flash 4 times aftera pause Door switchtriggered
Quick flash 5 times aftera pause Hood/Trunkswitch triggered
Quick flash 6 times aftera pause Ignition switchtriggered.
Flashing 2sec. ShockSensor triggered
Flashing 2sec. Doorswitch triggered
Flashing 2sec. Hood/Trunk switch triggered
Flashing 2sec. Ignitionswitch triggered.
-5-
2-Way remoteintrusion alert

- Disarm withoutsiren chirp :
Todisarm your systemwithout siren chirp, simply pressbutton once thenwithin 3sec.
press button once.
Note: this features isonly activated underthe system isin armed position,.
- Silentarm mode :
The system providea feature toturn OFF thesiren, simply pressbutton or once
(while system indisarmed orAcc off position). The systemwill respond onelights flash,
doors lock, disableengine starter,LED will beginflashing quickly untilall sensor inputs
are active -LED will startblinking slowly (flashonce per second)to indicate thesystem is
full armed. Mainunit sends signalto 2-way remoteto confirmArm and indicatorwill
flash once andgive one beepsound.
Note: Toturn on thesiren, simply buttononce will turnon the sirenagain.
- AutomaticREARM:
If the systemis disarmed byremote and adoor is notopened within approximately30
seconds the systemwill automatically rearmitself. This featureguards against disarming
caused by accidentalor unintended operationof the remotetransmitter. Mainunit will
sends signal tothe 2-Wayremote to confirmAutomatic rearmand indicator willturn
on for 1second and give1 beep.
- Passive arm (programmable):
If set programmemode to "WITH", while turnIgnition OFF, then closethe last door,
system will provide2 siren chirpand 2 lightflash and LEDflashing fast toindicated that
the system isin passive armingmode. After30sec. The systemwill arm byitself and
LED flashing slowlyto show thesystem is inarming mode. Mainunit sends thesignal to
the 2-Wayremote to confirmPassive arm and indicator will turnon for 1second
and give 1beep.
This system alsoprovide under passivearming with doorlock or withoutdoor lock
feature (please see"programme mode" features.) During theperiod of 30sec.passive
arming, if adoor is opened,Led will lighton and itwill re-passive armingwhen the door
closed again.
- Panicmode:
If you arethreatened in ornear your vehicle,you can attractattention by pressbutton
for 2sec. systemwill triggering for30sec. To stop Panicmode at anytime, simply press
any button once.Note: if Panic modeactivate in disarmedposition, the 2-wayremote
will respond melodysound and flashing indicator.
- Carsearch mode:
The system providea feature toeasy find yourcar position, simplypress button once
when in armedafter 8sec. Thesystem will respondby 5 lightsflash.
- Dualstage shocksensor:
This device onlyactivates after 8seconds of armingstate; this ispreventing from the
weak impact causedby the driverwhile leaving thecar.
The device operates:
-Light impactwill activate the1st stage sensorby giving 4short warning chirps.2-way
remote will respond4 beeps andflashing indicator.
-Heavy impactwill activate the2nd stage sensorand trigger thealarm for 30sec.2-way
remote will respondmelody 1 andflashing indicator.
NOTE: Adjustmentsare made viathe rotary controlabove the shocksensor.
-6-
1-way

- Remotesensor bypass :
This system offer2stage sensor optional.Within 8sec. afterset arming, topress button
once , thesystem will give2 short chirpsand 2 lightsflash, thus the1st stage shock
sensor has beenturn off.
Press button onceagain, within 8sec.the system willgive 3 shortchirps and 3lights
flash, thus the2nd stage shocksensor has beenturn off.
If press button once (at 3times) again within8sec. of armingthe shock sensorwill
turn ON again.
Note: - if remotesensor bypassed, itwill be detectedagain by nextarming.
- if armedwith silent mode,to operate sensorbypass will onlyindicate by
lights flash.
- Valet mode:
If you aregoing to haveyour vehicle serviced,parked by avalet or washedyou will want
to put yoursecurity system Intovalet mode. To enter valetmode disarm thesystem and
turn Ignition switchto ON position, then pressbutton + forover 2 secondsuntil
siren give 1long with 1short chirp andLED light ONto confirm thesystem is invalet
mode. When thesystem is inthe valet modeit can notbe armed. Thedoor lock and
unlock will functionas keyless entrysystem. The 2-Way remote willrespond 1 longand
1 short beeps.
To EXIT: Turn Ignitionswitch to ONposition , thenpress button + for over
2seconds, you willhear siren provide1 long with2 short chirpsand LED lightOFF to
confirm exit thismode and inalarm mode. The2-Way remotewill respond 1long and
2 short beeps.
Note: While in theValet mode,each time whenIgnition switch hasbeen turn off,the
siren will provide2 chirps forwarning sound.
- Ignitionsafety doorlock select(programmable):
If programmed withthis feature, turnIgnition ON after10 seconds thedoors will auto
locked , butwithin this 10seconds the doorhas been openedthis feature willbypassed,
till next timeof ignition on.When turn IgnitionOFF,the doors willunlock for takeoff.
Note: Youmay manage lockand unlock doorsin ignition onposition by shortpressing
button to lockdoor or pressing to unlock door.
- Passive immobilizer(programmable):
If programmed withthis function, whenturn off ignitionswitch for 30seconds or you
open and closethe door,it will disablethe engine starterright way .The LED willflash
twice per second.
The 2-Wayremote will respond indicator flashing twiceper second.
Exit: Todisarm this functionby (1) simplypress button once.LED off.
or (2) Turn Ignition onthen press Valet /over-ride switchonce, LED off.
Note: The 2-Waywill give onebeep sound andone indicator flashwhen this
immobilizer activated.
- Emergencyreset switch:
If the remotehas been lostor damage, orforgot the PINcode number theowner can
enter the carby using thekey. Itwill act thealarm. To disarm thealarm turn ignitionon
and press resetswitch once ,it will disarmthe alarm immediately. (Please askyour
installer this resetswitch location).
Note: after this emergencyreset activated, thePIN code willresumed factory setting
PIN code"6"
-7-

- Channel-2(-) output(programmable):
This channel "Orange/blackwire" is anegative (-500mA) outputfeatures, this feature
can be controlled" Disarmed output / Turbomode (engine running)/ Dome light" ,
2nd killer:
If programmed withthe feature ,the channel willconstant output whenthe system
disarmed, this featurenormally for 2ndimmobilizer. 40Arelay is required,COM & NO.
Turbo mode(enginerunning):
Dome Light:
If programmed withthe feature ,the channel willoutput 30sec. whendisarming .
-Channel-3 (-) output (programmable):
This channel "Graywire" is anegative (-500mA) outputfeatures, this featurecan be
controlled " Trunkopen / Turbo mode /2nd stage unlcok".
Trunk open:
if programmed withTrunk openfeature, simply pressand hold button over 2 seconds,
the channel willoutput for 1second pulse ,this feature normallyfor open thetrunk.
Note:
1. if trunkhas been remoteopened in armingposition, hood/trunk switchwill delay
sensing for 20seconds, and theshock sensor willbe bypassed.
2. If remotetrunk in armedposition, the 2-Way remote willrespond indicator
flashing every 2sec.If trunk keepopened for over1minutes, it willgive 8 beeps.
Turbo mode:
2nd stage unlock:
If programmed withthe feature ,t
If programmed withthe Turbomode, this featurefor the carwith turbo timekeeps engine
running 3 minutesafter arriving atyour destination.
Tooperate this turbomode by pressing for 2sec. whiledriving or ignitionON , the
siren will giveone chirp andthe LED willstart flashing fast,at the timethe system isin
standby turbo timemode, the ownermust follow underprocess to activatethe Turbo
mode:
(1) Within 15sec. Turn Accoff (engine stillkeep running), openand close doorto leave
the car.
Note: If within this15sec. press anybutton once willexit the mode,LED off.
(2) While leaving thecar by openand close thedoor, within5sec. press button once,
the system willarm immediately,the parking lightswill keep flashing,however the
engine will stillkeep running for3 minutes andthen in armed.The 2-Wayremote will
respond indicator flashingfast every 2sec.until system armedby
indicator flash onceand give 1beep.
Note:(1) Afterleaving the car, within 5sec.press wrong buttonwill exit themode.
(2) Afterleaving the car, within 5sec.without press buttonwill exit mode
automatically.
Exit turbo mode:
Pressing button oncewithin turbo time, the systemwill exit turbomode and inarmed.
NOTE:
1. In Turbo mode, thesensor zone triggerwill be bypasseduntil the turbotime finished.
2. In Turbo mode, ifdoor, hoodor trunk hasbeen triggered, enginewill stop runningand
alarming the system,and to disarmthe system mustuse your PINcode.
Same instructions /operation as Channel-2turbo time mode.
o operate itby press button at 2nd time, 2nd stage
unlock will beoutput for passengerside . -8-

-Channel-4 (-)output(programmable):
This channel "Pinkwire" is anegative (-500mA) outputfeatures, this featurecan be
controlled " Window output/ Turbomode / Horn".
Window close:
If programmed withthe Window outputfeature, this channelwill constant outputtingfor
30 seconds whensystem armed forwindow close feature.
Note: the sensor willbe bypassed whenwindow is output.
Turbo mode:
Horn pulse:
- 2step disarm:
This system offers2 step disarm.It's a featurethat make itpossible to silenceand reset
the system whileit is triggering,without disarming thesystem. If thesystem is triggered
and the sirenhas been sounding,pressing any buttononce on theremote transmitter
will stop the
- Power disconnectingmemory :
Alarm is builtin memory onmain unit. Generally, after alarmpower is cutoff and
reconnect, main unitwill read backthese data makethe alarm toresume. When in
disarm, arm orvalet mode position,power off thenon , alarmwill read backoriginal
position.
- Vehicle status checking:
The 2-Wayremote offer thefeature to checkthe current statusof the car, simply press
button once withinproper operation range.The main unitwill send thesignals to
the 2-Wayremote about thevehicle current status. Please see undertable.
How touse yourPIN code:
If the remotecontrol has beenlost or damaged,you can manuallydisarm your systemby
enter your ownPIN code .(The system's factory-setPIN code is"6" )
Turning theIgnition switch fromOFF to ONposition, LED willstart flashing, thetimes of
LED flashing isaccording to thePIN code numbers,while LED flash6 times thenturning
the ignition switchto the OFFposition , thesystem will disarmedimmediately and siren
will give 4-shortchirps.
NOTE:
Each cycle ofalarm triggering isonly provide onetime to setPIN code, otherwisethe
owner must waitnext cycle triggeringand then setPIN code againto disarm thesystem.
If the ownerforgot the PINcode number,must use "Emergencyreset switch "to reset the
alarm system (pleasesee "Emergency resetswitch" ), afterthis emergency resetswitch
has been activated,the system PINcode will resumeback to theoriginal factory PIN
code "6" .
Same instructions /operation as Channel-2turbo time mode.
If programmed withHorn pulse output,for additional vehicle'shorn honk outputalert.
trigger and returnthe unit tothe armed state.
-
Display Beeps Vehicle current status
1-flash
2-flash
1-flash
2-flash
Vehicle in armed position
Vehicle in disarmed position
Vehicle in Valet mode /door locked
Vehicle in Valet mode/door unlocked
1-short
2-short
1-long + 1-short
1-long + 1-short
-9-

- Anticar-jacking:
This feature willprotect your vehiclein the eventthat there isan attempt toHi-jack the
vehicle. Alternative"Remote activation"or "ACC ON withdoor open andclosed " is
available by programming. While systemis trigger anti-carjack mode, lightswill flash
once and theLED will fastflashing to showthe system isenter anti-car jackingmode.
See under "anti-carjack mode table".
Remote activates:
Tooperate it whendriving the car(ACC ON), pressbutton for 3sec. The parking
lights will flashonce and theLED will fastflash to showthe system isenter anti car-jack
mode.
EXIT:
1- Within 90sec: After enterthis mode, turnignition on andpress button for3 times
within 3sec.,LED willoff to confirmexit this anticar-jacking mode and
siren will give2 chirps.
2- After 90sec:Toexit this modemust use yourPIN code, pleasesee under "Howto use
your PIN code".
Door switchactivates:
If you programmedthis mode, tooperate it whendriving the car, if adoor is forcedbeen
opened and closed,the system willactivate Anti-carjack immediately.The parking lights
will flash onceand the LEDwill fast flashto show thesystem is enteranti car-jack mode.
EXIT:
1- Within 90sec: After enterthis mode, turnignition on andpress button for3 times
within 3sec.,LED willoff to confirmexit this anticar-jacking mode and
siren will give2 chirps.
2- After 90sec:Toexit this modemust use yourPIN code, pleasesee under "Howto use
your PIN code".
-Anti car-jackmode table:
If enter anticar-jack mode, Parkinglights will flashingonce and theLED will fastflashing
to show thesystem is enteranti car-jack mode.
While proceed at90sec. main unitsends signal tothe 2-Wayremote and respond
indicator flashing andgive melody sound.
LED flash
Lights flash
Siren chirp
Immobilizer-1
Immobilizer-2
Timer
LED flashing fast
1 flash
Lights flashing once per second
Pre-warning Siren blowing
Immobilizer-1 blocked
2nd killer blocked
0sec. 40sec. 60sec. 90sec. 120sec.
-10-

This programming features is provide the owner to learn the new transmitter or set new PIN
code into the system memory. This system can expand 4 different transmitters, and comes from
factory with two transmitters already programmed into the system memory. The PIN code from
1 ~30 numbers is available to set into the system memory.
Whenever you want to add or delete transmitter code ; or set your own PIN code of the system,
the produces are as following:
1. In Disarmed position, turning ignition switch from ON-OFF for 8 times within 10 seconds
and stay in the OFF position, siren will provide 1-long chirp to indicate that the system is in
this programming mode.
2. During step 1. Ignition switch stay in the OFF position:
It's available to learn the new transmitter into the system by press any button once of the new
transmitter, siren will give 1-long and 1-short chirps to indicate the first transmitter code learn
into the system memory. To learn the 2nd,3rd,4th new transmitters, simply press any button
once on the each transmitter, the numbers of siren short chirps is according to the numbers of
the new transmitters learn into the system memory . (Each time learning new code of remote,
the old code will be erased, hence you have to learn again.)
Note: If learning 2-Way remote, the 2-Way remote will respond 1 beep follow with melody sound
to indicate the code has been learned.
Exit: To exit this programming mode, if there is no new transmitters button been pressed, and
ignition not turn ON, after 8sec. siren will give 2-long and 2-short chirps to indicate that the
system has been exit the programming mode.
3. During step 1 or step 2. Turning ignition switch to the ON position:
It's available to set the new PIN code into the system, siren will give 1-long and 1-short chirps
to indicate that the system is in PIN code setting mode, at the time LED will start flashing, the
times of LED flashing is according to the numbers of the PIN code, let's say you want to set
the PIN code " 12", while LED flashing 12 times then turning ignition switch to the OFF
position, thus the new PIN code "12" has been programmed, the siren will give 2-long and
2-short chirps and then LED will auto flashing 12 times as showing the new PIN code for the
owner of final notification.
Note: During the LED flashing of the counting numbers, if ignition switch not been turn off, the
LED will keep flashing 30times and the system will auto exit this mode, siren will give
2-long and 2-short chirps, thus the PIN code "30" has been programmed.
Note: During the LED flashing of final notification, alarm will not allow to activated.
Transmitter & PIN code programming:
-11-

FEATURES
1
2
3
4
5
6
7
8
9
10
11
Item NO by LED flash
Press button
Ignition on safety door lock
Passive arming & door lock
Passive immobilizer
Channel-2 output feature
Channel-3
Channel-4
Arm/Disarm chirp ON/OFF
Door unlock 1& 2 pulse
Door switch Anti car-jack
2-Way remote Check in-Range
Factory default setting
output feature
output feature
PROGRAMME MODE TABLE
1-chirp 2-chirp 3-chirp
Press once
Press twice
Press 3 times
W/O
*W/O
*W/O
*W/I
W/I
*2nd-killer
*Trunk open
*Window
*ON
*1pulse
OFF
2pulse
W/I
W/I
With door lock
Without door lock
Turbo
Dome Light
2nd stage
Unlock
Horn
Turbo
Turbo
Many of the operating settings of this unit are programmable. The programmable mode setting
dictates how the unit operates.
To enter programme mode and access Feature Change:
1. Disarmed the system, turn ignition from ON to OFF, within 10 seconds press valet Switch
ON-OFF for 8 times.
2. Siren will 2 long chirps sound and LED indicator ON to confirm the system is in programme
mode.
3.
*Exit programme mode: Under programming mode, if turning Ignition to ON , the system will
exit the programming mode and siren will give two chirps .
Note: if item No: 11 has been programmed, the system will auto exit the mode by given 2 chirps.
Under the programming mode (Features table may referring the following chart) ., Suppose
to set the function #5 :
press the (remote button for 5times) , Led will indicate flashing 5 times then pause per
cycle ., then you may press the (remote Button to selected the feature#5 enable
siren 1 chirp , or press again the button to disable the feature siren 2chirp. Again, If want
to set Item No.#10, press remote button for another 5times more then LED will indication
10time then pause per cycle (The quantity of led flashes is according to the numbers of
pressed Button ), then Press the Button to enable the feature #10 siren 1 chirp or
Press the button again to disable the feature, siren 2chirp. , and so on ..
Programme mode features:
Note: means factory default setting before delivery.
W/I : means with thefeature W/O : means withoutthe feature
*W/O
*W/O
W/I
W/I
-12-
Press button once, siren give 1 long
chirp andall features back to factory default.

System Installation:
1. Thoroughly readand become familiarwith the installationinstructions before
beginning the installation.
2. Review systemcontents: (1).A controlmodule. (2).2-way pagertransceiver antenna
(3). One 5-button2-way LED remotetransmitter.
(4).One 3-button or4-button random coderemote transmitter
(5).Dual stage shocksensor (6).High output6-tone siren (optional)
(7).Status LED indicator (8).Valet over-rideswitch
(9).Harness:
.20-Pin main harness .Two 4-pinshock sensor harness.
.4-pin (blue port)transceiver harness .2-Pin block relayharness
.Led harness .Valet/over-ride switchharness
3. Verifywith the owner, the mountinglocation for allvisible components, includingthe
LED and Valet/over-ride switch.
4. Verifywith the owner, the optionalprogramme features.
5. Inspect andperform a functiontest for allvehicle systems beforeand after the
installation.
6. Alwaysuse a Volt / Ohmmeter for testingvehicle circuits. Neveruse a testlight.
7. Alwayslook before drillingany holes ormounting self-tapping screws.Be sure fuel
lines and exteriorwiring looms areclear as theyoften close tothe chassis anddifficult
to see.
8. Protect allwires running fromthe engine compartmentto the interiorof the vehicleby
covering with electricaltape and splitloom tubing. Besure to usea grommet when
routing wires throughthe firewall.
9. Properly fuseany additional accessoriessuch as windowmodule, trunk opener, etc.,
making sure topower them separatefrom the alarmmodule. This willensure the
functionality system inthe event ofan accessory failure.
Mounting theControl Unit
The control unitonly be mountedin the interof the vehicle.Do not mountthe main unitin
the engine compartment.Choose a mountinglocation that willnot be easilyaccessible
to a thief,and will notinterfere with theoperation of anyvehicle components, suchas
foot pedal, steeringcolumn, air vents,seat rails, etc.
Do not mountingthe control unituntil after settingthe internal jumpersand performing
a complete operationcheck of thesystem. Afterinstallation is completeand
performance verified, thecontrol unit canbe easily mountedusing wire tiesthrough the
mounting tabs onthe button ofthe unit.
Mounting theShock Sensor
Choose a suitableinterior mounting locatingfor the shocksensor that providesample
coverage of thevehicle. Keep thesensor away fromthe vehicle's ECMor other sources
of the electricalinterference. Suggested mountinglocations include airconditioning
ducts, dashboard braces,or center consolesupports.
During proper operation,the shock sensorwill detect impactsto the vehicleonly and
will not usuallybr triggered byslow rocking movementsof the vehiclelike those caused
by wind.
-13-

WIRING DIAGRAM :
J1
jumper
J2
jumper
Note: Disconnect the power from the main control unit
before setting the jumpers .
Antenna
Extend the whole wire, align it
with the intersection of dashboard
and the front window glass.
Keep it away from the metal at
least 5 centimeter to have the
best receiving condition.
2 stage shock sensor detector
External Ultra sonic &
micro-wave sensor port
+12VDC
- Ground
1st stage (-) trigger
2nd stage (-) trigger
R.F Antenna
With jumper Without jumper
Door lock / unlock
0.8sec.
for normal car.
Door switch arming
delay 0sec. for
normal car.
Door switch arming
delay 30sec. for
Dome light delay
car.
Door lock / unlock
4sec. for air
compressor car.
For optional Linking
module
Optional 30A
relay
CL-6700
CONTROLUNIT
1 2 3 4 5 6 7 8 9 10
11 12 13 14 15 16 17 18 19 20
Cutting the vehicle's
starter wire will leave
two sides- the ignition
switch side and the
starter solenoid side.
N/C BLOCKING
30
85
86
87a
87
Orange (-)
Orange / Black(-)
Connect to Red
from Siren
Brown(+)
Cut Existing
low current
Fuel pipe wire
Connect to +12Volt
ignition switch
40Arelay
Programme Negative
Pulsed output for
2nd killer & Turbo feature
& Dome light
Black(-) Connect to Chassis
Ground (-)
15Amp Fuse Connect to (+)
12Volts Battery
Sources
Red (+)
Yellow(+)
Connect to Switched (+)
12Volts Ignition
O
C
N
C
A
S
F
T
F
O
Gray (-)
+12V
Trunk release
solenoid
Programme Negative
Pulsed output for
Trunk open &Turbo &
2nd stage unlock
Blue/red
Green/red
Blue
Green
Blue/black
Green/black
Door unlock-N/O
Door lock-N/O
Door unlock-Com
Door lock-Com
Door unlock-N/C
Door lock-N/C
Central door lock wiring
Door lock
Door unlock
Negative Pulsed when armed output
for Engine disable
Pink (-) Programme Negative pulsed output
for the feature of:
1. Window close
2.Turbo
3. Horn pulse
White (+)
Connect to Hood
Pin Switch Blue/white(-)
2-WAY ALARM
CONTROL UNIT
+12V
- Ground
(-) Ground
Green
Blue
Black
Red
Red
Black
Blue
Green
Status LED indicator
Valet/ Over-ride switch
J2
J1
Channel-2 (PROG.)
Channel-3(PROG.)
Channel-4 (PROG.)
For 2nd killer wiring
For trunk open wiring
White (+) Right Parking Lights
Left Parking Lights
Connect to
Existing Positive
Door Pin Switch
(FordType)
Purple(+)
White/red (+)
Lights(+)or (-) input , for
the parking lights power
sources
10Amp Fuse
Green/white(-)
Connect to
Existing Negative
Door Pin Switch
(GMType)
2-Stage
Shock Sensor
12
-14-

Green/black
Green
Green/red
Blue/black
Blue
Blue/red
Green/black
Green
Green/red
Blue/black
Blue
Blue/red
Green/black
Green
Green/red
Blue/black
Blue
Blue/red
MOTOR CONTROL
MOTOR CONTROL
UP
DOWN
MAIN LINE
ORIGINAL
BUILT-IN
CONTROLLER DOOR MOTOR LOCK
(Inside of the front door)
1.) For Factory installed central door lock system
2.) Directly connect to 2wire Actuator
3.) Abuilt-in Central door lock with electric lock switch(like: CHRYSLER..)
2 WIRE ACTUATOR
+ 12V
(-)GND
ELECTRIC
MOTOR
MOTOR LOCK
INSIDETHE
FRONTDOOR
+ 12V
UP
DOWN
Central door lock wiring
LOCK MOTOR
UNLOCK MOTOR
Green/black
Green
Green/red
Blue/black
Blue
Blue/red
4.) For vacuum type central door lock system (like : Mercedes Benz , AUDI..)
ELECTRIC
MOTOR AIR COMPRESSOR
+ 12V
DOWN UP
Note: Door lock active time for 4 secs.
Central door lock wiring
-15-
Central door lock wiring:

Model:
LED type
Table of contents
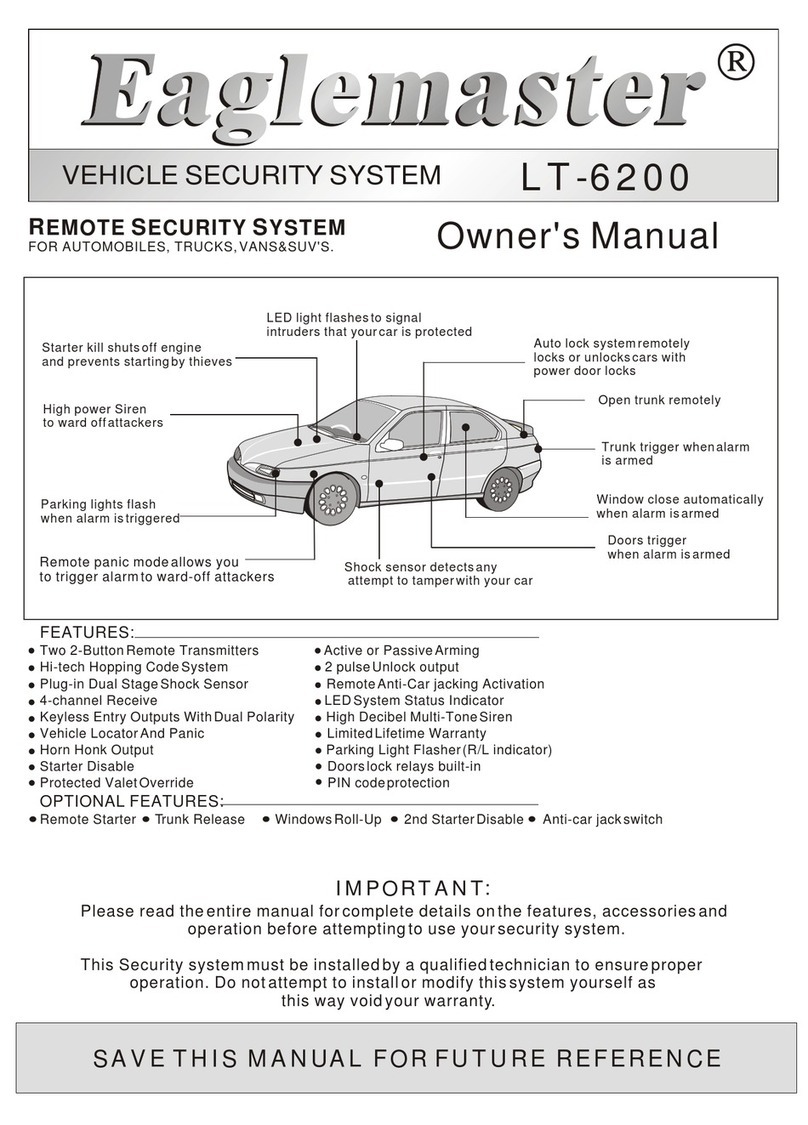
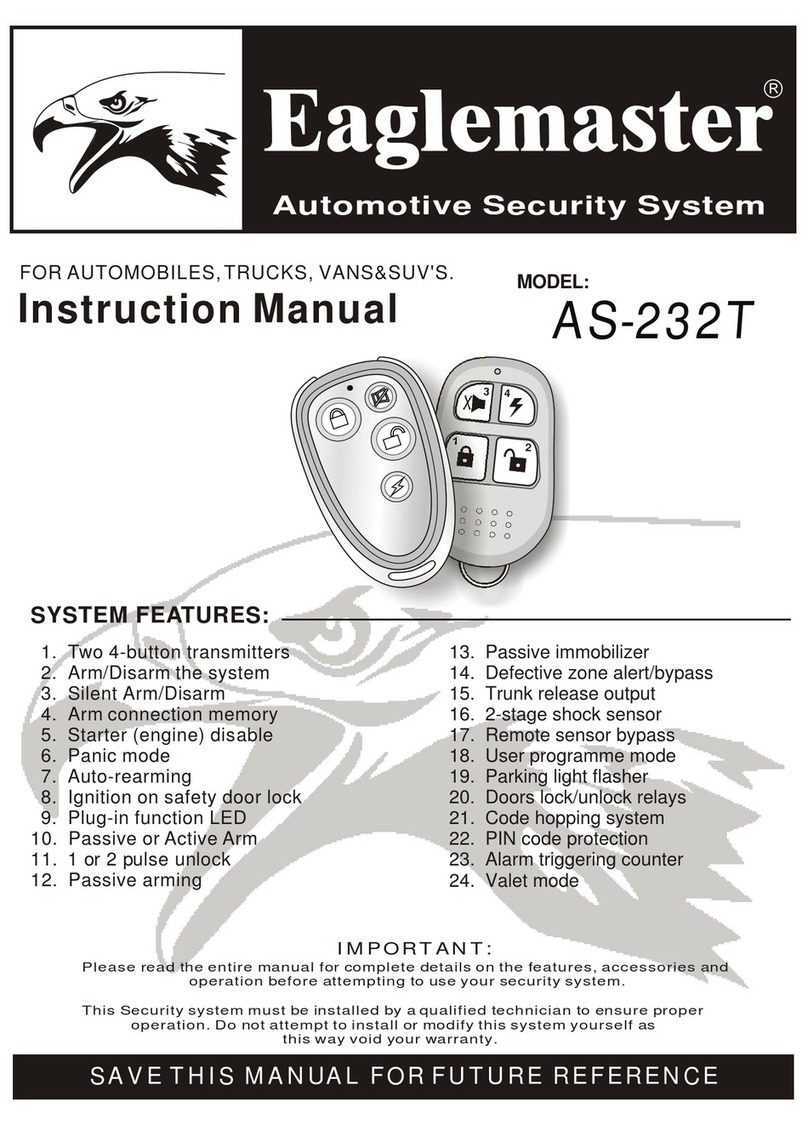
Other Eaglemaster Car Alarm manuals

Eaglemaster
Eaglemaster E4 User manual

Eaglemaster
Eaglemaster E5 G7 User manual

Eaglemaster
Eaglemaster E8 User manual

Eaglemaster
Eaglemaster AS-232T User manual

Eaglemaster
Eaglemaster CA-168 Safety guide

Eaglemaster
Eaglemaster LT-6200 User manual

Eaglemaster
Eaglemaster E1 Plus User manual

Eaglemaster
Eaglemaster E5 User manual