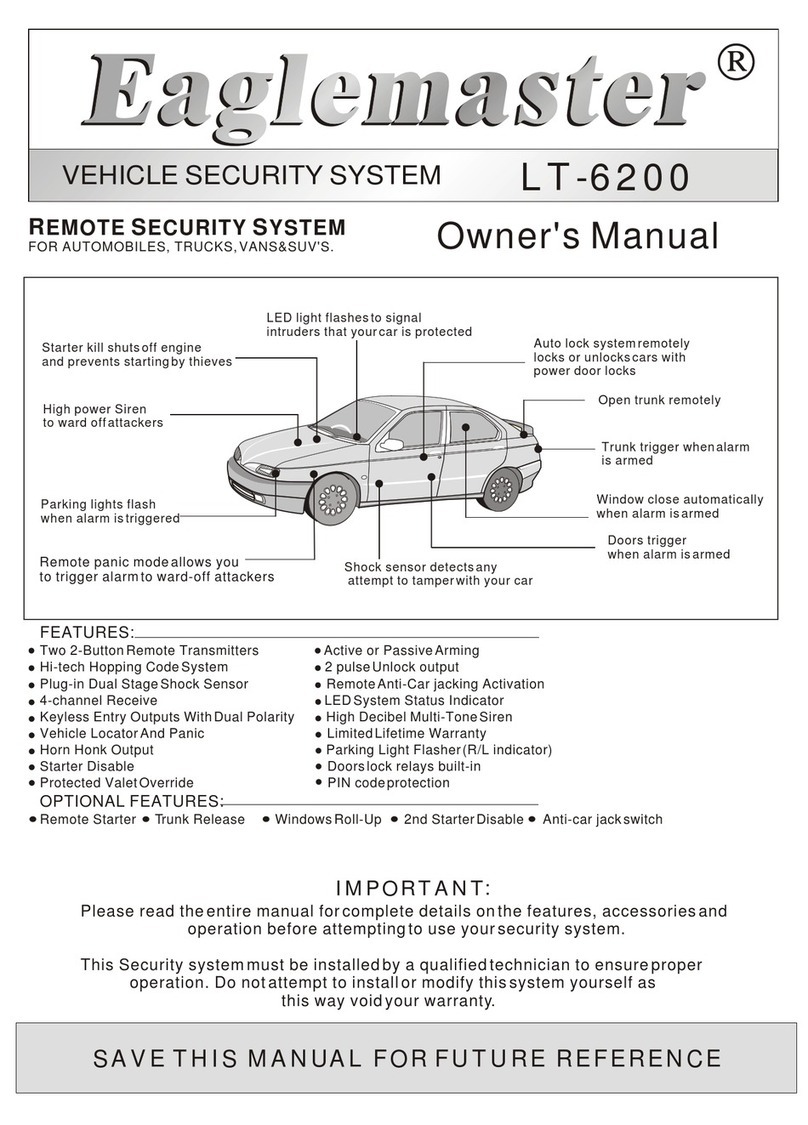
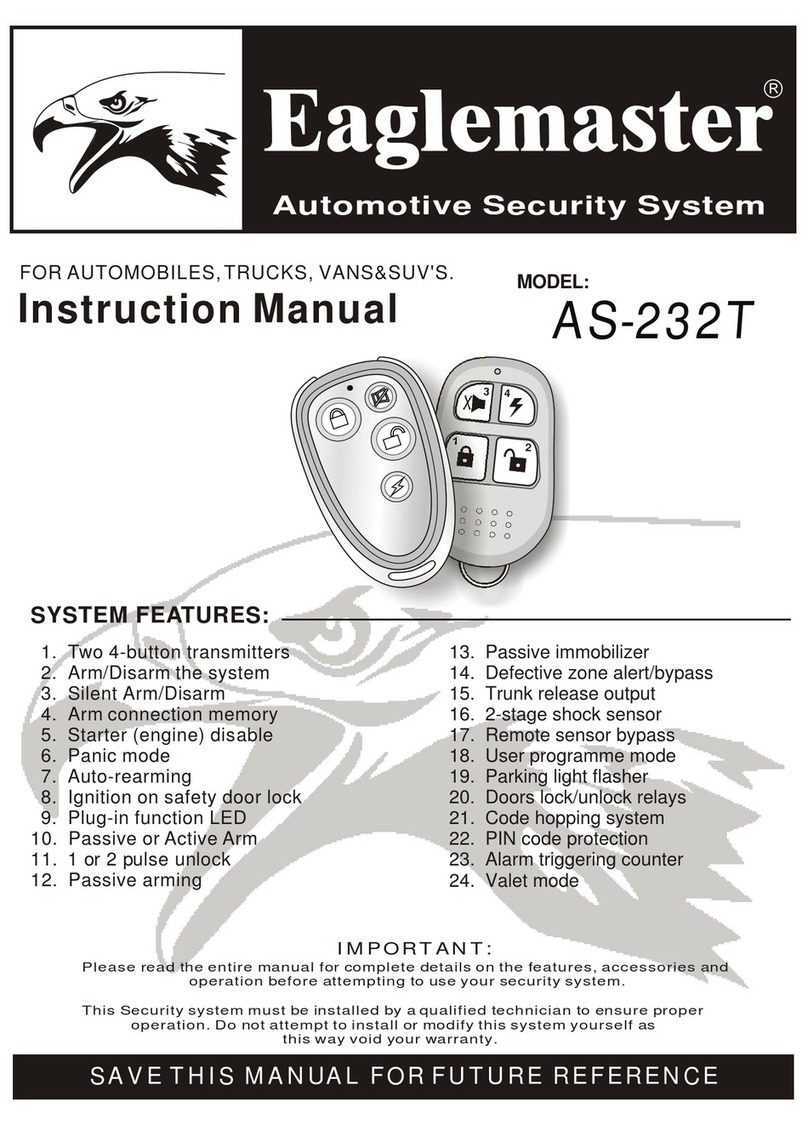
Eaglemaster E8 User manual

IMPORTANT:
Please read the entire manual for complete details on the features, accessories and
operation before attempting to use your security system.
This Security system must be installed by a qualified technician to ensure proper
operation. Do not attempt to install or modify this system yourself as
this way void your warranty.
2-WAY CAR ALARM SYSTEM
WITH REMOTE ENGINE START
MODEL

About Your System
NOTE:
Congratulations on yourpurchase of this state-of-the-art vehicle securitysystem.
With proper installationthis system will provide superior protectionand performance for
many years tocome.
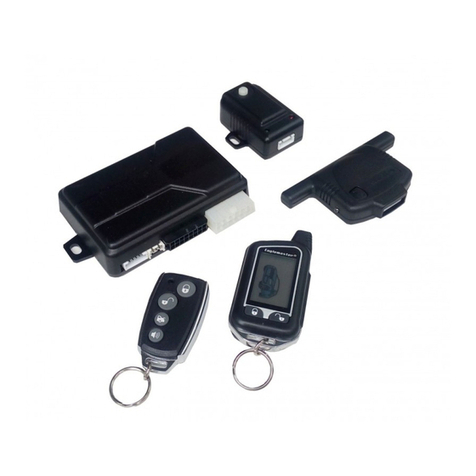
What is included:
Acontrol module
Tranceiver module
One 5-button 2-wayLCD remote transmitter
One 4-button randomcode remote transmitter
Dual stage shocksensor
High output 6-tonesiren (optional)
Full set wireharness
Pin switches
Options and Accessories:
This system includesseveral optional inputs and outputs allowingthe creation ofa
completely personalized securityand convenience systemby offering manyoptional
features such as:
2nd stage doorunlock
Channel programme timeoutput
2pulse signal doorunlock
Engine turbo timemode
Check range notification
Arm/disarm chirpon/off
*Many require additionalparts and/or labor, see storefor details
Some of thefeatures described in this manual may required additional partsand/or
labor, andmay not be included as part of the standardinstallation of thisunit.
Additionally, manyfeatures of this security system haveselectable options thatmust be
activated or programmedduring the system'sinstallation. These itemswill be identified
in the followingsections. Please discuss these features and any questions youmay
regarding the installationof this product with your authorized dealer.
Window close control
Anti car-jack byignition turn
Power trunk/hatch release
Glass breakage sensor
Micro-wave detector
Back-up battery siren

Functions of remotetransmitters
The remote transmittersintegrated with the security system usethe most perfectand
reliable radio frequency transfer as opposed to all car security systems being sold at the
moment. Some of modern skilled car hijackers use the devices known as code grabbers
allowing to accept and keep a signal transferred by the remote control of the car security
system. As soon as the driver is out the code is used by the hijacker to disarm the system.
Unlike the remote controls described above the remote transmitters integrated with your
security system change the code of the transferred signal each time when the button is
pressed, therefore, when a hijacker reproduces the signal grabbed from your remote
transmitter, thesecurity system just will not react.
Functions of remotetransmitterbuttons
Button to armthe system (ARM)
Button to disarmthe system (DISARM)
Button to controlremote engine start
Button to controlTrunk open / CH-1 active
Button to checkcar status , to turn onLCD back light
Fig.1
2-way remote #TR-45 1-way remote #TX-4R

Standard LCD 2-wayicon instructions
Remote transmitting asignal.
System Armed.
Passive arming &
Auto re-arming mode.
Panic mode.
Check-in range turnON status.
System Disarmed.
Zone1
1st-stage sensor bypass.
Zone2
1st-stage sensor bypass.
Silent Armed.
Zone1
2nd-stage sensor bypass.
Zone2
2nd-stage sensor bypass.
2way battery levelindication.

Door open whenarmed. Trunk open whenarmed. Hood open whenarmed.
Zone1
1st stage sensortriggered.
Zone1
2nd stage sensortriggered.
Zone2
1st stage sensortriggered.
Zone2
1st stage sensortriggered. Door switch triggered. Trunk switch triggered.
Ignition switch triggered.
Hood switch triggered. Immobilizer mode.

Valet mode. Safety mode/ Safestatus
Remote engine runningmode. Clock time enginestart mode. Fix time enginestart mode.
Temperatureengine start mode.
Anti car-jacking mode.
Turbo mode. Call / pagemode.
Battery conservemode. Remote button lock Vibrate mode.

Remote Function Table:
Functions Step Condition
Arm and door lock
Arm without siren chirp
Zone1- 1st-stage bypass
Zone1- 2nd-stage bypass
Car search mode
Standby Anti-Hi-Jack mode
Disarm and door unlock
Disarm without siren chirp
Arm with engine run mode
Remote engine start
Remote engine stop
Safety mode (manual-type car)
Zone2- 1st-stage bypass
Zone2- 2nd-stage bypass
Press once
Press over 2sec. until 1 beep given.
Press once within 5sec. of arming.
Press twice within 5sec. of arming.
Press once after 5sec. of arming.
Press over 2sec. Until 1 beep given.
Press once
Press over 2sec. until 1 beep given.
Press over 2sec. Until 1 beep given.
Press over 2sec. then press once.
Press over 2sec.
Press over 2sec.
Press once within 5sec. of arming.
Press twice within 5sec. of arming
Disarmed & ACC off
Disarmed & ACC off
Arming after 5sec.
ACC ON
Engine running
Armed with safe status
Arming within 5sec.
Arming within 5sec.
Armed
Armed
Engine running mode
Engine running
Arming within 5sec.
Arming within 5sec.

Remote Function Table:
Functions Step Condition
Trunk open / CH-1 active
Prolong engine running time
Enable check-in range
Status check & Back light
Indoor temperature check
Silent armed
Valet mode
Panic mode
Anti-Hi-Jack mode
FIX time engine start
Temperature engine start
CH-2 active
CH-3 active
CH-4 active
Press over 2sec. until 1 beep given
Press once, after LCD indicate 3min left.
Press once within 5sec. of arming.
Press once
Press over 2sec. Until 1 beep given.
Press over 2sec. until 1 beep given.
Press once
Press over 2sec. until 1 beep given.
Engine running mode
Armed with safe status
Arming within 5sec.
ACC OFF
ACC ON
ACC OFF
ACC ON
Armed with safe status

Functions Step Condition
Remote button lock (on/off)
Vibrate mode on/off
Clock time adjust mode
Clock time engine start
Battery conserve mode
Press over 2sec. until 1 beep given.
Press over 4sec. until 2 beep given.
Press over 2sec. until 1 beep given.
Remote battery discharge/replacement
If the batterybecomes exhausted, the remote will emitextra long beep,While press any
button on theremote, few seconds later the indicatorwill flashing for identify.
The battery dischargeis displayed on the LCD screenas the iconwith the status indicator .
Also you canpay your attention that the effectivedistance for the transmitter is being
reduced.
To replace the batteries of 2-way remote
- Bend thetop part of the cover abit, move itup and remove,
- Remove thedischarged battery,
- Place thenew battery (AAA) observing polarity,
- Carefully placethe cover back.
To replace the batteries of 1-way remote
- Loose thescrews on the back side ofthe transmitter housingand separate two halves of
the transmitter housing,
- Remove thedischarged battery,
- Place thenew battery 12V 23A observingpolarity,
- Carefully placethe cover back (please do notdamage the LEDand switchers on the
Circuit board);
tighten the screwson the back side of thetransmitter housing.

Programming of codes for new transmitters
Important
Please notice that during the programming of a new transmitter into the system memory all
previous programmed codes of the transmitters will be erased so in case of programming
for additional transmittersthe available transmitters shall be programmed again.
The system supports in memory up to four codes of remotes irrespective of the fact if the
codes of fourdifferent remotes orthe same code four times isrecorded into the system.
Programming of newtransmitters.
Important
Please notice that each following operation shall be done within 10 sec after the previous
operation. If the 10 second period is over the system will automatically exit the
programming mode and two long chirps will acknowledge theexit. If the ignition is turned off
during programming the system will immediately exit the programming mode and two long
chirps will acknowledgethe exit.
1. Disarm the system.
2. Turn theignition from on to off.
3. Within 10 secafter switching offthe ignition pressand hold the Valet buttonover 3 sec ,
the LED startsflashing , release the Valetbutton.
4. Press and holdthe Valetbutton, you will hear the sirenstart chirping (from1~3 chirp),
while give 2chirp sound, immediately release the Valet button.
5. The LED willstart flashing to acknowledging that thesystem is ready for programming of
new transmitters.
6. Press any buttonof the first transmitter, youwill hear 1-shortchirp acknowledging that
the first transmitterhas been programmed
Press any buttonof the second transmitter, youwill hear 2-shortchirp acknowledging
that the secondtransmitter has been programmed.
Repeat the operation3 for other transmitters.
7. Toexit the transmitter programming mode, Turn on the ignition and youwill hear two long
siren chirps.
Programming 2-Way remote
Battery conserve mode
The mode canbe turned on/off2-way receiving inthe Disarmed mode if you simultaneously
press down thebuttons until thezzz icon turn on. Being inthe Disarmed mode
the remote pagerturns off itsreceiver in 30sec.
Toexit the mode, simply press thebuttons until zzzzicon turn off.
2way remote buttonlock ON/OFF
For safety purpose,this 2-way remote can be lockoutthe remote button in order notto
mis-touched the buttons.Press button for over 2sec. untilone beep is heard,
remote button isnow locked. To turn onremote button, press button for over
2sec. until twobeeps is heard, remote button isnow unlocked.
2-way LCD display:
2-way LCD display:
Beeps 2-way remote feature
Vibrations
1-beep
1-beep
1-time
1-time
Remote with toneand vibration
Remote with vibrationonly
Remote with toneonly
Vibrate mode on/off
Press button forover 2sec. the 2-way remote will respond tone &vibrate feature,
the button pressing2sec. will change the feature, seeunder table:

Check-in range notification(on/off )
Arming the systemwithin 2 seconds, press button onceon the 2wayremote , the
system will enablethis Check- in range function.
- With in5 minutes, the 2-way remote willthan give 1beep sound every one minute for5
cycles to remindthe user within range.
- After5 minutes, the 2-way remote willdetect range every10 minutes and without any beep
sound, the icon will constant onif the user within range.
For friendly usage,the 2-way remote will provide 2beeps/ 3cycles andflashing icon
if the useris out of the receiving rage. However, afterwardsif the 2-way remote detect the
signal again fromthe system, the icon will beON to indicate the 2-way remoteis within
range.
Note: If under Check-inrange mode, if alarm triggered, thisfunction will automatically
turn off (disable).
The 2way remote
will respond:
This Icon willturn on and give 1 beep
sound to indicatethe function has been
turned ON.
Time adjust mode
Besides operating foralarm functions, LCD remote control additionallyprovides 24-hour
real time clock.
Instructions:
1. Press and holdButton for 2sec.to enter time-setup mode, 1 beepwill be heard.
2. Press button toselect Hour & Min adjust setting.Icon flashing toindicate.
3. Press button toturn up the numbers. Press button to turn downthe numbers.
The button maybe held downto scroll faster.
4. Press button toexit the setting mode. 2 beepwill be heard.
Note: The remote willrevert to normal operation from theset mode when 10-seconds has
elapsed without a button entry.
Minutes display
24-hour display

2-way signal paging features
A pageis the signal the control modulesends to theremote controls confirmation of
receipt of acommand or alarm system status. Whenthe remote controlreceives a page
it will generatea page notification to the user(notifications are audiblebeeps) and the
LCD Icons willdisplay the current system status.
Command Page
When a command(arm/disarm, remote start , or auxiliarychannel) from the remote
control is sentand received, the system will senda command page back to confirmreceipt.
Note: When the systemis in Valet mode, theremote control will show the lockicon and
unlock icon, butwill not generate a command page.
Page Recognition (Acknowledgement)
Toclear a page alert/notification, quickly pressany button onthe remote control. This
can be performedat any time during or afterthe page notificationhas occurred.
The remote controlwill not send a command tothe system atthis time; it will only clear
future repeats ofthe page notification. The next timea button is pressed on theremote
control it willsend a command to the system.
Vehicle statuschecking
Turn on LCD display back light
The 2-Way remote offer thefeature to check the current statusof the car, simply pressthe
button once within proper operation range.The main unitwill send the signals to the
2-Way remote about the vehiclecurrent status.
Simply press button once, the backlight of LCD display will turnon 5 secondsand
also check thevehicle status.
Alarm Page
If the alarmsystem is triggered while armed, anAlarm Page will be sentto the remote
control. When theremote receives an Alarm Page,the LCD icons will display thealarm
system status informationand the remote control will generatebeeps.

Display Beeps Vibrations Trigger
1st stage-Sensor warning
2nd stage-Sensor triggering
Trunk switch triggering
Door switch triggering
Hood switch triggering
Ignition triggering
1st stage-Sensor warning
2nd stage-Sensor triggering
5 short
Melody 1
5 short
Melody 1
Melody 2
Melody 3
Melody 4
Melody 5
1 times
1 times periodically
1 times
1 times periodically
2
5 times periodically
times periodically
3 times periodically
4 times periodically
Alarm Page table
Zone 1
Zone 1
Zone2
Zone 2

- Defective Zone Bypass & Alert:
If the security system is armed at the same time that an input is active (such as a door opening
or hood / trunk opening ), you will hear one siren chirp to indicate arming and after 5 seconds
a second siren chirp to indicate bypass Notification. A Bypass Notification chirp means that the
security system ignores the input that was active when the system was armed, until that input
ceases.
Note: You may press 2-way remote button once to check again which zone is not closed.
- Arm without siren chirp : Press the button over 2sec.
You may temporarily to arm your system without siren chirp , to operate it by simply press and hold
the button for over 2sec. until the remote give 1 beep sound, then release the button .
The system will armed and without one siren chirp.
Note: this features is only activated under the system is in disarmed and Acc off position,.
Standard features
the status LEDwill flash approximately once per
second, indicating thatthe system is actively protecting yourvehicle.
- To ARM the system: Press the button once.
Toarm your system within proper operationrange, simply pressbutton once (while
system in disarmedor Acc off position) .The system willrespond one sirenchirp, one lights
flash, doors lock,disable engine starter,
2-way LCD display:
Defective zone Siren chirps 2-way beeps 2-way LCD indicator
Door opened 4 chirps 1 long + 3 short
Trunk opened 5 chirps 1 long + 4 short
Hood opened 6 chirps 1 long + 5 short
IMMO icon
indicate that
the engine
blocked

Passive arming:(Table-1 ofNo.2 ON status)
If set programmemode to "ON", while turn Ignition OFF, then close the last door, the LED
will starts flashingand Siren will give 2 chirpsand Lights flashtwice to indicated that the
system is inpassive arming mode. After 30sec.The system willarm by itselfand LED
flashing slowly toshow the system is in armingmode. Main unitsends the signal to the 2-
Way LCD remote and indicatesARM mode with one beepsound .
Note: If during theoperating of the passive arming timerif a dooris being opened the
Operating of the passive arming timerwill be suspended.As soon as all doors,hood
and trunk are closed the systemwill start thecycle of the passive arming again.As
soon as 30 seconds are overthe armed modewill be turned On.
2-way LCD display:
Icon flashing
indicator
Two beepsound will provided to
to indicate thatthe system is in
Passive arm mode.
- Automatically rearming : (Table-1 of No.4 ON status)
If the system is disarmed by remote and a door is not opened within approximately 30 seconds the
system will automatically rearm itself. This feature guards against disarming caused by accidental
or unintended operation of the remote transmitter. Main unit will sends signal to the 2-Way LCD
remote and indicates ARM mode with one beep sound.
- When armed your vehicle is protected as follows:
Light impacts triggerthe sensor. When triggered, thesiren will give 3 chirps.
Heavy impacts triggerthe sensor. The sequence consistsof the siren sounding
continuously and theparking lights flashing for 20 seconds.
If a dooris opened, the system will immediatelystart chirping the siren and flashingthe
parking lights for30seconds.
Turning onthe ignition key will trip thesame progressive response as opening adoor.
Turning onthe trunk or hood will tripthe same progressive response as openinga door.
The optional starterkill prevents thevehicle's starter from Cranking.
2-way LCD display: Flashing icon toindicate
that the systemis inAuto
re-arming mode.
Icon flashing
indicator

- To DISARM the system : Press the button once.
Todisarm your system within proper operatingrange, simply pressbutton once (while
system in armposition). The systemwill respond twosiren chirp, two light flash, doors
unlock, Enable yourengine starter, LED off.
- Disarm withoutsiren chirp :Press the button over 2sec.
Todisarm your system without siren chirp, simply pressand hold the button for over
2sec. until theremote give 1 beep sound, thenrelease the button . The systemwill
disarmed and withoutone siren chirp.
Note: this features isonly activated under the system isin armed position.
- 2 step disarm:
This system offers2 step disarm. It's a featurethat make itpossible to silence and reset
the system whileit is triggering, without disarming thesystem. If thesystem is triggered
and the sirenhas been sounding, pressing any buttononce on theremote transmitter will
stop the triggerand return the unit to thearmed state.
Note: Under system triggering,if press any button of 2-wayremote once ,the remote will
stop the beepsound and LCDdisplay will indicate the intrusion iconfor 2sec.
Press any buttonagain to stopalarm triggering.
- 2nd step release start killer (Table-1of NO.7 ONstatus):
If programmed withthis feature, when disarming the systemby the remote,however the
engine will stillblocked, the status LED will fastflashing 4 timesafter a pulse and the 2way
LCD will turnon the icon for indication.
To exit: Turn ignitionON then (1) press Valet(over-ride) switch once. (2) or press remote
button once torelease the start killer . Thestatus LED willoff to indicatethe engine
released .
2-way LCD display: + Twobeep sound
- Alarm cycle :
If a violationoccurs the system will respond bysounding the sirenand flashing the lights for
approximately 30sec. beforethe system resets itself and continuesto protect yourcar. If
violation still occursthe system, siren and lights willworking for 4or 5 cycles then the
system reset itselfand continues to protect other zones.
- Zone-1 /Zone-2 : 2nd stage sensor triggeringlimited for 4cycles
- Door /Hood / Trunk zone triggeringlimited for 5 cycles

- Silent armingmode : Press the button over 2sec.
Simply press thebutton
1+2 over 2sec..The system willarmed without sirenchirp. Disarm the system the sirenwill
be automatically returnedinto the normal mode.
Totemporarily turn offthe arm ordisarm chirps, use Silent mode.
Note: The Zone1 and Zone 2 sensors are bypassed if the system is armed using Silent
Mode. This ensuresthat no chirps will be emittedby the siren in an areayou want chirp-free.
The system isstill fully capableof triggering. Only thesensor is bypassed.
- Disarming without a transmitter :(table-1 of No.6 Valet swstatus)
The security systemcan be disarmed without the remotetransmitter. Thefunction
is provided forthe case when you need todisarm the systemand drive the car but the
Remote transmitter isfaulty or lost. If while theprogramming of thesystem for the manual
disarming the Valet (table-1 ofNo.6) was selected act as followsto disarm thesystem:
open the cardoor - the security system willbe triggered andthe siren will be turned on;turn
on the ignition,press the Valet switch once to disarm thesystem.
- Disarming by usingthe PIN code :(table-1 of no.6PIN code status)
Toselect the PIN coded disarming mode.Please contact yourinstallation technician or see
Functions to beprogrammed section and the Installation manual. If the codeddisarming
mode is onyou can use the manufacturer code(25) or toprovide the maximum arming of
your car youcan program your own PIN codefor disarming atany time. Thecode comprises
two digit; eachdigit can vary from 1 to9.
To disarm the system using the PIN code
1. Open the doorwith the key (the system willbe triggered andthe parking lights will go on
and so on).
2. Turn ONthe ignition .
3. Press the Valet button 2times , the number of timeswhich is in accordance with thefirst
digit of yourPIN code (the manufacturer setting is2 time).
4. Turn OFFthe ignition then turn ON again.
5. Press the Valet button 5times, the number of times whichis in accordancewith the
second digit ofyour PIN code (the manufacturer settingis 5 time).
6. System will automaticallydisarmed if insert the correct PINcode.
Note:
If you enterthe wrong code , you mustwait next cycletriggering and turn off the ignition
then start fromstep #2.
2-way LCD display: + One beepsound

- Panic (turning on/off) : Press the button over 2sec.
The system will be immediately armed , and siren turned on and the parking lights will start
flashing for 30seconds.
To turn off the panic mode, press any button once of the remote . If you do not turn off the
panic mode thesystem will be automatically turned offin 30sec. and in armed .
- Car search mode:
The system providea feature to easy find yourcar position, simply press button once
when in armedafter 5sec. Thesystem will respond by 1-long chirpwith 10sec. for the
parking lights flashing.
- In door temperature check :Press the button over 2sec.
This feature providetemperature check inside the vehicle ,simply press thebutton for
over 2sec. the2way LCD will indicate icon toshow the currenttemperature .
Icon flashing
indicator
2-way LCD display:
Under Panic mode,the
2-way remote willrespond
melody sound and flashing
icons .
- Passive immobilizer: (Table-1 ofNO.3 ON status)
Toturn on the function of passivelocking of theengine contact an installation technician or
see the sectionProgrammed functions (Table-1 of NO.3 ).
If programmed withthis function, when turn off ignitionswitch for 30 seconds or youopen
and close thedoor, it will disable theengine starter rightway . T
Turning offof the passive locking of theengine
- If theignition is turned on press thedisarming button 2 for a short time to cancelthe
function of thepassive immobilizer
- If thetransmitter is faulty or lost turnoff the systemwith the Valet switch .
he status LEDwill fast
flashing 4 timesafter a pulse and the 2way LCD will turnon the IMMO icon.
2-way LCD display:
2-way LCD display:
+ Twobeep sound
Icon turn onfor
current temperature
inside the car

- Intrusion Alert by status LED :
Upon disarming thesystem, if the vehicle is attemptedor intruded, sirenand lights will
Indicates 5 chirpsand 5 flashes to identify whichzone was triggered.LED mode indicates
the following differenttriggering.
- 2-way LCD Intrusion Alert:
Upon disarming thesystem, if the vehicle is attemptedor intruded, the2-way remote will
respond 2 shortbeep follow with melody sound, andLCD display willindicates different
icons as under:
Note: Before the ignitionturn on, you may realized againwhich zone beentriggered by
Press button (statuscheck) once, the LCD will displaytriggered zone again.
flash 2 times after a pause Sensor 1st-stage triggered
flash 3 times after a pause Sensor 2nd-stage triggered
flash 4 times after a pause Door switch triggered
flash 5 times after a pause Hood switch triggered
flash 6 times after a pause Trunk switch triggered
Flash 7times after a pause Ignition switch triggered
Zone2: 1st-stage
sensor triggered
Zone1: 1st-stage
sensor triggered
Zone2: 2nd-stage
sensor triggered
Zone1: 2nd-stage
sensor triggered
Door switch triggered Trunk switch triggered
Hood switch triggered Ignition switch triggered
Table of contents
Other Eaglemaster Car Alarm manuals

Eaglemaster
Eaglemaster AS-232T User manual

Eaglemaster
Eaglemaster E5 G7 User manual

Eaglemaster
Eaglemaster E1 Plus User manual

Eaglemaster
Eaglemaster E2 User manual

Eaglemaster
Eaglemaster LT-6200 User manual

Eaglemaster
Eaglemaster CA-168 Safety guide

Eaglemaster
Eaglemaster E5 User manual

Eaglemaster
Eaglemaster E4 User manual
Popular Car Alarm manuals by other brands

Black Widow Security
Black Widow Security BW 6 Relay installation manual

Clifford
Clifford intelliguard 700-IQ owner's manual

PATROLLINE
PATROLLINE HPS 841 GSM Using instruction

Clifford
Clifford AvantGuard 2 installation guide

pursuitrak
pursuitrak PRO1CP owner's manual

Black Widow
Black Widow BW1700 installation manual