Eaglemaster LT-6200 User manual

IMPORTANT:
Please read theentire manual forcomplete details onthe features, accessoriesand
operation before attemptingto use yoursecurity system.
This Security systemmust be installedby a qualifiedtechnician to ensureproper
operation. Do notattempt to installor modify thissystem yourself as
this way voidyour warranty.
SAVE THIS MANUAL FORFUTURE REFERENCE
High power Siren
to ward offattackers
Parking lights flash
when alarm istriggered
Starter kill shutsoff engine
and prevents startingby thieves
LED light flashesto signal
intruders that yourcar is protected
Open trunk remotely
Trunk trigger whenalarm
is armed
Auto lock systemremotely
locks or unlockscars with
power door locks
Doors trigger
when alarm isarmed
Shock sensor detectsany
attempt to tamperwith your car
Remote panic modeallows you
to trigger alarmto ward-off attackers
Window close automatically
when alarm isarmed
Owner's Manual
REMOTE SECURITY SYSTEM
FOR AUTOMOBILES, TRUCKS,VANS&SUV'S.
VEHICLE SECURITY SYSTEM
LT-6200
FEATURES:
Two 2-ButtonRemote Transmitters Active or PassiveArming
Hi-tech Hopping CodeSystem 2 pulseUnlock output
Plug-in Dual StageShock Sensor RemoteAnti-Car jacking Activation
4-channel Receive LEDSystem Status Indicator
Keyless Entry Outputs WithDual Polarity High Decibel Multi-ToneSiren
Vehicle LocatorAnd Panic LimitedLifetime Warranty
Horn Honk Output Parking Light Flasher(R/L indicator)
Starter Disable Doorslock relays built-in
Protected ValetOverride PIN codeprotection
OPTIONAL FEATURES:
Remote Starter Trunk Release WindowsRoll-Up 2nd StarterDisable Anti-car jackswitch

Hi-tech hopping
code system
Press Button once Arm / Door Lock
Hold Button for 2 seconds Arm Without Siren/HornChirp
Press Button once after 10sec.armed Car finder
Press Button once after set Arming 1st stage- Sensors by Pass
Press Button twice after set Arming Sensors by Pass
Press Button Disarm / Doors unlock
Hold Button for 2 seconds. Disarm Without Siren/HornChirp
Press Both buttons once Panic / Anti Car-Jack (ACC ON)
Hold Both buttons for 2 seconds Trunk Opener
2nd stage-
REMOTE FUNCTION TABLE
Remote Features:
Each alarm is assorted with two special transmitters.
Hi-tech hopping code system is applied to each
transmitter. This system has supper confidential
technology. It can hardly possible be copied. It is used
high stable UHF frequency as radio transmission circuit.
For your operation convenience, four transmitters can
be learn into this alarm at the same time.
Transmitter's battery use: 12V GP23A
Sub-Function Setting
In Disarm position. Turn off IGN ,within 10 seconds press valet SW 5 times, until siren /horn
chirp 4 times and lights ON means system entering in programmable mode. The times of valet SW
pressing is according to the function item number. To judge it as per LED indication (times of
flashes).E.g. to set sub-function item No.2 :Press valet SW 2 times,LED quick flash 2 times after
a pause. Then press remote to select ON or OFF .To press button function will be ON , siren/horn
will giving two chirps. To press button function will be OFF ,siren/horn will giving four chirps.
Note: * means factory setting before delivery.
If the above condition happens , alarm will exit this setting mode by turn IGN to ON position or
within 10 seconds there is no setting activity , Lights will OFF.
SUB-FUNCTION TABLE
Item No. Function ON OFF
1 Immobilizer (smart engine disable) YES *NO
2 Passive arming function setting (door lock) YES *NO
3 Passive arming function setting (door without lock) YES *NO
4 Door switch arming detection delay *0sec. 45sec.
5 Safety Door Lock *YES NO
6 Unlock output 1or 2 pulse selection *1pulse 2pulse
7 Siren / Horn Selection *Siren Horn
8 Anti car-jacking mode selection *Active Passive
WARNING!
CHANGE BATTERY WHENREMOTE
RANGE IS GETTING SHORT
Left button
Arm Right button
Disarm

How touse codelearning :
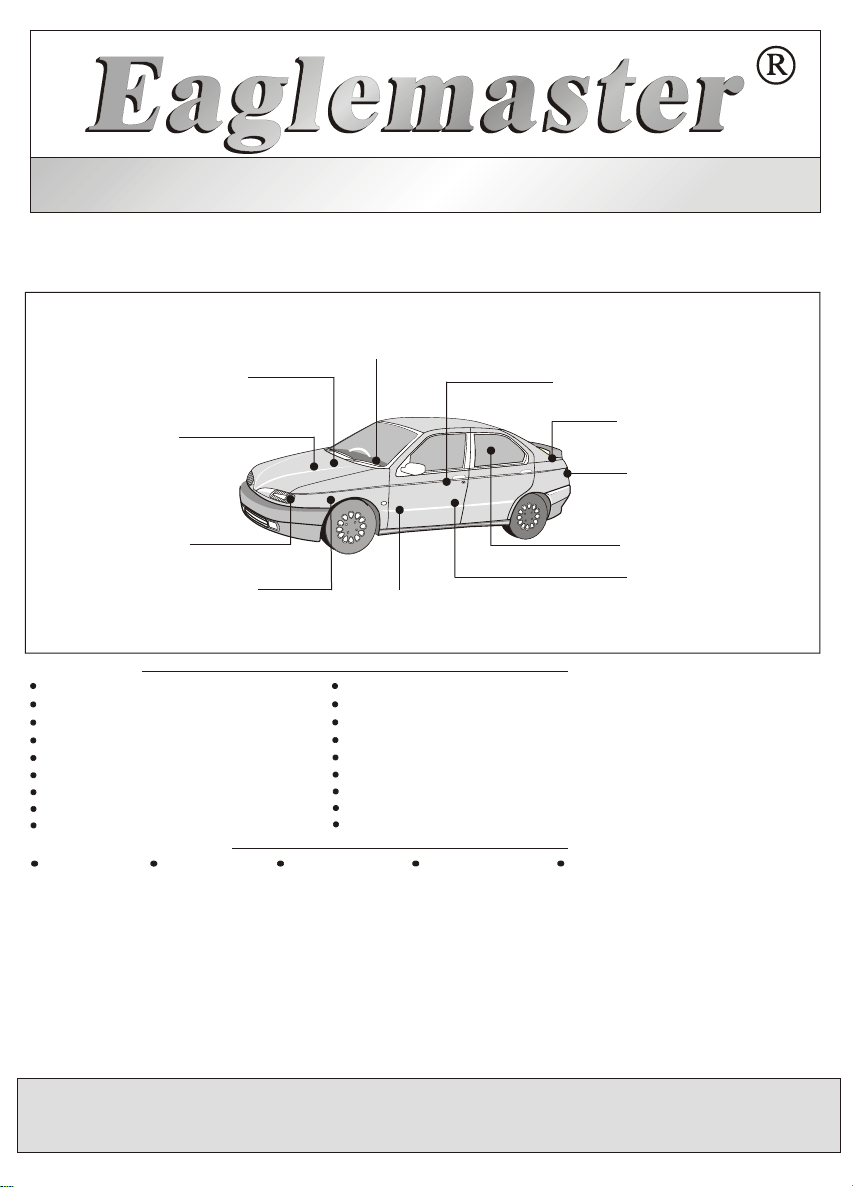
Standard features:
This system canexpand 4 differenttransmitters, and comesfrom factory withtwo transmitters alreadyprogrammed into thesystem
memory. Wheneveryou want toadd or deletetransmitter code ofthe system, justobey the followinginstruction :
1.In Disarm position. Turn onIGN , within10 seconds pressvalet SW 5times.
2.Siren/Horn will chirp3 times andLights ON toconfirm the systemis in codelearning mode.
3.To pressany remote button,code learning achievedif it givesone short chirp.
4.To turnoff learning mode: (1)Turn off IGN. (2)Four transmitters havebeen successfully learntalready
(3)Within 10 seconds, there isno new transmitterbe learnt. LightsOFF to confirmExit this mode.
1.To Armthe system:Press button siren/hornwill chirp once,lights flash onceand LED willflash slowly .
Doors locked ,start killed andcontroller to closeall windows. Alarmwill be triggered whenever the carwas hit orintruded
2.To Armthe systemwithout Siren/Hornchirp :To hold button for over2 seconds, light
flash one butno chirp sound,other functions arethe same asArm .(This featureto prevent noisein silent area)
3.To Disarmthe system:Press button sirenwill chirp twice,lights flash twiceand LED willbe off .Doors
unlocked and startkiller released
4.To Disarmthe system without Siren/Hornchirp :To hold button for over2 seconds,
light flash twicebut no chirpsound, other functionas the sameas Disarm.(This featureto prevent noisein silent area)
5.Panic :Press button + , panic modewill be activated. Siren willburst and lightswill flash for29 seconds, untilpress
any button toturn off thepanic mode.
6.Remote
7.Auto Re-Arming:Alarm arms again30 seconds afterdisarm, unless thedoors have beenopened or engineis
ignition on. Thisfeature is toavoid mis-touch ormis-disarmed.
*When triggering 2ndstage sensor:Siren/Horn gives 20seconds sound andlight flash 20seconds. there isonly 6 times
trigger imitation afterthe alarm isin armed statusevery each time.
*When triggering IGN,door,hood or trunkand etc. :Siren/Horn gives 29seconds sound andlight flash 29seconds.
After alarm triggeringthere is 2seconds pause. Thealarm will detectto see ifit is recoveredto normal armingcondition. If itis not ,
the alarm willtrigger again.
12.Remote Sensorby Pass:The alarm offerstwo stage sensoroptional. Within 10seconds after setarming, to
press button once,siren/horn will chirptwice , then1st stage sensorby pass. topress button twice,siren/horn will chirp3 times
then all sensorswill be shutoff and nosensor working forarming protection.
13.Car Finder:
TrunkRelease:Keep press button + for over2 seconds thentrunk will automaticallyopened.
During Arming ,remote trunk releasewill not triggeralarm and sensortrigger function willalso shut off, but IGNand doors keep
arming condition. Afterclose trunk for5 seconds ,trunk and sensortrigger will returnto arm status.
8.Alarm AbnormalArming Indication:In arming alarmmode if thesiren chirps 4times and light
flash 4 timesit reminder youthat door(s) orengine hood ortrunk is notshut properly.The alarm willbypass that zonebut it willstill
protect other zones.LED will showyou the abnormalcondition :
9.2nd KillerOutput: This feature canbe controlled separatelyof the enginedisable. This output(-500mA) is
working with systemdisarming. 40A relayis required andgo with normallyclosed & commonoutput.
10.Passive Arming:If you wantto use thisfunction, set itemNo.2 or itemNo.3 on "ON"position. While youturn off
IGN, open doorthen close door, LED will quickflash. After 30seconds alarm willarmed automatically ,but during 30seconds, if
any of thedoor, trunk, hoodis open, alarmwill stop this"passive arming".
11.AlarmTrigger:During arming, ifturn on IGN,open door, andetc...alarm will triggerin order tostop the offender.
*When triggering 1ststage sensor:Siren / Horngives one longchirp for warning.
If your carin crowded bigparking place ,youcan easy tofind your car position by pressbutton once.
Siren chirp oncefollow with lightsflashing for 30sec.If press button for 2sec. Lightsflashing 30sec. Butwithout siren chirp.
Note: Such featureoperate after 10sec.Once entering inarm position.
14.Valet mode :turn Ignition on, within 10 seconds hold valet switch for over 5 seconds , LED will be on indicating in the Valet
mode. Under this mode, remote lock and unlock is still effective and other functions are shut off temporary. Mode exiting : To turn on IGN,
within 10seconds hold valet switch for over 5 seconds, LED will be off means exit of Valet mode.
15.Alarm Trigger memory:In arm status if anything triggers, after you disarm, siren/horn will sound and light will flash
4 times indicating that alarm was triggered before .LED mode indicates the following different triggering :
16.Smart Engine Disable (Anti-car jack/immobilizer) :Set sub-function Item No.1 to "ON" position.
After turn off IGN position for 30 seconds or you open and close door in 30 seconds after turn off IGN, it will start engine disable function right
way and LED start flash twice per second. To disarm this function, turn IGN on ,within 10 seconds, press Valet SW for 5sec. and into valet
mode. Or simply press button once. LED will shut off and into normal status.
Quick flash 2 times after a pause Sensor 1st stage trigger
Quick flash 3 times after a pause Sensor 2nd stage trigger
Quick flash 4 times after a pause Door trigger
Quick flash 5 times after a pause Engine hood or trunk trigger
Quick flash 6 times after a pause IGN trigger

17.Power disconnecting memory: This system is built in memory on main unit. Generally, after alarm power is cut
and reconnect, main unit will read back these data make the alarm to resume. When in disarm, arm or valet mode, anti car-jacking mode power
off then on again, alarm will read back original position.
18.Safety door lock/unlock: To use this function, set sub-function NO.5 to "ON". After closer last door, turn on IGN for
10 seconds all doors will auto lock for protection. To turn off IGN, all doors will auto unlock for take off conveniently.
19.Window (-) Output: This channel is a negative (-500mA) output features. To operated this option when equipped, simply
press button, system will armed and window roll-up/down approximately 30 seconds.
20.Parking lights relay built-in:This system is build-in with a double-side point relays for Right and Left two side
turning indicator.
22.Pager output :Pager (-) 500mA output can be connected to alarm pager to become two way service.
23.
21.Central door lock relays built-in:This system is build-in relays for door lock/unlock and available for any
different design of car .
Anti car-jack:This feature will protect your vehicle in the event that there is an attempt to Hi-jack the vehicle. There are three
ways to activate this feature. While system is trigger anti-car jack mode, Lights will flash 3 times and the LED will fast flashing to show the
system is enter anti-car jacking mode. See under 24"anti-car jack mode table".
1).REMOTE ANTI-CAR JACK : While Ignition ON, Press button + once . The parking lights will flash 3 times and the LED will
fast flash to show the system is enter anti car-jack mode.
TO EXIT:Within 60sec. after enter this mode, simply press button once , or Acc on press valet switch once LED off to confirm exit mode.
NOTE: After 60sec., to exit this mode must use your PIN code to disarm your system, please see "How to use your PIN code".
2).ACTIVE ANTI-CAR JACK: To install this optional anti-car jack switch contact your dealer and Set sub-function Item No.8 to "ON"
position. This switch is not a switch at all. It is a factory switch already in your vehicle that will function Anti car-jack mode by Push or turn ON
this switch. Any factory switch in the vehicle maybe used, as long as it switches positive voltage .Ask your customer to determine which switches
will work in the vehicle. Some possible switches are light switch, radio turn-on, or defroster switches. During this switch is turned ON, while
door's been open system will enter anti-car jack mode.
TO EXIT:Within 60sec. after enter this mode, In Acc on, Push or turn anti-car jack switch OFF or press valet switch once LED off to
confirm exit this mode.
NOTE: After 60sec., to exit this mode must use your PIN code to disarm your system, please see "How to use your PIN code".
2).PASSIVE ANTI-CAR JACK:If set sub-function Item No.8 to "OFF"set, system will automatic enter anti car-jack mode, when you
open one of the door in Ignition on position.
TO EXIT:Within 60sec. after enter this mode, In Acc on, press valet switch once LED off to confirm exit this mode.
NOTE: After 60sec., to exit this mode must use your PIN code to disarm your system, please see "How to use your PIN code".
24.Anti car-jack mode table:If enter anti car-jack mode, Parking lights will flashing 3 times and LED will fast flashing
to show the system is enter anti car-jack mode.
25.How to use your PIN code: If you are in Anti car jack mode after 60sec. Or system in triggering, you can manually
disarm your system by enter your own PIN code .(The system's factory-set PIN code is 1 . 2 . 3 . 4 )
1) Turn Ignition "OFF then ON" LED will go OFF,
2) Press and hold valet switch, LED will start flashing, the times of LED flashing is according to the PIN codes number.
3) To set your 1st PIN code(1) , press and hold valet switch, while LED flash 1 time then release valet switch LED will OFF, means your
1st PIN code (1) been programmed.
4) To set your 2nd PIN code(2) , press and hold valet switch, while LED flash 2 times then release valet switch LED will OFF, means your
2nd PIN code (2) been programmed.
5) To set your 3rd and 4th PIN code same as above instruction.
6) After 4-digit PIN code been programmed , system will be disarmed.
26.Set your own PIN code:Choose any 1-4-digit code, but the 4digit code must not be a zero. For example : Let's say you
want to set a password of " 9 . 1 . 3 . 1 " ,Turn Ignition ON then OFF, within 10sec., Press and hold valet switch for 5sec. Until siren give 2
chirps and Lights ON, means enter this mode, release valet switch. Upon program mode, press and hold valet switch, LED will start flashing,
the times of flashing is the number of 1st PIN code, while flash 9 times, release valet switch and your 1st code been programmed. To set 2nd PIN
code, press and hold valet switch again, while LED flash 1 time, release valet switch and your 2nd code been programmed. To set 3rd and 4th
are the same as front instructions. If 4-digit codes been programmed, siren will chirp 9 and 1and 3and 1to sound your new PIN codes and into
normal status, hence your new PIN codes been programmed and Light will turn off automatically.
LED flash
Lights flash
Siren chirp
Pager output
Engine disable
Timer
LED flashing fast
3 flash Lights flashing once per second
Siren pre-warn chirps Siren blowing
Engine disable
0sec. 50sec. 60sec. 89sec.
Pager output

LT6200 ALARM MODULE
Blue port, plug-indual zone
shock sensor
White port, plug-inAdditional sensor
+12V (+500mA)
GND
2nd Stage trigger
1st Stage trigger
Red
Black
Green
Blue
Red/Black
Orange
Brown
Black
Red
Blue
Blue
Yellow
Black
Green
Pink
White
Purple
Orange
Lock-Nomally close (+7A)
Lock-Common (+7A)
Lock-Nomally open (+7A)
Unlock-Nomally close (+7A)
Unlock-Common (+7A)
Unlock-Nomally open (+7A)
15A
10A
10A
Fuse
Fuse
Fuse
Chassis ground (-) input
Constant power (+12V) input
Red 2-pin port
Central door lock
control line
2 Ports of4 pin fordual zone
shock sensor or othersensors
With loop wire :
door lock timer 0.8sec..
Cut loop wire :
door lock timer 4sec..
System wiringdiagrams
Do not coilor around
the thin blackAntenna
wire !!
Connect to
Existing Positive
switch for enable
Anti- car jack
+12VDC
output
Anti-car
jack trigger
(+) input
On
Off
Or use Optional
on/off switch for
enable anti-car
jack
White 2-pin port
Valet Switch
LED
Negative Pulsed
output For Optional
Window Roll Up
Negative Pulsed
output For
Optional Trunk
release
Negative Pulsed
output For Optional
Pager unit
Connect to
Existing Positive
Door Pin Switch
(Ford Type)
Connect to
Existing Negative
Door Pin Switch
(GM Type) 30
85
86
87a
87
Orange from
Socket relay
Cut Existing lowcurrent
Start solenoid Wire
Blue from
Socket relay
O
C
N
C
A
S
F
T
F
O
Connect to Switched (+)
12Volts Ignition Connect to
Hood or Trunk
Pin Switch
Connect to Redfrom Siren
(-)500mA when disarmedoutput
for 2nd starterdisable
Green/White
White/Red
Yellow
Brown/White
Green
Gray
Left parking Light (+)
Right parking Light (+)

2nd killerinterrupt diagram(Yellow wire(-)12v Disarmedoutput)
Trunkrelease diagram(Green/White wire(-)12V 500mA output)
This wire providesa constant -500mAground output foroperating optional relaywhile alarm isdisarmed. This
will disable theengine operation.
OPERATION:Pressing and holdbutton#1+ #2 for2 seconds willactivate Green/White wireoutput for 3seconds.
Black
Green
Pink
White
Purple
Orange
Black
Green
Pink
White
Purple
Orange
MOTOR
CONTROL
DOWN
UP
MAIN LINE
ORIGINAL
BUILT-IN
CONTROLLER
DOOR MOTOR LOCK
(Inside of the front door)
1.) ForFactory installedcentral doorlock system
2.) Directlyconnect to2 wireActuator
3.) Abuilt-in Centraldoor lockwith electriclock switch(like: CHRYSLER..)
4.) Forvacuum typecentral doorlock system(like : MercedesBenz , AUDI..)
2 WIRE ACTUATOR
+ 12V (-)GND
ELECTRIC
MOTOR
ELECTRIC
MOTOR
MOTOR LOCK
INSIDE THE
FRONT DOOR
+ 12V
DOWN
UP
AIR COMPRESSOR
+ 12V
UP
DOWN
Black
Green
Pink
White
Purple
Orange
Black
Green
Pink
White
Purple
Orange
Note: Door lock active time for 4 secs.
Door Lock Wiring diagram
86
86
85
85
87
87
87a
87A
30
30
orange
Blue (COM)
Socket
Red wire Green (N/O)
ALARM
BRAIN
ALARM
BRAIN
Yellow
Green/White wire
+12V To(+) or (-)as needed towork trunk
ToTrunk Releasewire
+
-Cut existing lowcurrent starter
solenoid or cutfuel line
+12V
Table of contents
Other Eaglemaster Car Alarm manuals

Eaglemaster
Eaglemaster E4 User manual

Eaglemaster
Eaglemaster E8 User manual

Eaglemaster
Eaglemaster E5 G7 User manual

Eaglemaster
Eaglemaster CA-168 Safety guide

Eaglemaster
Eaglemaster AS-232T User manual

Eaglemaster
Eaglemaster E2 User manual

Eaglemaster
Eaglemaster E1 Plus User manual

Eaglemaster
Eaglemaster E5 User manual