Earlens Contact Hearing Solution User manual

Earlens Hearing Aid User Manual
®
(R)
Contact Hearing Solution User Manual


1
Earlens(R) Contact Hearing Solution User Manual

2
Welcome
Thank you for choosing the Earlens Hearing Solution. This user manual is designed to
show you how to use and care for your new Earlens Hearing Aid. We encourage you
to carefully read this entire booklet including the Warnings and Precautions sections
to achieve the maximum benefit from your new hearing technology.
If you have further questions that are not answered in this manual, please contact
your hearing professional or call the Earlens Concierge at 1
-844-730-5986. You
should always access the most up-to-date version of the Earlens Hearing Aid Patient
Instructions for Use (IFU) at www.earlens.com/IFU. The IFU contains results from
Earlens Hearing Aid clinical studies and information regarding safe and eective
EMC use.
can

3
Getting to Know Your Earlens Hearing Aid .........4
The Lens ...................................................................6
The Processor and Ear Tip ....................................7
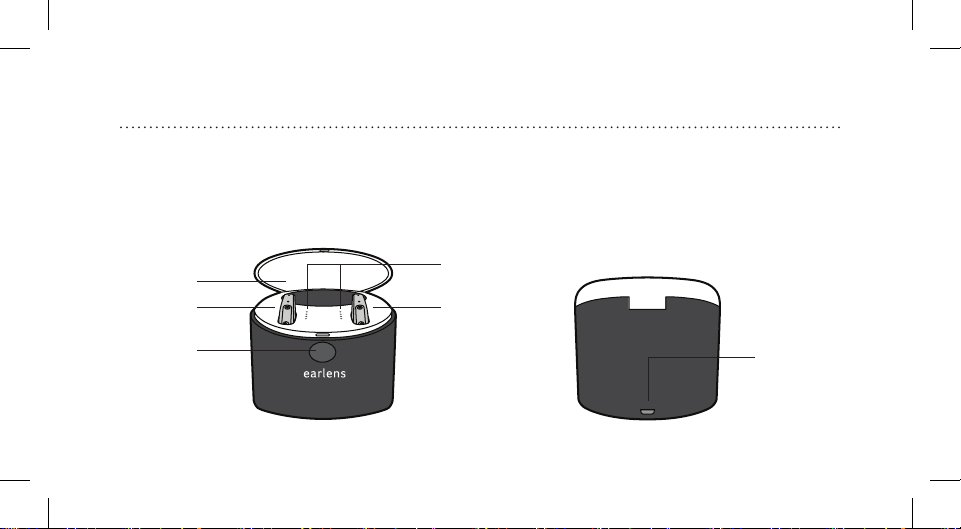
The Charger .............................................................8
Mineral Oil .............................................................10
Using your Earlens Hearing Aid .......................... 11
Turning the Processor O....................................11
Turning the Processor On....................................12
Identifying Left or Right Device ...........................13
Putting on the Processor and Ear Tip................14
Removing the Processor and Ear Tip.................16
Changing Volume and Program ........................17
Processor Alerts.....................................................22
Telephone and Cellphone Use ............................24
Charging and Battery Life ...................................26
Cleaning and Maintenance .................................. 27
Daily Care...............................................................27
Oiling Instructions.................................................29
Avoiding Moisture & Heat....................................32
Warranty................................................................33
Troubleshooting...................................................... 34
Warnings................................................................... 37
Precautions .............................................................. 39
Technical Information............................................ 43
Device Labeling Symbols ...................................... 44
Contents

4
Getting to Know Your Earlens Hearing Aid
The Earlens Hearing Solution uses asmall Lens placed in your ear by aphysician to
activate your natural hearing system.The behind-the-ear Processor collects sound and
transfers it to the Ear Tip, which converts the sound signal into a rapidly pulsed
energy pulses that power the Lens to vibrate and gently activate your natural
hearing system.
There are important components to your Earlens Hearing Aid that will be described
in this section: the Lens, the Processor, the Ear Tip, the Charger and mineral oil. The
components that you will interact with include the Processor, Ear Tip, Charger and
mineral oil.

5
1Sound enters the microphone on the Processor,
which processes the audio signal based on your
hearing needs.
2The audio signal is then converted into
pulses of energy that are transmitted by the
Ear Tip.
3When the energy signal reaches the Lens,
it vibrates the eardrum gently at dierent
frequencies — resulting in rich, natural sound.
1
2
3

6
The Lens
The Lens is powered by pulses of energy that contain sound information. When the
Lens detects the signal, it gently activates your natural hearing system,allowing you
to hear sound. To keep your Lens functioning properly, you must apply mineral oil
once to twice daily, or as directed by your provider, and avoid placing foreign
objects in your ear (such as Q-tips, bobby pins, and your fingernails).

7
The Processor and Ear Tip
The Processor sits comfortably behind your ear. It collects and sends audio signals
through the Ear Tip. Those signals are received by the Lens.
Ear Tip
Processor
Microphones
Cable
Transmitter
Vent
User Controls

8
The Charger
The Charger can hold one or two devices. It features a USB-based AC wall power
adapter as its power source. The Charger includes an LED indicator display to let you
know the charging status of your Processor(s).
Micro-USB
Power Supply
Plug-in
Back View of Charger
Lid
Charging
Status
Indicators
Lid Release
Button
Front View of Charger
Slot Slot

9
Charging Status Indicators
Charging Status Indicators What It Means
One ashing light Charger connecting to Processor
One solid light Battery charging and below 33% charged
Two solid lights Battery charging and above 33% charged
Three solid lights Battery charging and above 66% charged
Four solid lights Battery fully charged
Four ashing lights
Processor not charging; remove from
Charger, re-insert into charging slot and
immediately press top user control
No lights Check that Charger is plugged in and
Processors are correctly in slots

10
Mineral Oil
Mineral oil plays an important role in keeping the Lens in position
and properly working. Apply one pump of mineral oil daily, or as
directed by your provider. If you forget to apply the mineral oil to
your ear as advised, your Lens may stop working or fall out. In
the event that you forget to oil as scheduled, apply oil as soon as
possible and then resume as advised.
Detailed mineral oil use instructions are available in the Care and
Maintenance section of this manual.

11
Using your Earlens Hearing Solution
Turning the Processor O
When you remove your Processor from a plugged-in Charger, it will be ON.
To turn the Processor OFF,
push and hold the bottom
user control for 3 seconds.
Bottom User Control
3 Seconds

12
Turning the Processor On
To turn the Processor ON, push and hold the top user control for 3 seconds.
Top User Control
3 Seconds

13
Identifying Left or Right Device
To identify a left or right device, look at the color of the indicator in the Ear Tip.
Left
Blue indicates a
Left device
Right
Red indicates a
Right device

14
Putting on the Processor and Ear Tip
It is important
that the
Ear Tip
is placed
properly in
your ear.
1 2
Place the Processor
behind your ear, where it
should rest comfortably.
Hold the Ear Tip between your thumb
and index nger with the colored dot
pointing up and the Positioning Lip
pointing toward the back of the head.

15
3 4
Slowly insert the Ear Tip into your ear
canal. Gently pulling your outer ear up
and back may help with insertion.
Gently push the Ear Tip into your
ear canal, pushing it as far as it will
comfortably go, to ensure it is seated
in the correct position.

16
Removing the Processor and Ear Tip
To remove the Processor and Ear Tip, grasp the Cable between your thumb and
index nger near the Ear Tip and gently pull it out of the ear canal.

17
Changing Volume and Program
Your hearing professional can customize your user
controls based on your preferences and needs. Your user
controls can be set up to change volume, change programs
or to change both the volume and programs. Please speak
to your hearing professional how your user control settings
have been customized.The tables on the next few pages
can also serve as a helpful reference for instructions.

18
User Control
Options Action/Press
Volume &
Program
Volume
Increase = Short Press Up
Cycle
to Next
Program
Volume
Increase
Power
O
Volume
Decrease
Volume
Decrease =Short
Press Down
Cycle to Next
Program =Long Press Up
(3 seconds)
Power O =Long Press Down
(3 seconds)
Other manuals for Contact Hearing Solution
1
Table of contents
Other Earlens Hearing Aid manuals