EW-06G OPERATION MANUAL
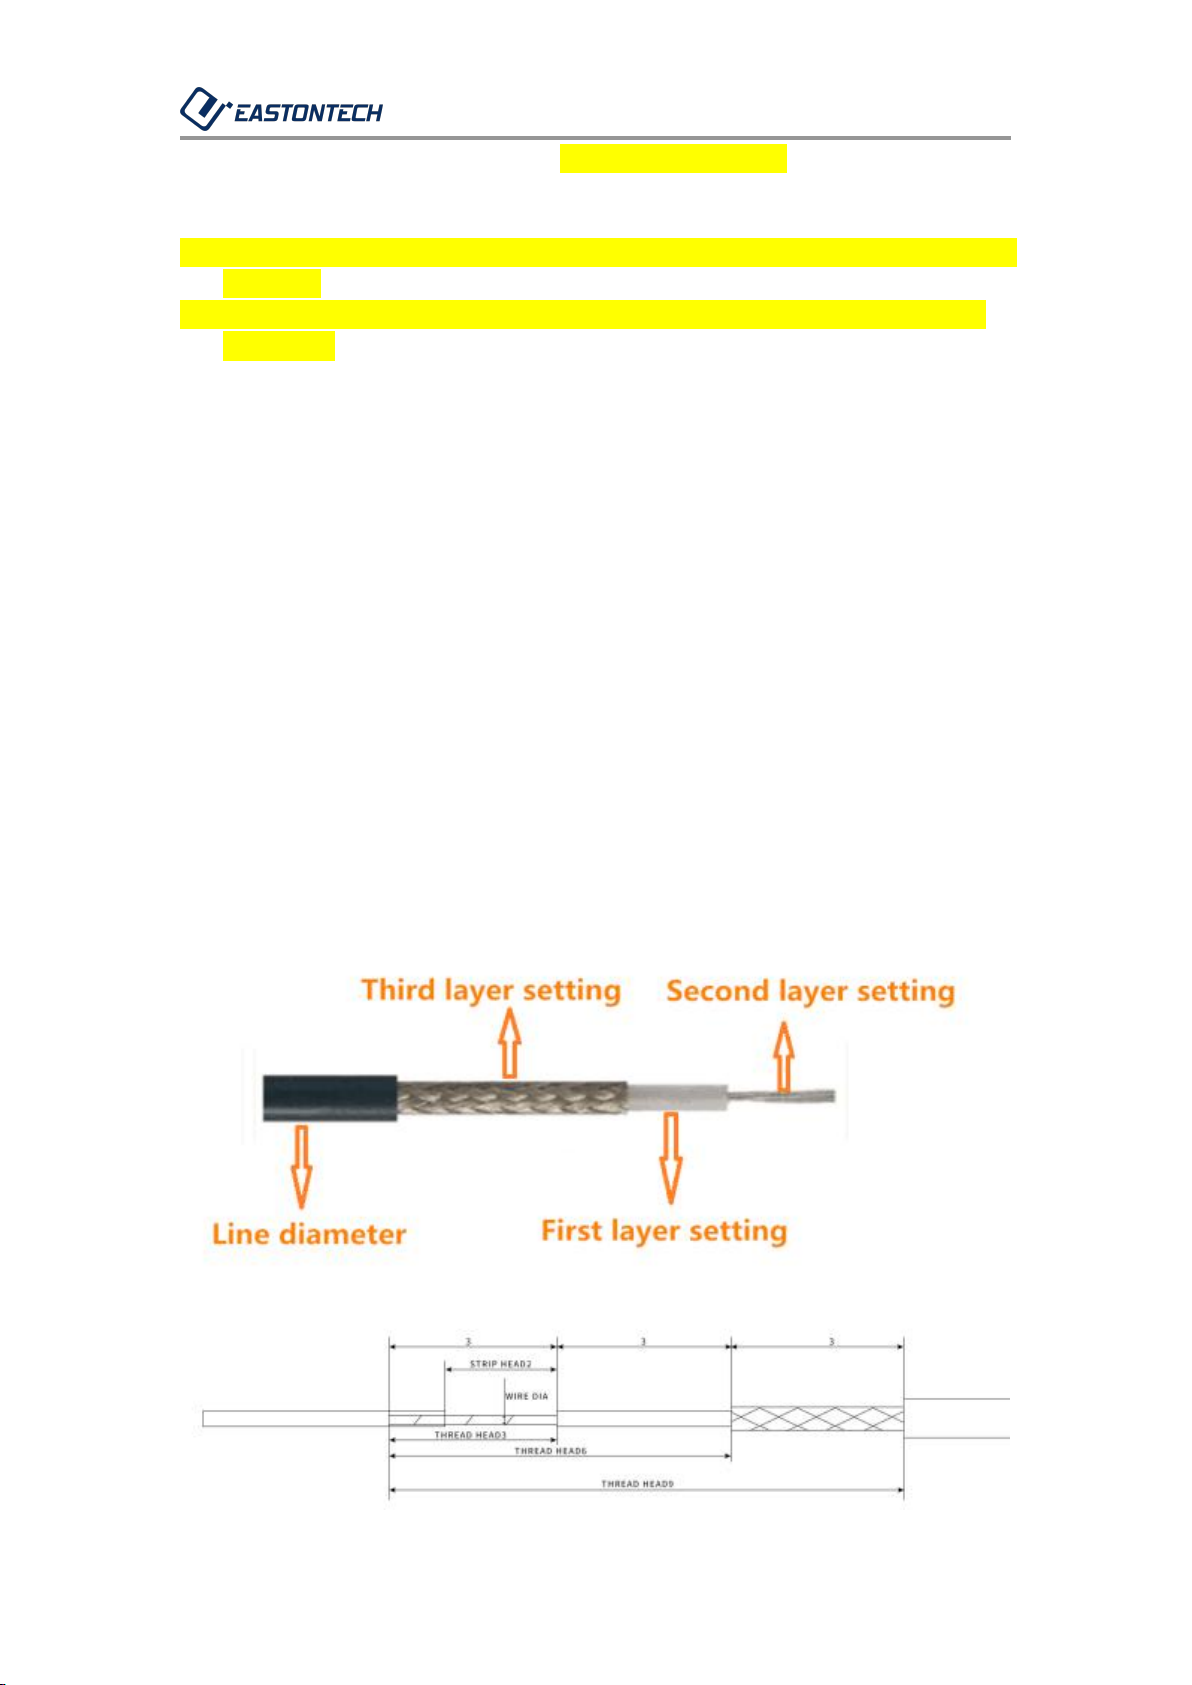
1. As shown in the figure above, first set the first layer "thread head" setting 6,
the second layer "thread head" setting 3, and the third layer "thread head"
setting 9, then the machine automatically runs the path: 6,3, 9. Finally back to
the beginning of the head stripping. You can also set the first layer "thread
head" setting 3, the second layer "thread head" setting 6, and the third layer
"thread head" setting 9, then the machine automatically runs the path: 3, 6, 9
and finally Back to the beginning of the stripping. You can also set the first
layer "thread head" to 9 and the second layer "thread head" to 3. The third
layer "thread head" is set to 6, then the automatic path of the machine is: 9,3,6
and finally back to the starting point of stripping.
2. If there are 9 layers of wires, you need to set the required parameters in 9
setting screens. After setting, return to the main screen and press reset to
start.
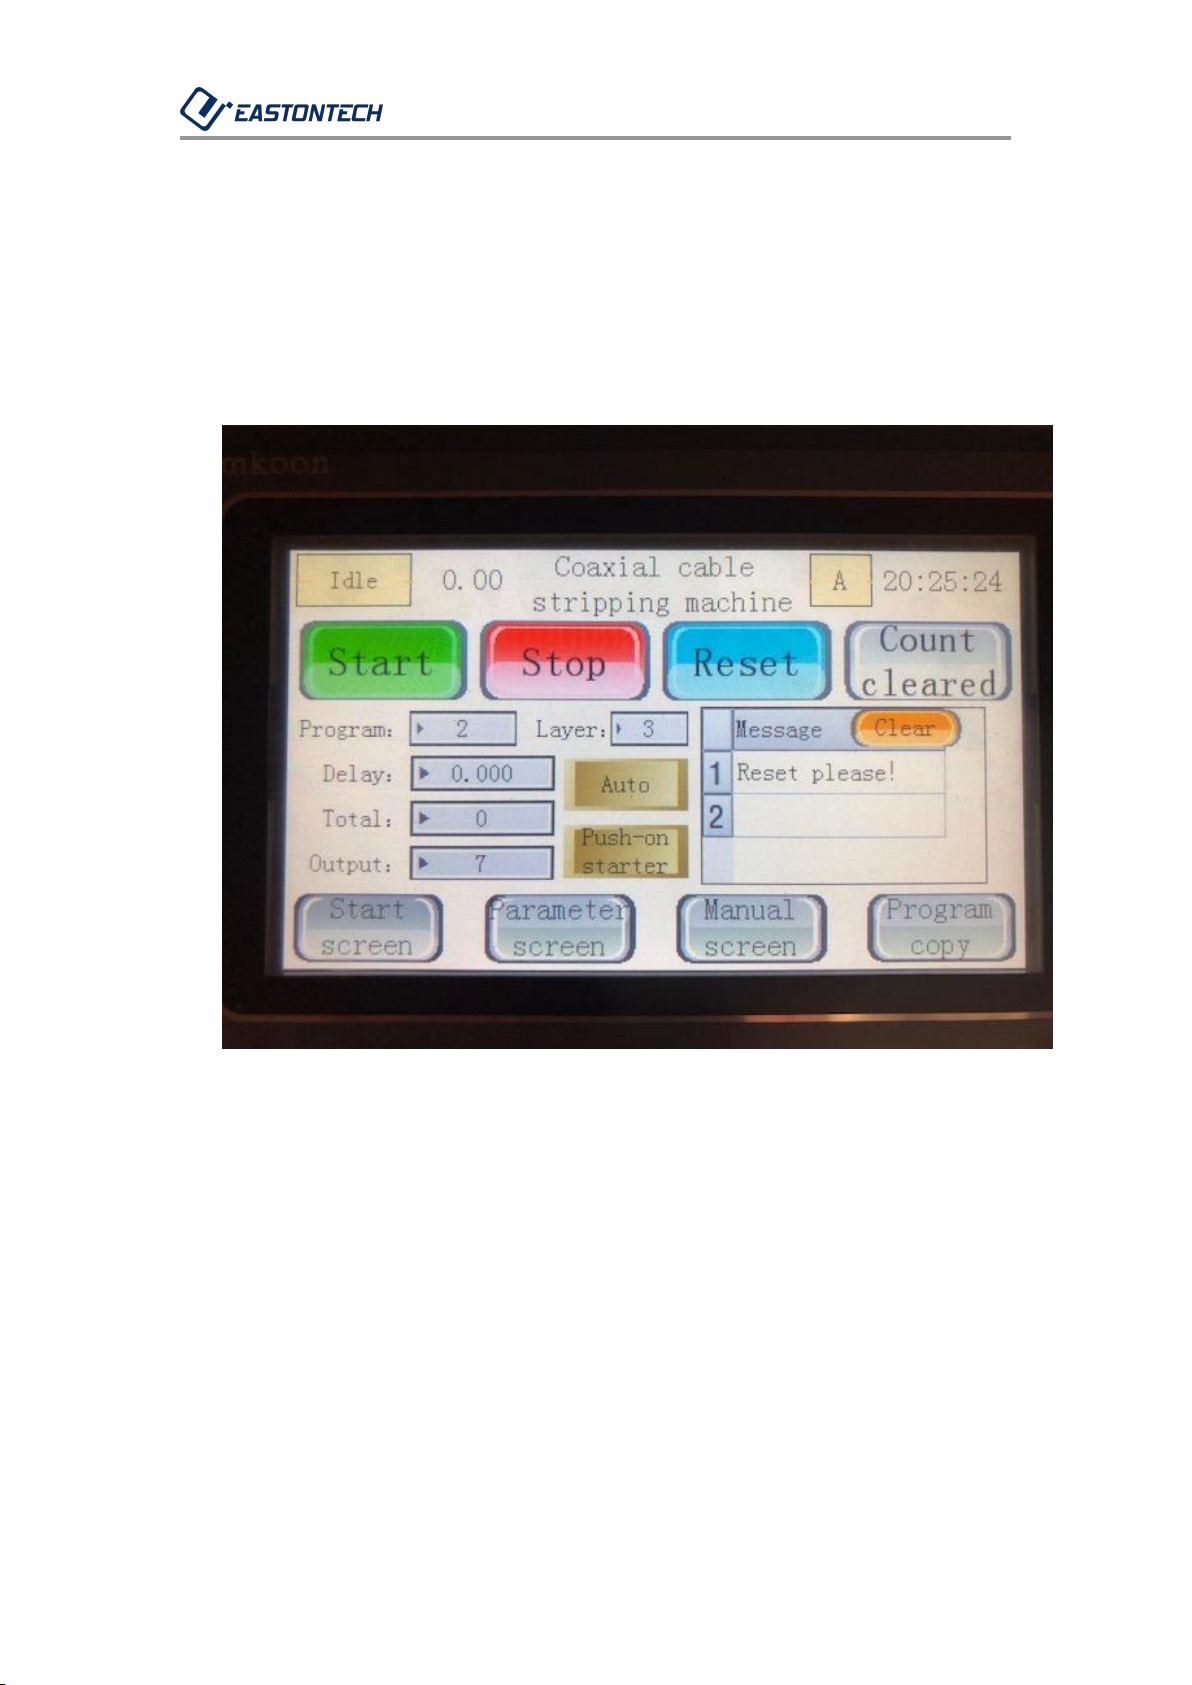
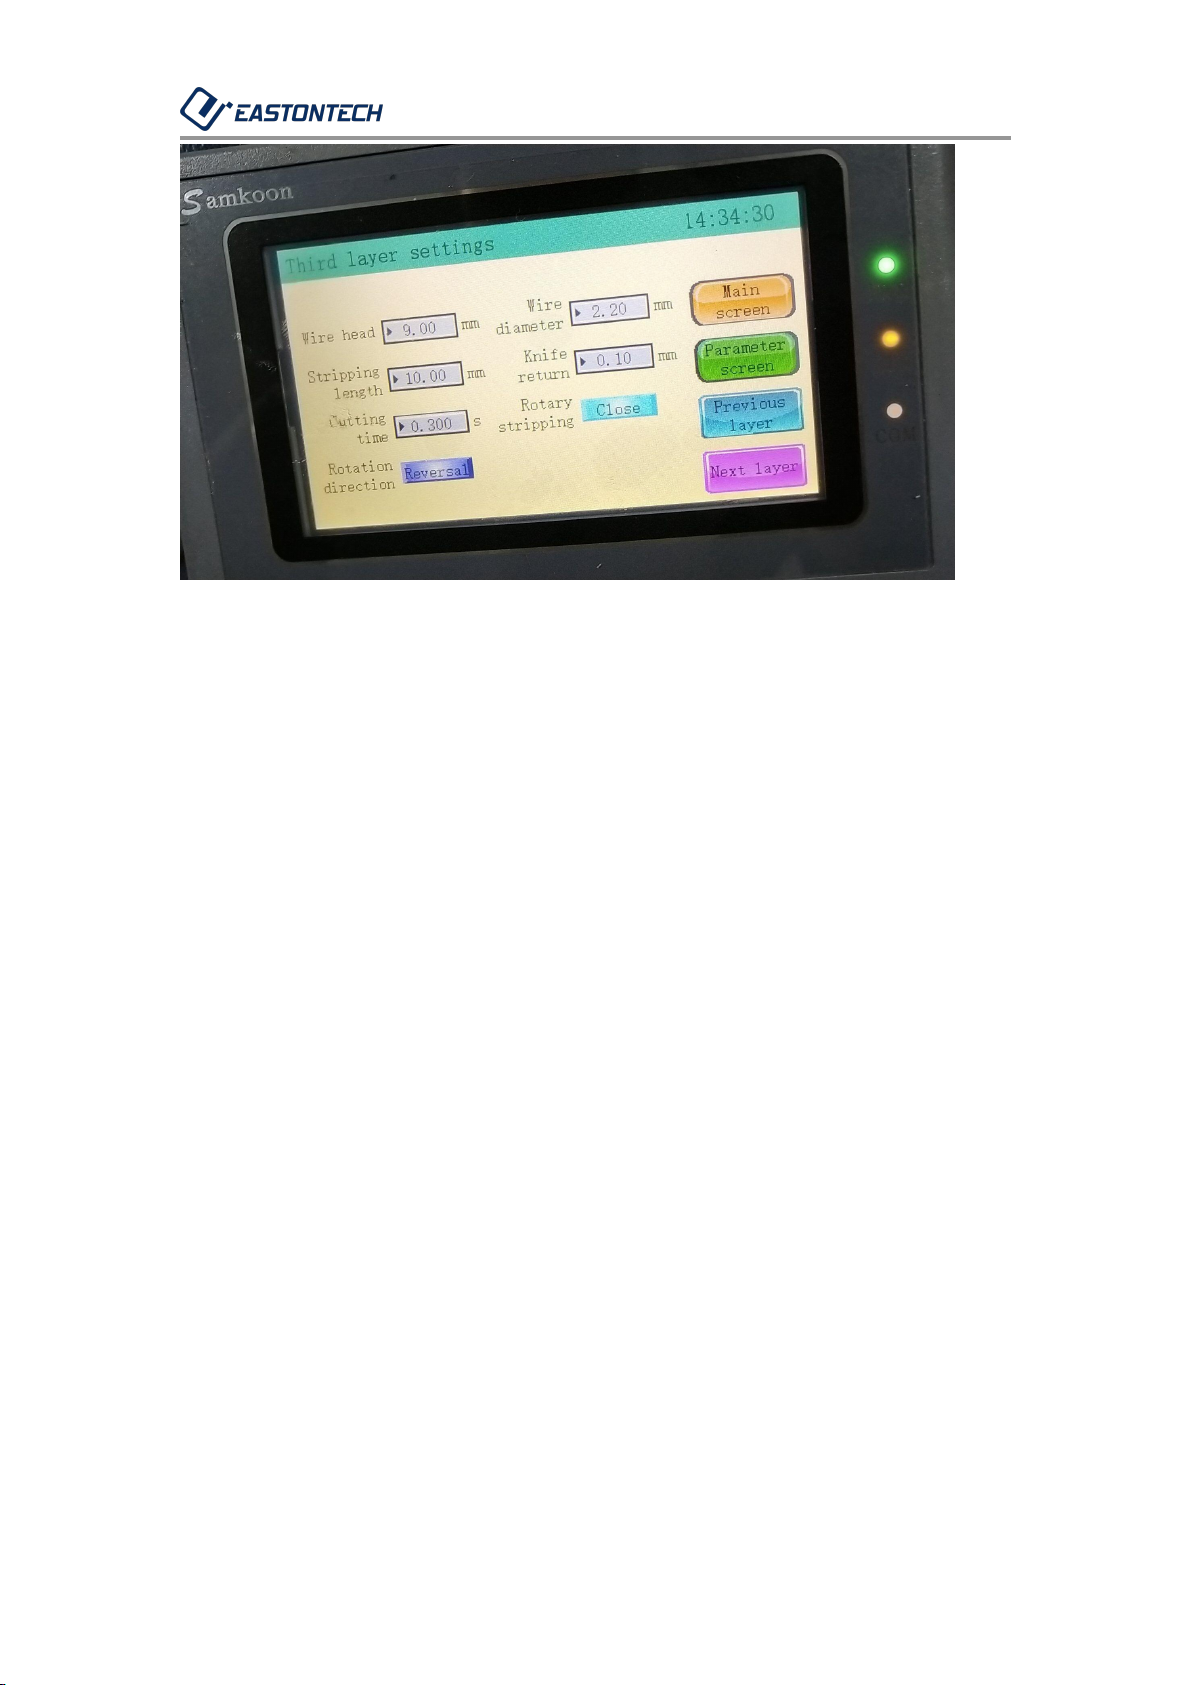
Detailed Setting
This page is to set each layer stripping parameters. The layer function is
boosted from the main page NO. 10 (Number of piles) . The sequence that
blades work is according to : first-second-third- forth...-Ninth. (Please noted
that this does not necessarily go with from cable Jacket layer to inner core
layer sequence. Generally we set the first layer stripping according to the
diameter with shielding.