Eastwood 33916 User manual

1/2 TON TRANSMISSION JACK
INSTRUCTIONS
Item #33916

2Eastwood Technical Assistance: 800.343.9353 >> tech@eastwood.com
The EASTWOOD 1/2 TON TRANSMISSION JACK is an all-steel, heavy-duty jack that allows for easy installation and removal of the vehicle’s transmission.
The Transmission Jack features an adjustable Lifting Pad for precision lifting and lowering into tight compartments.
SPECIFICATIONS
Max. Weight Capacity: 1000 lbs. (453 kg.)
Min. Pad Height: 9.5” [0.24m]
Max. Pad Height: 28.5” [0.72m]
TOOLS REQUIRED
• Two 14mm wrenches (not included)
• Two 18mm wrenches (not included)
• Two 22mm wrenches (not included)
• Two 24mm wrenches (not included)
CONTENTS
COMPONENTS
(1) Main Jack Assembly - [A]
(4) Load Support Brackets - [B]
(4) 2” Swivel Casters - [C]
(1) M8 x 1.25 Safety Chain Hook - [D]
(1) M8 Wingnut - [E]
(1) 40” Safety Chain - [F]
(1) Handle - [G]
HARDWARE
(16) M6 x 1.00 x 15 Bolts
(16) M6 Washers
(16) M6 Nuts
(8) M10 x 1.75 x 20 Bolts
(8) M10 Washers
DANGER indicates a hazardous situation which, if not avoided, will result in death or serious injury.
WARNING indicates a hazardous situation which, if not avoided, could result in death or serious injury.
CAUTION indicates a hazardous situation which, if not avoided, could result in minor or moderate injury.
NOTICE is used to address practices not related to personal injury.
SAFETY INFORMATION
The following explanations are displayed in this manual, on the labeling, and on all other information provided with this product:
A
B
C
D
G
E
F

To order parts and supplies: 800.343.9353 >> eastwood.com 3
THIS JACK CAN TIP OR COLLAPSE CAUSING SEVERE INJURY!
• DO NOT exceed the rated 1000 lbs. [453 kg.] weight capacity.
• DO NOT stand on the Transmission Jack.
• Use only on a hard, smooth, level and clean work surface. DO NOT use on a sloped or rough textured surface, earth, grass, sand,
gravel or any other loose or unstable surface.
• Concentrate load points to the center of the Transmission Jack Lifting Pad and only the Lifting Pad. Failure to do so can cause the
balance to shift suddenly, tipping the Jack and its load which can quickly cause severe injury and property damage!.
CRUSH HAZARD!
• DO NOT use a Jack to support a vehicle while performing any work. The vehicle MUST be supported with appropriate equipment
such as approved Jack Stands or equivalent immediately after lifting.
• DO NOT remove or cover any of the factory supplied labels or warnings! They include specific safety information that must be
communicated to future users.
INJURY HAZARD!
• No alterations or modifications shall be made to this product.
IMPROPER MOTOR VEHICLE REPAIR WORK CAN RESULT IN INJURY OR DEATH!
• Performing automotive repair work can cause injury, death and vehicle accidents. DO NOT attempt to use this tool or begin work
without proper training and a thorough understanding of motor vehicle mechanical systems.
• Always consult an authorized manufacturer’s service manual or reference materials on the particular vehicle.
INJURY HAZARD!
• This Transmission Jack has moveable components that can crush and pinch. Keep fingers and hands away from pinch points
when operating.
SAFETY INFORMATION

4Eastwood Technical Assistance: 800.343.9353 >> tech@eastwood.com
ASSEMBLY
• Place Jack assembly [A] on its side or upside down (FIG. 1). Attach all four (4)
Swivel Casters [C] to the Jack assembly [A] using M6 x 1.00 x 15 bolts, M6
washers and nuts (FIG. 2).
• Place Jack on its wheels (FIG. 3). Attach the four (4) Load Support Brackets to
the Lifting Pad using M10 x 1.75 x 20 bolts and M10 washers (FIG. 4).
• Insert the threaded portion of the Safety Chain Hook [D] down into the hole on
the side of the lifting pad. Screw on the Wingnut [E] to the Safety Chain Hook
[D], (FIG. 5).
• Hook the 40” Safety Chain [F] to the Safety Chain Hook [D]. Take the unhooked
end of the Safety Chain [F] and place one link into the slot on the opposite side of
the Lifting Pad from the Safety Chain Hook [D] (FIG. 6).
• Insert the Handle [G] into the pump mechanism and twist the Handle [D] so the
notch locks into the “L” shape cut out (FIG. 7).
FIG. 1FIG. 1
FIG. 2FIG. 2
FIG. 3FIG. 3
FIG. 4FIG. 4

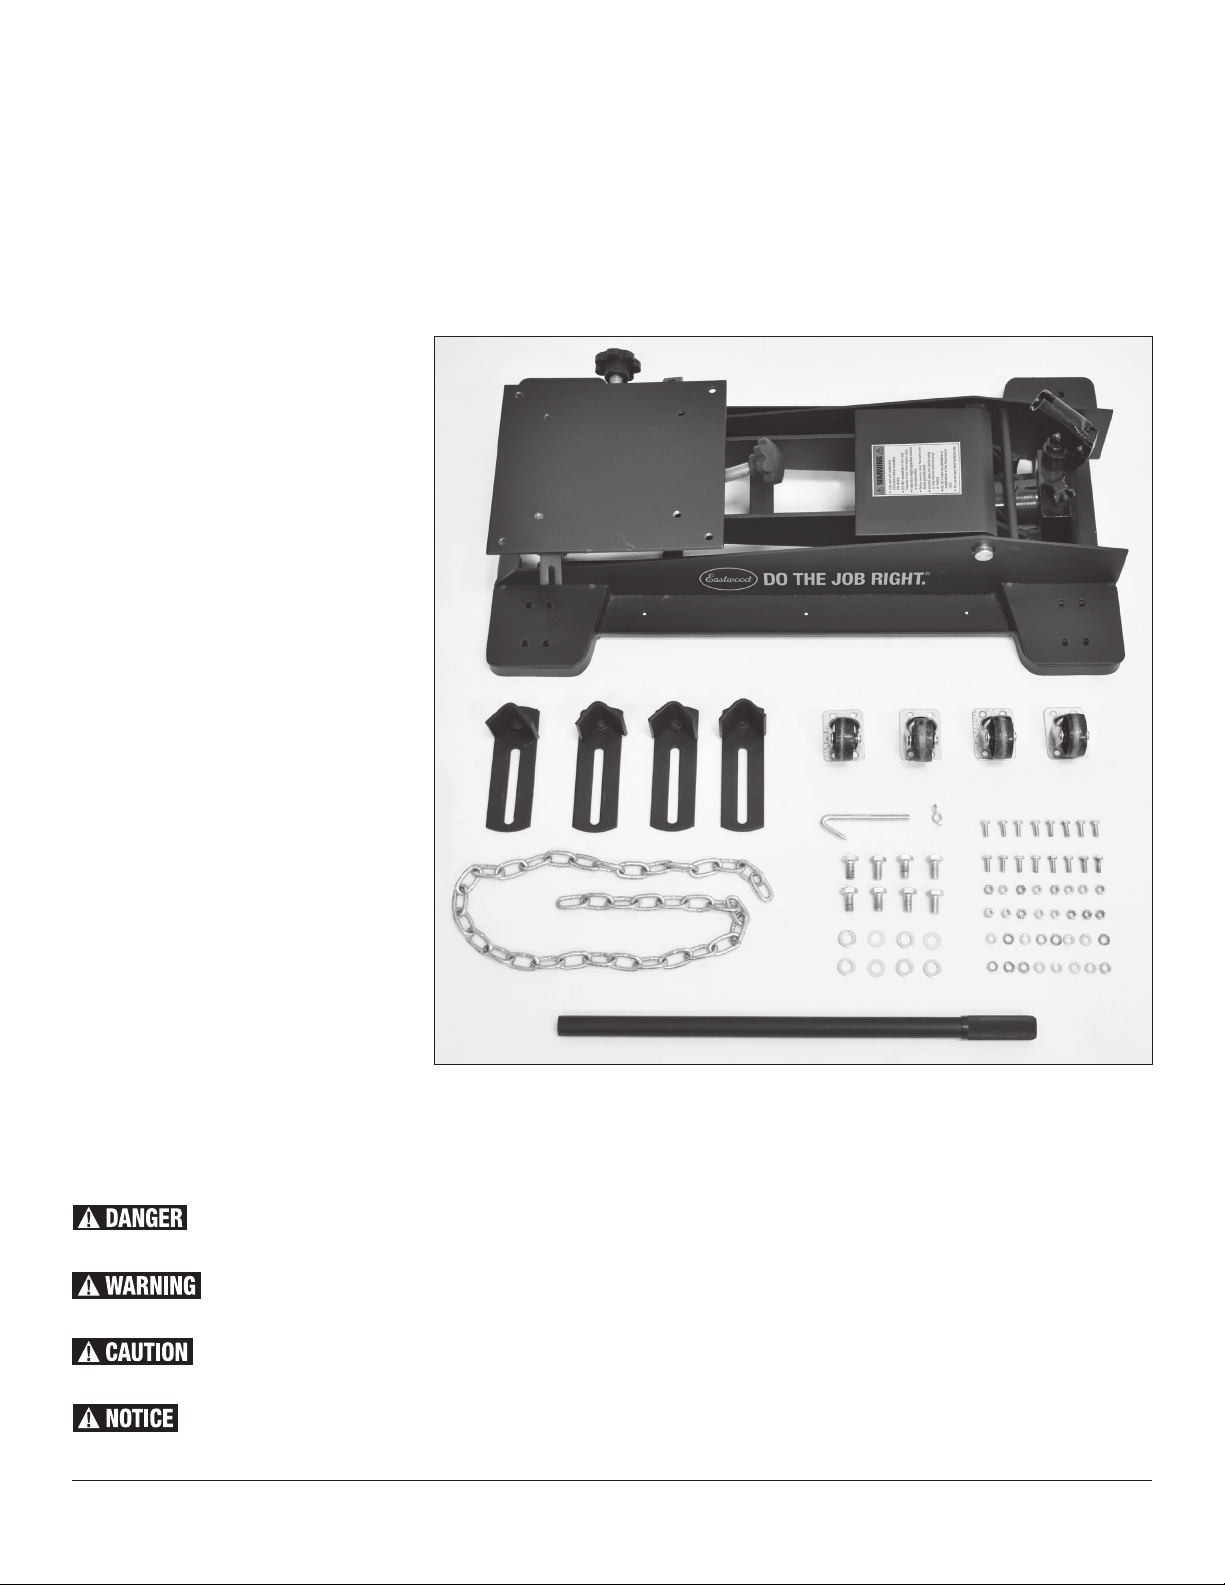
To order parts and supplies: 800.343.9353 >> eastwood.com 5
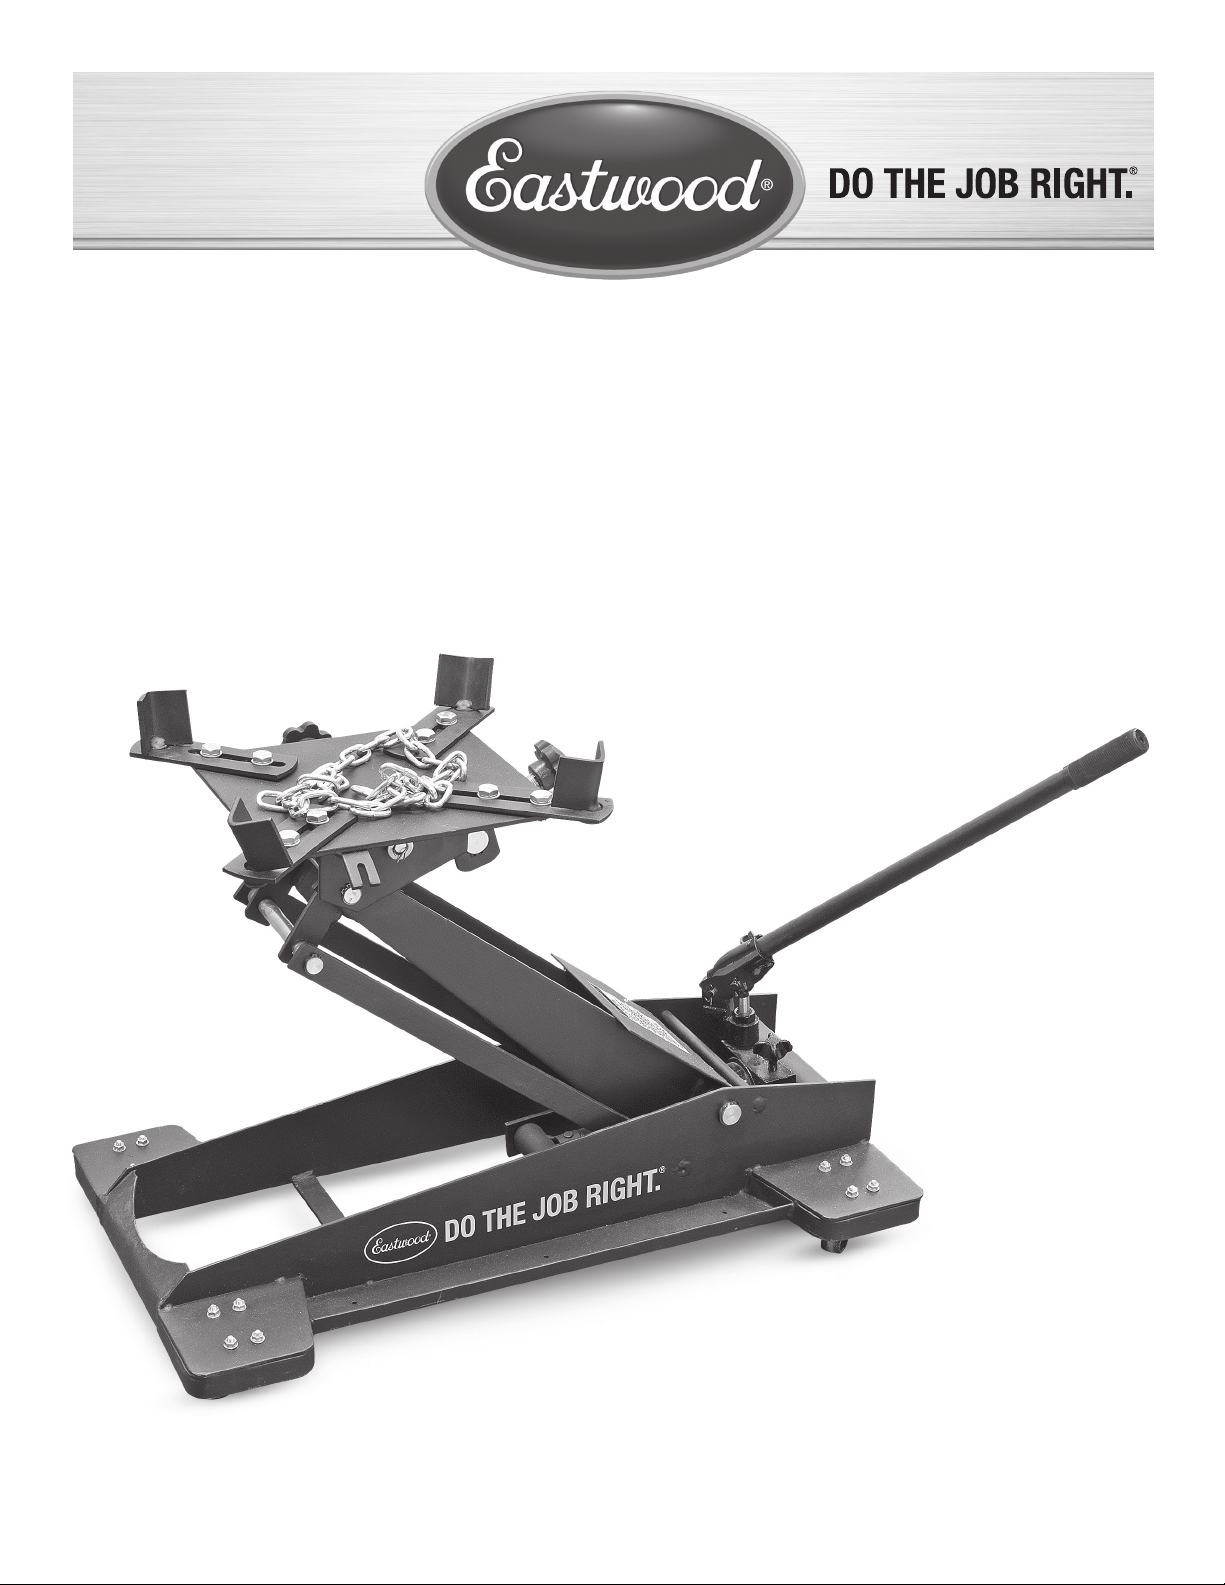
JACK OPERATION
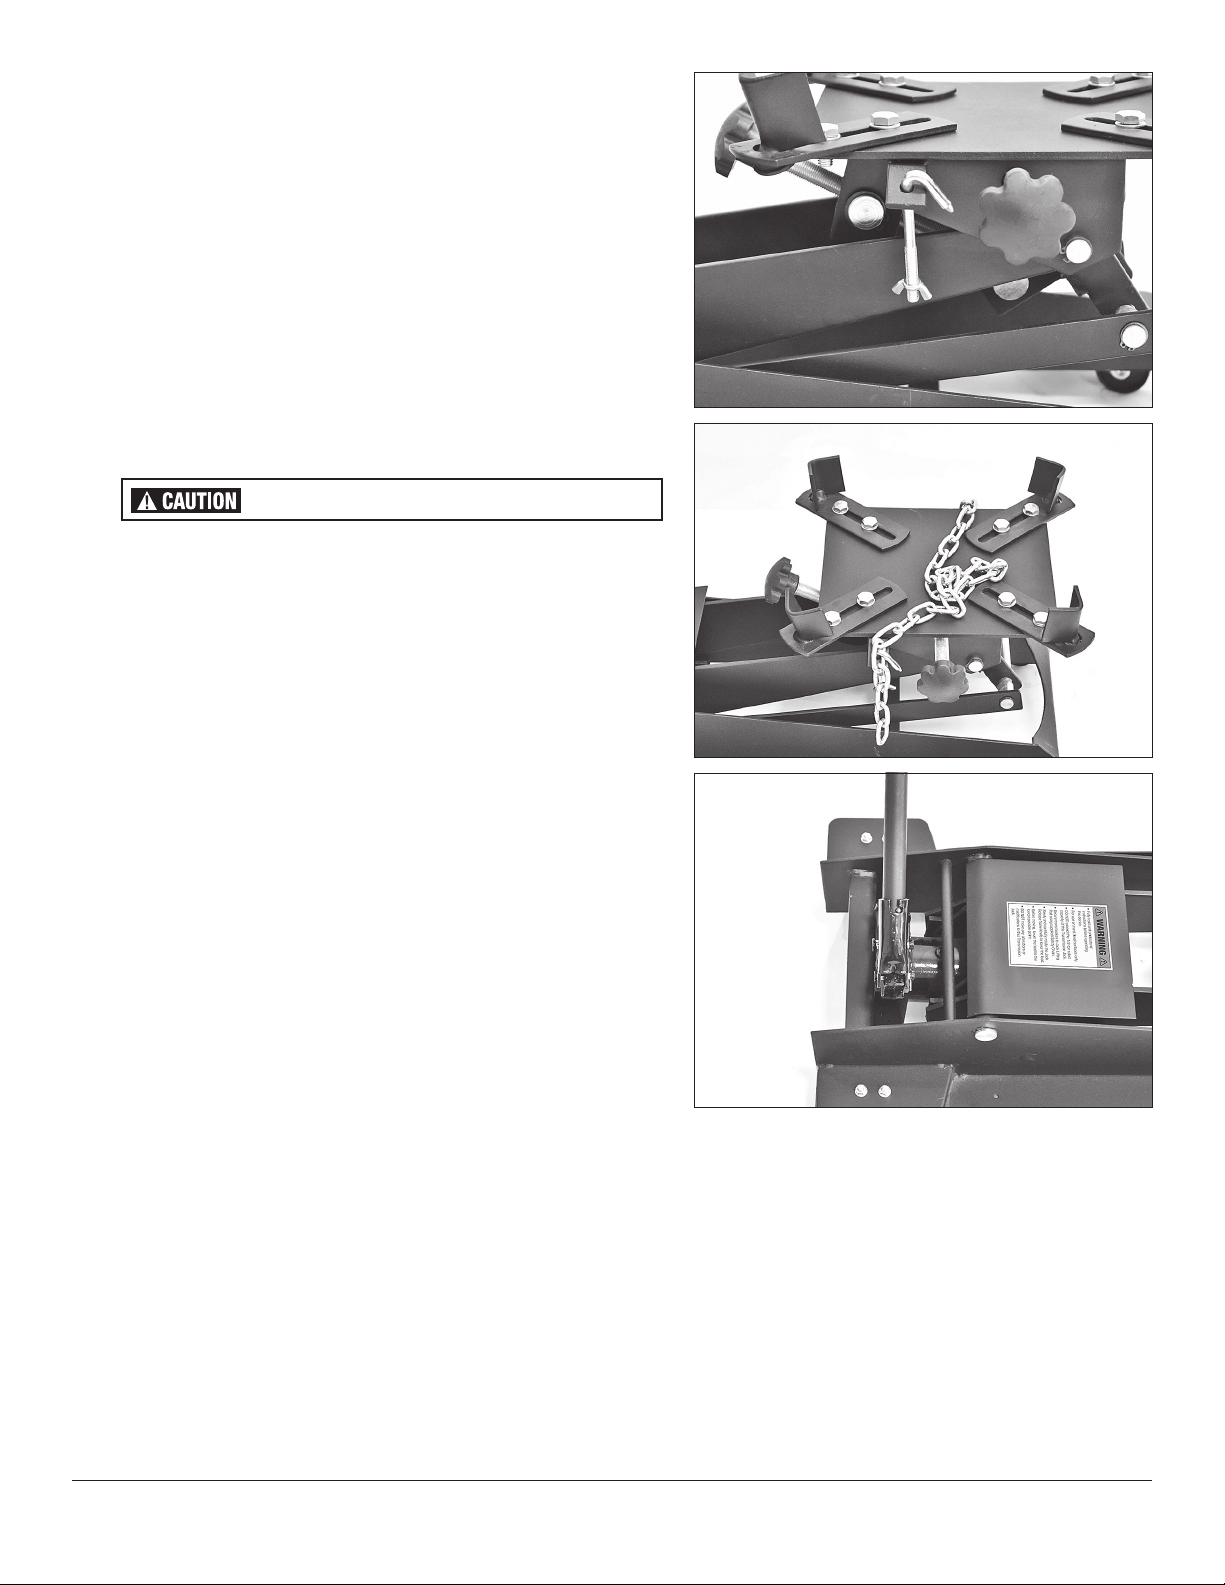
• Right next to the Jack Handle and hydraulic pump, rotate the knob clockwise to
close the Jack Release Valve.
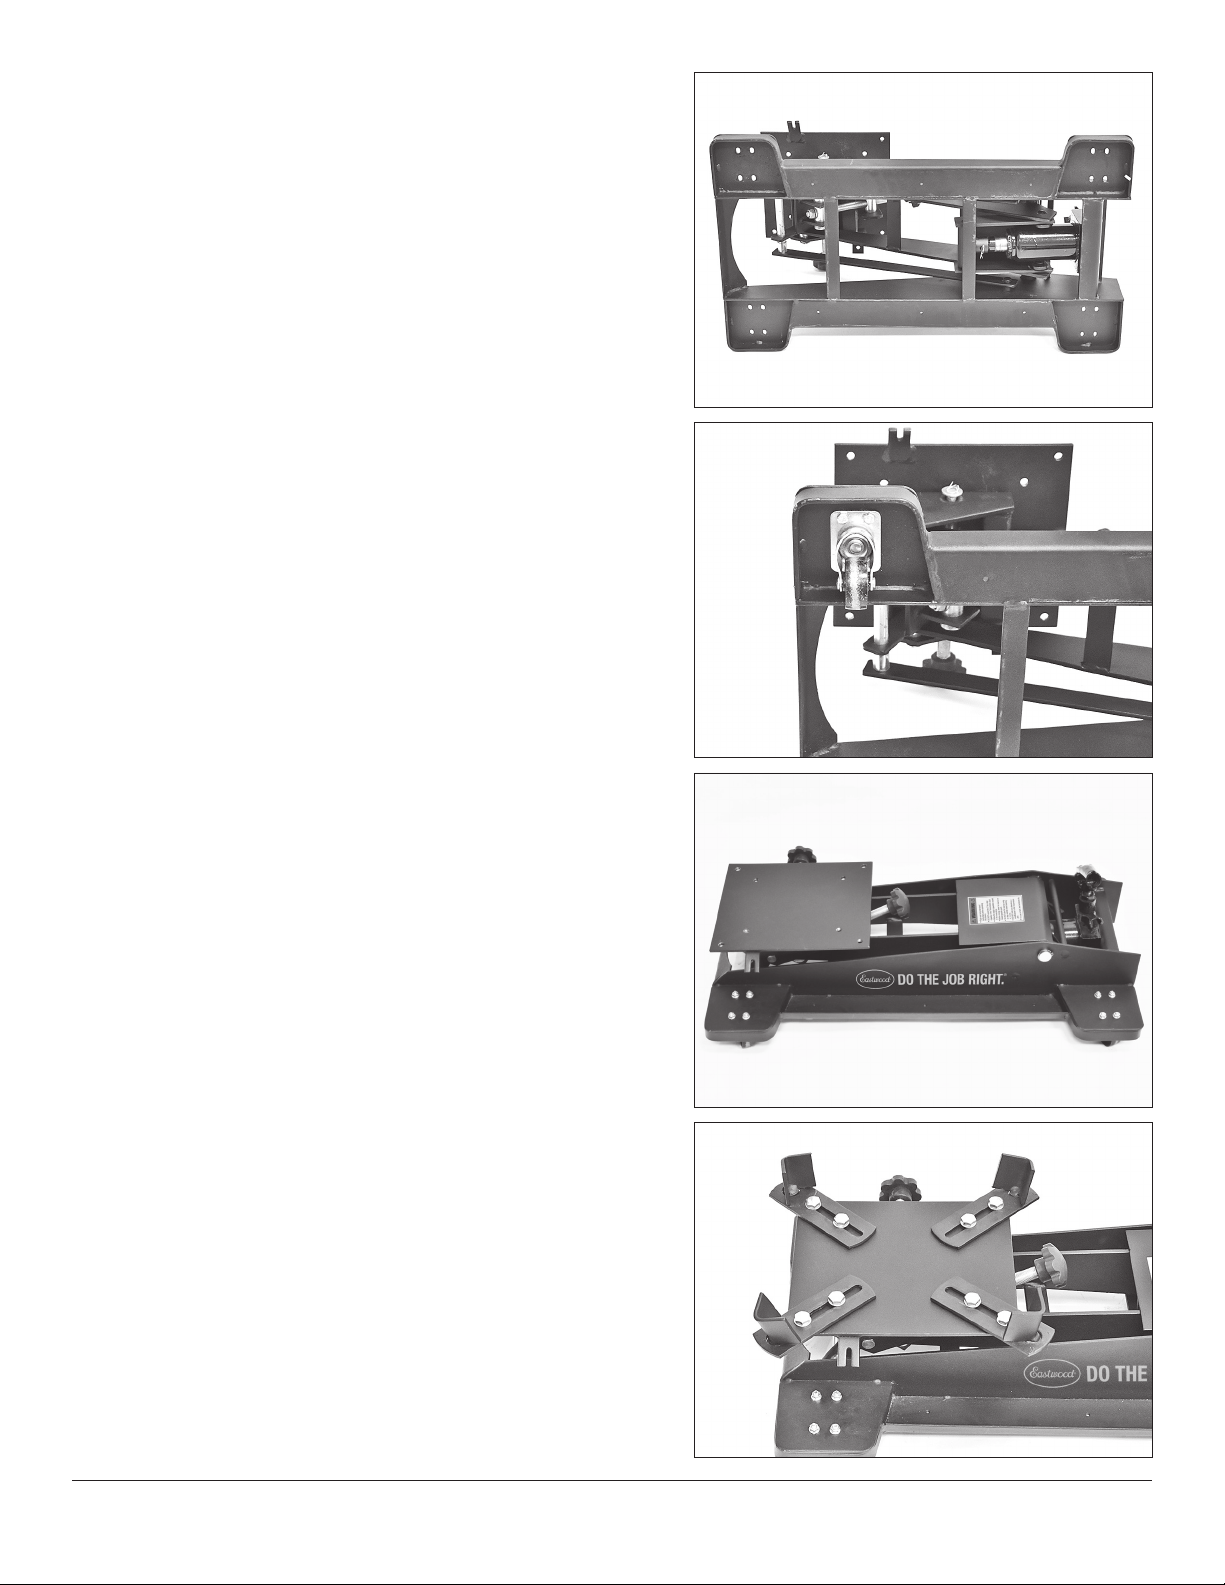
• Place the Lifting Pad with it centered under the transmission.
• Pump the Handle with full strokes to raise the Lifting Pad into place under the
transmission.
• If the Lifting Pad is not in the desired location, fine tune adjustments can be
made by two (2) adjustment knobs on the lifting pad. The knob closest to the
handle adjusts forward and backward tilt. The knob next to the Safety Chain
Hook adjusts the lifting pad left and right.
• Push down on the Handle to lift and support the weight of the transmission.
• Wrap the safety chain over the top of the transmission and secure to the
safety chain hook. Tighten the wing nut on the safety chain hook to make
the chain tight.
• To lower the transmission, very slowly and carefully Rotate the Jack Release
Valve Knob Counter- Clockwise to open the Jack Release Valve.
• When the Lifting Pad has fully retracted into the Jack Frame, withdraw the
Jack from under the vehicle.
MAINTENANCE
• Keep all moving components of the Transmission Jack well lubricated and free of
and dirt or debris accumulations.
• The Transmission Jack is finished in rugged powdercoating which will provide
many years of effort free beauty however it is advisable to keep the finish clean
and free from excessive dust and dirt.
• Keep the Transmission Jack in a clean and dry environment. DO NOT store it in
or expose it to a damp or wet environment.
• Before each use, inspect all components for potential damage and proper
alignment. Check all hardware for tightness
• DO NOT use if damage is discovered.
• Occasionally add a heavy-bodied chassis grease to the Zerk fitting located on
the main pivot shaft.
FIG. 5FIG. 5
FIG. 6FIG. 6
FIG. 7FIG. 7
PINCH/CRUSH HAZARD!

6Eastwood Technical Assistance: 800.343.9353 >> tech@eastwood.com
NOTES

To order parts and supplies: 800.343.9353 >> eastwood.com 7
NOTES

ADDITIONAL ITEMS
#31504 Eastwood 6 Ton Jack Stands Set of 2
#22280 Eastwood 3 Ton, Low-Profile Heavy-Duty Steel Floor Jack
#23048 Eastwood Detachable Car Ramp Set
#23400 Eastwood 2pc Rubber Wheel Chock Set
© Copyright 2020 Eastwood Automotive Group LLC 12/20 Instruction item #33916Q Rev 1
If you have any questions about the use of this product, please contact
The Eastwood Technical Assistance Service Department: 800.343.9353 >> email: tech@eastwood.com
PDF version of this manual is available at eastwood.com
The Eastwood Company 263 Shoemaker Road, Pottstown, PA 19464, USA 800.343.9353 eastwood.com
Table of contents
Other Eastwood Jack manuals
Popular Jack manuals by other brands

NOOK
NOOK ActionJac 1-MSJ Installation & maintenance instructions

Omega Lift Equipment
Omega Lift Equipment 18124C Operating instructions & parts manual

Evercraft
Evercraft 776-2007 manual

Seatra
Seatra TRAIL-A-MATE owner's manual

Challenger Lifts
Challenger Lifts RJ4.5 Installation, operation & maintenance manual

Strongway
Strongway 55832 owner's manual