Easy@Home GT-FSI-07-US User manual

ID: #05007
m
y
h
a
n
s
e
c
o
n
t
r
o
l
.
c
o
m
M
A
N
U
A
L
D
E
V
E
L
O
P
E
D
I
N
G
E
R
M
A
N
Y
User-friendly
Manual
User Guide
Manual
del usuario
REMOTE CONTROLLED WALL
SOCKETS
SET DE TOMAS DE CORRIENTE
RADIOCONTROLADAS
English ...... Page 6
Español ..... Página 21
re

QR codes take you where you want to go
quickly and easily
Whether you require product information, spare parts or accessories, de-
tails on warranties or after sales service, or if you want to watch a product
demonstration video, our QR codes will take you there in no time at all.
What is a QR code?
A QR code (QR = Quick Response) is a type of matrix that can be read with a
smartphone camera and that contains a link to a website or contact details
for example.
Advantage:You do not need to manually enter a website address or contact
details.
How it works
To scan the QR code, all you need is a smartphone with QR code reader soft-
ware and an internet connection.* This type of software can be downloaded
for free from your smartphone’s app store.
Try it out now
Just scan the QR code with your smartphone and find out
more about the Aldi product you have purchased.*
Your Aldi Service Portal
All details mentioned above can also be found in the
Aldi Service Portal at www.aldi.us.
* Depending on your smartphone service you may be charged for the connection.
or c
bsite add
artphone w
is type of s
pp store.
th your sm
di product yo
ice
P
o
rtal
ed a

Contents
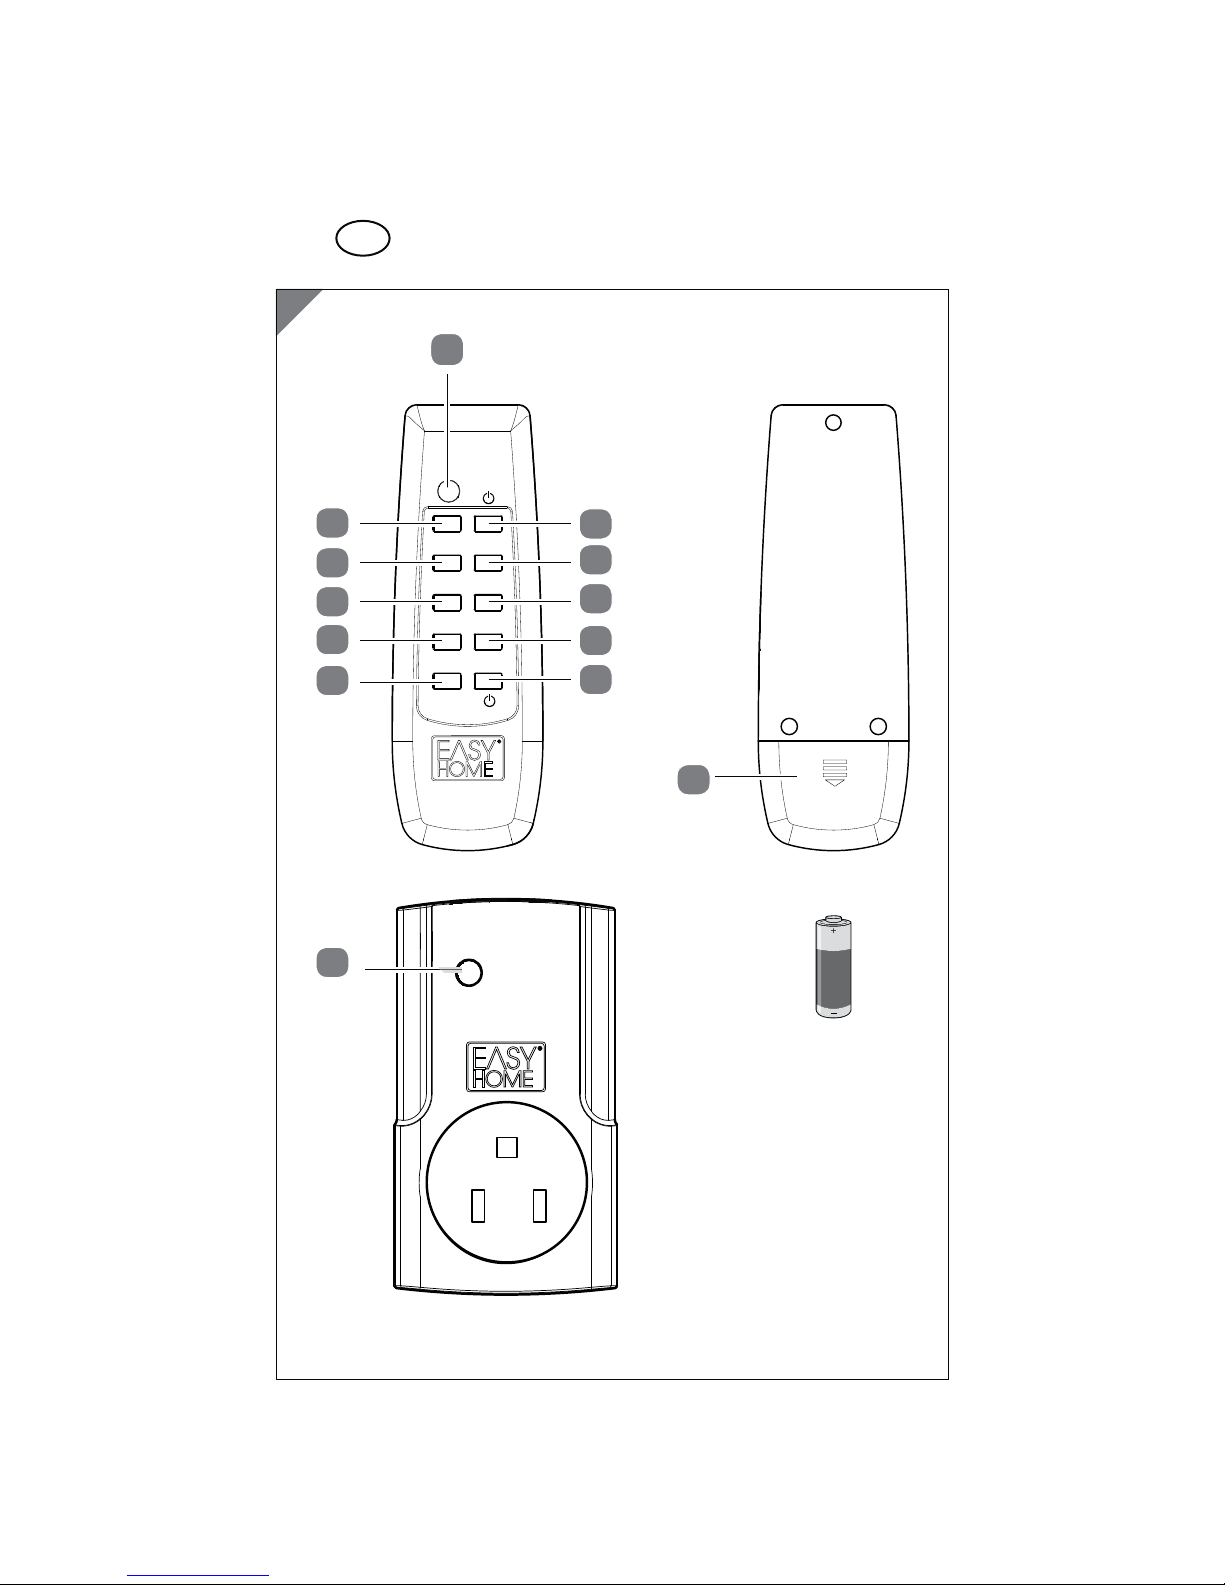
Overview .............................................................................4
Device parts/Product contents...........................................6
General information............................................................7
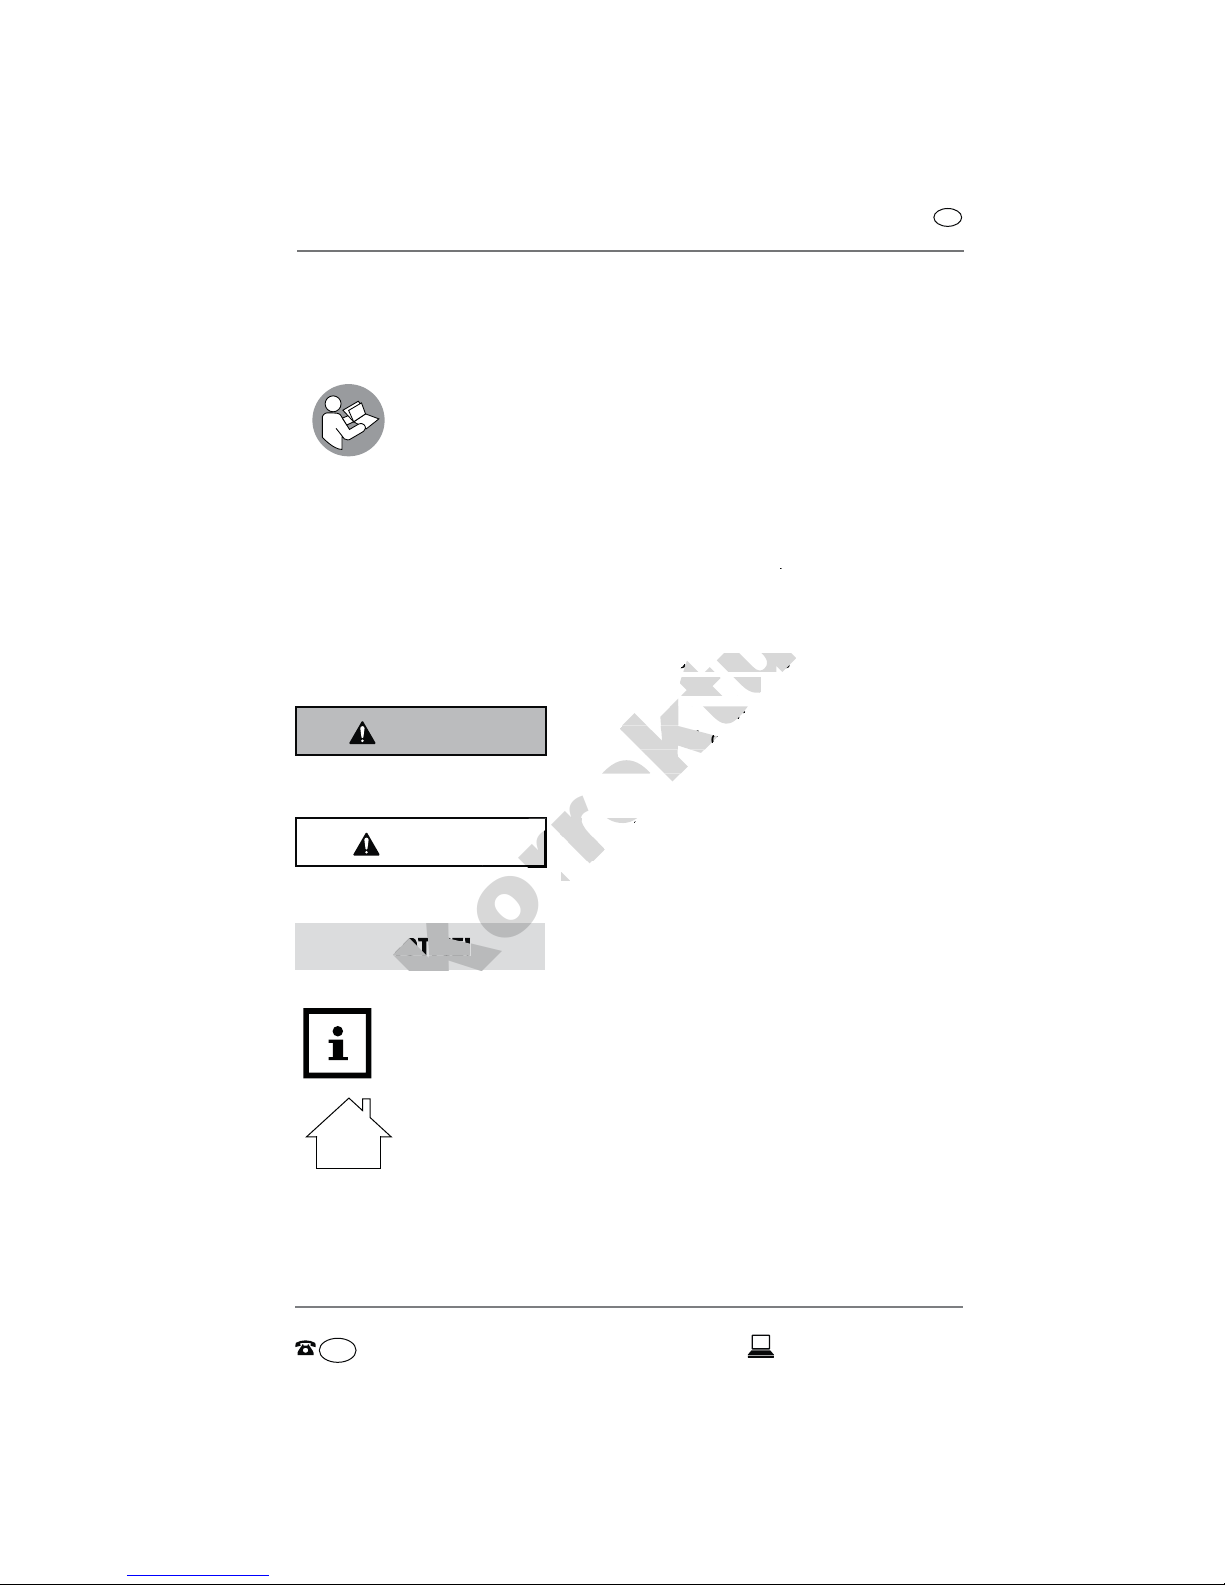
Reading and storing the instruction manual ......................7
Explanation of symbols ...........................................................7
Safety...................................................................................8
Proper use................................................................................. 8
Safety notes .............................................................................. 8
Preparation ........................................................................11
Checking the remote controlled wall sockets and the
product contents .....................................................................11
Inserting/changing batteries................................................11
Selecting a location.................................................................11
Assigning channels ................................................................ 12
Operation........................................................................... 14
Connecting a device...............................................................14
Additional notes...................................................................... 15
Care and storage............................................................... 16
Cleaning the remote controlled wall sockets.....................16
Storing the remote controlled wall sockets........................ 17
Troubleshooting................................................................ 18
Technical data ................................................................... 19
Disposal..............................................................................20
Warranty card....................................................................39
Warranty conditions..........................................................40
......
............
1
ets and the
.................
......................
................
................
..............
...............
...............
.............
mote controlle
mote contro
ting
............
.......

GT-9000
GT-FSI-07
4
USA
A
1
2
3
4
5
6
7
8
9
10
11
12
13
1
I
1-4
3
2
4
I
Korrektur
k
k
r
ur
K
K
K
K
K
Ko
Ko
Ko
K
K

5
USA
B
Korrektur
Ko
k
r
ekt
k
k
k
k
k
t
kt
kt
r
r
r
r
r

6
USA
Device parts
1Indicator light (remote control)
2Off button channel 1
3Off button channel 2
4Off button channel 3
5Off button channel 4
6Off button for all channels
7On button for all channels
8On button channel 4
9On button channel 3
10 On button channel 2
11 On button channel 1
12 Battery compartment
13 Indicator light (remote controlled wall socket)
Product contents
Remote control, 1x
Remote controlled wall socket, 3x
Alkaline battery (12 V, type A23), 1x
Korrektur
e controlled waontrolled wa

AFTER SALES SUPPORT
USA
G
eneral informatio
n
7
USA
1-866-558-8096 service@801service.net
Remote controlled wall sockets
General information
Reading and storing the instruction manual
This instruction manual accompanies these remote controlled wall
sockets. It contains important information on setup and handling.
Before using the remote controlled wall sockets, read the instruction
manual carefully. This particularly applies for the safety notes.
Failure to heed this instruction manual may result in severe injury or damage to
the remote controlled wall sockets.
Store the instruction manual for further use. Make sure to include this in-
struction manual when passing the remote controlled wall sockets on to third
parties.
Explanation of symbols
The following symbols and signal words are used in this instruction manual, on
the remote controlled wall sockets or on the packaging.
WARNING! This signal symbol/word designates a hazard
with moderate degree of risk which may lead
to death or severe injury if not avoided.
CAUTION! This signal word designates a hazard with low
risk which may result in minor or moderate injury
if not avoided.
NOTICE! This signal symbol/word warns against
potential damages to property.
This symbol provides you with useful supplementary information
on operation.
The remote controlled wall sockets are exclusively designed for
indoor use.
Korrektur
all
used in this instrsed in this inst
he packaging.ackaging.
nal symbol/wornal symbol/wo
moderate degroderate deg
o death or severath or seve
r
r
r
or
or
This signaThis signa
risk whisk w
if noif
Ko
NOTICE!

Safet
y
USA
AFTER SALES SUPPORT
8
USA
1-866-558-8096
service@801service.net
Remote controlled wall sockets
Safety
Proper use
The remote controlled wall sockets are only designed for devices with a supply
voltage of 120V~, 60Hz and a nominal current of up to 15 A. It is only intended
for private use and not suitable for commercial or medical purposes. The remote
controlled wall sockets may only be used in indoor spaces.
Only use the remote controlled wall sockets as described in this instruction
manual. Using it in any other way is deemed improper and may result in damage
to property or even personal injury. The remote controlled wall sockets are not
a children’s toy.
The manufacturer or vendor cannot be held liable for damages incurred
through improper or incorrect use.
Safety notes
WARNING!
Risk of electric shock!
A faulty electrical installation or excessive line voltage may
result in an electric shock.
− Only connect the remote controlled wall sockets if the line
voltage of the socket corresponds to the specification on
the nameplate.
− Do not use the remote controlled wall sockets if they exhibit
visible damage.
− Do not open the housing; instead, have a qualified pro-
fessional perform repairs. Liability and warranty claims
are waived in the event of repairs performed by the user,
improper connection or incorrect operation.
− Only parts that comply with the original device data may
be used for repairs. Electrical and mechanical parts, which
are essential for providing protection against sources of
danger, are located in these remote controlled wall sockets.
Korrektur
ages inc
es in
llation or extion or ex
ock.k.
e r
emote conemote con
e socket corree socket corre
plate.plate.
e the r
e the r
emotemo
age.age.
he
he

AFTER SALES SUPPORT
USA
Safet
y
9
USA
1-866-558-8096 service@801service.net
Remote controlled wall sockets
− The remote controlled wall sockets may not be operated
with an external timer or separate telecontrol system.
− Do not touch the remote controlled wall sockets with wet
hands.
− Keep the remote controlled wall sockets away from open
fire and hot surfaces.
− Never store the remote control where there is a risk of it
falling into a tub or sink.
− Make sure that children do not insert any objects into the
housing.
− Do not make any modifications to the remote controlled
wall sockets.
− Do not connect multiple remote controlled wall sockets
with one another (series circuit).
− Only use the remote controlled wall sockets with a properly
installed socket with a properly connected protective
conductor.
WARNING!
Danger for children and persons with impaired physical,
sensory or mental capacities or lack of experience and
knowledge!
− Children may not play with the remote controlled wall
sockets. Keep children away from the remote controlled
wall sockets and the accessories.
− Make sure that children do not play with the packaging
wrapper. They may get caught in it when playing and
suffocate.
Korrektur
emote
ote
ntrolled wall
lled wa
d wall socketswall socket
perly connecperly connec
r
r
r
r
r
dren and peren and per
mental capacimental capaci
ge!ge!
en may not
en may not
Keep cKeep

Safet
y
USA
AFTER SALES SUPPORT
10
USA
1-866-558-8096
service@801service.net
Remote controlled wall sockets
WARNING!
Battery precautions
Using the batteries improperly increases the risk of explosion
and risk to health.
− Do not heat the batteries, do not short circuit them and do
not throw them in open fire. Do not expose the batteries to
direct sunlight, radiators or similar.
− Do not attempt to charge the batteries.
− Only insert a battery of the same or equivalent type.
− Do not allow leaky battery acid to come into contact with
skin, eyes or mucus membranes. In the event of contact
with battery acid, immediately flush the applicable areas
with plenty of clean water and consult a physician.
− Immediately remove the empty battery from the remote
control.
NOTICE!
Risk of damage!
Improper storage of the remote controlled wall sockets could
damage them.
− Never place the remote control on or near hot surfaces
(e.g. stovetops etc.).
− Stop using the remote controlled wall sockets if the plastic
parts exhibit cracks or breaks or are deformed. Only replace
damaged parts with corresponding original spare parts.
− Observe the technical data.
Korrektur
lent t
t t
nto contac
o con
he event of co
event of c
h the applicathe applica
onsult a physsult a phys
ty battery froty battery fro
ge of the remge of the rem
m.
ce the r
ce the r
emoem
ops etcops e
er
e

AFTER SALES SUPPORT
USA
P
reparatio
n
11
USA
1-866-558-8096 service@801service.net
Remote controlled wall sockets
Preparation
Checking the remote controlled wall sockets and the
product contents
NOTICE!
Risk of damage!
If you are not cautious when opening the packaging with
a sharp knife or other pointy object, you may damage the
remote controlled wall sockets.
− Be very careful when opening.
1. Take the remote controlled wall sockets out of the packaging and check
whether the remote controlled wall sockets or the individual parts exhibit
damages. If this is the case, do not use the remote controlled wall sockets.
Contact the manufacturer at the service number specified on the warranty
card.
2. Check to make sure that the product is complete (see Fig. A).
Inserting⁄changing batteries
1. Push the battery compartment cover in the direction of the arrow
to open it (see Fig. B).
2. If necessary, clean the contacts of the battery and the battery
compartment 12 .
3. Insert the enclosed battery or a battery of the same type (A23/12 V) in the
battery compartment. Be absolutely sure to take note of the polarity.
4. Slide the battery compartment cover back onto the battery compartment.
Selecting a location
WARNING!
Risk of electric shock and damage!
A faulty electrical installation or excessive line voltage may
result in an electric shock.
ma
out of the packat of the packa
ockets or the indets or the ind
use the remoteuse the remote
e service numbevice numbe
he product is coproduct is c
ging batterng batte
compartment cmpartment c
Fig. BFig. B
).).
ry, clean the con, clean the con
tment
tment
Ko
12
..
enclosedenclosed
part
part

P
reparatio
n
USA
AFTER SALES SUPPORT
12
USA
1-866-558-8096
service@801service.net
Remote controlled wall sockets
− Only use the remote controlled wall sockets in indoor
areas. Do not use it in wet rooms or in the rain.
− Only connect the remote controlled wall sockets to an
easily accessible socket so that you can quickly disconnect
it from the grid in case of a failure.
− The remote controlled wall sockets may heat up during
operation. Make sure that the remote controlled wall
sockets are not covered by curtains or other objects in the
process; this will ensure that they are properly cooled.
− Never expose the remote controlled wall sockets to high
temperatures (heaters etc.) or to the effects of the weather
(rain etc.).
Assigning channels
1. Connect one of the remote controlled wall sockets to a properly installed
socket.
The indicator light 13 of the remote controlled socket will flash for 30 seconds
(learning mode).
2. Push any button on the remote control.
The indicator light on the remote control will flash/blink.
3. To assign a channel to the remote controlled wall socket control, push the
ON button 8/9/10 /11 for the desired channel during learning mode.
The indicator light of the remote controlled wall socket will illuminate
continuously when the remote controlled wall socket is connected with the
remote control.
TIP:
The learning mode is restricted to 30 seconds after you have
inserted the remote controlled wall socket. If you are unable to
assign a channel during learning mode, repeat steps 1 – 3.
4. Push the OFF button 2/3/4/5for the respective channel to switch
the remote controlled wall socket off.
5. If you would like to assign multiple channels to a remote controlled wall
socket,
− first assign a channel to it by following steps 1 – 3.
− Then pull the remote controlled wall socket out of the permanently
installed socket and follow the steps 1 – 2 again.
− In step 3, assign another channel to it.
The remote controlled wall socket can now be controlled via both channels.
Korrektur
s of th
f th
ockets to a propkets to a prop
trolled socket wtrolled socket w
control.rol.
ote control willcontrol wil
remote controllmote control
/
r
1
for the defor the d
f the remote cone remote c
en the remote coen the remote co
.
TT
IPIP
::
he learnhe lear
rte
rte

AFTER SALES SUPPORT
USA
P
reparatio
n
13
USA
1-866-558-8096 service@801service.net
Remote controlled wall sockets
6. If you would like to change or delete an assignment;
− first pull the remote controlled wall socket out of the permanently installed
socket and wait approx. 2 seconds.
− Insert the remote controlled wall socket back into the permanently in-
stalled socket to reactivate learning mode.
− Push the OFF button for the respective channel.
The indicator light for the remote controlled wall socket will then start to
blink quickly. The current assignment has been deleted.
− Now the learning mode will be reactivated and the indicator light will
blink slower again. Push the ON button for the desired channel.
The indicator light of the remote controlled wall socket will then illuminate
continuously and the new channel is assigned.
TIP:
The assignment of the channels is saved. Even if the remote
controlled wall socket is disconnected from the outlets, the
programmed settings are saved.
Exception: If you pull the remote controlled wall socket
out of the permanently installed socket after a very short
operation time, the assignment may be lost and must be
reconfigured.
7. To check whether the channels have been properly assigned, push the
respective ON button for the respective channel.
The indicator light for the remote controlled wall socket will light up.
8. Then switch the remote controlled wall sockets off again using the OFF button
for the respective channel.
The indicator light for the remote controlled wall socket will no longer be
illuminated.
TIP:
You can switch all channels on or off at the same time with the
ON/OFF button 6/7for all channels.
You have successfully installed the remote controlled wall socket.
Korrektur
nnels is saved. Evs is saved. E
disconnected frisconnected fr
s are saved.e saved.
ull the remote coull the remote c
anently installeently installe
me, the assignmthe assignm
red.
hannels have benels have be
n for the respectr the respe
t for the remotethe remote
he remote controhe remote contro
pective channel.ective channe
cator light for thcator light for th
ted.ted.
TT
IP
IP

Operation
USA
AFTER SALES SUPPORT
14
USA
1-866-558-8096
service@801service.net
Remote controlled wall sockets
Operation
Before you are able to use the remote controlled wall sockets, insert the batteries
in the remote control and assign the desired channels to the remote controlled
wall sockets (see chapter “Inserting/changing batteries” and “Assigning channels”).
Connecting a device
NOTICE!
Risk of damage!
Improper use of the remote controlled wall socket and failure
to observe the technical data may damage the remote con-
trolled wall socket and the device to be connected.
− Only connect devices that are suitable for unattended
operation to rule out any risks associated with switching
errors.
− Do not operate any heavy AC adapters in the remote con-
trolled wall sockets because the plugged contacts of the
permanently installed wall socket could be mechanically
overloaded.
− Do not insert any additional child safety mechanisms in
the remote controlled wall socket because the plug
connection between the plug of the device you intend to
connect and the remote controlled wall socket could be
affected and there is a risk of overheating.
− Only connect devices with a supply voltage of 120V~, 60Hz
and a nominal current of up to 15A to the remote controlled
wall socket.
− The remote controlled wall sockets have an integrated
child safety mechanism that prevents access to live parts
to a large extent. Make sure that the plug pins of the device
to be connected do not tilt in the remote controlled wall
socket.
socket a
ket
ge the rem
the rem
connected.nnected.
able for unatble for unat
associated wiassociated w
AC adaptersC adapters
ause the pluse the plu
d wall sockewall socke
ny additionaladditiona
ontrolled waontrolled wa
n between thn between th
nd the rem
nd the rem
d therd the

AFTER SALES SUPPORT
USA
Operation
15
USA
1-866-558-8096 service@801service.net
Remote controlled wall sockets
1. Make sure that the device you intend to connect and the corresponding outlet
are suitable for operation with a remote controlled wall socket. Observe the
notes in this chapter and in the chapter “Safety notes” in this respect.
2. Connect the desired device to the remote controlled wall socket.
Switching the remote controlled wall socket on and off
− Use the ON button 8/9/10 /11 for the respective channel to switch
the remote controlled wall sockets on.
− Switch the remote controlled wall socket off with the
OFF button 2/3/4/5for the respective channel.
− You can switch all channels on or off at the same time with the
ON/OFF button for all channels 6/7.
Additional notes
Power failure
After a power failure, the memory for the system code and the respective channel
of the remote controlled wall socket may malfunction.
− In this case, pull the remote controlled wall socket out of the permanently
installed socket and do not connect it to the grid for at least 6 hours.
− Reassign the channels (see chapter “Assigning channels”).
Radio frequency interference
Radio frequency interference may disrupt wireless communication between
the receiver and the transmitter. It is not possible to switch the remote controlled
wall socket on or off during such a fault.
− Pull the remote controlled wall socket out of the permanently installed socket.
− Wait a few seconds and then connect it again.
Notes on range
The following factors may reduce the range:
• walls
• room ceilings
• garages
• adjoining buildings
• radio frequency interference
• buildings of any kind and vegetation
• conductive metal parts located near the devices or inside or near the trans-
mission path e.g. radiators, metallic insulated glass windows, reinforced
concrete ceilings, metal plated walls of prefabricated houses etc.
Korrektur
ystem code and tm code and t
ay malfunction.ay malfunction.
trolled wall socked wall sock
onnect it to the gect it to the
e chapthapt
er “Assiger “Ass
nterferencerference
erference may drence may d
he transmitter. Ithe transmitter. It
or off during suor off during su
emote controlleemote controlle
w seconds aw seconds a

C
are and stora
g
e
USA
AFTER SALES SUPPORT
16
USA
1-866-558-8096
service@801service.net
Remote controlled wall sockets
• radiation of antennas associated with the distance between transmitters or
receivers and conductive surfaces or objects (including the human body or
ground)
• broad-band disruptions in urban environments that reduce the signal-
to-noise ratio; the signal is not recognized in case of such “noise”
• radiation of insufficiently shielded electronic devices, e.g. openly operated
computers or similar
The effectively achievable distance between the transmitter and receiver in
normal operation depends on the installation location and environment.
Generally, proper operation of all components without problems with respect
to the receipt of wireless signals should be possible.
Under certain circumstances, problems with wireless communication between
the receiver and transmitter may occur and you will not be able to switch the
remote controlled wall sockets on or off.
− In this case, pull the remote controlled wall socket out of the permanently
installed socket and insert it again.
Care and storage
Cleaning the remote controlled wall sockets
NOTICE!
Risk of short circuit!
Waterthathaspenetratedthehousingmaycauseashortcircuit.
− Never submerge the remote controlled wall sockets in water.
− Make sure that no water penetrates the housing.
NOTICE!
Risk of damage!
Using unsuitable cleaners could damage the surface of the
remote controlled wall sockets and the remote control.
− Do not use any aggressive cleaners, sharp or metallic
cleaning utensils such as brushes with metal or nylon
bristles.
− Do not use any solvents or abrasives.
Korrektur
munica
ica
be able to sw
ble to
cket out of the pket out of the
ontrolled wtrolled w
o
cuit!cuit!
spenetratedspenetrated
mer
mer
ge thege the
hat nohat n

AFTER SALES SUPPORT
USA
C
are and stora
g
e
17
USA
1-866-558-8096 service@801service.net
Remote controlled wall sockets
1. Pull the remote controlled wall socket out of the permanently installed socket.
2. Only wipe the remote controlled wall socket and the remote control off with
a dry cloth.
Storing the remote controlled wall sockets
NOTICE!
Risk of damage!
The batteries could leak and permanently damage the
remote control if you store the remote control with the batteries
inserted for a prolonged period of time. The battery liquid
(electrolyte) is corrosive.
− If you do not use the remote control for a prolonged period,
store the batteries separately.
− Do not remove the battery liquid with bare hands. Do not
allow battery liquid to come into contact with skin, eyes
and mucus membranes. Use conventional rinsing gloves.
If, however, your skin does come into contact with battery
liquid, immediately wash your hands with plenty of water
and, if necessary, consult a physician.
− Wipe up the leaked battery liquid with a damp cloth. You
can wash the used cloth and reuse it or dispose of it with
household garbage.
If you do not use the remote controlled wall sockets for a prolonged period of time,
− take the battery out of the battery compartment 12 and store it separately,
− store the remote controlled wall sockets and the remote control so that they
are protected from dust and direct sunlight.
. The b
he
ol for a prolon
or a prolon
quid with bard with bar
me into contae into conta
s. Use convense conven
n does come ioes come
y wash yourwash your
y, consult a ponsult a
eak
ed battered batter
he used clothhe used clot
old garbage.d garbage
use the remouse the remo
tery otery

Troubleshootin
g
USA
AFTER SALES SUPPORT
18
USA
1-866-558-8096
service@801service.net
Remote controlled wall sockets
Troubleshooting
Some malfunctions may be caused by minor faults, which you can resolve
yourself. Follow the instructions in the following table for this.
If it is still not possible to resolve the problem with the remote controlled wall
socket, contact customer service. Do not attempt to repair the remote
controlled wall socket yourself.
Problem Possible cause Troubleshooting
The remote controlled
wall socket cannot be
switched on or off.
The range of the
wireless signal has been
exceeded.
Reduce the distance
between the remote
control and the remote
controlled wall socket.
The battery of the remote
control is empty.
Replace the battery with
a battery of the same
type.
The signal transmission
is disrupted or the
assignment of the
channels was deleted.
Refer to the chapter
“Additional notes”.
Another remote
controlled wall socket
has inadvertently
responded to the
command from the
remote control.
The assignment is
incorrect.
Assign the channels to
the remote controlled
wall sockets (see chapter
“Assigning channels”).
One of the remote
controlled wall
sockets automatically
switches off.
The assignment is
incorrect.
Assign the channels to
the remote controlled
wall sockets (see chapter
“Assigning channels”).
Korrektur
t
t
tu
kt
t
t
ek
K
K
Ko
K
ur
r
lled w
d w
place the batt
ce the b
a battery of the
attery of th
type.type.
ion
the
as deleted.eleted.
Refer to tRefer to t
“Addit“Addi
gnment isment is
rect..
oteote
allyally
The aThe
incinc

AFTER SALES SUPPORT
USA
Technical dat
a
19
USA
1-866-558-8096 service@801service.net
Remote controlled wall sockets
Technical data
Model: GT-FSI-07-US, GT-9000 (transmitter)
Supply voltage: 120 V~, 60 Hz
Maximum load/maximum cur-
rent for each socket receiver:
15 A (Resistive)
1000 W Tungsten
½ hp
Range: Max. 98.43' (30 m)
Only with visual contact between the remote
control and the remote controlled wall socket.
Operating temperature: 32–95°F (0–35 °C)
Transmission frequency: 433.92 MHz
Battery: Alkaline, 12 V, type A23 (contained in the
product contents)
Because our products undergo continual development and improvement,
technical changes and changes to the product design are possible.
Korrektur
A23 (containe
3 (contain
ts)
development anelopment an
roduct design aroduct design

D
isposal
USA
AFTER SALES SUPPORT
20
USA
1-866-558-8096
service@801service.net
Remote controlled wall sockets
Disposal
Disposing of packaging
− Sort the packaging before you dispose of it. Dispose of paperboard and
cardboard with the recycled paper service and wrappers with appropriate
collection service.
Disposing of old appliances
Old appliances may not be disposed of in the household trash!
− Should the remote controlled wall sockets no longer be capable of being
used at some point in time, dispose of it in accordance with the regulations
in place in your state or country.
− Please ensure your recycling information does apply to the local regulations
and the EPA recommendations (www.epa.gov).
Batteries and storage batteries may not be disposed of with household
waste!
− As a consumer, you are required by law to turn in all batteries and storage
batteries, regardless whether they contain harmful substances* or not, at a
collection point in your city, county or state or in a retail outlet
so that they can
be disposed of in an environmentally-friendly manner
.
* marked with: Cd = cadmium, Hg = mercury, Pb = lead
Korrektur
pa
with the
h the
ply to the local re
to the local r
v).
ot be disposedbe disposed
by law to turn inaw to turn in
they contain hary contain har
county or state ounty or sta
vironmentally-frmentally-fr
cadmium, Hg =dmium, Hg =
This manual suits for next models
1
Table of contents
Languages:
Other Easy@Home Accessories manuals
Popular Accessories manuals by other brands

Dometic
Dometic ELITE SLIDE TOPPER Series Installation & operating instructions

Dacor
Dacor Flushing System Kit ACFS Installation and user instructions

Rohde & Schwarz
Rohde & Schwarz R&S RT-ZC20B user manual

IFM Electronic
IFM Electronic efector 500 PB5 Series operating instructions

Hanna Instruments
Hanna Instruments HI 504901 instruction manual

Honeywell
Honeywell Fire-Lite Alarms SD365TA Installation and maintenance instructions