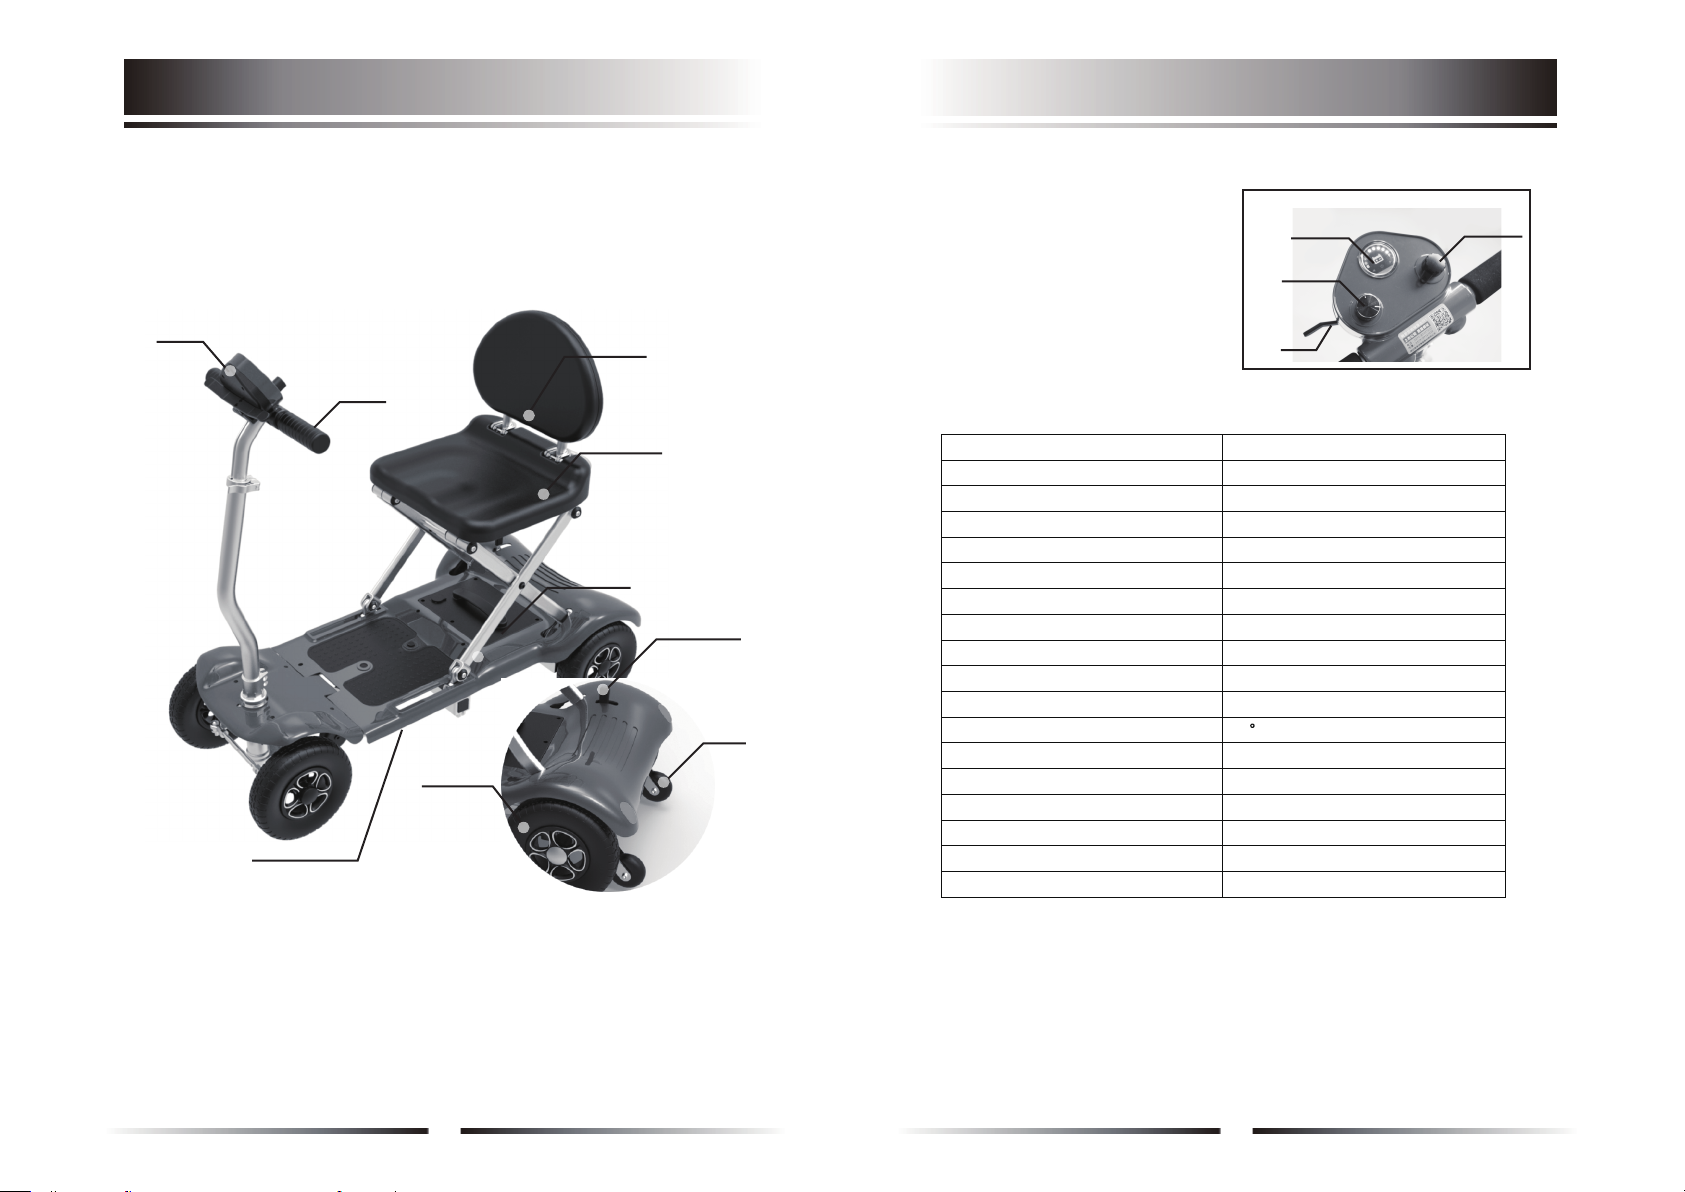
TILLER CONSOLE
The tiller console houses all of the controls needed to drive your scooter, including
the key switch, the speed adjustment knob, throttle control lever, battery condition
indicator, etc. With all of controls on the console you can control various motions
of your scooter.
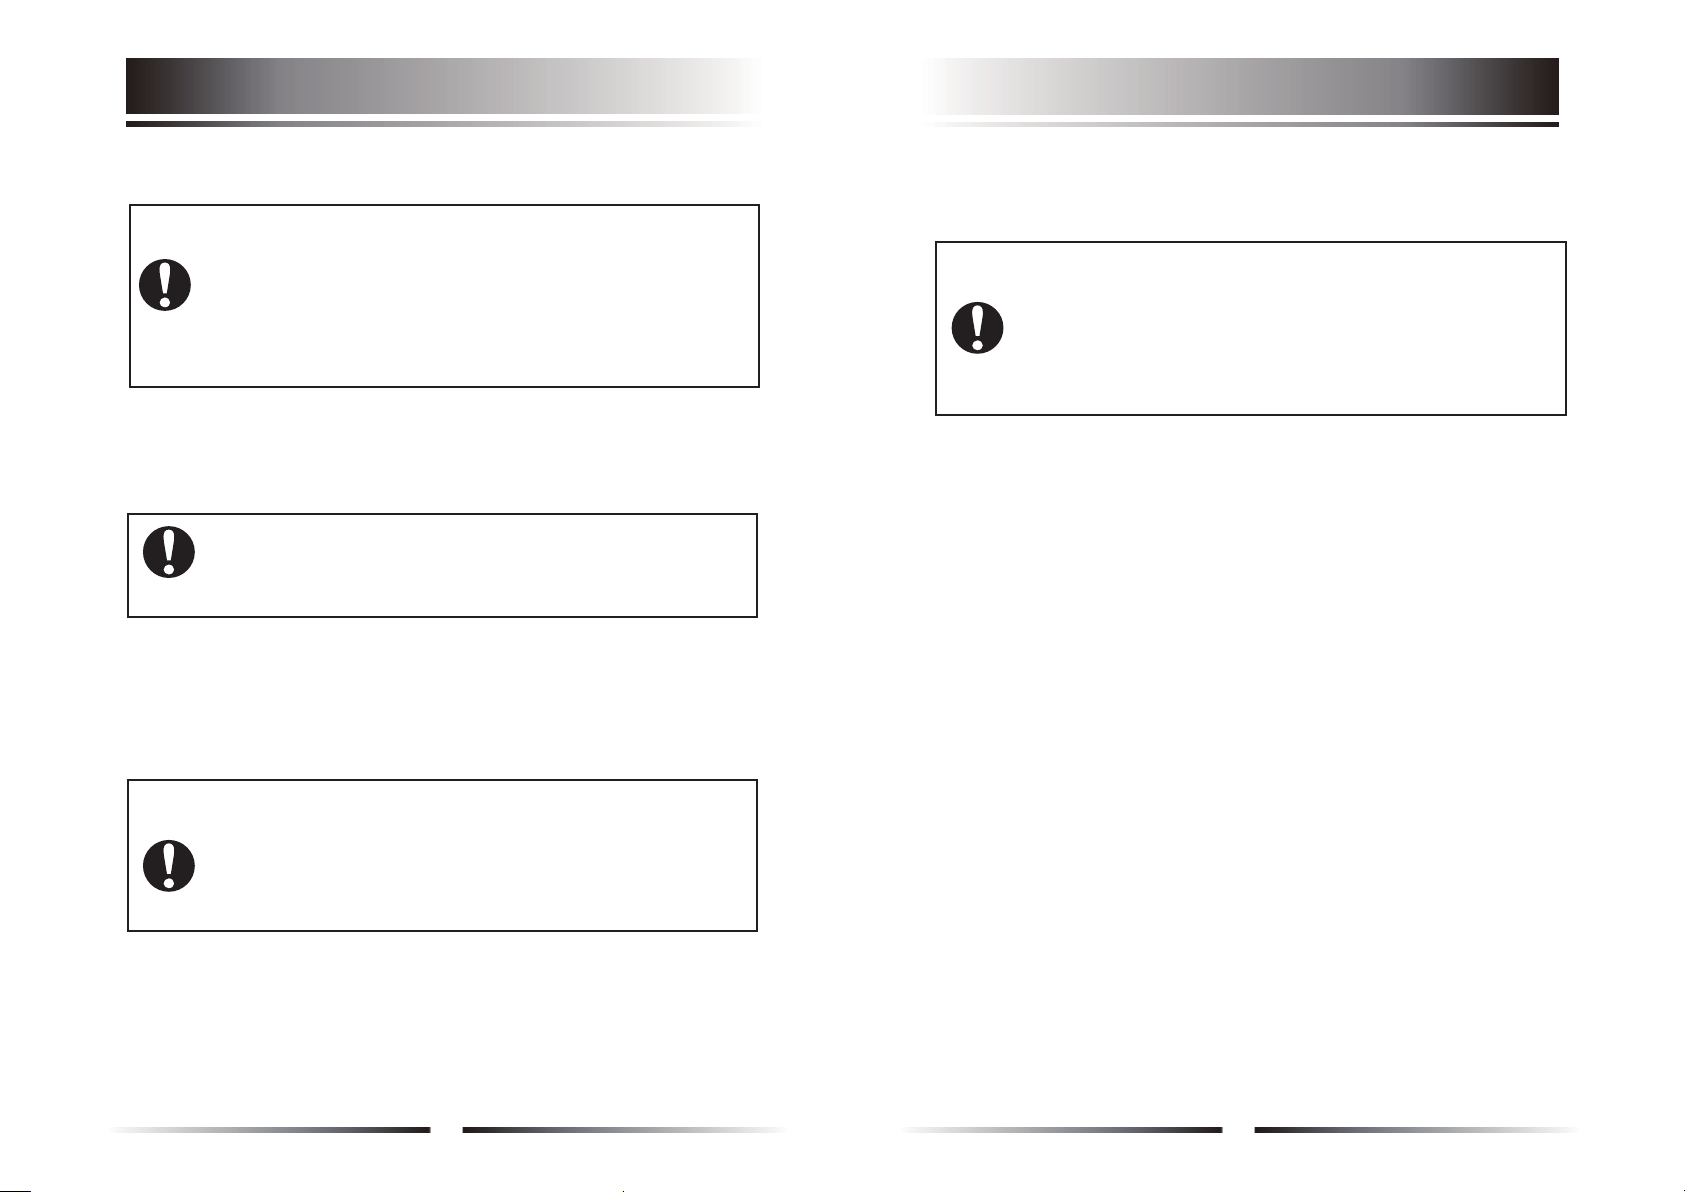
POWER SWITCH (See fig.2)
The light on the battery gauge turns on when the key is fully inserted into the key
switch,and it goes out when the key is removed.
WARNING! Do not use the key switch to stop your scooter unless an
urgent event has happened.
WARNING! When at condition of rest, power down your scooter to
prevent unintended motion.
THROTTLE CONTROL LEVER (see fig. 2)
This lever allows you to control the forward and reverse speed of your scooter
up to the maximum you preset with the speed adjustment knob.
Pull backward the left end of the throttle control lever, the brake is disengaged
and the scooter will move backward; Pull backward the right end of the throttle
control lever, the brake is disengaged and the scooter will move forward.
The larger the rotating angle of the lever is, the faster the speed of your scooter.
When you release the lever completely, it automatically returns to the primary
position, i.e. the stop position, and engages your scooter’s brake to slow the
scooter until to be stopped completely.
SPEED ADJUSTMENT KNOB(see fig.2)
This knob allows you to preset and limit your scooter’s top speed. Maximum
forward speed: 6km/h, maximum reverse speed: 3km/h.
BATTERY CONDITION INDICATOR (see fig.2)
When your scooter is powered up, this indicator shows the remaining
capacity of the batteries by 3 colors as red, yellow and green.
Green: the battery is fully charged.
Yellow: the electricity is running out, and the battery needs to be charged.
Red: the battery has consumed, and it needs to be charged immediately.
OFF-BOARD CHARGER (see fig.3)
Open the hasp on the battery box, you could charge your scooter with the
off-board charger through a 3-pin charger socket inside the battery box.
(see fig.3) For specific methods,see Page 6 of this manual.
There is a free wheel mode lever at the lower right of the seat base, shown
as fig.1. Whenever you do not want to move your scooter by motor, you can
put it in freewheel mode.
Push forward on the manual freewheel mode lever to disengage the drive
motor (manual mode)
Push backward on the manual freewheel mode lever to reengage the drive
motor (drive mode)
1. When your scooter is in freewheel mode, the brake system is disengaged.
In this case, the control system will automatically cut off the function of moving
forward or backward.
2. Never sit on your scooter when it is in freewheel mode. Failure to do so
may cause personal injury.
3. Never put your scooter in freewheel mode on any incline. Failure to do so
may cause personal injury.
3-PIN CHARGER SOCKET(see fig.3)
This socket is used to connect the off-board charger. When charging, this
socket makes your scooter out of work.
78
IV. OPERATION IV. OPERATION
WARNING! If your scooter occurs an unexpected motion, please
release the throttle control lever immediately. The scooter will
automatically stop unless this lever is out of the order.
CAUTION! Before you are master of operating, please drive it at a
low speed
WARNING! Incorrect connection may cause damage to the charger,
connectors and circuits.
WARNING! When your scooter is in drive mode, the manual
freewheel mode lever must be in backward position, i.e. in drive
mode, so as to guarantee the brake system to work normally. Failure
to do so may cause personal injury or damage to the scooter.