8
Before Using
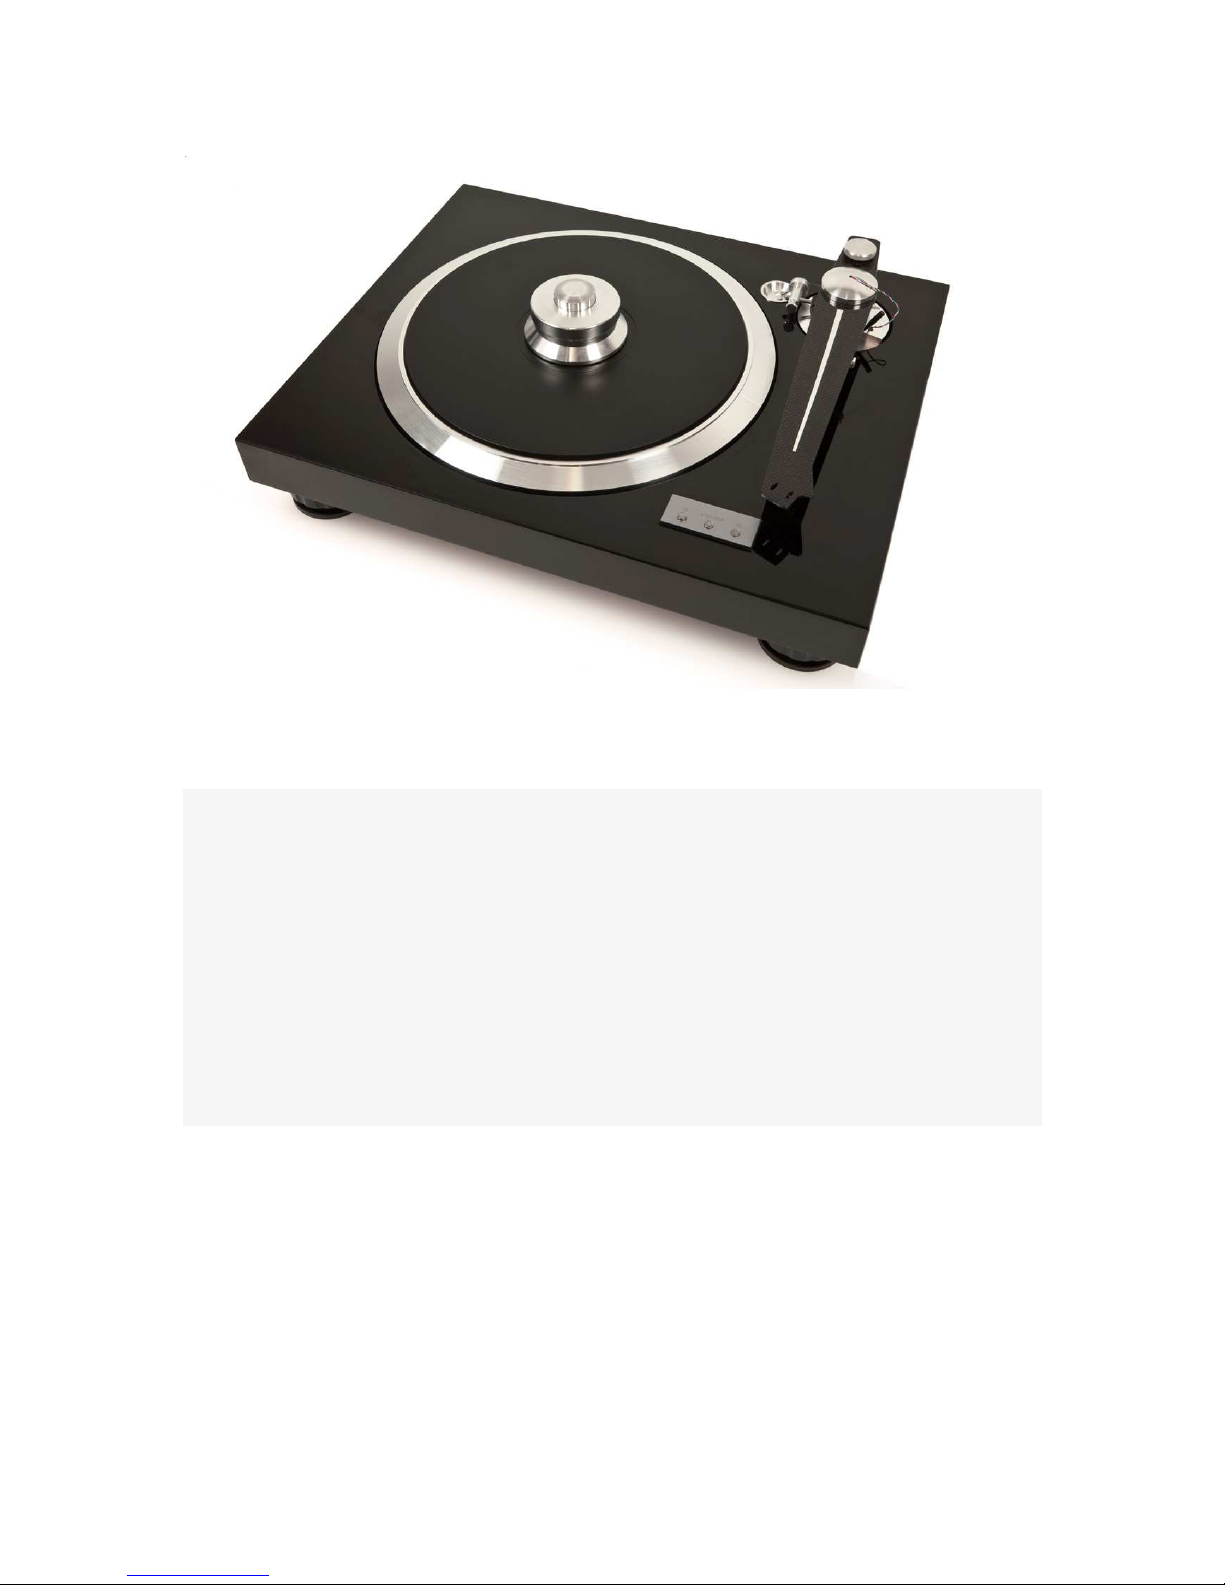
Assembly the turntable from the parts that are inside of the package!
Remove the cover protection from the Sub Platter Shaft (2) and check if there is enough
grease. You will find the additional grease in the accessories if the shaft is not enough
lubricated. Place the Sub Platter (1) on the Shaft (2). Place the Drive Belt (4) on the Pulley
of both Motors (3). You need to install the Tightening Disc (6) to the Platter (5) by screwing
it to the thread of the platter pin. After you successfully installed the Tightening disc to the
platter and disc is holding firmly on the platter you can install the platter. Hold the Tightening
disc while centering the Platter (5) into the hole of the turntable chassis (7) and install the
Platter (5) on the Sub Pletter (1). In the next step assembly the Tonearm (8) that you find in
the accessories box inside of the packaging.
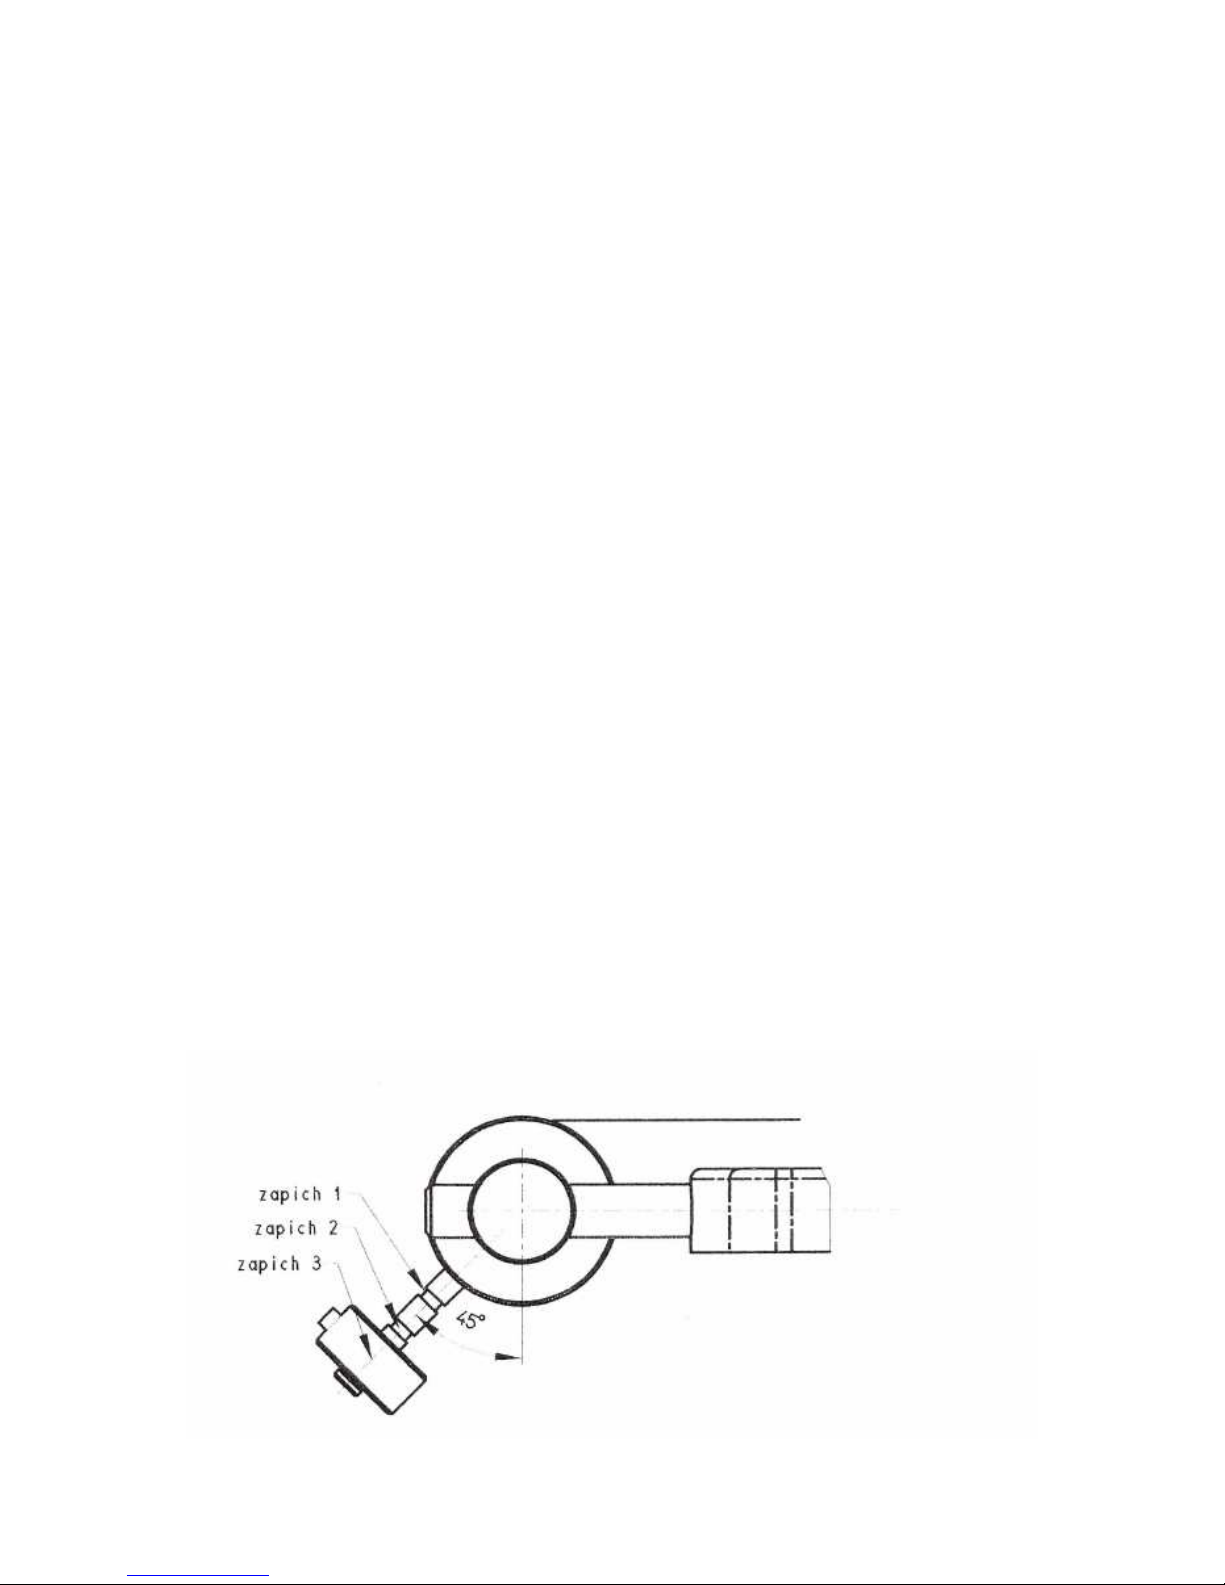
Mounting of the Cartridge (9) to the Tonearm (8):
If you purchased one of our EAT cartridges please install it to the flat carbon tonearm now.
Install screws that are part of the cartridge box into the oval holes of the tonearm and fix it
into the cartridge holes from the bottom side of the carbon tonearm. Connect the cartridge
system with the Tonearm cables:
-White Left channel L+
-Red Right channel R+
-Green Right channel R-
-Blue left channel L-
Now the tonearm is prepared. Install prepared tonearm on the tip of the Tonearm pivot
point (10). Install the Isolation connector (11) of the tonearm output to the Plug of the
isolating connector(12). Be sure that it is properly inserted. The locating pin of the
connector is facing to the counterweight of the tonearm. After inserting secure the
isolation connector by fully tightening of the union nut. It remains to complete the
Antiscating disc(13)with hanging nylon hair that is ended by a small eye on one end.
Antiscating disc (13) set on the pin of the antiscating rider (14). Belt up the antiscating
hair in the groove around the perimeter of the Hang up (15) and the eye of the antiscating
hair hook to the Fixing screw (16). You tighten fixing screw (16) in to the thread of the
suspention.
Operation and adjusting of the turntable
Turntable unit must be in the perfect straight position. This we will achieve by Adjustable
feet (17). Set up the height and the levelling of the chassis by turning the feet to the left side