EAT Prelude User manual

European Audio Team
INSTRUCTIONS FOR USE
E.A.T. Prelude

2
Dear Music Lo er,
Congratulations and thank you for choosing European Audio Team Products. Your
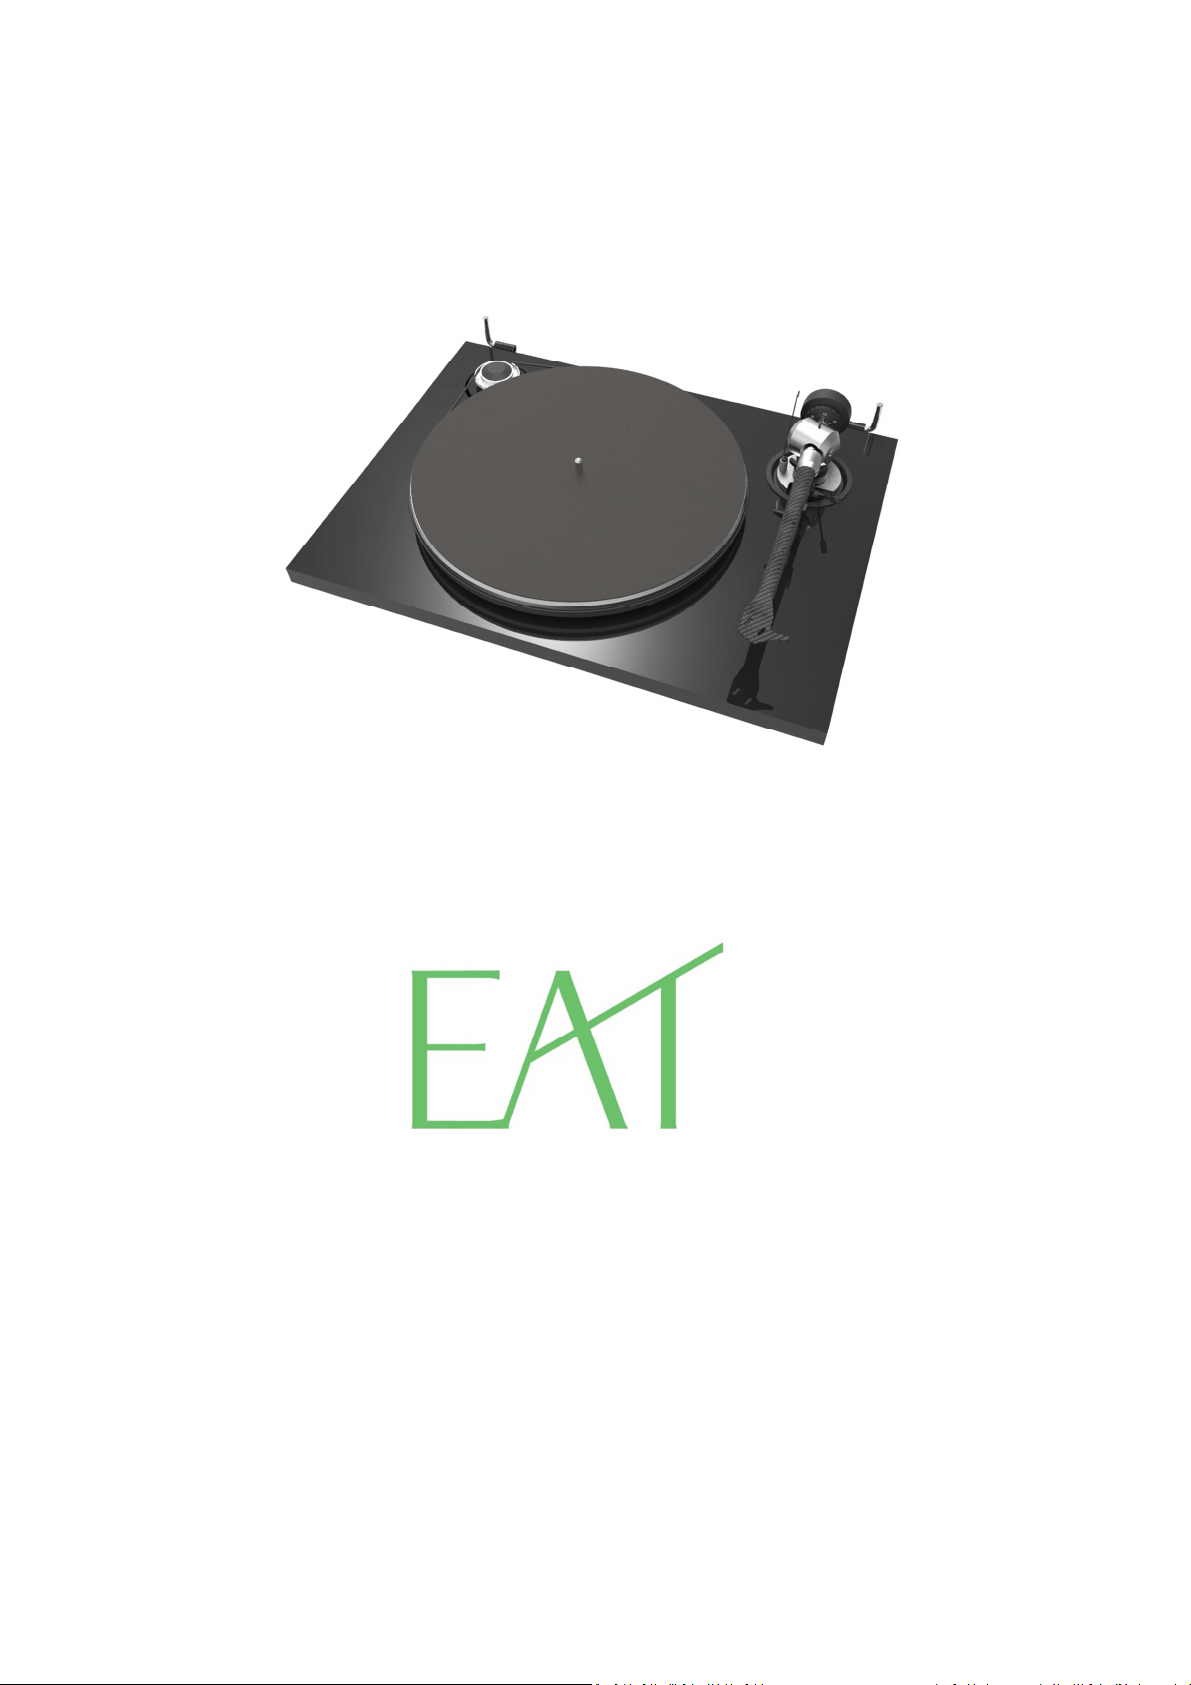
E.A.T. Prelude turntable has been handcrafted and rigorously tested by skilled technicians
at the European Audio Team factory to gi e you years of enjoyable, trouble free ser ice.
Although it may seem like asking for dri ing directions, please take a few moments
to read all of this manual. It has many helpful tips and ideas on properly setting up
and using your system. We promise that if you take the time to read and follow these
tips you’ll get better system performance and enjoyment. Please contact your dealer if
you require additional assistance.
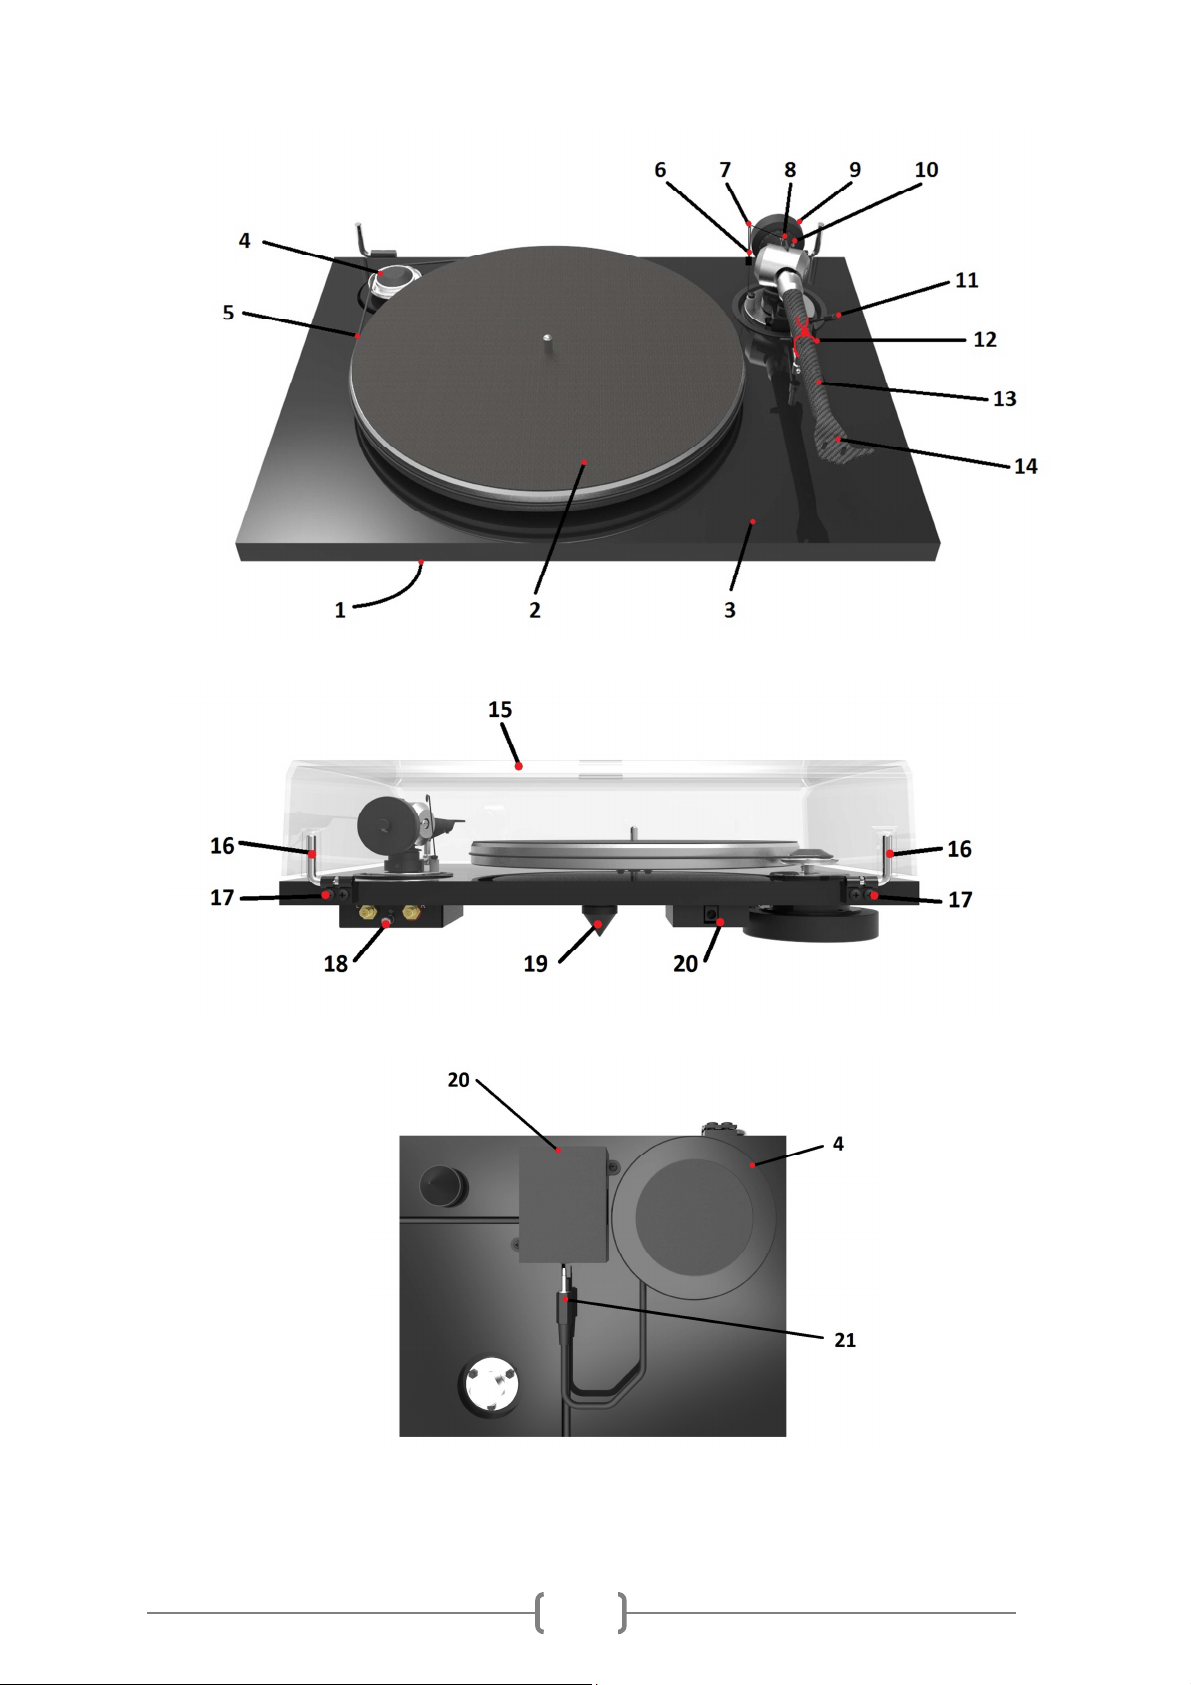
The Prelude incorporates an array of features that contribute to its audiophile performance:
1. Proprietary ultralow noise AC motor and high precision frequency DC-dri en AC
generator for speed stability. Free-standing motor with no connection to the board.
The hea y motor base with weight 1.5kg.
2. The platter with TPE damping and felt mat with belt dri e principle. The platter is
constructed from an aluminum magnesium alloy sitting on a brass bearing.
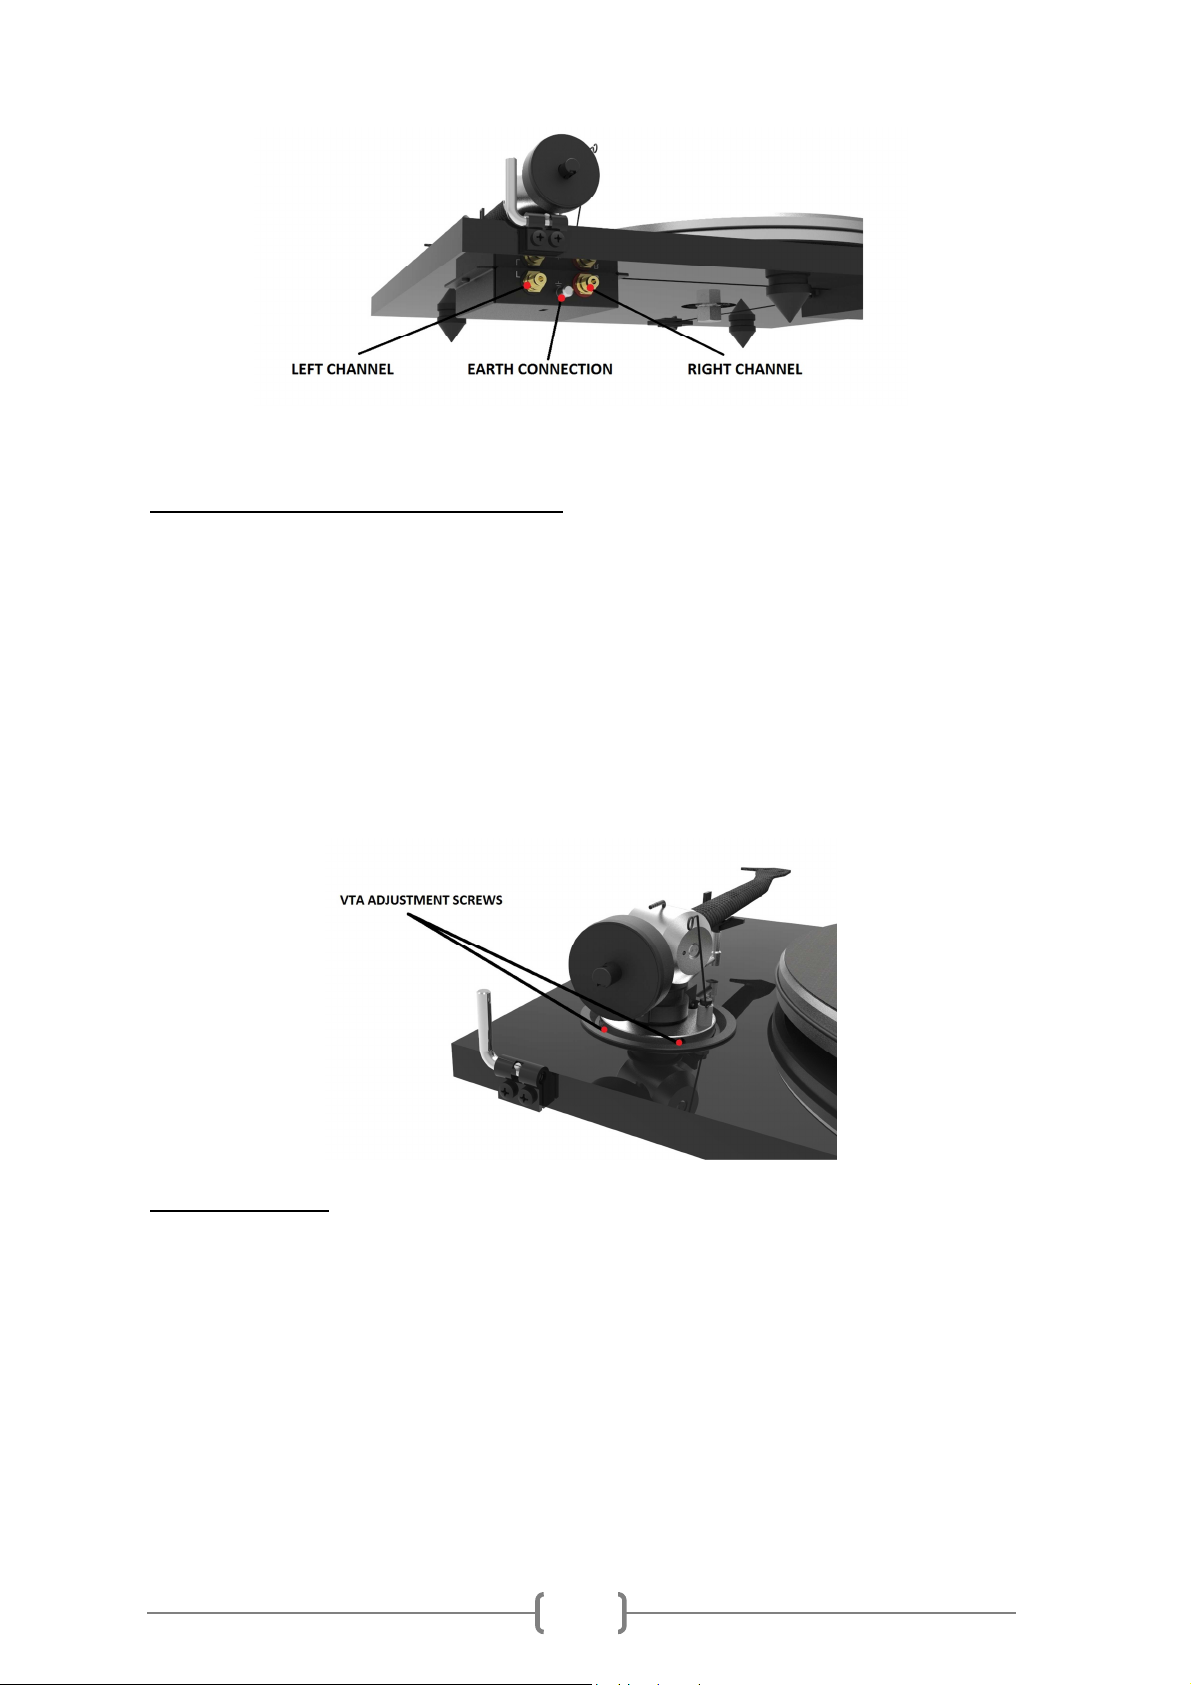
3. The tonearm construction is combination of conical carbon fibre tonearm tube (casted
in single peces), cardan bearing in horizontal axle with hardened tips sitting in zircon
bowl and ABEC7 ballraces in ertical axle. The counterweight is damped with thermo-
plastic elastomer (TPE) damping pad.
4. All key features for cartridge alignment and adjustability are a ailable on the tonearm
- VTA/SRA, VTF, azimuth, anti-skate, and a slotted carbon headshell for o erhang and
offset angle.
5. The conical feet with thermo-plastic elastomers (TPE) damping.
Important:
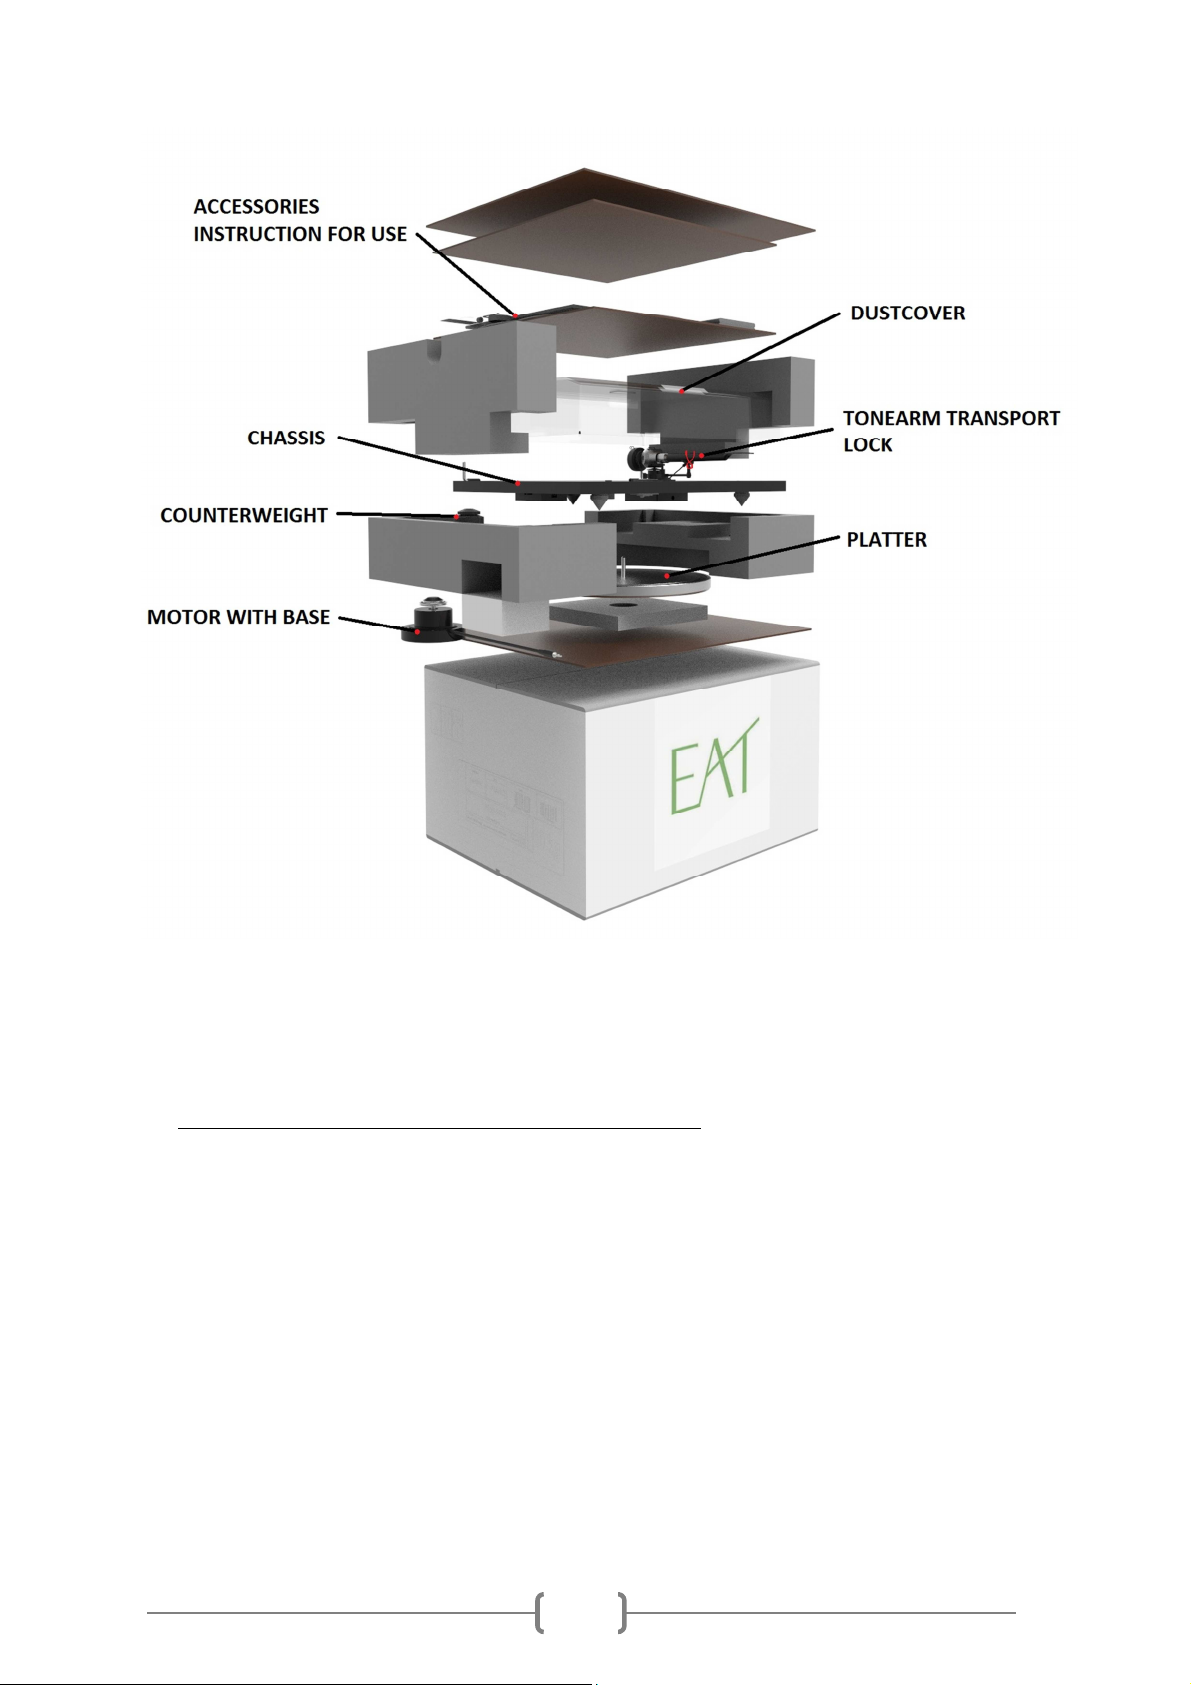
Your turntable was shipped partially disassembled in order to a oid damage to
sensiti e parts.
Please check immediately to make sure that neither the packaging nor
the de ice was damaged in
transit. If you are missing parts or if the unit is damaged,
please do not operate and contact your
dealer.
Throughout the manual, this symbol will alert you to potential hazards for the user or the unit,
and how to avoid possible misuse.
!

3
Contents
Packaging layout 4
Product illustrations and key 5-6
Setup
1. Motor installation 7
2. Platter and dri e belt installation 7-8
3. Tonearm assembly 8
a) Cartridge installation 8-9
b) Counterweight installation, Vertical Tracking Force setting (VTF) 9
c) Tonearm output connection 9-10
d) Vertical Tracking Angle setting (VTA) 10
e) Azimuth setting 10-11
f) Anti-skating assembly and adjustment 11-12
4. Le eling the turntable 12
5. Starting the motor, changing the speed 13
Technical specifications 14
Troubleshooting, warranty, ser ice 15

4
Please do your part to help protect the environment:
Disposal of packaging material
E.A.T. packaging is carefully designed to protect your component from damage in
transit
and you are strongly urged to keep the original packaging in order to
safely ship or
otherwise transport your turntable in the future.
Howe er, the packaging materials were chosen to be en ironmentally friendly,
so if
you must discard the packaging, please recycle.

5

6
KEY: CONTROLS, FEATURES AND CONNECTIONS
1. ON/OFF switch
2. Platter with felt mat
3. Chassis
4. Motor base with motor and double step pulley
5. Dri e belt
6. Anti-skating weight with wire
7. Anti-skating weight support hoop
8. Anti-skating stub with adjustment scale
9. Tonearm counterweight
10. Downforce scale
11. Tonearm lift le er
12. Tonearm rest with remo able transport lock
13. Tonearm tube
14. Headshell
15. Dustco er
16. Dustco er hinge
17. Dustco er hinge fasteners
18. RCA output with earth connection
19. Damped adjustable feet
20. Power supply socket
21. Motor connection cable with 3.5mm Jack connector

7
SET P
1. Motor installation
Remo e the complete motor base (4), (including motor, pulley and connection cable) from the
packaging and place it to the required position on the place where turntable will be installed.
Install the turntable chassis o er the motor base. Motor base should be in the middle of the
hole in left rear corner of the chassis as shown in the following illustrations.
Connect the motor connection cable to the power socket as shown in the following ilustration.
2. Platter and dri e belt installation
Remo e the protecti e co er from the platter bearing shaft.
Install the platter (2) and the drive belt (5) as shown in the following illustrations.

8
3. Tonearm assembly
The tonearm includes a combination of cardan bearings in horizontal axle and Japanese ball
bearings in ertical axle.
See the next steps to set up your tonearm.
a) Cartridge installation
* If you purchased this turntable in a package that included the cartridge, this has already been
done for you.
Install the cartridge into the carbon headshell, using the appropriate hardware included with
your cartridge.
Connect the cartridge as indicated below:

9
•White left channel L+
•Red right channel R+
•Green right channel R-
•Blue left channel L-
For correct cartridge alignment, use the two-point cartridge alignment protractor pro ided with
your Prelude accessories. If unfamiliar with two-point setup, please refer to your dealer.
b) Counterweight installation, Vertical Tracking Force setting (VTF)
The counterweight (6) supplied is suitable for cartridges weighing between 7 - 11g.
Pushing carefully, turn the counterweight onto the rear end of the tonearm tube (7), so that
the downforce scale (10) shows towards the front of the player. Lower the tonearm lift and
position the cartridge in the space between tonearm rest and platter. Carefully rotate the
counterweight until the tonearm tube balances out. The arm should return to the balanced
position if it is mo ed up or down. This adjustment must be done carefully. Do not forget to
remo e the cartridge protection cap if fitted.
Once the arm is correctly balanced return it to the tonearm rest (12). Hold the counterweight
without mo ing it, and gently re ol e the downforce scale ring until the zero is in line with the
anti-skating stub (8). Check whether the arm still balances out.
Rotate the counterweight counter clockwise (seen from the front) to adjust the downforce according
to the cartridge manufacturer's recommendations. One mark on the scale represents 1 mN (= 0.1g
/ 0.1 Pond) of downforce.
Please note: Adjust the downforce prior to installing the anti-skating weight.
The recommended downforce for the factory fitted cartridge Ortofon 2 RED is 18mN.
c) Tonearm output connection
Connect the tonearm cable pro ided with the accessories to the RCA tonearm output that is
located at the rear of the turntable, behind the tonearm. Connect the grounding cable on the
earth connection screw.

10
d) Vertical Tracking Angle setting (VTA)
To set the Vertical Tracking Angle, first put a record on the platter. When the needle is lowered
into the record groo e, the tube of the tonearm should be parallel to the surface of the record.
If it is not, loosen both hexagonal screws in the tonearm base just enough to allow ertical
mo ement of the arm pillar without force, and slide the arm up or down until it is parallel.
Carefully and e enly retighten the hexagon screws without applying excessive force (which
could deform the arm pillar).
e) Azimuth setting
The cartridge needle must be perpendicular to the record in order to trace the groo e wall
modulations correctly.
The azimuth (angle) is precisely set by the factory. In the e ent that you need to modify this
setting, howe er, follow the instructions below.
Loosen the small AZIMUTH SET SCREW, again using the 1.5 mm hexagonal key.

11
DO NOT REMOVE THE AZIMUTH SET SCREW COMPLETELY!
Loosen the screw just enough to be able to gently rotate the arm tube and set the azimuth to
the correct position.
The correct position can be checked from the front iew, preferably with
the needle placed on a mirror placed on the platter. Once the azimuth setting is correct, gently
re-tighten the AZIMUTH SETTING SCREW.
Examples of incorrect azimuth setup:
Too much left angle:
Too much right angle:
The correct position is 100% perpendicular to the record.
f) Anti-skating assembly and adjustment
Hang the loop of the thread of the anti-skating weight in the groo e of the anti-skating stub (8)
corresponding to the downforce applied to your cartridge and feed the thread through the loop
!

12
of the wire support (7).
The anti-skating force must be adjusted corresponding to the downforce as follows:
Downforce
Groo e in the stub (8)
10 - 14mN 1
st
from bearing rings
15 - 19mN 2
nd
" " "
20mN and bigger
3
rd
" " "
Be careful when handing the anti-skating thread in order to a oid damaging it
4. Le eling the turntable
Three precision adjustable damped feet are mounted under the turntable for le eling the
turntable. Once the turntable is in final position, put the spirit le el on the sub-chassis, and
then le el the turntable by screwing or unscrewing the feet as needed. It is ad isable to check
le el from se eral positions on the chassis.
8
!

13
5. Starting the motor, changing the speed
Controling the turntable:
•To start rotation of the platter, press the button ON/OFF switch (1)
•To play 45 r.p.m., put the drive belt (5) o er the larger diameter part of the motor pulley
using accessory toll pro ided. To re ert to 33r.p.m. repeat the proceedings using the
smaller step on the pulley.

14
Model
PREL DE
Nominal speed
33/45 rpm, manual speed change
Speed variance
33rpm: ± < 0.15%, 45rpm: ± < 0.13%
Wow and flutter
33rpm: ± < 0.1%, 45rpm: ± < 0.09%
Signal to noise
S/N Ratio (mechanical noise): - 40 dB S/N
Ration (electrical noise): -67 dB
Downforce range
0 -
30 mN
0 - 3.0 grams
Supplied counterweight system
Counterweight (black) → for cartridges
7 - 11 g
Effective tonearm mass
8 g
Effective tonearm lenght
230 mm
Overhang
18 mm
Power consumption
5 W max/ 0.3W standby
Voltage
Uni ersal swith mode power supply
15 V DC/0.8 A, 100-240 V AC, 47 - 63Hz
Dimensions (W x H x D)
462 x 340 x 110mm without dustco er,
462 x 340 x 125mm closed dustco er
462 x 430 x 390mm opened dustco er
Weight (without box)
8 kg (turntable)
Weight (with box)
12 kg

15
Troubleshooting
The platter doesn’t turn although the unit is switched on:
•The unit is not connected to the mains power supply (the building’s electrical system).
•No mains power is being deli ered at the socket.
•The dri e belt is not fitted properly or has slipped off.
No signal through one or both channels:
•No signal contact from the cartridge to the internal tonearm wiring; or from that to the arm lead; or
from that to the phono box; or between that and the amplifier. This could be due to a faulty plug,
broken wire or loose solder joint in the plug/socket connection.
•Phono input not selected at amplifier.
•Amplifier not switched on.
•Amplifier or speakers are defecti e or muted.
•No connection to the loudspeakers.
Strong hum on phono input:
•No ground connection from cartridge or arm or arm cable to amplifier, or ground loop.
Distorted or inconsistent sound from one or both channels:
•Turntable is connected to wrong input of amplifier, or MM/MC switch is incorrectly set. Needle or
cantile er damaged. Wrong rpm; dri e belt o erstretched or dirty; platter bearing needs lubrication
or is dirty or damaged.
Service
Should you encounter a problem that you are not able to identify or alle iate despite the abo e
information, please contact your dealer for further ad ice. Only when the problem cannot be resol ed
should the unit be sent to the responsible distributor in your country.
Guarantee repairs will only be effecti e if the unit is returned in appropriate packaging. For this reason
we recommend keeping the original packaging.
Ne er return a turntable without making sure that is it properly disassembled and correctly packaged in
the original packaging according to the supplied diagram. Please: Remo e the feet, counterweight,
platter, cartridge and belt and pack them separately. Fit the cartridge protection cap. Insert the
transport lock for the tonearm prior to carefully packaging the turntable.
Warranty
The manufacturer accepts no responsibility for damage caused by failing to adhere to these instructions
for use and/or by transportation without the original packaging. Modification or change to any part of
the product by unauthorized persons releases the manufacturer from any liability o er and abo e the
lawful rights of the customer.
The information abo e was correct at the time of going to press. The manufacturer reser es the right to make
changes to the technical specifications without prior notice as deemed necessary to uphold the ongoing process of
technical de elopment.
E.A.T. European Audio Team is a Registered Trademark of Jozefina Lichtenegger.
This guide was produced by: E.A.T. European Audio Team. Copyright ©2018. All rights reser ed.
Table of contents
Other EAT Turntable manuals