-3-
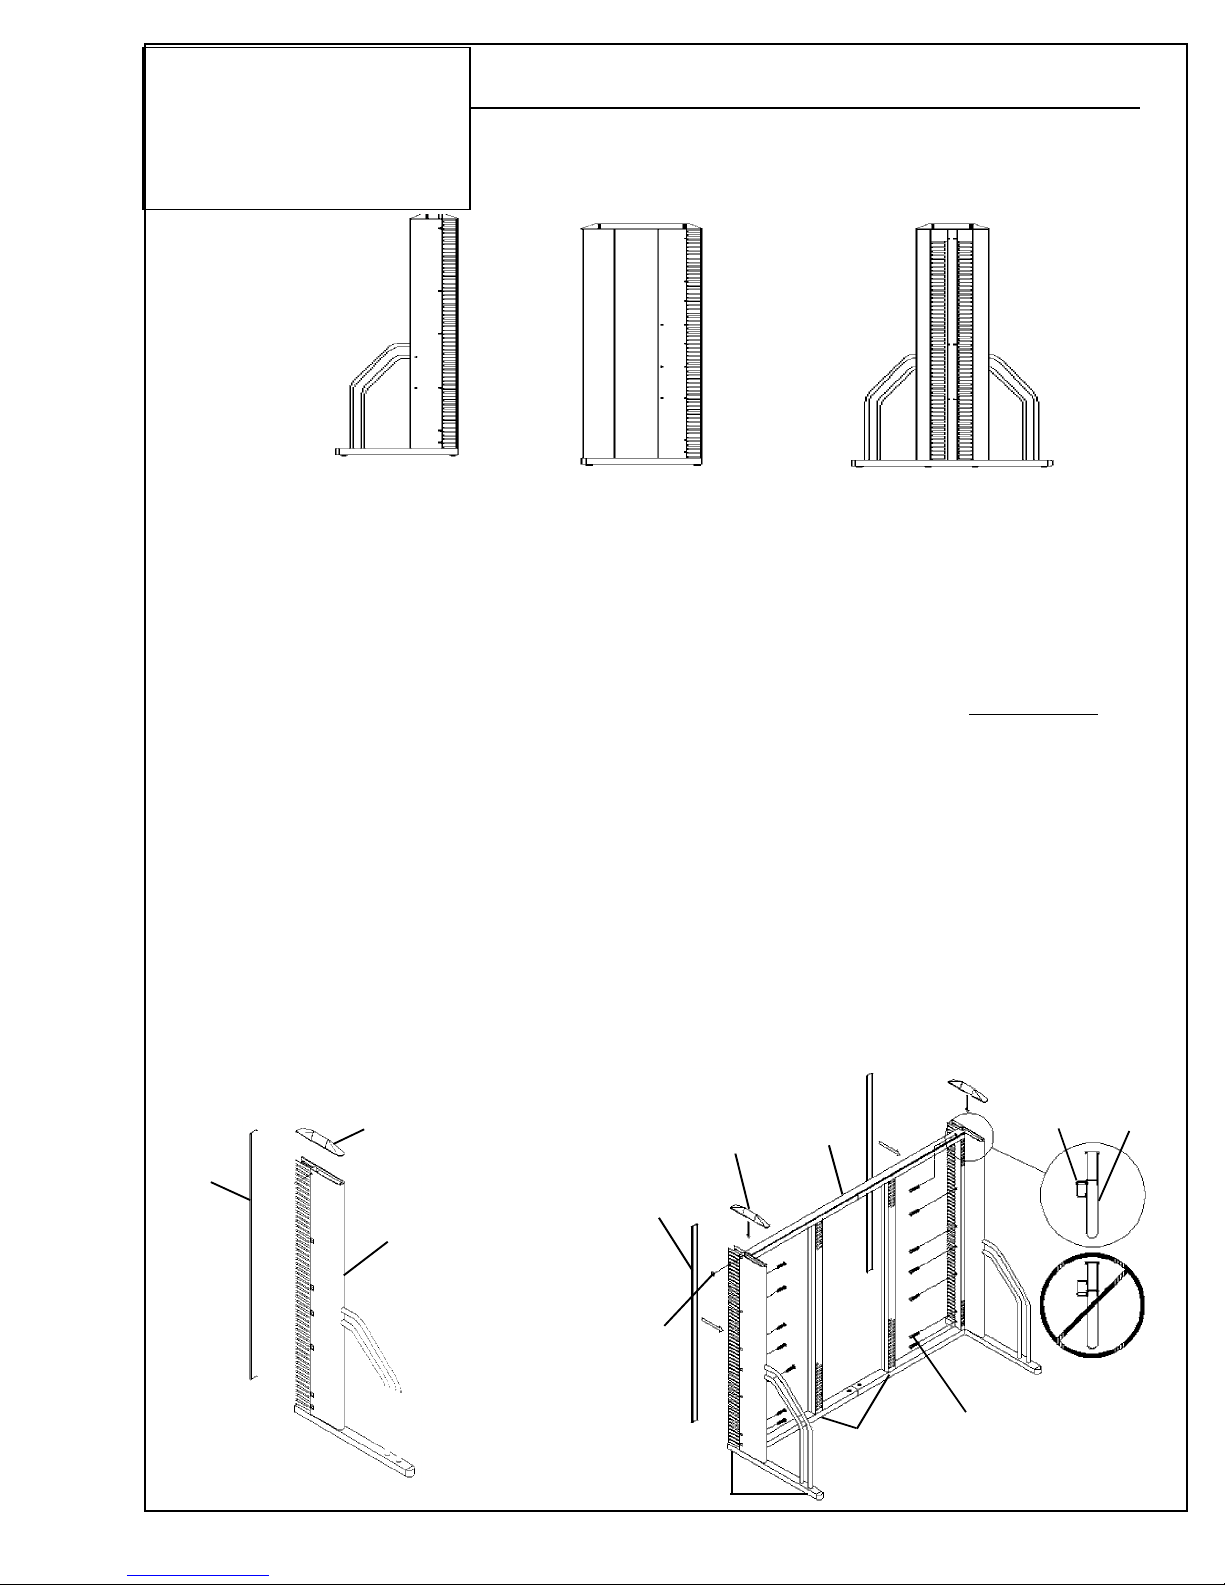
Full Frame and
Upright Assembly
(cont.)
81489 A-4
technical furniture
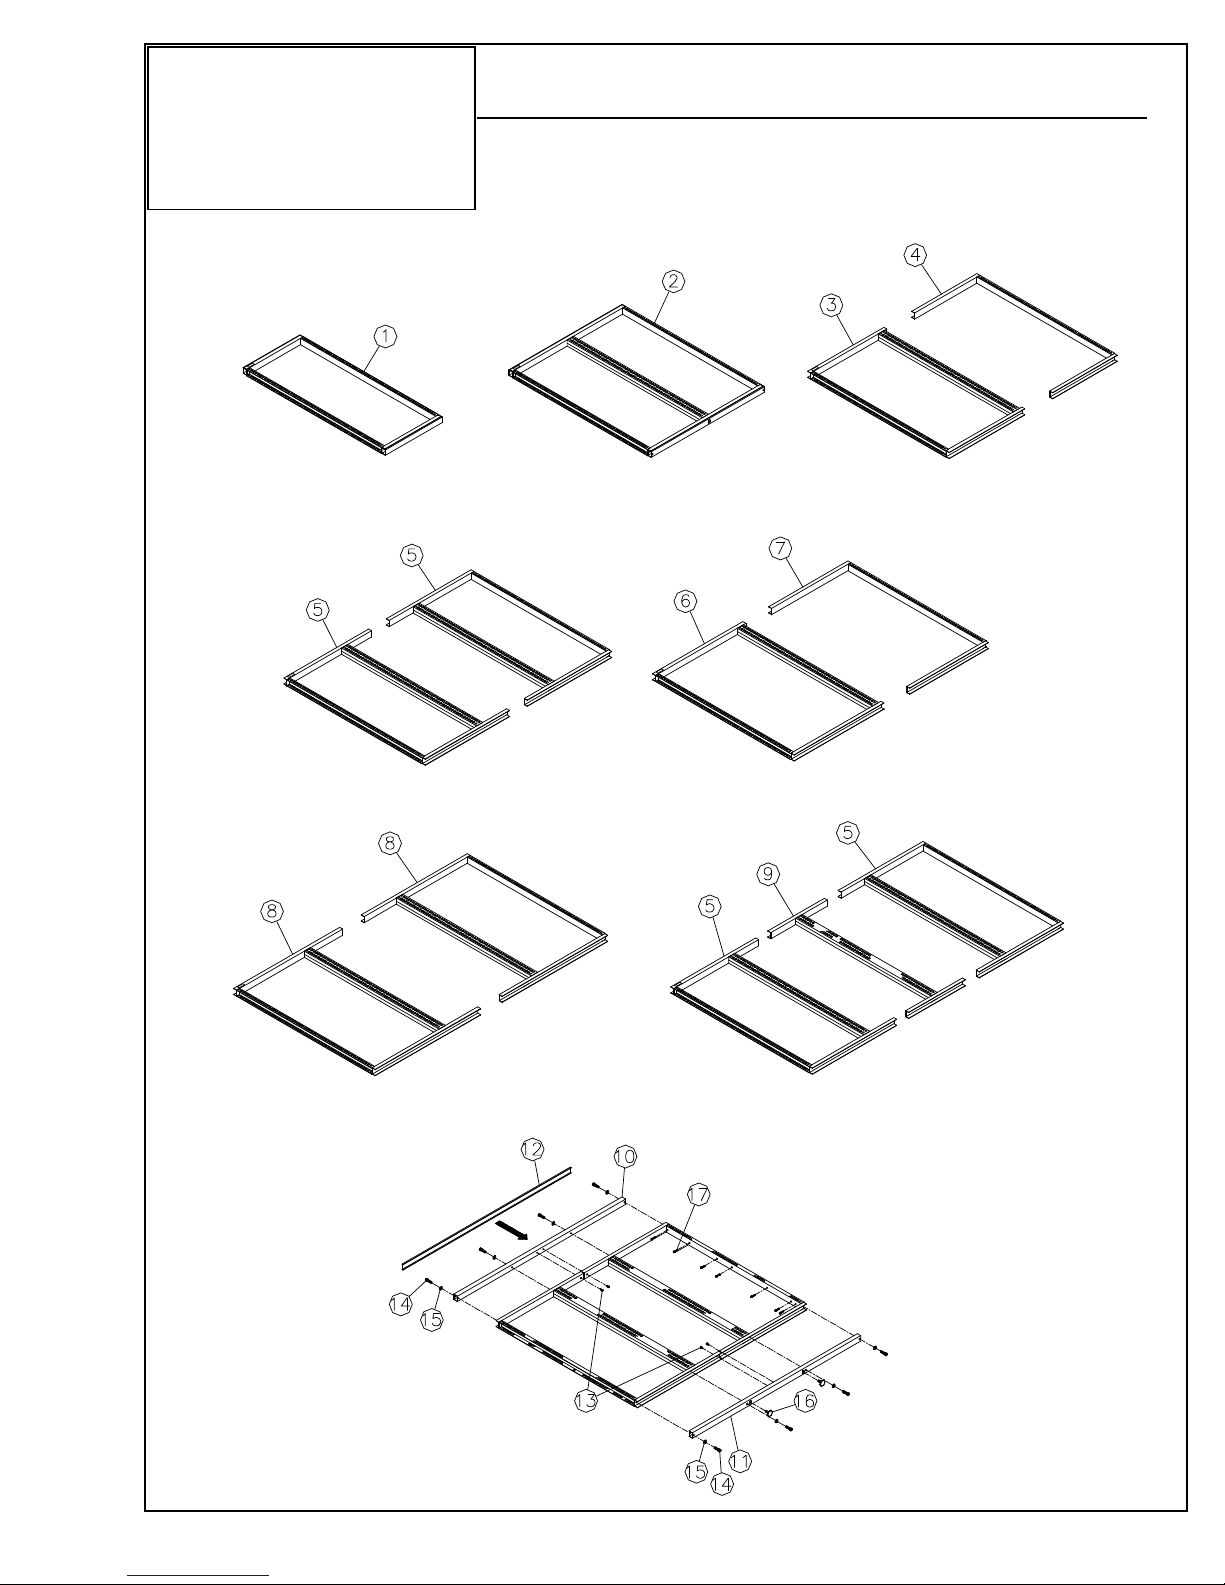
Parts List
Description Qty.
3485X 24”W x 45”H Full Frame
3486X 30”W x 45”H Full Frame
3487X 36”W x 45” H Full Frame
3488X 42”W x 45” H Full Frame
2466X 24”W x 61” H Full Frame
2469X 30”W x 61” H Full Frame
12472X 36”W x 61” H Full Frame 1
2467X 24”W x 72”H Full Frame
2470X 30”W x 72” H Full Frame
2473X 36”W x 72” H Full Frame
2468X 24”W x 84” H Full Frame
2471X 30”W x 84” H Full Frame
2474X 36”W x 84” H Full Frame
3489X 48”W x 45”H Full Frame
22478X 48”W x 61”H Full Frame 1
2479X 48”W x 72”H Full Frame
2480X 48”W x 84”H Full Frame
3491X L.H. 60”W x 45”H Full Frame
32626X L.H. 60”W x 61”H Full Frame 1
2667X L.H. 60”W x 72”H Full Frame
2669X L.H. 60”W x 84”H Full Frame
3490X R.H. 60”W x 45”H Full Frame
42627X R.H. 60”W x 61”H Full Frame 1
2668X R.H. 60”W x 72”H Full Frame
2670X R.H. 60”W x 84”H Full Frame
Part Number
Parts List
Description Qty.
3497X Half 72”W x 45”H Full Frame
52624X Half 72”W x 61”H Full Frame 2
2622X Half 72”W x 72”H Full Frame
2620X Half 72”W x 84”H Full Frame
3493X L.H. 45”W 36”/36” Full Frame
63596X L.H. 72”W x 61”H x 36”/36” FF 1
3315X L.H. 72”W x 36”/36” Full Frame
3598X L.H. 72”W x 84”H x 36”/36” F F
3492X R.H. 45”W 36”/36” Full Frame
73597X R.H. 72”W x 61”H x 36”/36” F F 1
3316X R.H. 72”W 36”/36” Full Frame
3599X R.H. 72”W x 84”H 36”/36” F F
3495X Half 90”W x 45”H Full Frame
82949X Half 90”W x 61”H Full Frame 2
2950X Half 90”W x 72”H Full Frame
2876X Half 90”W x 84”H Full Frame
3448X Add-on 96”W x 45”H Full Frame
92787X Add-on 96”W x 61”H Full Frame 1
2788X Add-on 96”W x 72”H Full Frame
2789X Add-on 96”W x 84”H Full Frame
2664X Support, 47.00”, Top
2637X Support, 59.46”, Top
10 2639X Support, 71.46”, Top 1
2878X Support, 89.46”, Top
2785X Support, 95.46”, Top
Part Number