Connect the Power Supply
4
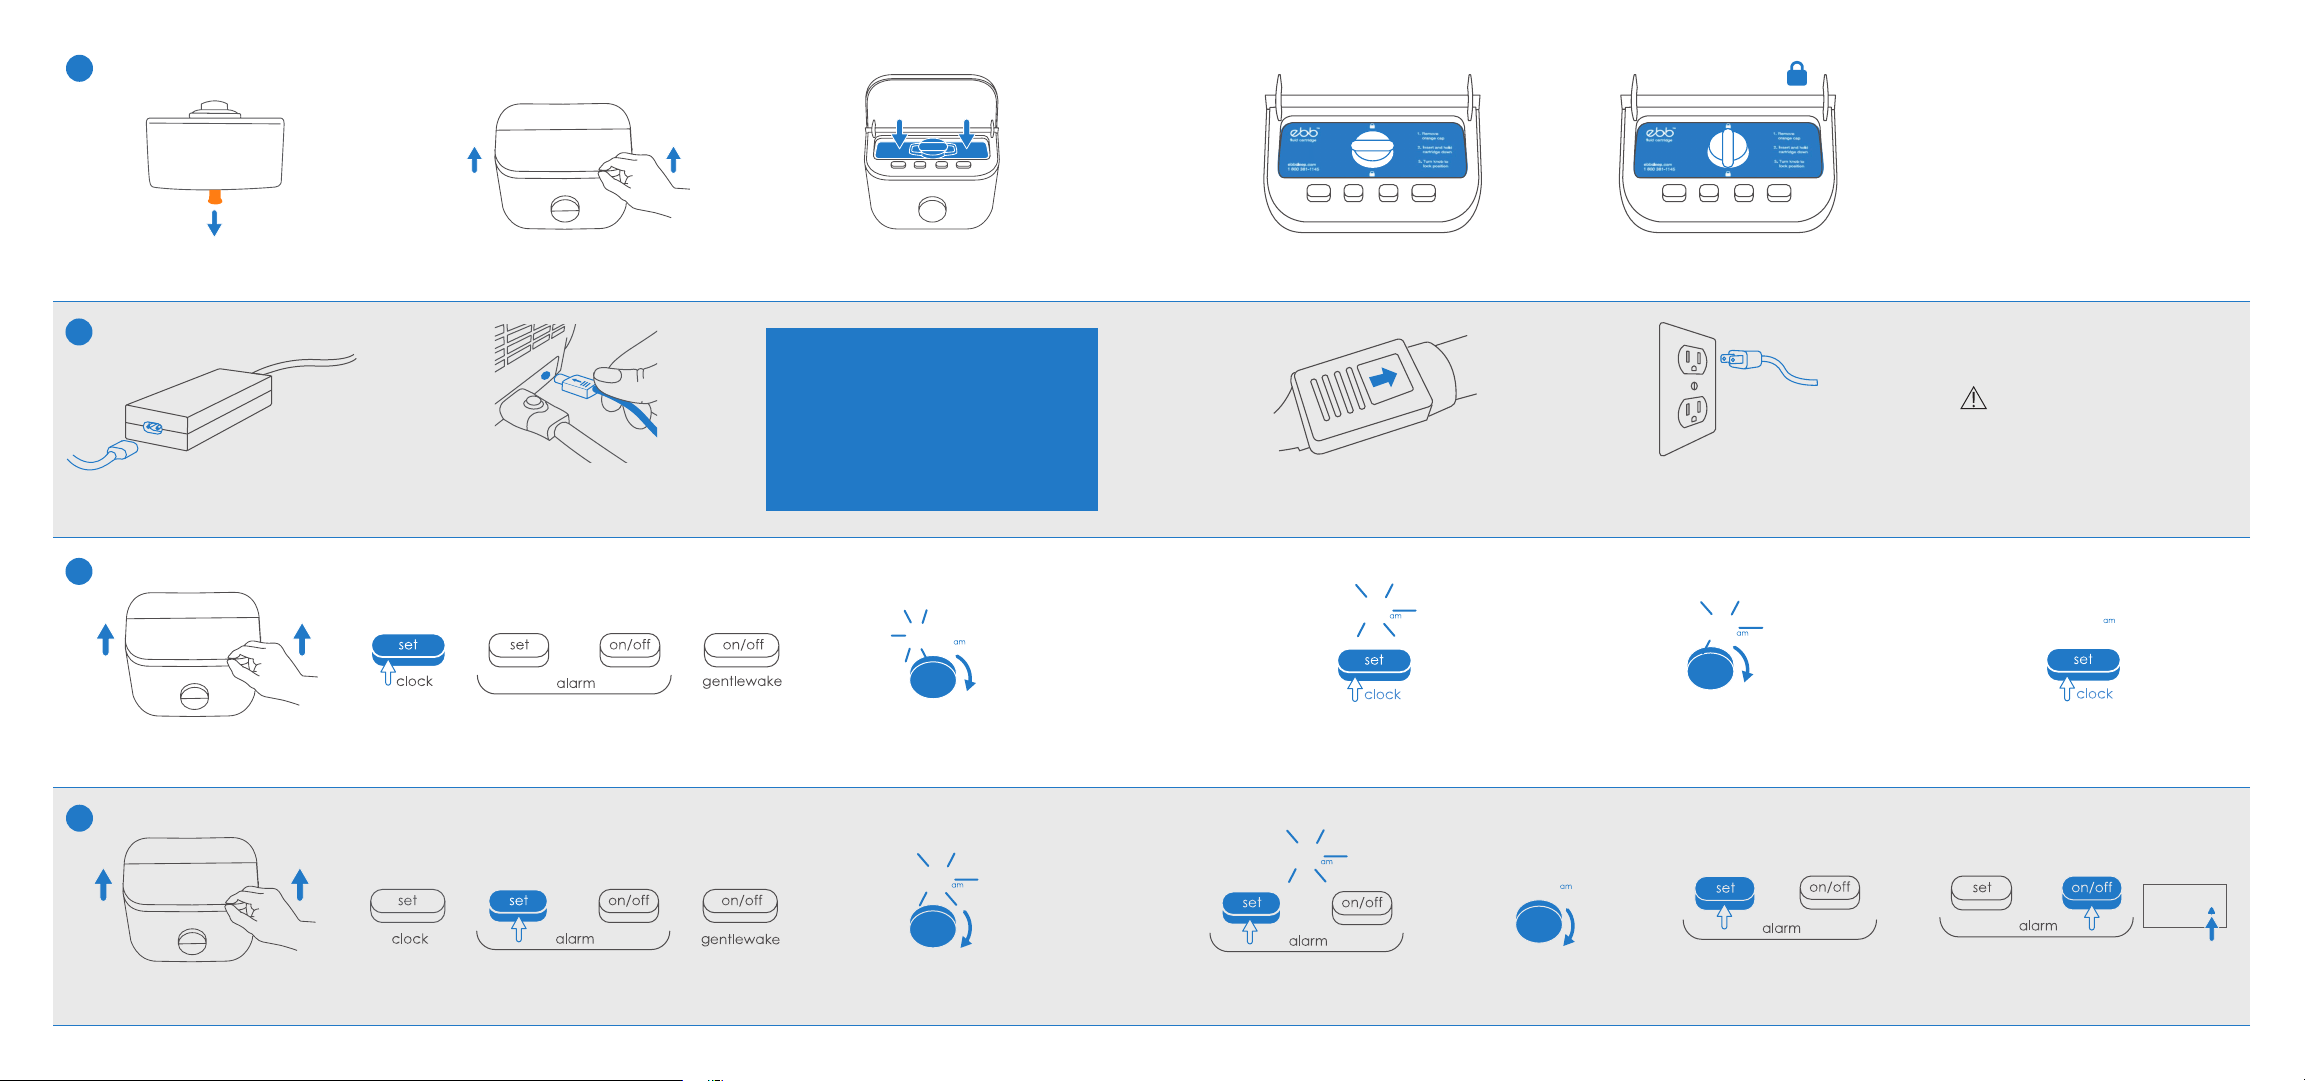
Set the Clock
5
Set Wake Time
6
4. Plug into an electrical outlet that
is not controlled by a wall switch.
1. Plug the end of the power
cord into the power supply.
3. The hours begin blinking. Turn dial
to correct hour with AM or PM.
6:00
5. Turn dial to the correct minute.
7:35
WARNING
Route the electrical cord to
prevent a tripping hazard or
being entangled with furniture.
Insert Fluid Cartridge
3
2. Open Lid. 3. Insert fluid cartridge
and hold down.
1. Remove orange cap from fluid
cartridge before inserting.
2. Plug the power supply fully into the connector
on the back of the bedside controller.
1. Open lid to access clock buttons.
1. Open lid to access clock buttons.
3. The flat surface with the arrow should face
up on the power cord when plugging in the
bedside controller.
4. Press the “Set Clock” button.
The minutes will begin to blink.
7:00
4. Press set alarm button
to select minutes.
7:30
7. Press “alarm on/off” button. The
bell icon appears when alarm is on.
am
8:30
6. Press the set alarm button
to set alarm time.
6. Press “Set Clock” button
to set clock time.
7:35
2. Press and release the “Set Clock” button.
2. Press and release the “Set Alarm” button. 3. The hours begin blinking. Turn
dial to set hour with AM or PM.
7:00
5. Turn dial to set minutes
for wake up time.
7:35
Note: The connection is intentionally snug.
The power supply is installed correctly
when you can no longer see the metal
portion of the connector.
4. Hold down and turn to lock position. 5. Knob is in locked position. Wait 30 seconds
before using bedside controller.


