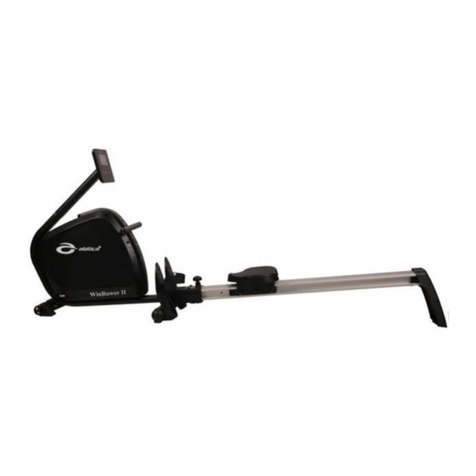
Echanfit CRW4106 User manual

ECHANFIT
User Manual
Magnetic Rowing Machine

- 1 -
CONTENTS
Important Safety Information-------------------------------------------------------------------------------03
Exploded Diagram--------------------------------------------------------------------------------------------04
Parts List--------------------------------------------------------------------------------------------------------05
Hardware Package-------------------------------------------------------------------------------------------06
Spare Parts List------------------------------------------------------------------------------------------------06
Install Instructions----------------------------------------------------------------------------------------07~10
Pedal Adjustment---------------------------------------------------------------------------------------------11
Moving the Machine------------------------------------------------------------------------------------------11
Resistance and Frame Balance Adjustment -----------------------------------------------------------12
Display Manual------------------------------------------------------------------------------------------------13
Storage and Maintenance ----------------------------------------------------------------------------------14

- 2 -
Thank you for purchasing the ECHANFIT CRW4106/4106B Magnetic Rowing Machine.
Please read this user manual carefully and keep it for future reference. If you need any
assistance, please contact our support team with your product model number and Amazon
order number.
Package Contents
⚫Magnetic Rowing Machine CRW4106/4106B
⚫User Manual
⚫Toolkits
Product Diagram

- 3 -
IMPORTANT! Please retain user’s manual for maintenance and adjustment instructions.
Your satisfaction is very important to us, please do not return until you have contacted.
IMPORTANT SAFETY INFORMATION
Thank you for choosing ECHANFIT magnetic rowing machine CRW4106/4106B.
Warning: To ensure your safety and health, please use this rowing machine correctly. It is
important to read this entire manual before assembling and using the rowing machine. Safe
and effective use can only be achieved if the rowing machine is assembled, maintained,
and used properly. It is your responsibility to ensure that all users of the rowing machine are
informed of all warnings and precautions.
1.Before starting the exercise, you should consult with your doctor to determine if your
health and physical condition are adequate for using this product together. Because the
bad condition of body can bring hidden trouble to your health and safety or hinder you to
use this rowing machine correctly.
2.If you are taking medication that affects your heart rate or blood pressure, your doctor's
advice is extremely important.
3. Always pay attention to the adverse reactions of the body. Improper and excessive use
can damage your body. If you notice any of the following symptoms, stop exercising
immediately: Chest pain and chest tightness, abnormal heartbeat, shortness of breath,
lightheadedness, dizzy or nauseous. If any of these symptoms occur during exercise, be
sure to consult your doctor before continuing exercise.
4. Keep children and pets away from rowing machine. This rowing machine is only suitable
for adults!
5. Please place the rowing machine on a firm, flat horizontal surface with soft materials to
protect your ground and carpets. Keep at least 0.6m of open space around the rowing
machine!
6. Please make sure all screws and nuts are locked before using the rowing machine.
7. Use the rowing machine correctly according to the rowing machine label. When parts are
found to be defective during assembly or inspection of the appliance, or when you hear
abnormal sound from the device, please stop using it immediately. Never continue to use
the rowing machine until the problem is solved.
8. Please wear suitable clothes when you exercise. Avoid loose clothing during exercise,
such clothes are easy to hang on or limit movement.
9. This rowing machine is only for indoor use, max user weight 264LB.
10. Please be careful not to sprain your back when moving or uplift this rowing machine.
11. This rowing machine is not suitable for medical rehabilitation.
12. Please properly keep the instruction manual and assembly tools for emergency use.

- 4 -
EXPLODED DIAGRAM

- 5 -
PARTS LIST
No.
Description
Qty
No.
Description
Qty
1
Main frame
1
35
Flat washer 5
2
2
Rear foot tube frame
1
36
Flat washer 8
23
3
Slide tube frame
1
37
Flat washer 10
1
4
Foot pedal tube assembly
1
38
Left protective cover
1
5
Computer bracket
1
39
Right protective cover
1
6
Tension tube
1
40
Decorative cover
2
7
Seat cushion limiting plate
2
41
Armrest fixing pad
1
8
Seat cushion mounting plate
2
42
Foot pedal
2
9
Front foot tube
1
43
Belt PJ660/260J
1
10
Magnetic wheel
1
44
Ribbon pulley Φ45*35
1
11
Deep groove ball bearing 608-2RS
4
45
Foam L=210mm
2
12
Deep groove ball bearing 6000-2RS
2
46
Foot pedal adjusting belt
2
13
Pull rod
4
47
resistance knob (assembly)
1
14
Pull rod limiting plate
4
48
Pullback device
1
15
Allen wrench
1
49
Seat cushion wheel
2
16
Wrench with screw driver
1
50
Seat cushion
1
17
Lock nut M8
5
51
Left front cover
1
18
Lock nut M10
1
52
Eccentric foot cover
2
19
Nut M8
4
53
Circular tube plug
2
20
Nut M10*1.0
4
54
Limit sleeve
1
21
Nut M10*1.0
4
55
Cushion pad
4
22
Bolt M8*125
3
56
Non-slip mat
1
23
Isolation nylon pad Φ23*Φ10.5*2
2
57
Computer back cover
1
24
Bolt M8*65
4
58
Computer up cover
1
25
Bolt M10*55
1
59
Dry battery
2
26
Bolt M8*20
11
60
Bottom wire L=500m
2
27
Bolt M8*40
2
61
Induction bar clamp
1
28
Screw ST4.2*12
8
62
Roller spacing
4
29
Screw ST4.2*9.5
1
63
Right front cover
1
30
Bolt M5*10
3
64
Seat cushion wheel
2
31
Bolt ST4.2*13
8
65
Bolt M6*50
2
32
Screw ST4.2*9
12
66
Nut M6
2
33
Bolt M6*8
4
67
Screw ST4.2*19
2
34
Spring washer 8
15
68
Anti-slipped pad A
2

- 6 -
HARDWARE PACKAGE
SPARE PARTS LIST
No.
Description
Spec.
Qty.
No.
Description
Spec.
Qty.
1
Main frame
1
58
Computer
1
2
Rear foot tube frame
1
24
Bolt
M8*65
4
3
Slide tube frame
1
26
Bolt
M8*20
7
4
Foot pedal tube assembly
1
36
Flat washer
Φ8
13
5
Computer bracket
1
28
Screw
ST4.2*12
2
9
Front foot tube
1
34
Spring washer
8
11
42
Foot pedal
2
50
Seat cushion
1
15
Allen wrench
S=5
1
55
Cushion pad
Φ25*18
2
16
Wrench with screw driver
S13、14、15
1
59
Dry battery
2
17
Lock nut
M8
2
27
Bolt
M8*40
2
31
Screw
ST4.2*13
2
Install Tool:
#15 Allen Wrench S=5 1PC
#16 Wrench with screw driver S13、14、15 1PC

- 7 -
INSTALL INSTRUCTIONS
STEP 1:
Use the Allen wrench (15) lock the Front foot tube frame (9) onto the Main frame (1) with
Bolt (24), Washer (36), Spring washer (34).
STEP 2:
Use the Bolt (26), Flat washer (36), and Spring washer (34) to lock the Rear foot tube frame
(2) on the Slide tube frame (3).

- 8 -
STEP 3:
Install the Seat cushion (50) into the Slide tube frame (3).
STEP 4:
1. Use Bolt (26), Spring washers (34), and Flat washers (36) to lock the Slide tube frame (3)
on the Main frame (1).
2. Screw the Cushion pad (55) into the Main frame (1).

- 9 -
STEP 5:
Lock the Foot pedal (42) to the Foot pedal tube assembly (4) with Bolt (23), Flat washer (36)
and Lock nut (17).
STEP 6:
Use Bolt (27), Spring washer (34), and Flat washer (36) to lock the Foot pedal tube
assembly (4) to the Main frame (1).

- 10 -
STEP 7:
Insert the Sensor cable A and B into the Computer bracket (5), and then lock the screw (31)
into the Computer (58).
STEP 8:
1. Take out the Computer up cover (58), and then put the Dry battery (59) into the
Computer up cover (58) as shown in C in the figure;
2. Connect the Sensor cable as shown in the figure A and B, to connect the Sensor cable A
with A and B with B;
3. Insert the Computer bracket (5) into the Main frame (1) and fix it with the Screw (28).

- 11 -
PEDAL ADJUSTMENT
MOVING THE MACHINE
According to the size of feet
the pedal strap is adjustable.
The specific tightness
adjustment method is shown
in the left figure. A direction
is tense, B direction is loose.
Frame Movement:
The front foot tube frame have transport
wheel in the front, lift up the rear foot tube
frame, you can move the frame to the
position you want.

- 12 -
RESISTANCE AND FRAME BALANCE
ADJUSTMENT
Resistance Adjustment:
Adjust the resistance knob (47) clockwise to increase the resistance and counter clockwise
to reduce the resistance.
Frame Horizontal Regulation:
If the ground is uneven, the rear foot cover (52) can be adjusted according to the arrow
direction Aor B in the figure to make the frame level.

- 13 -
DISPLAY MANUAL
Button Function:
MODE: press this button to select the function.
----Keep pressing this button for 3 seconds to clear all data, included time,
times, calories burned, total count, distance and scan (all of the above).
Functional Operation:
1. SCAN: press the MODE button into scan state, the computer will automatically scan,
time, times, calories, total number of times, and every scan interval is 6 seconds.
2. TIME: show the time from the computer start to the end.
3. COUNT (Times Count ): show the number of times from the computer start to the end.
4. CALORIE: show the total calories from the computer start to the end.
5. TOTAL COUNT (Total Number of Times):count all times after installing the battery.
If there is without any movement signal, the computer display will close automatically after
4 minutes, and will wake up when there is movement signal or any button is operated.
6. REPS/MIN (Average Speed): show the average number of movements per minute.
Scope Description:
Function
Scanning interval
Every 6 seconds
Time (minutes)
0:00—99:59
Times count
0—9999 times
Calories
0:0—999.9 CAL
Total number of times
0—9999 times
Battery
2 piece of battery
Working temperature
0—40 degree
Storage temperature
-0 degree—+60 degree

- 14 -
STORAGE AND MAINTENANCE
1. Keep the rowing machine in a clean and dry place.
2. Grasp the frame to move the rowing machine. Do not use the seat to move it. The seat
will move and it may hurt your hand and fingers.
3. Remove the battery before storing the machine for a long time.
4. Clean the Seat Rail with an absorbent cloth.
5. Always make sure all the nuts and bolts are properly tightened.
6. Regular inspection is required. Replace any worn or damaged parts immediately.
Warranty and Customer Support
For questions, support, or warranty claims, contact us at the address below that
corresponds with your region. Please include your Amazon order number and product
model number.
Please note, ECHANFIT can only provide after sales service for products purchased
directly from ECHANFIT. If you have purchased from a different seller, please contact them
directly for service or warranty issues.

- 15 -
Model: CRW4106/4106B
XIAMEN CAMELON TECHNOLOGY CO., LTD.
https://www.amazon.com/echanfit | service@camelonfit.com
This manual suits for next models
1
Table of contents
Popular Home Gym manuals by other brands

U.N.O
U.N.O Motive Fitness WR 600 Assembly & user manual

Trojan
Trojan POWER CAGE 400 Care instructions and assembly manual

Sportplus
Sportplus H400 user manual
SMITH SYSTEM
SMITH SYSTEM LS 541N Assembly instructions & owner's manual

MARBO-SPORT
MARBO-SPORT MS-A102 Assembly instruction

Hoist Fitness
Hoist Fitness CF-3252 owner's manual
