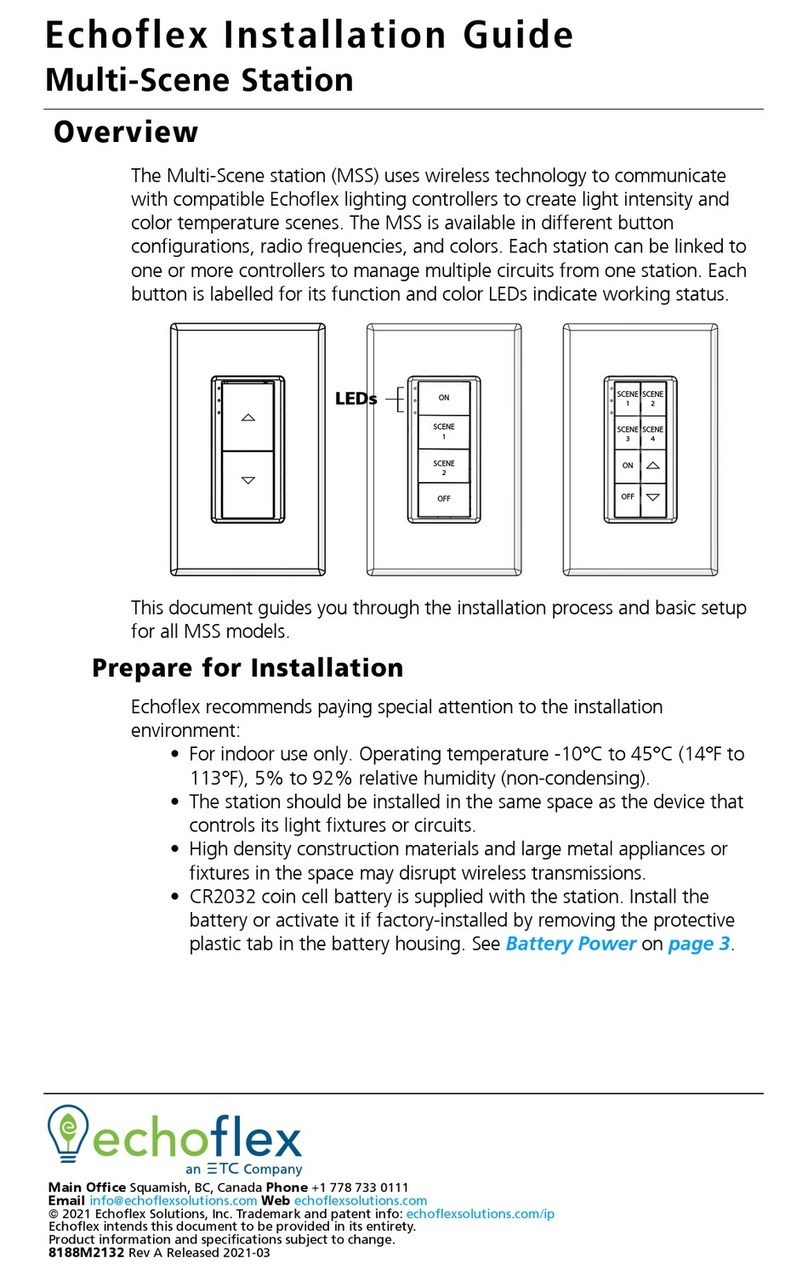
echoflex ER6CD User manual

ER6CD
Install Guide
This guide covers all models of the ER6CD lighng controller. The box contents
includes the controller with lock nut and installaon guide.
Overview
The ER6CD controller is a 600 Wa dimming controller.
The model ER6CD-AU-120 is phase adapve and the model ER6CD-AU-277
provides reverse phase dimming control. They both provide dimming control
for line voltage tungsten lamps, 2-wire uorescent ballasts and line voltage
LED drivers. The ER6CD-AU-120 also controls 120V electronic low-voltage
transformer loads. Neither of these controllers can accommodate magnec, or
step-down transformer loads.
These controllers have a single channel dimming output and uses wireless
technology to monitor any rooms environment, eliminang much of the wiring
normally required for distributed lighng control. This translates into quick
installaons with less disrupon to occupants, allowing facilies to accelerate
retrot schedules and start saving money sooner.
The controller supports several methods of conguraon making it easy for
installers and facility operators to manage these sengs without extra tools
reducing call-backs and installaon expense.

2
The controller automacally adjusts lighng levels from received input from the
following wireless devices:
• ambient light levels monitored by a wireless photo sensor
• occupancy state monitored by a wireless occupancy sensor
• switch acon from a wireless wall switch
• gateway control implemenng scheduled or other events
Controller and Wall Switches
Echoex switches can also be used as dimmer switches – press and hold the ON or OFF
side of a linked switch to modulate the dimming output up or down.
The controller works with the wireless single and dual rocker switches. A switch ON
acon will ramp the dimming output to the last dimmed level set by a switch. If a photo
sensor is linked to the controller as well, the output ramps to full output over 2 seconds.
A quick double-press ON will ramp up to maximum output and accelerate the fade
period to ½ second. A press OFF acon will fade the lights down over 2 seconds. A quick
double-press OFF will accelerate the fade period to ½ second.
Controller and Timed Switches
The controller can be congured so the single and dual rocker switches become med
switches. An ON acon turns the lights ON and a mer is set to count down. Once the
mer expires, the lights fade to OFF.
The me period is congurable and has 5 sengs: no mer (default), 5 minutes, 15
minutes, 30 minutes and 1 hour. Addionally, if the user presses the rocker switch ON
mulple mes ( to a total of 5 presses), the mer interval is added for each ON press.
If ON is pressed while the lights are on and the mer is counng down, an addional
period of me is added to the mer total.
The controller will ramp the light output down then up (ick-warn) 1 minute before the
mer is due to expire to warn users of the pending OFF event.
To congure the me period, refer to the secon on ”Conguring the Controller”.
The controller will turn the lights OFF when there is no moon detected in the room
indicated by a linked moon sensor. If the applicaon requires the lights to remain ON
during vacant periods but at a dimmed level (i.e. warehouse or stairwell applicaons), a
conguraon property accessible using Garibaldi soware can enable this feature.
Occupancy sensors only: When only occupancy sensors are linked to the controller, the
sensor will automate the lights both ON and OFF.
Occupancy sensors with switches: When switches and sensors are linked, the controller
will assume manual-ON, auto-OFF operaon referred to as Vacancy Sensor Mode.
The controller can also be congured to turn the lights ON immediately (Auto-ON) with
moon, see the secon tled “Conguring the Controller”.
Photo Inhibit: This feature requires a linked photo sensor. When Photo Inhibit is enabled,
the Auto-ON feature will be ignored when the natural light level measured by the light
sensor is above the day-lighng set point. The photo inhibit feature will not turn lights
OFF if the lights are ON.

3
• Light level is < day-lighng set point – The lights do turn ON automacally when
you enter the room.
• Light level is > day-lighng set point – The lights do not turn ON automacally
when you enter the room.
• Lights are ON and the light level increases past day-lighng set point – The lights
stay ON.
• Lights are OFF and the light level decreases past day-lighng set point – The lights
will turn ON upon the next moon detected by the occupancy sensor.
The controller will modulate the light intensity from a dimming xture based on the
ambient light level in the room. A wireless photo sensor monitors light levels and must
be linked to the controller to provide the light level in the room.
The daylight control applicaon has several variables:
• Maximum dimming level - the highest level the dimming output will reach.
• Minimum dimming level - the lowest level the dimming output will reach.
• Lighng set point - the daylight control set point serves two purposes, closed loop
control and open loop control.
- When the controller is congured for daylight harvesng and set
to closed loop control, the set point becomes the absolute value in percent of light the
controller will try to aain.
- When the controller is congured for daylight harvesng and set to
open loop control, the set point is where the dimming output begins to dim the xture as
the natural light increases.

4
Seng the set point is covered later in this document under “Conguring the Controller”.
The daylight harvesng applicaon can override the Auto-ON feature of occupancy
sensors if the light level is sucient and calls for the lights to be o.
The daylight harvesng applicaon can be overridden by a manual wall switch when the
light is dimmed to o by clicking the switch on. If the light level remains above the Light-
OFF-Set point, the controller will turn the light o again aer 250 seconds.
The daylight harvesng applicaon does not aect the operaon of the wall switch or
moon sensor when the light is on. If the light is on, either the switch or moon sensor
can override the light o.
See the secon on Occupancy Based Lighng Applicaon - Photo Inhibit for alternave
funconality.
The “F series” controllers includes patent pending technology that works with all
Echoex sensors equipped with the range conrmaon feature to provide visual
feedback of a linked sensors signal strength for opmal sensor placement.
To evaluate the radio signal strength, the sensor must be also support the test and be
linked to the controller. Check the sensors documentaon to nd out if it supports radio
range conrmaon tesng. Do not have any repeaters in the controllers vicinity enabled
during the test.
The range conrmaon test is invoked at the sensor and sends unique telegrams to the
controller. The controller will evaluate the signal strength from the sensor and send back
a unique telegram containing the strongest signal value received. This value is displayed
at the sensor using color LEDs.
Consult the sensor installaon guide for more details.
For indoor use only.
• United States only: 32°F to 122°F (0-50 °C)operang temperatures in 5-95% non-
condensing humidity.
• Canada only: 0°C to 40°C (32-104 °F) operang temperatures in 5-95% non-
condensing humidity.
Two models are available including:
• 120 VAC, +/- 10% at 50/60 Hz,maximum load 600 Was (5A)
• 277 VAC, +/- 10% at 50/60 Hz, maximum load 600 Was (2.17A)

5
Note: The Dimmer has an idle draw of 4 Was
Load Types (all voltages)
• Tungsten lamps
• 2-wire Fluorescent ballasts
• Line voltage LED drivers
Load Types (ER6CD-AU-120 model ONLY)
• 120V Electronic low voltage transformer
The controller is intended for use with Echoex wireless sensors and switches.
Consideraon should be made for locang the controller based on the construcon
materials and furniture that may disrupt transmissions. Fire doors, elevator shas,
stairwells, storage areas and any large metal objects can create radio shadows and
disrupt wireless transmissions.
It is recommended that switches and sensors be placed within 75 feet (22m) of the
dimmer for opmal performance.
Line of sight 80 feet (24m) corridors
Line of sight 330 feet (100m) open halls
Plasterboard 80 feet (24m) through 5 walls
Brick 33 feet (10m) through 1 wall
Concrete 33 feet (10m) through 1 wall
Ferro Concrete 33 feet (10m)
Ceiling Not recommended
Wood/Plaster/Glass 0-10%
Brick/MDF 5-35%
Metal 90-100%

6
The controller is mounted directly to an electrical juncon box or panel at the electrical
lighng load or before the load in the circuit.
1. Locate the circuit breaker panel and turn o the power to the lighng circuit.
2. Remove the face plates and other hardware from the juncon box, gaining access
to the high voltage wiring.
3. The dimmer mounts to the exterior of the juncon box or panel with the 1/2”
(13mm) threaded nipple.
The dimmer is supplied with a wire harness that is specic to the input voltage, either
120VAC or 277VAC.
a. Connect the green/yellow striped wire to the ground wire from the breaker
panel and the ground wire from the lighng load.
b. Connect the white wire to the incoming neutral wire from the breaker panel and
the neutral wire of the lighng load.
c. Connect the incoming hot wire (black for 120VAC or brown wire for 277VAC) to
the line input feed wire (hot) from the breaker panel.
d. Connect the red output wire to the lighng load.
Wiring Diagram
Load
White
Neutral
Red
ER6CD
Orange-Antenna
Dimmer
Green/
Yellow
Black 120V
Brown 277V
or

7
1. Restore power to the circuit. The dimmer will turn on to full output.
2. Test the circuit by linking a wireless switch (If factory pre-commissioning has been
ordered a switch may be linked before delivery). To link a switch:
a. Within radio range of the controller, press the switch paddle up (On) three mes
consecuvely.
b. Press the paddle down (O) three mes consecuvely.
c. Press the paddle up again, three mes consecuvely.
3. Test the controller response.
a. Press the switch down (O) once. The controlled lighng should respond by
dimming o.
b. Press the switch up (On) once. The controlled lighng should respond by
dimming on.
4. Press and hold the paddle down or up switch to manually dim the circuit down or
up.
The LEARN buon is used to link switches or sensors to the controller.
1. Press the buon marked LEARN for a half second. In link mode the LEARN LED will
stay ON and the POWER LED will toggle every 2 second.
2. Using the switch that will be linked to the controller, press the wall switch ON three
mes. If linking a sensor, press the sensors TEACH or LINK buon, refer to the sensor
documentaon. The POWER LED will remain lit for 4 seconds while it links the new
device. It will resume toggling allowing you to link another device up to a total of 20
devices. Linking a switch or sensor that is already linked to a controller, will
remove or unlink it from the controller.
3. To exit link mode, press the LEARN buon on the controller again for a half second.
Link mode will also me out aer no acvity in 30 seconds.
The CLEAR buon erases all devices linked to the controller and resets the controller to
factory default sengs.
1. Press the CLEAR buon (approximately 5 seconds) unl the green LEARN LED blinks
on.
The table below describes the LED acvity & associated mode of the controller.
LINK mode ON Toggle 2 sec. Toggle
Storing ID ON ON 4 sec. ON 4 seconds
Clearing ID ON OFF 4 sec. OFF 4 seconds
CLEAR mode ON 1 sec. N/A ON 1 sec.

8
number of long blinks indicates the linked device type
followed by short blinks counng the number of devices linked.
Factory Default OFF ON Solid
with linked switch(es) OFF followed by short blinks
counng switches repeatedly
with linked occupancy sensor(s) OFF followed by short blinks
counng sensors repeatedly
with linked photo sensor(s) OFF followed by short blinks
counng sensors repeatedly
with central command OFF followed by short blinks
counng sensors repeatedly
The dimming mode for the ER6CD-AU-120 Phase Adapve Dimmer is detected
automacally by default. The dimming mode for the ER6CD-AU-277 is reverse phase by
default. At the device, you can change the dimming mode manually, entering forward
phase, reverse phase, or automac phase dimming.
1. Simultaneously, press and hold the “Learn” and “Clear” buons for ve seconds,
then release. The CLR/LRN and Status LEDs will begin to ash.
The LEDS indicate which dimming mode is acve.
• Both Green: Forward Phase dimming
• Both Red: Reverse Phase dimming
• If the dimmer is in Automac dimming mode, the Status LED will ash amber, and
the CLR/LRN LED will indicate the current mode with specic LED colors. (red is
Reverse Phase dimming mode and green is Forward Phase dimming mode).
2. To change the current mode, press and hold the “Learn” and “Clear” buons unl
the LEDs change to the desired dimming mode according to the LEDs state.
There are a few methods of conguring parameters in the controller. Simple Tap is a quick
method of changing a parameters seng, one at a me. For accessing the complete set
of conguraon parameters, use the Smart Click process on the following pages.
There are three methods of conguring parameters in the controller.
1. Simple Tap
2. Smart Click
3. Garibaldi Commissioning Soware (not covered in this guide)
Simple Tap uses the switches and sensors that are linked to the controller to set the
associated conguraon parameters. You must be able to access the sensors teach
buon and switches to perform the Simple Tap process.
If the sensor is linked to mulple controllers and you do not want to make changes to all,
turn the controllers relay o (lights o) to ignore the Simple Tap changes.
Simple Tap allows you to:
• Enable or disable the moon sensor Auto-ON feature

9
• Set the moon sensor Auto-OFF mer
• Select Daylight Harvesng or Photo Inhibit mode
• Set the Light ON/OFF dimming set points for closed loop or open loop
1. With the light on, tap the occupancy sensors teach buon followed by three
quick consecuve clicks of a linked wall switch ON.
2. To enable Auto-ON, click once more ON; to disable click OFF. The light will blink
dimming down then up once to conrm the change.
1. With the light on, tap the occupancy sensors teach buon to reset the mer
period. There are 6 possible sengs and the number of taps on the buon
counts the number according to the me period, see the table below. Level 1
(me out 0 seconds - demo mode) is set by tapping 3 mes, consecuve taps
up to a maximum of 8 taps is Level 6 (me out 25 minutes). The light will blink,
dimming down then up once on the third tap and then begin counng the level
set aer 3 seconds.
Taps
3 taps* 0 sec. 1 blink
4 taps 5 min. 2 blinks
5 taps 10 min. 3 blinks
6 taps 15 min. 4 blinks
7 taps 20 min. 5 blinks
8 taps 25 min. 6 blinks
* for demonstraon purposes only
2. Aer the controller has completed responding to the change, press the sensors
teach buon once before exing.
You can select daylight harvesng mode (default) or Photo Inhibit mode. For more
informaon on these operang modes, see the secons at the beginning of this guide
tled Occupancy Based Lighng Applicaons – Photo Inhibit and Daylight Harvesng
Applicaon.
A light sensor and wall switch must be linked to the controller before proceeding.
1. Press the photo sensors Teach buon once followed by clicking the switch ON
three mes within 5 seconds.
2. Either:
• click the switch once more ON to acvate Photo Inhibit operang mode.
• or click the switch once OFF to acvate Daylight harvesng operang mode.
The set point values are a percentage of the full range of the linked photo sensor. The
light will blink down then up to conrm the change.
The controller will modulate the dimming output based on the measured light level from
the light sensor.
The lighng set point is used to adjust how the dimming output responds to the ambient
light levels.

10
There are two methods of seng the set-point.
You can use the light sensor to funcon as a closed loop sensor. When set as a closed
loop sensor, the controller will dim the lights unl the light level recorded at the sensor
meets the set point value. For more informaon on this operang mode, see the secon
at the beginning of this guide tled Daylight Harvesng Applicaon. A light sensor must
be linked to the controller before proceeding.
1. With the light on, adjust the light level from the xture using the switch unl it
matches the desired light level.
2. Tap the light sensors teach buon 3 mes to set the daylight harvesng
parameters to a closed loop funcon. Move away from the sensor so your
shadow does not aect the sensor reading. The light will blink once to
acknowledge the change.
The lighng set-point can be set to an absolute value useful in open-loop sensor
applicaons. The absolute value selected becomes the maximum dimming set-point.
1. With the light on, tap the light sensors teach buon 4 mes to set the set point
to 20%.
2. Tap the buon addional mes incremenng the set point value by 20%. Five
(5) taps would equal 40%, seven (7) taps would be 80%.
3. The light will blink once at three taps and then begin blinking according to the
level set to conrm the change aer 3 seconds.
Taps
4 taps 20% 100% 2 blinks
5 taps 40% 100% 3 blinks
6 taps 60% 100% 4 blinks
7 taps 80% 100% 5 blinks
Conguring the controller requires that at least one wireless wall switch is linked to the
controller.
The Smart Click menu includes these parameters:
Level 1 Learn Mode
Level 2 Clear Switch/Clear All
Level 3 Repeater Funcon
Level 4 Status Telegram Funcon
Level 5 Time out Periods
Level 6 Auto-ON with Moon Funcon
Level 7 Minimum Dimming Output Enable
Level 8 Lighng Set-point
Level 9 Maximum Dimming Output
Level 10 Minimum Dimming Output

11
1. Press the Clear buon unl the green Learn led blinks ON, approximately 6
seconds.
2. With the controller cleared or in the factory default state, click the wireless switch
ON three mes, OFF three mes and ON three mes quickly within 5 seconds.
Using this method of linking a switch will only work on the rst wireless switch. Use the
learn buon or Smart Click to link addional switches.
It is important to have feedback (aached light) from the controller during conguraon.
The switch used to congure a controller using Smart Click should only be linked to the
controller you’re conguring. Add an addional switch if necessary.
1. Using a linked switch (see above), turn the light OFF.
2. Click and hold the switch OFF unl the light turns on, approximately 10 seconds.
3. Press ON unl the light blinks, about 5 seconds. The light will repeatedly blink once
every 5 seconds.
1. Enter Smart Click conguraon mode and with the light blinking once, press
ON for 3 seconds. The light will begin dimming down + up every second.
2. Add addional wireless switches by clicking ON 3 mes quickly. Add sensors
by pressing the TEACH buon on the sensor.
3. To connue with conguraon, press the switch ON for 3 seconds, the light
will resume dimming once. To exit Smart Click press OFF for 5 seconds.
1. Enter Smart Click conguraon mode and click the switch ON or OFF unl the light
is dimming down + up twice. Press ON for three seconds.
2. Click the switch ON 5 mes to clear the switch, click ON 5 mes again to clear ALL
switches and sensors and reset the controller to defaults.
3. Press OFF for 5 seconds to complete clearing.
repeats any telegram within range. Telegrams can be
repeated once or twice (single or dual hop). The repeater funcon can be enabled/
disabled by accessing the controller buons.
1. Press the Clear buon and hold, then quickly press the Learn buon; once to
disable, twice to enable single hop and three mes to enable dual hop repeang.
2. The learn LED will blink the corresponding value of the buon press.
3. Release the Clear buon.
Use Smart Click to enable repeang mode. Enter and click
the switch ON or OFF unl the light is dimming down + up three mes.
1. Press ON for 3 seconds. If the repeater funcon is enabled the light will turn ON, if
disabled the light will be OFF.
2. Click ON to acvate this funcon, OFF to deacvate.
3. To connue with conguraon, press ON for 3 seconds, the light will resume
dimming down + up three mes. To exit Smart Click press OFF for 5 seconds.
the controller can broadcast a status telegram per EEP:
A5-11-01. The telegram will broadcast every 100 seconds. Refer to the table on page
15 for a detailed explanaon of the telegram. If the controller has a wired occupancy
sensor connected to the low voltage input, this sensor status can be shared with other
controllers. The controller must be rst linked with the receiving controllers.
Enabling the status telegram acvates the shared occupancy feature and also sends the
learn command to the other controllers for linking. The status telegram can be enabled/

12
disabled by accessing the controller buons. Press the Learn buon and hold, press the
Clear buon once to disable, twice to enable (this sends the learn telegram). Release
the Learn buon. The learn LED will blink once when disabling, twice when enabling this
telegram.
If there is no access to the controllers buons, follow these Smart Click steps.
1. Enter Smart Click conguraon mode and click the switch ON or OFF unl the light
is dimming down + up four mes
2. Press ON for 3 seconds. If the status telegram funcon is enabled the light will turn
ON, if disabled the light will be OFF
3. Click ON to acvate this funcon, OFF to deacvate
4. To connue with conguraon, press ON for 3 seconds, the light will resume
dimming down + up four mes.
5. To exit Smart Click press OFF for 5 seconds
- the controller can be congured to wait a period of me aer an ON
event from a wireless switch or occupancy sensor before turning the load OFF (auto o).
1. Enter Smart Click conguraon mode and click the switch ON or OFF unl the light
is dimming down + up ve mes.
2. Press ON for 3 seconds. The light will turn OFF and then ON per the table sengs
below.
3. Using the linked switch, click ON to increase the meout or OFF to decrease the
meout, in 5 minute increments.
4. To connue with conguraon, press ON for 3 seconds, the light will resume
dimming down + up ve mes. To exit Smart Click press OFF for 5 seconds.
Timed Switch
OFF no auto-o 0 sec. (demo)
1 Blink 5 min. 5 min.
2 Blinks 15 min. 10 min.
3 Blinks 30 min. 15 min.
4 Blinks 60 min. 20 min.
5 Blinks N/A 25 min.
use with an moon sensor to turn lights ON automacally
when moon is detected. If a moon sensor is used with no switch then Auto-ON is
enabled automacally. If a switch is linked later, Auto-ON is disabled.
1. Enter Smart Click conguraon mode and click the switch ON or OFF unl the light
is dimming down + up six mes.
2. Press ON for 3 seconds. If the auto-on funcon is enabled the light will turn ON, if
disabled the light will be OFF.
3. Click ON to acvate this funcon, OFF to deacvate.
4. To connue with conguraon, press ON for 3 seconds, the light will resume
dimming down + up six mes.
5. To exit Smart Click press OFF for 5 seconds.
Enables or disables the minimum dimming
output. Enable this feature when the light xtures output ickers at low dimming levels.
Use this enable ag together with the Minimum Dimming Output level to set the lowest
level the output will reach when dimming.
1. Enter Smart Click conguraon mode and click the switch ON or OFF unl the light
is dimming down + up seven mes.

13
2. Press ON for 3 seconds. If the dimming output is enabled the light will turn ON, if
disabled the light will be OFF
3. Click ON to acvate this funcon, OFF to deacvate.
4. To connue with conguraon, press ON for 3 seconds, the light will resume
dimming down + up seven mes. To exit Smart Click press OFF for 5 seconds.
The set point is a single value that can aect how the
controller manages the light output depending on if the controller is setup for daylight
harvesng or photo inhibit applicaons.
When set for photo inhibit operaon, the Auto-ON feature associated with a linked
occupancy sensor will be ignored when the natural light level measured by the light
sensor is above the lighng set point. The photo inhibit feature will not turn lights OFF if
the lights are ON.
• Light level is < day-lighng set point – The lights do turn ON automacally when
you enter the room.
• Light level is > day-lighng set point – The lights do not turn ON automacally
when you enter the room.
• Lights are ON and the light level increases past day-lighng set point – The lights
stay ON.
• Lights are OFF and the light level decreases past day-lighng set point – The lights
will turn ON upon the next moon detected by the occupancy sensor.
When set for daylight harvesng operaon, the set-point is used with a photo sensor
(light sensor) and will automacally turn lights on and o or modulate dimming xtures
depending on ambient light levels.
You can use the light sensor to funcon as a closed loop sensor. When set as a closed
loop sensor, the controller will dim the lights unl the light level recorded at the sensor
meets the set-point value. For more informaon on this operang mode, see the secon
at the beginning of this guide tled Daylight Harvesng Applicaon.
If the light from the xture does not impact the light reading at the sensor then it is
an open loop applicaon. When the dimming output is enabled, the value selected
becomes the maximum dimming set point. With the dimming output disabled, the value
becomes the Light-ON set point.
Control Response
In the diagram below, the thick line indicates the dimming output. The output will
begin lowering as the natural light level increases (thin line). The point where the light
output begins dimming down is the lighng set point (default 60% sensor FSR). The
minimum dimming level is set to 100% sensor FSR.
• Enter Smart Click conguraon mode and click the switch ON or OFF unl the light is
dimming down + up eight mes.

14
• Press ON for 3 seconds. Default seng is 60% of the light sensors full scale range. There
are 4 steps from 20% to 80%. The light will blink the step count. (see table below). Click
on to increase the set-point, o to decrease the set-point.
Taps
4 taps 20% 100% 2 blinks
5 taps 40% 100% 3 blinks
6 taps 60% 100% 4 blinks
7 taps 80% 100% 5 blinks
3. To connue with conguraon, press ON for 3 seconds, the light will resume
dimming down + up eight mes. To exit Smart Click press OFF for 5 seconds.
- sets the maximum level of the dimming
output.
1. Enter Smart Click conguraon mode and click the switch ON or OFF unl the light
is dimming down + up nine mes.
2. Press ON for 3 seconds. Default seng is 100%. Adjust the maximum light level to
the brightness level desired by clicking ON to increase and OFF to decrease in 2%
increments.
3. To connue with conguraon, press ON for 3 seconds, the light will resume
dimming down + up nine mes.
4. To exit Smart Click press OFF for 5 seconds.
sets the minimum level of the dimming
output.
1. Enter Smart Click conguraon mode and click the switch ON or OFF unl the light
is dimming down + up ten mes.
2. Press ON for 3 seconds. Default seng is 10%. Adjust the min. light level to the
brightness level desired by clicking ON to increase and OFF to decrease in 2%
increments.
3. To connue with conguraon, press ON for 3 seconds, the light will resume
dimming down + up ten mes.
4. To exit Smart Click press OFF for 5 seconds.

15
Repeater disabled
Status disabled
Minimum Dimming Output enabled
Moon sensor Time-out 15 minutes
Switch Time-out no me out
Auto-ON Time-out enabled with no linked switch, disabled with
linked rocker switch
Light-ON-Set point 60% of sensor FSR
Light-OFF-Set point 100% of Light-ON Set point
Maximum Dimming Level 100%
Minimum Dimming Level 10%
Grace Timer 30 seconds

16
CEC Title 24 compliant
ETL Listed Component
Conforms to UL Standard 508
Cered to
CAN/CSA Std C22.2 No.14
UL 2043 Plenum rated
FCC Part 15.231
Contains FCC ID: SZV-STM300U
The enclosed device complies with Part 15 of the FCC Rules.
Operaon is subject to the following two condions:
(I.) this device may not cause harmful interference and
(ii.) this device must accept any interference received, including interference
that may cause undesired operaon.
IC RSS-210
Contains IC: 5713A-STM300U
echoflex
Powered by ETC
#1, 38924 Queens Way | Squamish | BC | Canada | V8B 0K8
Toll Free: 888-324-6359 | Phone: (778) 733-0111 | Fax: (604) 815-0078
Email: info@echoexsoluons.com | www.echoexsoluons.com
Copyright 2014-2016 Echoex Soluons, Inc. | Specicaons subject to change without noce.
Document #8DC-5567 | Revision 2.2| Document 7189M5003 | Rev E
Table of contents
Other echoflex Home Automation manuals
