Echomaster EFS-CA1200 User manual

INSTALLATION MANUAL
EFS-CA1200

2 3
tel - 866-931-8021
tel - 866-931-8021
Thank you for purchasing the
EchoMaster
EFS-CA1200
WHAT’S INCLUDED:
FEATURES
With EFS-CA1200, your mobile assets are in good hands. This durable IP66
rated asset tracker will add GPS tracking and asset manager to eet equipment,
passenger vehicles, off-road vehicles and more. Please ensure you read and
understand all aspects of the manual before installing or using the EchoMaster
products.
• EFS-CA1200 Module
• Manual
• Weather-proof design 1P66 rated
• Internal rechargeable battery
• Driver behavior detection
• High voltage supported
• Congurable I/O In and outputs
• Built-in Accelerometer
• Movement notication
• OTAP-Wireless rmware updates
REQUIRED TOOLS
• Screwdriver set
• Drill and drill bits
• Wire cutters
• Wire strippers
• Terminal crimper
• Digital Multimeter
• Electrical Tape
• Soldering iron
PRIOR TO INSTALLATION
IMPORTANT: Prior to installation,
please note the ESN electronic serial
number located on the device, you will
need this for connecting to your Asset
Monitoring Application. Please refer to
the activation card included to activate
your device.

4 5
tel - 866-931-8021
tel - 866-931-8021
INSTALLATION GUIDE
INSTALLATION PREPARATION INSTRUCTION
INSTALLATION
STEP 1:
STEP 2:
EFS-CA1200
Main Power Installation
Connect the RED wire to (+) 12 Volt constant power or directly to the asset’s
battery.
Ignition Wire
Connect the White ignition wire to a power source that has power when the
assets are turned on and running.
If the asset you are installing on does not have an ignition source available,
you can connect the white ignition wire directly to the vehicle’s battery.
*NOTE: the asset will always report in the application as it is on with no
ignition state updates.
It is important to note that the EFS-CA1200 battery in the device should
be charged before the installation, you can connect the Red power wire
and the Black ground wire to a 12-volt battery for 4 hours or make sure the
Asset you are working on has a fully charged battery.
Chassis Ground
Connect the BLACK (-) Input wire to a solid chassis ground uninhibited
by paint or rust, you mustn’t use any oating grounds from the vehicle’s
electrical system. Always connect the ground wire directly to the assets
chassis and secure the connection with a factory bolt or aftermarket self-
tapping screw..

6 7
tel - 866-931-8021
tel - 866-931-8021
TESTING THE EFS-CA1200
STEP 3:
After installation move the asset outside and leave it running for ve minutes
allowing time for the GPS receiver to receive a good signal from the GPS
satellites.
CONFIRMING THE LED LIGHTS
Upon initial power-up of the EFS-CA1200, the LEDs on the top of the device
will start ashing, Identifying the Mode status of the device.
Note: The vehicle must be outside with a non-obstructed view of the sky for
its rst location to be set in the application.
Orange LED Status GSM/GPRS
Cellular Communications
Green LED Status GPS
Communications
Blinking: Tracker on, searching for
wireless signal
Solid - 2-way communication link with
the communication server estab-
lished
Solid- GPS lock established
ADD THE ASSET TO YOUR WEBSITE APPLICATION
STEP 4:
1. Login to emeetmonitor.com
2. Click the settings
gear in the upper right
corner
3. Select Vehicles from
the left menu
4. Select Add Vehicle
from the upper right
corner

8 9
tel - 866-931-8021
tel - 866-931-8021
4. Select Add Vehicle
from the upper right
corner
5. Fill out the vehicle’s
information and save
6. Select Devices from
the left menu
7. In the list of
devices, nd the
device you just
installed. Click the
“>” symbol on the
right side to open that
device, and assign it
to the vehicle you just
added.
8. Once the device
has been assigned,
click back to the map
view to conrm that
the location and status
is correct for the
vehicle that was just
set up.

10 11
tel - 866-931-8021
tel - 866-931-8021
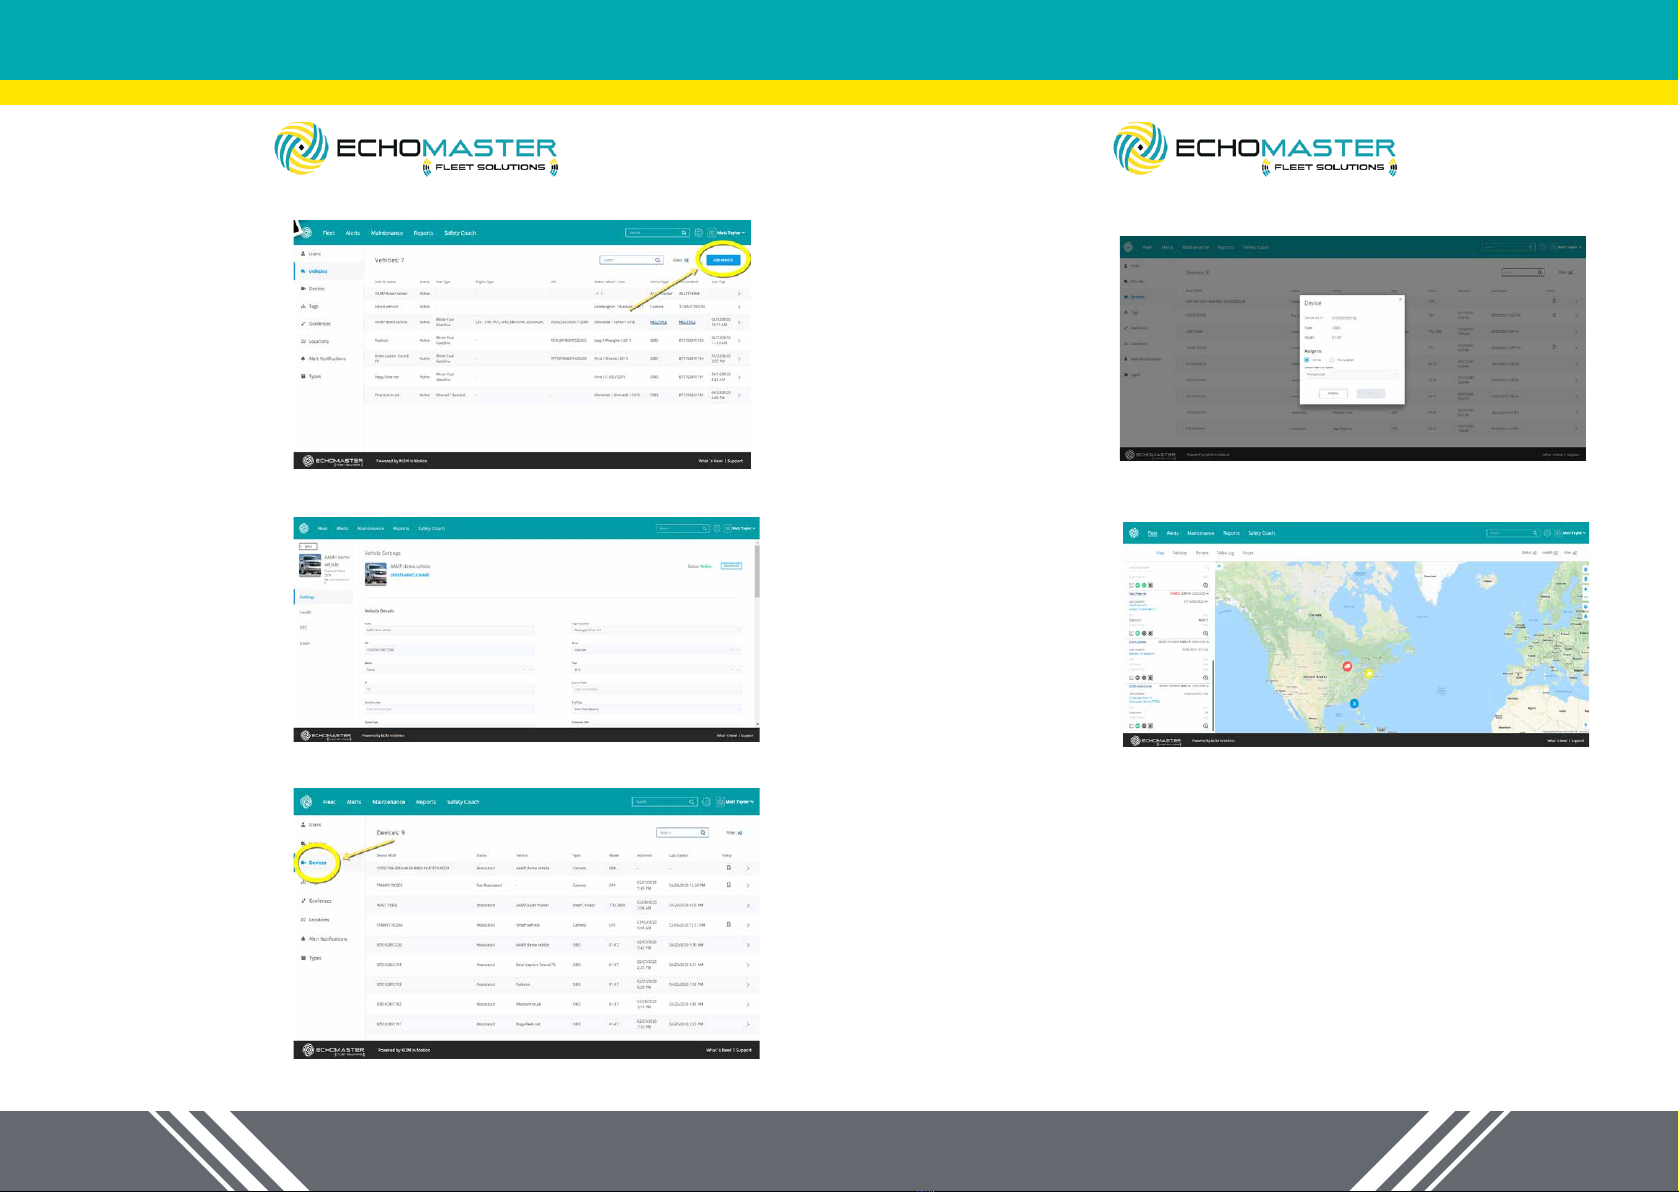
OPERATING VOLTAGE 12V to 24 v
BATTERY 5200mah Lithium-ion
CURRENT CAPACITY 1mA sleep mode,75mA
Active
SIZE 2.125 in x 4.33 in x 1.59 in
BAND OPERATION SMS, UDP packet data
HOST PROTOCOL AT commands, UDP, TCP
CERTIFICATIONS FCC, CE, IC, PTCRB,
ROHS
SPECIFICATION CHART
Issue Cause
Unit Does Not
Power-up
Power is not connected to the unit. With a Digital Volt-
meter, measure the voltage at the input to the unit. A
positive voltage should be measured on the + terminal
of the unit when measuring between the + terminal and
the - terminal or chassis ground. This voltage should
also measure 12 VDC. Correct the wiring to assure the
correct polarity and the correct voltage level. Check
fuse. Bad Ground connection. Make sure the ground is
connected directly to metal with no paint or residue. Use
a Digital Multimeter to test continuity to ground to ensure
a good connection.
Unit Does Not
Find Cellular
Service
The unit is not receiving the local cellular system. The
main cause of this is poor signal strength due to shield-
ing or coverage. Make sure the GSM (Orange) light is
solid, move the unit outside the building and or outside
of the vehicle if necessary and re-apply power to the
unit. Move the vehicle to acquire a better signal if neces-
sary. Contact tech support if the problem persists.
Unit Does Not
Receive a GPS
Signal
The GPS receiver is unable to lock into the satellites or
receive a signal. Make sure GPS (Green) light is solid
if not, make sure that the unit’s label is facing skyward
and that there is no metal between it and the sky in-
cluding but not limited to the roof of the vehicle and any
dash bracing. If it is, then move the vehicle outside of
or away from any building/garage to allow the internal
GPS antenna in the unit to have a clear view of the sky.
You may need to power the unit outside of the vehicle as
some vehicles may have metallic or leaded windshields.
Contact tech support if the problem persists.
Table of contents