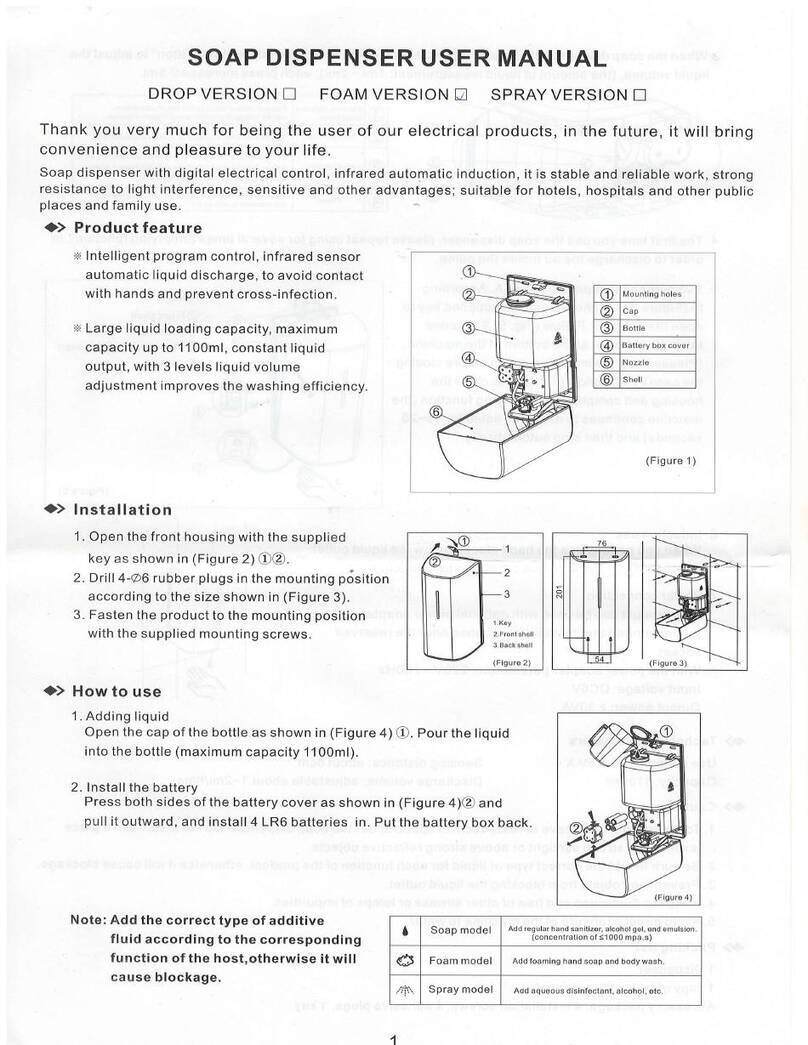
ecoSPIRITS SmartPour 1.1S User manual

SmartPour
1.1S
Operating Guide

Page 1of 12
SmartPour 1.1S Operating Guide
REV 01
1. SmartPour Introduction....................................................................................................................................................................... 2
2. SmartPour Accessories.........................................................................................................................................................................3
3. SmartPour Display Screen & Keypad...........................................................................................................................................3
4. SmartPour Specifications & Features ...........................................................................................................................................5
5. Registering Your SmartPour .............................................................................................................................................................5
6. Cleaning Your SmartPour...................................................................................................................................................................6
7. Using Your SmartPour .......................................................................................................................................................................... 7
8. Appendix - SmartPour Calibration ................................................................................................................................................8
8.1. SmartPour Calibration - Items Required ....................................................................................................................................9
8.2. SmartPour Calibration - Calibrate Button 3............................................................................................................................10
8.3. SmartPour Calibration - Calibrate Button 5............................................................................................................................10
9. Release History.......................................................................................................................................................................................12

Page 2of 12
1. SmartPour Introduction
Your SmartPour 1.1S is an intelligent spirits management system that pairs with the award-winning ecoTOTE™
and makes sustainable reuse of branded spirits bottles possible for the first time. Wi-Fi-enabled and powered by
our cloud-based CircularONE™ technology, each SmartPour 1.1S offers hygienic transfers of spirits to glass
bottles, cocktail shakers and serving vessels.
This purpose of this Operating Guide is to provide you with the necessary steps and instructions to operate your
SmartPour 1.1S safely and sanitarily.
This Operating Guide covers the key steps involved in registering, cleaning, and using of the SmartPour 1.1S.

Page 3of 12
2. SmartPour Accessories
Please ensure that the following items are included in with your SmartPour 1.1S. Please store your unit and its
accessories in a clean, dry and accessible location between uses.
1 x SmartPour 1.1S
1 x Soft Inlet Hose (selected units only)
2 x Hard Inlet Tube
1 x Stainless Steel Dispense Nozzle
1 x USB-C Charging Cable
ecoSPIRITS Mobile Application
*
available soon
3. SmartPour Display Screen & Keypad

Page 4of 12
Your SmartPour 1.1S features a back-lit LCD Display Screen and a touch-sensitive User Keypad to allow the user
to conveniently operate all key functions.
SmartPour Screen & Keypad
Important Note
The SmartPour 1.1S is available in three regional versions (Americas, EMEA and Asia Pacific) with pre-set volumes
for each region. Designated dispense volume buttons will vary for each region. The APAC region keypad is shown
here.
Remaining ecoTOTE
Volume
Pouring
Volume
Wi-Fi Indicator
Battery Indicator
Charging
Indicator
Cleaning Mode
Indicator
Designated Dispense Volume Buttons 1- 5
Power
Button
Cleaning &
Continuous
Pour
Button

Page 5of 12
4. SmartPour Specifications & Features
Your SmartPour 1.1S has the following specifications:
Dimensions: 197mm x 197mm x 83mm
Weight: 615 gm
Rated Voltage:7.4V
Rated Power: 6W
Battery Capacity: 2600mAH
Dispense Accuracy: Within ± 2%
CE-EMC & RoHS Certified
Your SmartPour 1.1S has the following intelligent technology features:
ecoTOTETM 3.0S Verification Enabled
Wi-Fi Enabled
CircularONETM Enabled
Note that there are 3 revisions (V1, V2 and V3) of SmartPour with slight difference in operation method. The
difference in operation will be noted in the instructions. This is not to be confused with the 3 regional
versions.
5. Registering Your SmartPour
Prior to using your SmartPour 1.1S for the first time, you must register your unit with ecoSPIRITS’ CircularONE
software in order to access the intelligent technology features. These next steps require the use of the
ecoSPIRITS Mobile Application. The application is available soon on Google Play.
Ensure that the SmartPour 1.1S is fully charged before the registration steps. To charge, plug your SmartPour 1.1S
into wall power using the USB-C Charging Cable provided.
Note:Ensure that a 2.4 GHz Wi-Fi Network is available before proceeding with the next steps.
Step 1 - If your SmartPour 1.1S is already powered on, turn off the device.
Step 2 - With the charging cable disconnected, press and hold the on the User Keypad for 5 seconds until a
beep is heard. This places your SmartPour 1.1S into Hotspot pairing mode.
Step 3 - Connect your mobile phone to your SmartPour 1.1S Hotspot:
Enter your phone's WiFi/WLAN settings

Page 6of 12
Connect to either of the following hotspot networks:
•SmartLife-XXXX
•SL-SmartPour-XXXX
Go back to the ecoSPIRITS App
Step 4 - Input your WiFI SSID and password into the fields on the ecoSPIRITS Mobile Application
Step 5 - Click “Register Device”
When you have successfully connected to WiFi, the will illuminate solid.
Note: If the registration process fails, repeat the whole registration process again from Step 1.
6. Cleaning Your SmartPour
Your SmartPour 1.1S should be cleaned before using it for the first time and then each time you switch between
spirits or after any extended period of non-use. To clean your SmartPour 1.1S, follow these steps.
Step 1 –Dispense Nozzle and Inlet Tube or Hose Cleaning
Wash the Dispense Nozzle and the PP Inlet Tube or Silicone Inlet Hose inside and out in clean, running water.
Shake off excess water before connecting the nozzle and the tube or hose to your SmartPour 1.1S via push-fit.
Step 2 - Cleaning Container Loading
Fill an empty clean container with at least two litres of clean hot water (40-60°C). Lower your SmartPour 1.1S over
the filled cleaning container, visually ensuring the inlet tube or hose is properly submerged under the water line.
Step 3 - Cleaning Cycle
Place an empty container under the Dispense Nozzle.

Page 7of 12
Power on your SmartPour 1.1S by pressing on the User Keypad. Press and hold the for five seconds. The
continuous flow dispense will commence automatically. Allow the flow to continue until the ecoTOTE is
completely empty.
Press to stop the dispense. Your SmartPour 1.1S has now been cleaned and is ready for use.
7. Using Your SmartPour
To use your SmartPour 1.1S, follow these steps.
Step 1 - SmartPour Power On
Power on your SmartPour 1.1S by pressing on the User Keypad. Check your unit is fully charged. Ensure the
PP Inlet Tube or Silicone Inlet Hose is properly connected. Inspect your SmartPour 1.1S to ensure it is clean and
ready for use.
Step 2 - ecoTOTE Loading
Ensure the ecoTOTE you wish to dispense is filled, sealed and undamaged. Cut the ecoTOTE tamper evident seal
using scissors. Unscrew the ecoTOTE cap and store in a clean area. Lower your SmartPour 1.1S over the ecoTOTE,
visually ensuring the Inlet Tube or Hose is properly inserted into the ecoTOTE glass vessel.
Step 3 - SmartPour Priming
Your SmartPour 1.1S will emit an audible tone confirming successful loading of the ecoTOTE. The volume
remaining will be displayed on the Display Screen. Place an empty spirit bottle under the Dispense Nozzle.
For V1: Touch and hold on the User Keypad to prime your SmartPour 1.1S with spirit. Discard any liquid that is
dispensed. It is now primed and ready for use.
For V2 and V3: Double tap on the User Keypad to prime your SmartPour 1.1S with spirit. Discard any liquid
that is dispensed. It is now primed and ready for use.
Step 4 Dispense
Ensure the SmartPour 1.1S remains powered on. Place a spirit bottle, cocktail shaker or drinks glass under the
Dispense Nozzle, ensuring the vessel is close enough to the nozzle to avoid splashing.
For V1: Press and hold the desired partial volume button on the User Keypad. Your chosen volume will dispense
automatically and be shown on the Display Screen.
For V2 and V3: Double tap the desired partial volume button on the User Keypad. Your chosen volume will
dispense automatically and be shown on the Display Screen.

Page 8of 12
8. Appendix - SmartPour Calibration
Each SmartPour 1.1S unit has been pre-calibrated at the factory as part of the quality control process. However
certain spirits with extreme viscosities and surface tensions may result in inaccurate volume dispensing. The
calibration settings within the SmartPour 1.1S may also drift as a result of normal use. In those unlikely scenarios,
recalibration of dispense volumes may be required to achieve an accurate dispense.
For best results, the actual spirit is recommended to be used for the calibration process. In the absence of the
spirit, water can be used as a substitute noting that the volume of dispensed product may not correspond exactly
to the pre-set dispense volume due to the difference in viscosity and surface tension of the 2 liquids. Regardless,
the accuracy of the dispense will be within ± 2%.
Additional Note
The volume dispensed is determined by the number of revolutions of the flowmeter. Upon entering Calibration
Mode, the display will show the default number of revolutions for “Button 3”.
For “Button 1”, calibration is required. This allows for customized volume to be set up for “Button 1”.
For “Button 2” and “Button 4”, the number of revolutions is extrapolated both directions, taking reference from
the set number of revolutions for “Button 3”. Hence, only calibration for “Button 3” is required.
For “Button 5”, the dispensed volume is determined by the number of revolutions for “Button 3” + Additional
Offset.
Increasing and decreasing the reference point increases and decreases the number of revolutions which also
affects the volume being dispensed.
Button 1
Button 5
Button 4
Button 3
Button 2

Page 9of 12
8.1. SmartPour Calibration - Items Required
a) 1 x Empty bottle
b) 1 x Measuring Scale (if measuring by weight/density)
c) 1 x Measuring Cylinder (if measuring by volume)
d) 0.8L Water or Actual Spirit
8.2. SmartPour Calibration - Calibrate Button 1
a) Fill up 1 empty bottle with at least 0.8L of water/spirit. Place the filled bottle under the SmartPour. Ensure
that the inlet nozzle is submerged in the water.
b) Turn on the SmartPour by touching the “Power” button.
c) Ensure that the prime step is completed before proceeding. Refer to Section 7, Step 3.
d) Obtain a clean and empty bottle and tare the empty bottle on a weighing scale.
e) Place the empty bottle under the dispense nozzle.
f) Touch “Button 3” and measure the weight of the dispensed liquid. This is the Measured Weight (MW). The
Target Weight (TW) is Desired Dispense Volume ± 2%.
g) Calculate the difference between TW and MW. If the difference is positive, it means the reference point
needs to be increased. If the difference is a negative value, it means the reference point needs to be
decreased.
h) Touch 8 times until a beep is heard. The screen interface will change indicating that the SmartPour is
now in Calibration Mode. The dispensed volume linked to Button 3 will display and blink repeatedly.
i) The default reference point for “Button 3” will be reflected on the display. E.g.: 125 or 135.
Note: The number may vary because the unit is pre-calibrated at the factory.
j) Touch “Button 4” to calibrate the Button 1 refill. Touch “Button 1” to increase the offset and touch “Button
2” to decrease the offset
k) Every 3-reference point will increase/decrease by approximately 1 ml. Touch “Button 1” to increase the
reference point and touch “Button 2” to decrease the reference point. Based on the calculated difference,
adjust the reference point accordingly.
l) Once done, tap on to save and exit calibration mode.
m) Touch “Button 3” and measure the dispensed volume. If the newly adjusted volume is still not accurate,
repeat steps d-l again.

Page 10 of 12
8.3. SmartPour Calibration - Calibrate Button 3
n) Fill up 1 empty bottle with at least 0.8L of water/spirit. Place the filled bottle under the SmartPour. Ensure
that the inlet nozzle is submerged in the water.
o) Turn on the SmartPour by touching the “Power” button.
p) Ensure that the prime step is completed before proceeding. Refer to Section 7, Step 3.
q) Obtain a clean and empty bottle and tare the empty bottle on a weighing scale.
r) Place the empty bottle under the dispense nozzle.
s) Touch “Button 3” and measure the weight of the dispensed liquid. This is the Measured Weight (MW). The
Target Weight (TW) is (Selected Dispensed Volume) ± 2%.
t) Calculate the difference between TW and MW. If the difference is positive, it means the reference point
needs to be increased. If the difference is a negative value, it means the reference point needs to be
decreased.
u) Touch 8 times until a beep is heard. The screen interface will change indicating that the SmartPour is
now in Calibration Mode. The dispensed volume linked to Button 3 will display and blink repeatedly.
v) The default reference point for “Button 3” will be reflected on the display. E.g.: 125 or 135.
Note: The number may vary because the unit is pre-calibrated at the factory.
w) Every 3-reference point will increase/decrease by approximately 1 ml. Touch “Button 1” to increase the
reference point and touch “Button 2” to decrease the reference point. Based on the calculated difference,
adjust the reference point accordingly.
x) Once done, tap on to save and exit calibration mode.
y) Touch “Button 3” and measure the dispensed volume. If the newly adjusted volume is still not accurate,
repeat steps d-l again.
8.4. SmartPour Calibration - Calibrate Button 5
a) Fill up 1 empty bottle with at least 0.8L of water/spirit. Insert the filled bottle into the SmartPour. Ensure
that the inlet nozzle is submerged in the water.
b) Turn on the SmartPour by touching the “Power” button.
c) Ensure that the prime step is completed before proceeding. Refer to Section 7, Step 3.
d) Obtain a clean and empty bottle and tare the bottle on a weighing scale.
e) Place the bottle under the dispense nozzle.
f) Touch “Button 5” and measure the weight of the dispensed liquid. This is the Measured Weight (MW). The
Target Weight (TW) is (Selected Dispensed Volume) ± 2%.
g) Calculate the difference between TW and MW. If the difference is positive, it means the reference point
needs to be increased. If the difference is a negative value, it means the reference point needs to be
decreased.

Page 11 of 12
h) Touch 8 times until a beep is heard. The screen interface will change indicating that the SmartPour is
now in Calibration Mode. The dispensed volume linked to Button 3 will display and blink repeatedly.
i) Touch “Button 5” to calibrate the Button 5 refill. Touch “Button 1” to increase the offset and touch “Button
2” to decrease the offset.
j) Once done, tap on to save and exit calibration mode.
k) Obtain a clean and empty bottle.
l) Place the bottle under the dispense nozzle.
m) Touch “Button 5” and measure the dispensed volume. If the newly adjusted volume is still not accurate,
repeat steps d-m again.

Page 12 of 12
9. Release History
Rev
Date
Originator
Description of Change
00
28 Oct 2022
Kyle Tye
Initial Release
01
08 Dec 2022
Kyle Tye
Update for different versions
For more information, please contact techsupport@ecospirits.global
Other manuals for SmartPour 1.1S
1
Table of contents
Popular Dispenser manuals by other brands
Kimberly-Clark PROFESSIONAL
Kimberly-Clark PROFESSIONAL ICON user guide
Rockwell Labs
Rockwell Labs InVade Power Dose instructions

Aroma
Aroma ARD-133 instruction manual
Easy
Easy EASY 20K+ user manual
Miele professional
Miele professional DOS-Modul G 60 Fitting instructions
Bunn
Bunn Ultra-2HP Programming manual
