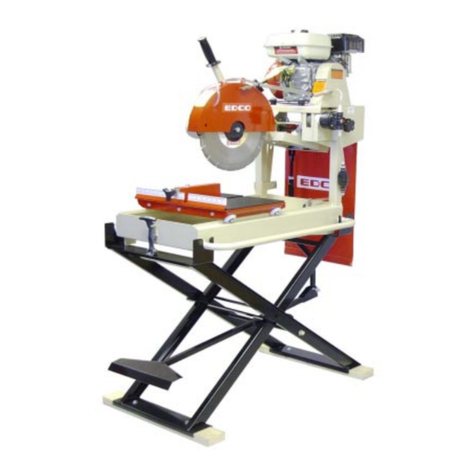
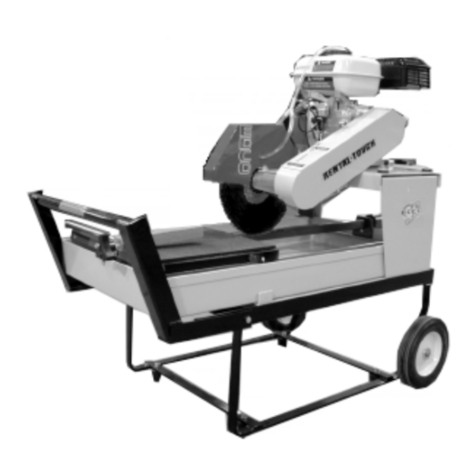
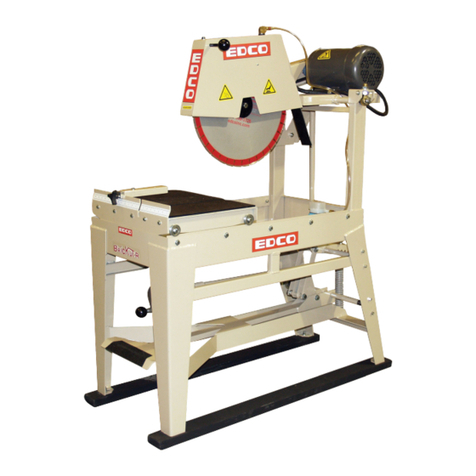
Edco BB14E User manual

Page 5
E-BB14E&BB14G-I-0416
E-SPTS-I-0809
EQUIPMENT DEVELOPMENT CO., INC. J
BB14 Electric (Figure 4)
A. Operating Handle
B. Motor
C. Reset Button
D. Power Cord
E. Water Pick Up Hose
F. Water Tray Plug
G. Rolling Table
H. Welded Steel Frame/Water Tray
I. Blade Guard
J. Drive Belt Guard
K. Blade Guard Lock
L. Cutting Angle Lock
M. Optional Folding Table
N. Submersible Water Pump
Operator Controls- Electric Models
Electric motor must be properly grounded
at all times.
Figure 4
AB
C
D
E
F
G L
H
I
J
K
Figure 5
N
M

Page 6
E-BB14E&BB14G-I-0416
EQUIPMENT DEVELOPMENT CO., INC.
Safety Guidelines
Safety warnings and guidelines do not by themselves eliminate danger.
They are not substitutes for proper accident prevention procedures and good judgement.
Read and understand this Operator’s Instruction Manual,
and the Engine Manufacturer’s Owner’s Manual
before operating this equipment.
Death of serious injury can result if this machine is used improperly.
Eye and ear protection must be worn at all times while the saw is in use. During normal operation, sound
pressure levels exceed 85dBA. Use only ANSI approved safety glasses to help prevent eye injury. Standard
eyeglasses have only impact resistant lenses; they are NOT safety glasses.
Operator must wear appropriate clothing and footwear. Do not wear loose clothing or jewelry that can
get tangled in moving parts. Footwear should provide sure footing and protection from debris that may be
dropped. Take steps to insure hair will not be caught in moving parts. If necessary, tie it back.
•When loading or unloading the saw, use caution. Make sure rolling table is locked so that the blade will not
be damaged. Do not move the saw while the engine is running.
• Never exceed the maximum operating speed of the blade. Match the blade speed rating with the arbor shaft
speed. (See page 11)
• Never leave the saw running unattended.
• Never operate this saw under the influence of drugs, alcohol or when taking medications that impair the senses or
reactions, or when excessively tired or under stress.
• Do not lend or rent this equipment without including the Operator’s Instruction Manual and the Engine Manufac-
turer’s Manual.
• Make sure all safety decals can be clearly read and understood. Replace damaged or missing decals immeditely.
For Electric Models:
• Electric motor must be properly grounded at all times. Check the outlet box to be sure the electrical service is
properly grounded and that adequate power is available. Insufficient power will cause motor to overheat and burn
out. Use only grounded extension cords correctly sized for the current draw and voltage drop (amp rating and
length). Never use frayed, damaged, taped or under rated extension cords. Electrical shock could result in death
or serious injury and damage to the equipment.
For Gasoline Models:
• Poisonous exhaust gas. Do not operate gasoline powered equipment without adequate ventilation. Carbon
monoxide is an invisible, odorless gas that can kill. NEVER REFUELAN ENGINE WHILE IT IS HOT OR AN
ENGINE WHILE IT IS RUNNING. Only refuel in a well-ventilated area and only refuel after the engine has cooled
completely. Thoroughly cleanup any spilled fuel before starting the engine.
Dry cutting creates a large volume of airborne dust. For health reasons, the operator should wear an
applicable respirator. The dust may contain chemicals known to cause serious illnesses, including
Silicosis - a fatal disease of the lungs. Check the chemical properties of the material to be cut and
follow all EPA/OSHA regulations.

Page 7
E-BB14E&BB14G-I-0416
E-SPTS-I-0809
EQUIPMENT DEVELOPMENT CO., INC.
Before Starting:
• Read and understand the instructions supplied by the engine manufacturer.
• Familiarize yourself with all engine and saw controls. (Figure 2)
• Visuallyinspect the entiremachine fordamage orwear.Look for signs of oil orfuel leaks.
Remove excess dirt or debris. Check that all nuts, bolts and screws are tight. Check for
proper alignment of moving parts, possible binding of moving parts, breakage of parts,
loose mounting brackets, and any other condition that might affect operation.
• Inspect diamond blade and arbor shaft. Check blades for cracks, loose segments,
worn or out-of-round arbor holes. Do not use warped, twisted, out-of-balance blades
or any blade of questionable condition. Refer to Rx for Diamond Blades.
• Install back splash shield (Figure 6 and 7).
On Gasoline Models:
• Gasoline models are shipped from the factory dry, meaning without oil or gasoline.
Both will need to be added before the unit is used. Check the Engine Manufacturer’s
Owner’s Manual for instructions on break-in, servicing and proper use of engine.
• Check engine oil. Make sure that it is at the proper level and that it is clean.
Note: Some engines have an Oil Alert System that will automatically stop the engine before the oil level falls below
the safe limit. To avoid an unexpected shut down, check the oil level regularly during operation.
• Check the fuel level. Do not over fill fuel tank and never refuel a hot engine. If refueling is necessary during
operation, allow engine to cool down first.
On Electric Models:
• Electric masonry saws are shipped with a grounded, male plug attached to the machine. Verify that any extension
cord that is used is sized appropriately for the electrical load and that it is properly grounded. Use only 3 wire
(single phase), grounded electrical cables that are marked U.L. and/or C.S.A. approved.
• Inspect the power and extension cords for damage. Do not use if either cord is frayed or
showing signs of wear.
• Identify the electrical power requirements of the saw. The voltage requirements of the motor can be found on the
motor data plate.
• Verify that the power switch is in the off position before plugging machine into the power source.
Operating Instructions
Figure 7
Figure 6

Page 8
E-BB14E&BB14G-I-0416
EQUIPMENT DEVELOPMENT CO., INC.
When Wet Cutting:
• Secure the drain plug and fill the tray with clean water.
On Gasoline Models:
• To engage water pump loosen the black knob and
lightly push top of water pump to the left with
constant pressure and tighten black knob.
(Figure 9 & 12)
• Prime the pump using the priming bulb. Pump the
bulb until water fills the clear plastic coolant hose
from the tray to the pump.
On Electric Models:
• Plug submersible pump into the special outlet on the
motor (circled). (Figure 10)
This outlet is intended for the water
pump only pictured in (Figure 11).
Do not use it for any other purpose.
DO NOT LET THE
WATER PUMP RUN DRY.
On All Models:
• The water in the tray must be kept clean. Running dirty
water through the system will cause damage.
• To change the water, turn off the saw, remove the plug
in the bottom of the tray to drain water and dispose of
properly. Do not drain onto the surface being worked on
or other maintained surface because staining will occur.
Flush any loose grit and dirt out of the tray. Replace
drain plug and refill with clean water. If water flow to the
blade seems to be low, check that strainer is clean and
the water pump pulley is properly engaged.
Figure 10
Shows BB14E Water Pump Outlet Figure 9
• To engage water pump loosen the black knob and lightly
pushtop of water pumptothe left with constantpressure
and tighten black knob. (Figures 9 & 12) Use the priming
bulb shown in
(Figure 13)
to prime the water pump.
On Gasoline models only
Figure 11
Black knob
Black knob

Page 9
E-BB14E&BB14G-I-0416
E-SPTS-I-0809
EQUIPMENT DEVELOPMENT CO., INC.
When Dry Cutting:
• Drain and flush any water or debris in the tray and
dispose of properly.
On Gasoline models:
• To disengage water pump loosen the black knob and
push top of water pump to the right with constant
pressure and tighten black knob. (Figures 9 & 12)
On Electric Models:
• Unplug the submersible pump from the water pump
outlet on the motor.
Be careful when draining water
from tray and dispose of waste
away from work area.
Draining the water directly to the ground will
causeapotentiallyseriousworking hazard includ-
ing, but not limited to, risk from electric shock if
using an electric motor. Figure 14 (BB14E)
Blade
Cover
Lock
Knob
Figure 12
• To disengage water pump loosen the black knob and
push top of water pump to the right with constant
pressure and tighten black knob (Figures 9 & 12).
DO NOT LET THE
WATER PUMP RUN DRY.
Figure 13
Blank
On Gasoline models only
Black knob
Black knob

Page 10
E-BB14E&BB14G-I-0416
EQUIPMENT DEVELOPMENT CO., INC.
Figure 15 (BB14G)
Starting the Engine:
• Be sure blade is clear of item to be cut.
• Determine that the recoil starter assembly turns freely, starter rope pulls easily, and the rope retracts properly.
• Follow the instructions supplied in the Engine Manufacturer’s Owner’s Manual for starting engine.
• Open the throttle and allow engine to reach operating temperature. Open throttle fully, do not use the throttle as a means
to match the arbor shaft speed to the specified blade speed requirements.
Be certain to use the proper blade for the machine.
Note: To ensure that the necessary power is transferred to the blade, all cutting must be done at full throttle. The gov-
ernor is factory set for correct speed - altering this setting may damage the machine. Maintain the engine
according to factory specifications.
Starting the Electric Motor:
REMINDER: Motor burnout due to use of improper voltage will void the warranty on the motor.
• Be sure blade is clear of the item to be cut.
• Turn on the motor.
• Listen for motor to reach operating speed. Do not use if motor hums or does not reach operating speed within a
few seconds. Motor hum may indicate a malfunction due to:
- Job site voltage may be too low.
- An Internal motor problem.
- The blade may be jammed.
or
- The belts may be too tight.
Throttle
Throttle

Page 11
E-BB14E&BB14G-I-0416
E-SPTS-I-0809
EQUIPMENT DEVELOPMENT CO., INC.
Cutting:
• Do not strain the engine/motor while cutting. Do not jam work piece into the blade. Do not twist the work piece
while cutting.
• When you have finished cutting:
On Gasoline models: To stop engine, return throttle to idle. Stop the engine by turning the engine mounted stop
switch to the OFF position. Do not leave the saw running unattended.
On electric models: Turn the power switch to OFF. Wait until saw comes to a complete stop before performing
any type of maintenance.
• Clean dust and debris from machine.
IMPORTANT:
• When actually cutting masonry products, it is important that the blade is at it’s maximum RPM. DO NOT force or
jam the blade. Forcing the blade will cause the motor to overheat, tripping the overload device or severe motor
damage.
• Do not reach underneath or around work piece while the blade is rotating.
• Keep stable footing at all times while cutting.
• Keep hair, clothing, fingers and all body parts away from the blade and any other
moving parts.
Arbor Shaft
Rating
Diameter
Blade Max.
Cutting Depth
BB14E
BB14G
Model
2600 RPM
2600 RPM
14 inches
14 inches
5 inches
5 inches
Figure 17
Possible Diamond Blade Problems
Segment Loss:
Usually insufficient
water
Cracked Segments
and/or Core
Wrong Blade for the job.
Blade Will Not Cut:
Blade is glazed or
to hard for the job.
Arbor Hole
Out-Of-Round
Blade not properly tightened
or seated on arbor.

Page 12
E-BB14E&BB14G-I-0416
EQUIPMENT DEVELOPMENT CO., INC.
Disconnect spark plug lead before performing
any maintenance on this machine.
Changing the Blade:
• Inspect the new blade thoroughly before installing. Check for cracks, loose or missing segments, worn or out-of-
round arbor holes. Refer to the Rx for Diamond Blades pamphlet provided with your blade for more detailed
information on inspecting blades. Be sure the blade is appropriate for the job and matches the arbor speed and
mounting configuration on this saw. (Figure 17)
• Push the rolling table all the way to the back of the machine.
• Blade guard should be rotated all the way up and tightened into place.
• Remove blade cap and bolt. Carefully remove old blade.
• Inspect arbor shaft, backing plate and blade guard while blade is off.
Clean if dirty or replace if damaged or worn.
• Look for “direction of rotation” markings on the blade. (Usually an arrow
stamped on the blade.)
• Place new blade on the arbor shaft verifying that once installed the
markings on the blade follow the proper direction of rotation.
• Reinstall and tighten bolt (Figure 18) using a SAE 3/4” wrench. Reinstall blade cap.
• Reposition blade guard and tighten. Reconnect spark plug lead. (if applicable)
Maintenance
Consult the Engine Manufacturer’s Owner’s Manual for more detailed engine maintenance instructions.
Figure 18
This manual suits for next models
2
Table of contents
Other Edco Saw manuals

Edco
Edco MASONRY GMS- 20 Assembly instructions

Edco
Edco SB-14 Datasheet

Edco
Edco HSS-14 User manual

Edco
Edco KL-18 Datasheet

Edco
Edco SDE-14 Assembly instructions

Edco
Edco GMS-20 User manual

Edco
Edco KL-14 User manual

Edco
Edco TMS-10 Datasheet

Edco
Edco GMS-10 Assembly instructions

Edco
Edco HSS-14-E Assembly instructions

Edco
Edco TMS-10 Assembly instructions

Edco
Edco TMS10-1L Datasheet

Edco
Edco HSS-14 Assembly instructions

Edco
Edco SS-26 Series Assembly instructions

Edco
Edco BB14G User manual

Edco
Edco SS-24 Assembly instructions

Edco
Edco SS-16A Assembly instructions

Edco
Edco SS-20 Assembly instructions

Edco
Edco SS-26 Series Assembly instructions

Edco
Edco GMS-14A Assembly instructions