manuals.online logo
Brands
  1. Home
  2. •
  3. Brands
  4. •
  5. Edco
  6. •
  7. Saw
  8. •
  9. Edco HSS-14-E Assembly instructions

Edco HSS-14-E Assembly instructions

Printed in USA
TVW ©2008
Page 1
E-HSS14-I-0408
HSS-14
Manual - Portable
Operator’s Instruction Manual
14” Gasoline Powered Masonry Saw
NOTE: Shown with optional cart
To order go to Discount-Equipment.com
We sell worldwide for the brands: Genie, Terex, JLG, MultiQuip, Mikasa, Essick, Whiteman,
Mayco, Toro Stone, Diamond Products, Generac Magnum, Airman, Haulotte, Barreto, Power
Blanket, Nifty Lift, Atlas Copco, Chicago Pneumatic, Allmand, Miller Curber, Skyjack, Lull,
Skytrak, Tsurumi, Husquvarna Target, Stow, Wacker, Sakai, Mi-T-M, Sullair, Basic, Dynapac,
MBW, Weber, Bartell, Bennar Newman, Haulotte, Ditch Runner, Menegotti, Morrison, Contec,
Buddy, Crown, Edco, Wyco, Bomag, Laymor, EZ Trench, Bil-Jax, F.S. Curtis, Gehl Pavers, Heli,
Honda, ICS/PowerGrit, IHI, Partner, Imer, Clipper, MMD, Koshin, Rice, CH&E, General Equip-
ment ,Amida, Coleman, NAC, Gradall, Square Shooter, Kent, Stanley, Tamco, Toku, Hatz,
Kohler, Robin, Wisconsin, Northrock, Oztec, Toker TK, Rol-Air, APT, Wylie, Ingersoll Rand /
Doosan, Innovatech, Con X, Ammann, Mecalac, Makinex, Smith Surface Prep,Small Line,
Wanco, Yanmar
Discount-Equipment.com is your online resource for
commercial and industrial quality parts and equipment sales.
561-964-4949
visit us on line @ www.discount-equipment.com
TO PURCHASE THIS PRODUCT PLEASE CONTACT US
Select an option below to find your Equipment
Equipment Financing and
Extended Warranties Available
Printed in USA
©2008 TVW
Page 2
E-HSS14-I-0408
READ AND UNDERSTAND THE OPERATORS INSTRUCTION MANUAL THOROUGHLY
BEFORE ATTEMPTING TO OPERATE THIS EQUIPMENT.
Death or serious injury could occur if this machine is used improperly.
Extreme care must be taken when operating electric
modelswithwaterpresent: Ensurepowercordisprop-
erlygrounded,isattachedtoaGround-Fault-Interrupter
(GFI) outlet, and is undamaged.
•Check all electrical cables - be sure connections are tight and
cable is continuous and in good condition. Be sure cable is
correctly rated for both the operating current and voltage of
this equipment.
•Improperconnection oftheequipment-grounding conductorcan
result in a risk of electric shock. Check with qualified electri-
cian or service person if there is any doubt as to whether the
outlet is properly grounded. Adhere to all local codes and
ordinances.
• NOTE: In the event of a malfunction or breakdown, grounding
provides a path of least resistance for the electric current to
dissipate. The motor is equipped with a grounded plug and
must be connected to an outlet that is properly installed and
properly grounded. DO NOT modify the plug provided on the
motor. If the plug does not fit the outlet have a qualified electri-
cian install the proper receptacle.
•Switch motor OFF before disconnecting power.
•Engine exhaust from this product contains
chemicals known to the State of California to
cause cancer, birth defects or other reproduc-
tive harm.
•Gasoline is extremely flammable and poisonous.
It should only be dispensed in well ventilated areas,
and with a cool engine.
•Small gasoline engines produce high concentra-
tions of carbon monoxide (CO) example: a 5 HP 4 cycle
engine operation in an enclosed 100,000 cu. ft. area with
only one change of air per hour is capable of providing
deadly concentrations of CO in less than fifteen minutes.
Five changes of air in the same area will produce noxious
fumes in less than 30 minutes. Gasoline or propane pow-
ered equipment should not be used in enclosed or partially
enclosed areas. Symptoms of CO poisoning include, head-
ache, nausea, weakness, dizziness, visual problems and
loss of consciousness. If symptoms occur - get into fresh
air and seek medical attention immediately.
SAFETY
MESSAGES SAFETY MESSAGES
Indicates an imminent hazard which, if not
avoided, will result in death or serious injury.
Indicates an imminent hazard which, if not
avoided, can result in death or serious injury.
Indicates hazards which, if not avoided, could
result in serious injury and or damage to the
equipment.
•Safety Instructions are proceeded by a graphic alert symbol
of DANGER, WARNING, or CAUTION.
ELECTRICAL POWERED EQUIPMENT
GASOLINE/PROPANE POWERED EQUIPMENT
•Equipment should only be operated by trained personnel in
good physical condition and mental health (not fatigued). The
operator and maintenance personnel must be physically able
to handle the bulk weight and power of this equipment.
•This is a one person tool. Maintain a safe operating distance
to other personnel. It is the operator’s responsibility to keep
other people (workers, pedestrians, bystanders, etc.) away
during operation. Block off the work area in all directions with
roping, safety netting, etc. for a safe distance. Failure to do so
may result in others being injured by flying debris or exposing
them to harmful dust and noise.
•This equipment is intended for commercial use only.
•For the operator’s safety and the safety of others, always keep
all guards in place during operation.
•Never let equipment run unattended.
•Personal Protection Equipment and proper safety attire must
be worn when operating this machinery. The operator must
wear approved safety equipment appropriate for the job such
as hard hat and safety shoes when conditions require. Hear-
ing protection MUST be used (operational noise levels of this
equipment may exceed 85db). Eye protection MUST be worn
at all times.
Keep body parts and loose clothing away from moving
parts. Failure to do so could result in dismemberment
or death.
•Do not modify the machine.
•Stopmotor/enginewhenadjusting or servicing this equipment.
Maintain a safe operating distance from flammable
materials. Sparksfrom the cutting-action of this machine
can ignite flammable materials or vapors.
GENERAL INSTRUCTIONS
DUST WARNING
Some dust created by power sanding, sawing,
grinding, drilling, and other construction activi-
tiescontainschemicalsknownto cause cancer,
birthdefects,or other reproductive harm. Some
examples of these chemicals are:
•Lead from lead-based paints, and
•Crystalline silica from bricks and concrete and other
masonry products.
Your risk of exposure to these chemicals varies depending
on how often you do this type of work. To reduce your risk:
workin a wellventilatedarea, use adustcontrolsystem, such
as an industrial-style vacuum, and wear approved personal
safetyequipment, such as a dust/particlerespiratordesigned
to filter out microscopic particles.
•Donotdisconnect power by pulling cord. To disconnect, grasp
the plug, not the cord.
•Unplug power cord at the machine when not in use and before
servicing.
To order go to Discount-Equipment.com
Printed in USA
TVW ©2008
Page 3
E-HSS14-I-0408
SPECIFICATIONS
Safety/Warnings......................................................................................................
Specifications/Table of Contents.............................................................................
Safety Guidelines....................................................................................................
Operating Instructions.............................................................................................
Maintenance............................................................................................................
SMI Dust and Silica Warning...................................................................................
Maintenance Schedule............................................................................................
Limited Equipment Warranty...................................................................................
Section Page Number
Table of Contents
Note:
All dimensions and
weights are for
reference only
and subject to change
at any time.
A
B
C
“A”
“B”
“C”
--
--
Weight
42” 106.68cm
27” 65.58cm
20” 50.8cm
--
--
208 lbs. 94.3kg
Figure 1
2
3
4
5-7
8-10
10
11
Back Page
HSS-14
NOTE: Shown with optional cart
To order go to Discount-Equipment.com
Printed in USA
©2008 TVW
Page 4
E-HSS14-I-0408
Safety Guidelines
Eye and ear protection must be worn at all times while the HSS-14 is in use. During normal opera-
tion, sound pressure levels exceed 85dBA. Use only ANSI approved safety glasses to help prevent
eye injury. Everyday eyeglasses have only impact resistant lenses; they are NOT safety glasses.
Operator must wear appropriate clothing and footwear. Do not wear loose clothing or jewelry that
can get tangled in moving parts. Footwear should provide sure footing and protection from debris
that may be dropped. Take steps to be sure hair will not be caught in moving parts. If necessary, tie it
back.
Disconnect the spark plug wire lead before performing any service on the machine.
• When loading or unloading the saw, use caution. Make sure rolling table is locked using the table lock so that the
blade will not be damaged. (Figure 4, Item K) Do not move the saw while the engine is running.
• This unit is shipped new from the factory without oil or gasoline, it will need to be added before it is used.
Check the Engine Manufacturer’s Owner’s Manual for instructions on break-in, servicing and use of engine.
This HSS-14 gasoline powered saw is designed to be used in areas where electrical power is not
available. Do not operate gasoline-powered equipment without adequate ventilation. The exhaust
fumes contain carbon monoxide, an invisible, odorless gas that can kill.
This machine is designed to cut brick, pavers, stone and tile. The work piece must be placed on the
rolling table surface and the table used to move the work piece to the blade. Cut only in a straight
line. Do not force or twist the work piece into the blade. Personal injury or damage to the equipment
or blade can result.
• Never exceed the maximum operating speed of the blade. Match the blade speed rating with the arbor shaft
speed.
• Never leave the saw running unattended.
•Never operate this saw under the influence of drugs, alcohol or when taking medications that impair the senses or
reactions, or when excessively tired or under stress.
• Make sure all safety decals can be clearly read and understood. Replace damaged or missing decals immedately.
Safety warnings and guidelines do not by themselves eliminate danger.
They are not given as substitutes for proper accident prevention procedures and good judgement.
Read and understand this Operator’s Instruction Manual,
and the Engine Manufacturer’s Owner’s Manual
before operating this equipment.
Death of serious injury can result if this machine is used improperly.
To order go to Discount-Equipment.com
Printed in USA
TVW ©2008
Page 5
E-HSS14-I-0408
Diagrams shown with Honda Cyclone Dual-Filter Element Engine as an example.
Consult the Engine Manufacturer’sOwner’s Manual for information on specific models.
Operating Instructions
A. Spark Plug Lead
B. Air Filter
C. Vacuum Hook Up
D. Water Tray
E. Oil Drain
F. Oil Plug/Dip Stick
G. Engine Throttle
H. Fuel Valve Lever
I. Choke
J. Air Filter Housing
K. Table Lock
L. Back Stop
M. Right Angle Guide Bar
N. Rolling Table
O. Diamond Blade
P. Blade Guard
Q. Water Hose
R. On/Off Switch
S. Recoil Starter
T. Fuel Tank
U. Muffler
V. Belt Guard
W. Dust Channel
X. Drain Plug
Y. (Optional) Cart
B
B
C
C
D
D
E
E
F
F
Figure 2 Figure 4
A
A
G
G
H
H
I
I
J
J
K
K
L
L
M
M
N
N
O
O
P
P
Q
Q
R
R
S
S
T
T
U
U
V
V
W
W
X
X
Y
Y
Figure 3
To order go to Discount-Equipment.com
Printed in USA
©2008 TVW
Page 6
E-HSS14-I-0408
Before Starting Engine:
•Read and understand the instructions supplied by the engine manufacturer.
• Familiarize yourself with all engine and saw controls.
• Visually inspect the entire machine for damage or wear. Look for signs of oil or fuel leaks. Remove excess dirt or
debris. Check that all nuts, bolts and screws are tightened. Check for proper alignment of moving parts, possible
binding of moving parts, breakage of parts, loose mounting brackets, and any other condition that might affect op-
eration.
• Inspect diamond blade and arbor shaft. Check blades for cracks, loose segments, worn or out-of-round arbor holes.
Do not use warped, twisted, out-of-balance blades or any blade of questionable condition. (Figure 9)
• Check engine oil. Make sure that it is at the proper level and that it is clean.
Note: Some engines have an OilAlert System that will automatically stop the engine before the oil level falls below
the safe limit. To avoid an unexpected shut down, check the oil level regularly during operation.
• Check the fuel level. Do not over fill fuel tank and never refuel a hot engine. If refueling is necessary during opera-
tion, allow engine to cool down first.
•Inspect the air filter to be sure it is clean.
• If wet cutting, attach water source to the machine’s supply hose circled in (Figure 5). If you have a place for the
water to run, remove the drain plug in the water tray (Figure 6).
• If wet cutting with the optional water pump which recycles the water from the tray, plug the drain hole and be sure
the water is circulating from the tray to the water pump.
• If dry cutting, attach the vacuum to the end of the dust channel circled in (Figure 7).
Note: While the HSS-14 was designed to be used with a standard shop vac, EDCO recommends using a heavy
duty industrial vacuum such as the VAC-100. The VAC-100 has the advantage of a Self-Purging System to help
keep concrete dust from building up on the filter and a larger filter area to maintain performance during use. Thus,
reducing time wasted on frequently cleaning a standard shop vac and filter media.
Refer to the
Rx for Diamond Blades
for more detailed information
on diamond blades.
Figure 7
Figure 5 Figure 6
To order go to Discount-Equipment.com
Printed in USA
TVW ©2008
Page 7
E-HSS14-I-0408
Starting the Engine:
• Be sure blade is clear of item to be cut.
• Determine that the recoil starter assembly turns freely, starter rope pulls easily, and the rope retracts properly.
• Follow the instructions supplied in the engine manufacturer’s Owner’s Manual for starting engine.
• Open the throttle and allow engine to reach operating temperature. Do not use the throttle as a means to match the
specified blade speed to the arbor shaft speed. Note: To ensure the necessary power is transferred to the blade, all
cutting must be done at full throttle. The governor is factory set for correct speed - altering this setting will damage
the machine. Maintain engine to factory specifications.
Cutting:
• Place the work piece on rolling table against the backstop and use the rolling table to move the work piece to the
blade. Do not strain the engine while cutting or jam work piece into the blade. Do not twist the work piece while
cutting.
• Do not reach underneath or around work piece while the blade is rotating.
• Keep stable footing at all times while cutting.
Keephair,clothing,fingers andallbodypartsaway fromthe blade
and any other moving parts.
• For wet cutting, maintain an adequate supply of water to cool the blade.
Note: If using the optional water pump, clean water must be run through
the cycle daily to avoid build up in the pump.
• When you have finished cutting, return throttle to idle. Stop the engine by
returning the engine mounted stop switch to the OFF position. Do not
leave the saw running unattended.
•Clean dust and debris from whole machine - including inside the dust channel.
IMPORTANT REMINDER: This machine is designed to use diamond blades to cut pavers, stone, tile,
masonry products and brick. Do not use it to cut anything else.
Figure 8
Blade Diameter
Arbor Shaft Diameter
Arbor Speed
14 inches
4 1/2 inches
3600 RPM
1.0 inches
Max Cutting Depth
Use Diamond Blades Only
Figure 9
Possible Diamond Blade Problems
Segment Loss:
Usually insufficient
water
Cracked Segments
and/or Core
Wrong Blade for the job.
Blade Will Not Cut:
Blade is glazed or
to hard for the job.
Arbor Hole
Out-Of-Round
Blade not properly tightened
or seated on arbor.
To order go to Discount-Equipment.com
Printed in USA
©2008 TVW
Page 8
E-HSS14-I-0408
Step Three:
Look for “direction of rotation” markings on the new blade.
(Usually an arrow stamped on the blade.)
Place new blade on the arbor shaft verifying that the markings on the blade follow the
proper direction of rotation. Blade should be positioned in the center of the dust chan-
nel. (Figure 12)
Reinstall and tighten bolt using a SAE 3/4” wrench.
Reposition blade guard and tighten wing nuts.
Reconnect spark plug lead.
Figure 11
Changing the Blade:
• Inspect the new blade thoroughly before installing. Check for cracks, loose segments, worn or out-of-round arbor
holes. Refer to the Rx for Diamond Blades pamphlet provided with your blade for more detailed information on
inspecting blades. Besure the blade is appropriate for the job and matches the arbor shaft speed & mounting
configuration on this saw. (See page 11)
The HSS-14 was designed to be used with diamond saw blades only. It is a “fixed head machine”, therefore it is
important to use blades that will not wear down. Fiber blades will wear down and the cut will not go all the way
through the work piece. In addition, for the vacuum system to operate properly when dry cutting, the blade must
reach into the dust channel.
Step One:
Move the rolling table out of the way to the back or front
of the machine.
Loosen the two wing nuts on the back side of the blade
guard and rotate blade guard back and tighten to hold in
guard in place. (Figure 10)
Step Two:
Loosen and remove arbor cap bolt.
(Figure 11)
Carefully remove old blade.
Inspect arbor shaft, backing plate and
blade guard while blade is off.
Clean if dirty or replace if damaged or
worn.
Maintenance
Disconnect spark plug lead before performing
any maintenance on this machine.
Consult the Engine Manufacturer’s Owner’s Manual for more detailed engine maintenance instructions.
Figure 10
Figure 12
To order go to Discount-Equipment.com
Printed in USA
TVW ©2008
Page 9
E-HSS14-I-0408
Belt Adjustment and Replacement:
• Periodically check to be sure the belts are undamaged and that they are at the proper tension. Slipping belts will
overheatcausing the cuttingspeed tobe limited andwill shortenthe life ofthe belts. Over-tensionedbelts will shorten
the life of the belts and bearings.
• On new equipment and after installing new belts, be certain to re-tension the belts after the first 4 hours of use.
New belts are stiff and require a break in period. Belts that become loose could slip and/or overheat.
• Damaged, stretched or excessively worn belts should be replaced with a new complete set of belts.
IMPORTANT: Belts must be replaced as a set, even if only one belt is showing wear.
• Remove belt guard (3 bolts) and inspect belts. A straight edge is a good tool to use to be certain sheaves are
even and properly aligned. (Figure 13)
• To tension/loosen belts or to remove worn belts, loosen engine mounting bolts (4) and slide the engine forward
or back until belts are at proper tension or loose enough to remove. (Figure 14)
• To remove belts, loosen engine mounting bolts (4) and jacking screw (circled) to allow the engine to slide
forward until belts slide off of the sheaves. (Figure 14)
• Place a complete set of new belts on the machine. Reposition engine then tighten bolts. Reinstall belt cover.
Clean and Lubricate Wheels on Rolling Table:
During daily visual inspection, check to be sure the wheels on the rolling
table move smoothly and that there is no debris in the wheel tracks.
(Figure 15)
Lubricate the wheels as necessary. Replace damaged or worn wheels
circled in (Figure 15).
Engine
Mounting
Bolts
Figure 14
Figure 15
Figure 13
To order go to Discount-Equipment.com

Printed in USA
©2008 TVW
Page 10
E-HSS14-I-0408
Change Engine Oil:
• Check Engine Oil before each operation. Open the filler cap and look at the dip stick. (Figure 16)
Oil should be clearly visable both on the stick and in the cavity and should look fairly clean. Running the machine
on dirty oil or when the oil is low will result in damage to the equipment.
• Change the Engine Oil after every 50 hours of operation - or sooner as conditions require. Refer to the Engine
Manufacturer’s Owner’s Manual for specific viscosity recommendations and changing instructions.
Inspect and Clean Oil Air Filter:
Shown with filter element. Outer foam filter is removable for cleaning. Refer to the Engine Manufacturer’s Owner’s
Manual for instructions on specific models. Check air filter at least once daily. (Figure 17)
Dirt build up on the filter will cause the engine to wear faster.
Dip Stick/
Filler Cap
Oil filler cap
& Dipstick
Oil drain
Figure 16 Figure 17
Air filter cover
Air filter element
NOTE: To remove air filter cover remove wing nut on top of filter cover and lift cover off as shown in (Figure 17).
Grinding/cutting/drilling of masonry, concrete, metal and other materials can generate dust, mists and fumes containing
chemicals known to cause serious or fatal injury or illness, such as respiratory disease, cancer, birth defects or other
reproductive harm. If you are unfamiliar with the risks associated with the particular process and/or material being
cut or the composition of the tool being used, review the material safety data sheets and/or consult your employer,
the manufacturers/suppliers, governmental agencies such as OSHA and NIOSH and other sources on hazardous
materials. California and some other authorities, for instance, have published lists of substances known to cause
cancer, reproductive toxicity, or other harmful effects.
Control dust, mist and fumes at the source where possible. In this regard use good work practices and follow the recom-
mendations of the manufacturers/suppliers, OSHA/NIOSH, and occupational and trade associations. Water should
beused for dustsuppression when wetgrinding/cutting/drilling is feasible. Whenthe hazards frominhalationof dust,
mists and fumes cannot be eliminated, the operator and any bystanders should always wear a respirator approved
by NIOSH/MSHA for the material being used.
Grinding/cutting/drilling of masonry, concrete and other materials with silica in their composition may give off dust or
mists containing crystalline silica. Silica is a basic component of sand, quartz, brick clay, granite and numerous
other minerals and rocks. Repeated and/or substantial inhalation of airborne crystalline silica can cause serious or
fatalrespiratorydiseases, including silicosis. Inaddition, California and someother authorities have listedrespirable
crystalline silica as a substance known to cause cancer. When grinding/cutting/drilling such materials, always follow
the respiratory precautions mentioned above.
SMI Dust and Silica Warning
To order go to Discount-Equipment.com
Printed in USA
TVW ©2008
Page 11
E-HSS14-I-0408
Maintenance Schedule
This is for a quick reference to the information supplied in the Maintenance portion of this manual.
Repairs are to be done
by authorized EDCO
Dealers only.
Read and follow instructions
in the Engine Manufacturer’s
Owner’s Manual.
Change Engine Oil
Daily
Before
Operation
After
Operation
As Required
Every 50 Hours
of Operation
Visually Inspect Entire
Machine and Hardware
Clean and Oil Air Filter
Inspect Guards
Check Engine Oil
Inspect Blade and
Arbor Shaft
Lubricate Wheels
on Rolling Table
Inspect Belts
Clean Dust and
Dirt Off Machine
Follow the Engine
Manufacturer’s
Maintenance
Instructions
X
X
X
X
X
X
X
X
X
X
Replace Spark Plug
Annually
To order go to Discount-Equipment.com

We sell worldwide for the brands: Genie, Terex, JLG, MultiQuip, Mikasa, Essick, Whiteman,
Mayco, Toro Stone, Diamond Products, Generac Magnum, Airman, Haulotte, Barreto, Power
Blanket, Nifty Lift, Atlas Copco, Chicago Pneumatic, Allmand, Miller Curber, Skyjack, Lull,
Skytrak, Tsurumi, Husquvarna Target, Stow, Wacker, Sakai, Mi-T-M, Sullair, Basic, Dynapac,
MBW, Weber, Bartell, Bennar Newman, Haulotte, Ditch Runner, Menegotti, Morrison, Contec,
Buddy, Crown, Edco, Wyco, Bomag, Laymor, EZ Trench, Bil-Jax, F.S. Curtis, Gehl Pavers, Heli,
Honda, ICS/PowerGrit, IHI, Partner, Imer, Clipper, MMD, Koshin, Rice, CH&E, General Equip-
ment ,Amida, Coleman, NAC, Gradall, Square Shooter, Kent, Stanley, Tamco, Toku, Hatz,
Kohler, Robin, Wisconsin, Northrock, Oztec, Toker TK, Rol-Air, APT, Wylie, Ingersoll Rand /
Doosan, Innovatech, Con X, Ammann, Mecalac, Makinex, Smith Surface Prep,Small Line,
Wanco, Yanmar
Discount-Equipment.com is your online resource for
commercial and industrial quality parts and equipment sales.
561-964-4949
visit us on line @ www.discount-equipment.com
TO PURCHASE THIS PRODUCT PLEASE CONTACT US
Select an option below to find your Equipment
Equipment Financing and
Extended Warranties Available

This manual suits for next models

1

Other Edco Saw manuals

Edco GMS-20 User manual

Edco

Edco GMS-20 User manual

Edco GMS-14A Assembly instructions

Edco

Edco GMS-14A Assembly instructions

Edco SS-24 Assembly instructions

Edco

Edco SS-24 Assembly instructions

Edco DS-20 Assembly instructions

Edco

Edco DS-20 Assembly instructions

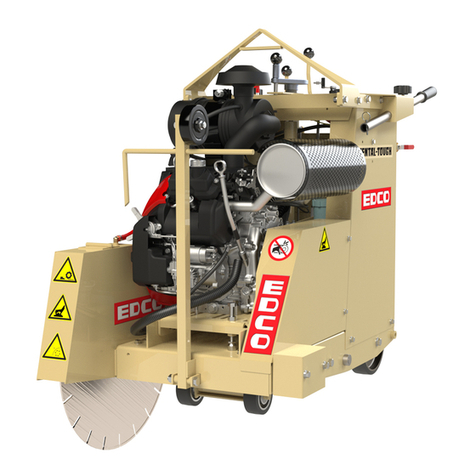
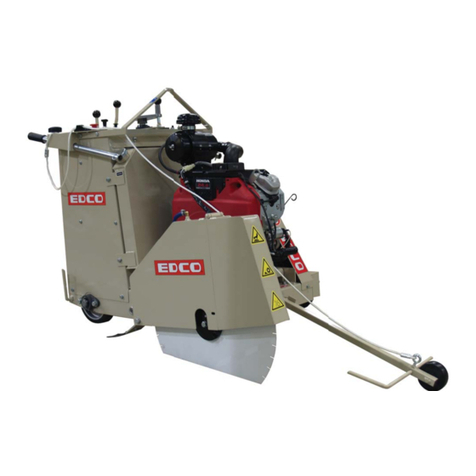
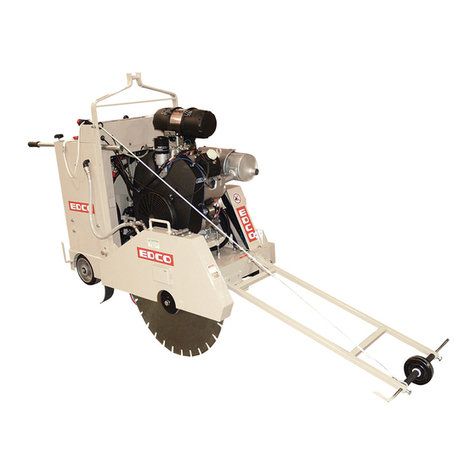
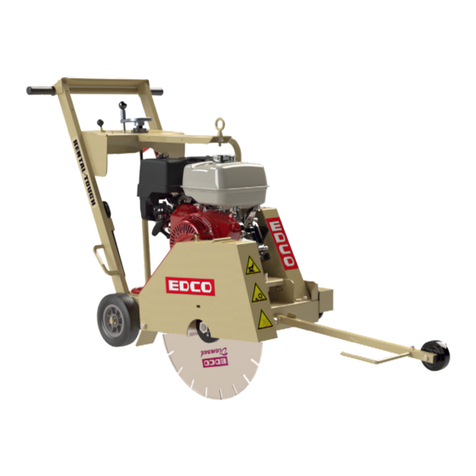
Edco HSS-14 Assembly instructions

Edco

Edco HSS-14 Assembly instructions

Edco SDE-14 Assembly instructions

Edco

Edco SDE-14 Assembly instructions

Edco HSS-14 User manual

Edco

Edco HSS-14 User manual

Edco TMS-10 Assembly instructions

Edco

Edco TMS-10 Assembly instructions

Edco SB-14 Datasheet

Edco

Edco SB-14 Datasheet

Edco TMS10-1L Datasheet

Edco

Edco TMS10-1L Datasheet

Edco BB14E User manual

Edco

Edco BB14E User manual

Edco SS-24 Assembly instructions

Edco

Edco SS-24 Assembly instructions

Edco SS-20 Assembly instructions

Edco

Edco SS-20 Assembly instructions

Edco DS-18 Assembly instructions

Edco

Edco DS-18 Assembly instructions

Edco SS-26 Series Assembly instructions

Edco

Edco SS-26 Series Assembly instructions

Edco MASONRY GMS- 20 Assembly instructions

Edco

Edco MASONRY GMS- 20 Assembly instructions

Edco TMS-10 Datasheet

Edco

Edco TMS-10 Datasheet

Edco SK-14 Datasheet

Edco

Edco SK-14 Datasheet

Edco MS-20 Datasheet

Edco

Edco MS-20 Datasheet

Edco SS-26 Series Assembly instructions

Edco

Edco SS-26 Series Assembly instructions

Edco SS-16A Assembly instructions

Edco

Edco SS-16A Assembly instructions

Edco BB14G User manual

Edco

Edco BB14G User manual

Edco KL-18 Datasheet

Edco

Edco KL-18 Datasheet

Edco GMS-10 Assembly instructions

Edco

Edco GMS-10 Assembly instructions

Popular Saw manuals by other brands

STAR TOOLS CS 165R Original manual translation

STAR TOOLS

STAR TOOLS CS 165R Original manual translation

Delta Homecraft PM-1694 Operating and maintenance instructions

Delta

Delta Homecraft PM-1694 Operating and maintenance instructions

Super Vac SVC4 user guide

Super Vac

Super Vac SVC4 user guide

Far Tools One SB 13VB Original manual translation

Far Tools

Far Tools One SB 13VB Original manual translation

Delta DELTA 28-984 Assembly manual

Delta

Delta DELTA 28-984 Assembly manual

Far Tools TS 1200 Original translation

Far Tools

Far Tools TS 1200 Original translation

Hyd-Mech S20P Service & parts manual

Hyd-Mech

Hyd-Mech S20P Service & parts manual

woodmizer LT28 Safety, Setup, Operation & Maintenance Manual

woodmizer

woodmizer LT28 Safety, Setup, Operation & Maintenance Manual

Far Tools LL 1400F manual

Far Tools

Far Tools LL 1400F manual

Z.I.P.P.ER MASCHINEN 9120039233529 user manual

Z.I.P.P.ER MASCHINEN

Z.I.P.P.ER MASCHINEN 9120039233529 user manual

Far Tools One IX 1200B Original manual

Far Tools

Far Tools One IX 1200B Original manual

Z.I.P.P.ER MASCHINEN ZI-WP500TN user manual

Z.I.P.P.ER MASCHINEN

Z.I.P.P.ER MASCHINEN ZI-WP500TN user manual

Festool TS 55 EBQ Original operating manual/spare parts list

Festool

Festool TS 55 EBQ Original operating manual/spare parts list

Clarke CMSF110 Operating & maintenance instructions

Clarke

Clarke CMSF110 Operating & maintenance instructions

Ferm SSM1007 Original instructions

Ferm

Ferm SSM1007 Original instructions

Parkside PFS 710 B1 Operation and safety notes

Parkside

Parkside PFS 710 B1 Operation and safety notes

IVT CS-185-RC instruction manual

IVT

IVT CS-185-RC instruction manual

Makita BPB180 instruction manual

Makita

Makita BPB180 instruction manual

manuals.online logo
manuals.online logoBrands
  • About & Mission
  • Contact us
  • Privacy Policy
  • Terms and Conditions

Copyright 2025 Manuals.Online. All Rights Reserved.