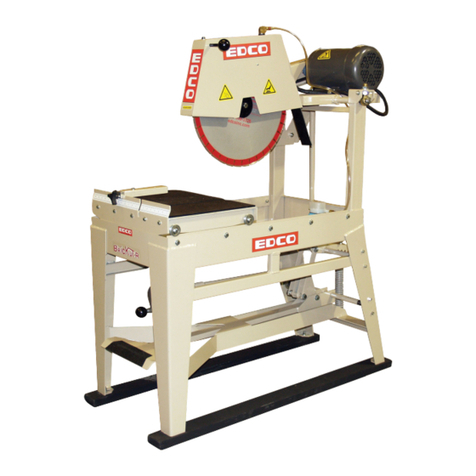
Edco GMS-10 Assembly instructions

Printed in USA
© 2000
Page 1
E-GMS10-I-03/00
100 Thomas Johnson Drive, Frederick, MD 21702-4600 USA
Phone (301) 663-1600 • 1-800-638-3326
Fax (301) 663-1607 • 1-800-447-3326
Operators Instruction Manual
GMS-10
10” Gasoline Powered Masonry Saw
NOTE:Shownwithoptionalcart
with Controlled Dust Operation

Printed in USA
© 2000
Page 2
E-GMS10-I-03/00
100 Thomas Johnson Drive, Frederick, MD 21702-4600 USA
Phone (301) 663-1600 • 1-800-638-3326
Fax (301) 663-1607 • 1-800-447-3326
Readandunderstandtheseinstructionsthoroughlybefore
attemptingtooperatethisequipment.. Differentmodelshave
differentpartsandcontrols,deathor serious injurycould
occurifthemachineisused improperly.
•Equipmentshouldonly beoperatedbytrained personnelingood
physicalconditionandmentalhealth(notfatigued). Theoperator
andmaintenancepersonnelmustbephysicallyabletohandlethe
bulkweightandpowerofthisequipment.
•Thisisaone person tool. Maintain a safe operating distance to
otherpersonnel. Itistheoperators’responsibilitytokeepother
people(workers,pedestrians,bystanders,etc.)awayduringopera-
tion. Blockoff theworkareainalldirectionswithroping,safety
netting,etc.forasafedistance. Failuretodosomayresultinothers
beinginjuredbyflyingdebrisorexposingthemtoharmfuldustand
noise.
•Thisequipmentisintendedforcommercialuse.
•Fortheoperatorssafety andthesafetyofothers,always keepall
guardsinplaceduringoperation.
•Neverletequipmentrununattended.
•PersonalProtectionEquipmentandpropersafetyattiremustbe
wornwhenoperatingthismachinery. Theoperatormustwearap-
provedsafetyequipment appropriateforthejob suchashardhat
andsafetyshoeswhenconditionsrequire. HearingprotectionMUST
beused(operationalnoiselevelsof this equipmentmayexceed
90db).Eye protectionMUSTbewornatalltimes. Adust/particle
respiratormustbeusedwhencuttingorgrindingwithoutanad-
equatedustcontrolsysteminplace.
Keepbodypartsandlooseclothingawayfrommovingparts.
Failuretodosocouldresultindismembermentordeath.
•Donotmodifythemachine. UseonlygenuineEDCOpartsand
accessories.RepairsandserviceshouldbeperformedbyEDCOor
byapprovedEDCO dealersorrepairtechnicians.
•Stopmotor/enginewhenadjustingorservicingthisequipment.
Maintainasafeoperatingdistancefromflammable
materials. Sparksfromthecutting-actionofthismachinecan
igniteflammablematerialsorvapors.
•Alwayskeepallguardsinplaceduringoperationfortheoperators’
safetyandthesafetyofothers.
READ AND UNDERSTAND THE OPERATORS INSTRUCTION MANUAL THOROUGHLY
BEFORE ATTEMPTING TO OPERATE THIS EQUIPMENT.
Death or serious injury could occur if this machine is used improperly.
Engineexhaustfromthisproductcontains
chemicalsknowntotheStateofCaliforniatocause
cancer,birthdefectsorotherreproductiveharm.
• Thisequipmentwill createdustfromthematerialbeingremoved.
ThatdustmaycontainchemicalsknowntotheStateofCaliforniato
causecancerand/orbirthdefectsorotherreproductiveharm.Check
thechemicalpropertiesofthematerialtoberemovedandtakethe
appropriateprecautions.
• Extreme care must be taken when operating electric
modelswithwaterpresent: Ensurepowercordisproperly
grounded,isattachedtoaGround-Fault-Interrupter(GFI)
outlet,andisundamaged.
• Check all electrical cables - be sure connections are tight and
cableiscontinuousandingoodcondition. Besurecableis cor-
rectlyratedforboththeoperatingcurrentandvoltageofthisequip-
ment. Improperconnectionoftheequipment-grounding
conductorcanresultinariskofelectricshock. Check
withqualifiedelectricianorservicepersonifthere is
any doubt as to whether the outlet is properly
grounded. Adheretoalllocalcodesandordinances.
•NOTE:Intheeventofamalfunctionorbreakdown,groundingpro-
videsapathofleastresistancefortheelectriccurrenttodissipate.
Themotorisequippedwithagroundedplugandmustbeconnected
toanoutletthatis properly installedandproperlygrounded. DO
NOTmodifytheplugprovidedonthemotor. Iftheplugdoesnotfit
theoutlethaveaqualifiedelectricianinstalltheproperreceptacle.
• SwitchmotorOFFbeforedisconnectingpower.
• Donotdisconnectpowerbypullingcord. Todisconnect,graspthe
plug,notthecord.
• Unplug power cord at the machine when not in use and before
servicing.
Engineexhaustfromthisproductcontainschemicalsknown
incertainquantities,tocausecancer,birthdefectsorother
reproductiveharm.
• Gasolineisextremelyflammableandpoisonous.Itshouldonlybe
dispensedinwellventilatedareas,andwithacoolengine.
Donotoperategasolinepoweredequipmentwith-
outadequateventilation. Carbonmonoxideisan
invisible,odorlessgasthatcan kill.
SAFETY
MESSAGES
EXHAUST HAZARD
GENERAL INSTRUCTIONS
SAFETY MESSAGES
GASOLINE POWERED EQUIPMENT
ELECTRICAL POWERED EQUIPMENT
• Safety Instructions are proceeded by a graphic alert
symbol of DANGER, WARNING, or CAUTION.
Indicatesanimminenthazardwhich,ifnotavoided,
willresultindeathor seriousinjury.
Indicatesanimminenthazardwhich,ifnotavoided,
canresultindeathorseriousinjury.
Indicateshazardswhich,ifnotavoided,couldresult
inseriousinjuryandordamagetotheequipment.
Printed in USA
© 2000
Page 3
E-GMS10-I-03/00
100 Thomas Johnson Drive, Frederick, MD 21702-4600 USA
Phone (301) 663-1600 • 1-800-638-3326
Fax (301) 663-1607 • 1-800-447-3326
Equipment Instruction Manual
EDCO Model GMS-10
Table of Contents
Section Page Number
Figure1
Safety Guidelines..............................................................................................................4
Operation Instructions................................................................................................5-7
Maintenance.............................................................................................................8-10
MaintenanceSchedule.....................................................................................................11
LimitedEquipmentWarranty................................................................................back cover
SPECIFICATIONSforGMS-10
Weight
Height
Width
Depth
119 lb
24 3/4 inches
18 3/4 inches
41inches
54kg
63cm
48cm
104cm
HOW TO ORDER REPAIR PARTS
To insure product safety and reliability, always use genuine EDCO
replacement parts when making repairs to the equipment.
When ordering parts, please specify the MODEL and SERIAL NUM-
BER of the machine as given on the NAMEPLATE. In addition, give
part number, description and quantity as listed on the parts list.
Please note: Due to improvements and changes in the equipment the
illustrations shown may be different from the actual machine.
Toll Free: Voice 1-800-638-3326 • Fax 1-800-447-3326
Note:
Dimensions and specifications
are for reference only and
subject to change.
41”
104cm
4 1/4”
12cm
6 1/4”
16cm
22 1/4”
57cm
24 3/4”
63cm
18 3/4”
48cm
36 1/4”
92cm

Printed in USA
© 2000
Page 4
E-GMS10-I-03/00
100 Thomas Johnson Drive, Frederick, MD 21702-4600 USA
Phone (301) 663-1600 • 1-800-638-3326
Fax (301) 663-1607 • 1-800-447-3326
Safety Guidelines
Eye and ear protection must be worn at all times while the GMS-10 is in use. During normal operation,
soundpressurelevelsexceed92dBA. Use onlyANSIapprovedsafetyglassesto help prevent eye
injury. Everyday eyeglasses have only impact resistant lenses; they are NOT safety glasses.
Operatormustwearappropriate clothing and footwear. Do not wear looseclothingorjewelrythat can
gettangledinmovingparts. Footwearshouldprovidesurefooting and protection from debris that may
be dropped. Take steps to be sure hair will not be caught in moving parts. If necessary, tie it back.
Disconnectthesparkplugwireleadbeforeperforminganyserviceonthemachine.
• When loading or unloading the saw, use caution. Make sure rolling table is locked using the table lock so that the
blade will not be damaged. (Figure 4, Item K) Do not move the saw while the engine is running.
• This unit is shipped new from the factory without oil or gasoline, it will need to be added before it is used.
ChecktheEngineManufacturer’sOwner’sManualforinstructionsonbreak-in, servicing and use of engine.
ThisGMS-10 gasoline powered saw is designed to be used in areas where electrical power is not
available. Donotoperategasoline-poweredequipmentwithout adequate ventilation. Theexhaustfumes
contain carbon monoxide, an invisible, odorless gas that can kill.
This machine is designed to cut brick, pavers, stone and tile. The work piece must be placed on the
rolling table surface and the table used to move the work piece to the blade. Cut only in a straight line.
Do not force or twist the work piece into the blade. Personal injury or damage to the equipment or blade
can result.
• Neverexceed the maximum operating speed of theblade. Matchthe blade speed rating with the arborshaft speed.
• Neverleavethesaw runningunattended.
•Neveroperatethis saw under the influence of drugs, alcoholorwhen taking medications that impair the senses or
reactions, or when excessively tired or under stress.
• Make sure all safety decals can be clearly read and understood. Replace damaged or missing decals immediately.
Safetywarningsand guidelinesdonot bythemselveseliminate danger.
Theyare not givenas substitutesforproper accidentpreventionprocedures andgood judgement.
Read and understand this Operator’s Instruction Manual,
and the Engine Manufacturer’s Owner’s Manual
before operating this equipment.
Death of serious injury can result if this machine is used improperly.

Printed in USA
© 2000
Page 5
E-GMS10-I-03/00
100 Thomas Johnson Drive, Frederick, MD 21702-4600 USA
Phone (301) 663-1600 • 1-800-638-3326
Fax (301) 663-1607 • 1-800-447-3326
Diagramsshown with HondaCyclone Dual-FilterElementEngine asanexample.
Consultthe Engine Manufacturer’sOwner’sManual forinformation onspecificmodels.
Operating Instructions
A. Spark Plug Lead
B. Air Filter
C. VacuumHook Up
D. WaterTray
E. OilDrain
F. Oil Plug/Dip Stick
G. EngineThrottle
H. FuelValve Lever
I. Choke
J. CycloneHousing
K. TableLock
L. Back Stop
M. RightAngleGuideBar
N. RollingTable
O. Diamond Blade
P. BladeGuard
Q. WaterHose
R. On/OffSwitch
S. RecoilStarter
T. FuelTank
U. Muffler
V. BeltGuard
W. DustChannel
X. DrainPlug
Y. (Optional)Cart
Figure3
G
H
I
J
A
B
C
D
E
F
Figure2
K
L
MNOPQ
RSTU
V
W
X
Y
Figure4

Printed in USA
© 2000
Page 6
E-GMS10-I-03/00
100 Thomas Johnson Drive, Frederick, MD 21702-4600 USA
Phone (301) 663-1600 • 1-800-638-3326
Fax (301) 663-1607 • 1-800-447-3326
Before Starting Engine:
•Readandunderstandtheinstructionssuppliedbytheenginemanufacturer.
• Familiarizeyourself with all engine and saw controls.
• Visuallyinspectthe entire machinefordamageorwear.Lookforsignsof oilorfuelleaks. Removeexcessdirt or debris.
Check that all nuts, bolts and screws are tightened. Check for proper alignment of moving parts, possible binding of
movingparts,breakage of parts, loose mounting brackets, and any other conditionthatmight affect operation.
• Inspect diamond blade and arbor shaft. Check blades for cracks, loose segments, worn or out-of-round arbor holes.
Donotusewarped,twisted,out-of-balancebladesoranybladeofquestionablecondition.(Figure 9)
• Check engine oil. Make sure that it is at the proper level and that it is clean.
Note:SomeengineshaveanOilAlertSystem that will automatically stop the engine before the oil level falls below the
safelimit. Toavoidan unexpected shut down, check theoillevel regularly during operation.
• Checkthefuellevel. Do not over fill fuel tank and never refuel a hot engine. Ifrefuelingisnecessaryduringoperation,
allowengine to cool down first.
•Inspect the air filter to be sure it is clean.
• Ifwetcutting,attachwatersourcetothemachine’ssupplyhoseasshowninFigure5. Ifyouhavea place for the water
torun,removethedrainpluginthewatertray(Figure4,ItemX).Aseconaryhoseattachmentisavailableasanoption
inplace of the drain plug (Figure 6).
• If wet cutting with the optional water pump which recycles the water from the tray, plug the drain hole and be sure the
water is circulating from the tray to the water pump.
• If dry cutting, attach the vacuum to the end of the dust channel. (Figure 7)
Note: WhiletheGMS-10 was designed to be used with a standard shopvac,EDCOrecommends using a heavy duty
industrial vacuum such as the VAC-100. The VAC-100 has the advantage of a Self-Purging System to help keep
concretedustfrombuilding up on the filter and a larger filter areatomaintainperformanceduring use. Thus, reducing
timewastedonfrequentlycleaning a standard shop vac and filter media.
Figure7
Figure5 Figure6

Printed in USA
© 2000
Page 7
E-GMS10-I-03/00
100 Thomas Johnson Drive, Frederick, MD 21702-4600 USA
Phone (301) 663-1600 • 1-800-638-3326
Fax (301) 663-1607 • 1-800-447-3326
Starting the Engine:
• Be sure blade is clear of item to be cut.
• Determine that the recoil starter assembly turns freely, starter rope pulls easily, and the rope retracts properly.
• Followtheinstructionssuppliedintheenginemanufacturer’sOwner’sManualforstartingengine.
• Open the throttle and allow engine to reach operating temperature. Do not use the throttle as a means to match the
specified blade speed to the arbor shaft speed. Note: To ensure the necessary power is transferred to the blade, all
cutting must be done at fullthrottle.The governor is factory set for correct speed - altering this setting will damage the
machine.Maintainengine to factory specifications.
Cutting:
• Place the work piece on rolling table against the backstop and use the rolling table to move the work piece to the
blade. Do not strain the engine while cutting or jam work piece into the blade. Do not twist the work piece while
cutting.
• Donotreachunderneathor around work piece while the blade is rotating.
• Keep stable footing at all times while cutting.
Keephair,clothing,fingersandallbodypartsawayfromtheblade
andanyothermovingparts.
• For wet cutting, maintain an adequate supply of water to cool the blade.
Note: Ifusingthe optional water pump, clean water must berunthrough
the cycle daily to avoid build up in the pump.
• When you have finished cutting, return throttle to idle. Stop the engine by
returning the engine mounted stop switch to the OFF position. Do not
leavethesawrunningunattended.
•Cleandust and debris from whole machine - including insidethe dust channel.
IMPORTANT REMINDER: This machine is designed to use diamond blades to cut pavers, stone, tile,
masonry products and brick. Do not use it to cut anything else.
PossibleDiamondBladeProblems
Figure9
Refertothe
RxforDiamondBlades
formoredetailedinformation
ondiamondblades.
Figure8
Blade Diameter
Arbor Shaft Diameter
Arbor Speed
10inches
3 5/8 inches
3600RPM
.625inches
Max Cutting Depth
UseDiamondBladesOnly

Printed in USA
© 2000
Page 8
E-GMS10-I-03/00
100 Thomas Johnson Drive, Frederick, MD 21702-4600 USA
Phone (301) 663-1600 • 1-800-638-3326
Fax (301) 663-1607 • 1-800-447-3326
Changing the Blade:
• Inspectthenewbladethoroughly before installing. Check for cracks, loose segments, worn or out-of-round arbor
holes. RefertotheRxforDiamondBlades pamphlet provided with your blade for more detailed information on
inspecting blades. Besure the blade is appropriate for the job and matches the arbor shaft speed & mounting
configurationonthissaw.(Seepage11)
The GMS-10 was designed to be used with diamond saw blades only. It is a “fixed head machine”, therefore it is
important to use blades that will not wear down. Fiber blades will wear down and the cut will not go all the way
through the work piece. In addition, for the vacuum system to operate properly when dry cutting, the blade must
reach into the dust channel.
Step One:
Push the rolling table all the way to the back of the
machine.
Loosenthe wing nut and slide blade guardup and tight-
enedintoplace.
(Figure10)
Step Two:
Loosenandremovelockingplatebolt.
(Figure11)
Carefullyremoveoldblade.
Inspectarborshaft,backingplate and
bladeguardwhilebladeisoff.
Cleanifdirtyorreplaceifdamaged or worn.
Step Three:
Lookfor“directionofrotation”markings on the new blade.
(Usuallyanarrowstampedontheblade.)
Placenewblade on the arbor shaft verifying that the markingsonthe blade follow the
proper direction of rotation. Blade should be positioned in the center of the dust channel.
(Figure12)
Reinstall and tighten bolt using a SAE 1/2” wrench.
Repositionbladeguardandtightenwingnut.
Reconnectsparkpluglead.
Maintenance
Disconnect spark plug lead before performing
any maintenance on this machine.
Consult the Engine Manufacturer’s Owner’s Manual for more detailed engine maintenance instructions.
Figure10
Figure11
Figure12

Printed in USA
© 2000
Page 9
E-GMS10-I-03/00
100 Thomas Johnson Drive, Frederick, MD 21702-4600 USA
Phone (301) 663-1600 • 1-800-638-3326
Fax (301) 663-1607 • 1-800-447-3326
Belt Adjustment and Replacement:
• Periodically check to be sure the belts are undamaged and that they are at the proper tension. Slipping belts will
overheatcausingthecuttingspeedtobelimitedandwillshortenthelifeofthebelts. Over-tensionedbeltswill shorten
the life of the belts and bearings.
• On new equipment and after installing new belts, be certain to re-tension the belts after the first 4 hours of use. New
belts are stiff and require a break in period. Belts that become loose could slip and/or overheat.
• Damaged, stretched or excessively worn belts should be replaced with a new complete set of belts.
IMPORTANT: Belts must be replaced as a set, even if only one belt is showing wear.
• Remove belt guard (3 bolts) and inspect belts. Astraight edge is a good tool to use to be certain sheaves are
evenandproperlyaligned. (Figure 13)
• To tension/loosen belts or to remove worn belts, back off engine mounting bolts (4) and use the jacking screw to
slidetheengine forward or back until belts are at proper tensionorlooseenough to remove.
• To remove belts, back off engine mounting bolts (4) and use the jacking screw to allow the engine to slide back until
beltsslideoff of the sheaves.
• Place a complete set of new belts on the machine. Reposition engine then tighten bolts. Reinstall belt cover.
Clean and Lubricate Wheels on Rolling Table:
During daily visual inspection, check to be sure the wheels on the rolling
table move smoothly and that there is no debris in the wheel tracks.
(Figure15)
Lubricatethewheels as necessary. Replace damaged or worn wheels.
Figure13
Jacking Screw
Engine
Mounting
Bolts
Figure14
Figure15

Printed in USA
© 2000
Page 10
E-GMS10-I-03/00
100 Thomas Johnson Drive, Frederick, MD 21702-4600 USA
Phone (301) 663-1600 • 1-800-638-3326
Fax (301) 663-1607 • 1-800-447-3326
Change Engine Oil:
• Check Engine Oil before each operation. Open the filler cap and look at the dip stick. (Figure 16)
Oil should be clearly visable both on the stick and in the cavity and should look fairly clean. Running the machine on
dirty oil or when the oil is low will result in damage to the equipment.
• ChangetheEngineOil after every 50 hours of operation - or soonerasconditionsrequire. Referto the Engine
Manufacturer’sOwner’sManualforspecificviscosityrecommendationsandchanginginstructions.
Inspect and Clean OilAir Filter:
Shownwith Honda Cyclone DualFilter style element.
Outerfoamfilterisremovableforcleaning.
RefertotheEngineManufacturer’sOwner’sManual
for instructions on specific models.
Check air filter at least once daily.
(Figure19)
Dirt build up on the filter will cause the engine to wear out faster.
Figure18
Figure16
Figure19
Figure17
OilDrain
Dip Stick/
FillerCap

Printed in USA
© 2000
Page 11
E-GMS10-I-03/00
100 Thomas Johnson Drive, Frederick, MD 21702-4600 USA
Phone (301) 663-1600 • 1-800-638-3326
Fax (301) 663-1607 • 1-800-447-3326
Maintenance Schedule
Thisis for a quick reference to the information supplied in the Maintenance portion of this manual.
Repairs are to be done
by authorized EDCO
Dealers only.
Read and follow instructions
in the Engine Manufacturer’s
Owner’s Manual.
ChangeEngineOil
Daily
Before
Operation
After
Operation
AsRequired
Every50Hours
ofOperation
Visually Inspect Entire
MachineandHardware
Clean and OilAir Filter
InspectGuards
CheckEngineOil
InspectBladeand
ArborShaft
LubricateWheels
onRollingTable
Inspect Belts
CleanDustand
DirtOffMachine
FollowtheEngine
Manufacturer’s
Maintenance
Instructions
X
X
X
X
X
X
X
X
X
X
ReplaceSparkPlug
Annually

Printed in USA
© 2000
Page 12
E-GMS10-I-03/00
100 Thomas Johnson Drive, Frederick, MD 21702-4600 USA
Phone (301) 663-1600 • 1-800-638-3326
Fax (301) 663-1607 • 1-800-447-3326
LIMITED EQUIPMENT WARRANTY
USE ONLY GENUINE EDCO PARTS AND ACCESSORIES
For your own safety, the safety of others and the life of your machine
Equipment Development Company, Inc. herein re-
ferredto asEDCOwarrants thateachnew unit manu-
factured by EDCO to be free from defects in material
and workmanship in normal use and service for a pe-
riod of (1) one year (except in the case of the cutter
drumassembly on all modelconcrete asphalt planes,
in which case the warranty period shall be 90 days)
from date of shipment to the original retail or equip-
ment rental center owner.
EDCO will, at its option, repair or replace, at the
EDCO factory or at a point designated by EDCO any
part, which shall appear to the satisfaction of EDCO
inspectionto have been defectiveinmaterial or work-
manship.
Thiswarranty, does not apply tofailure occurring as a
result of abuse, misuse, negligent repairs, corrosion,
erosion, normal wear and tear, alterations or modifi-
cations made to the product without express written
consent of EDCO: or failure to follow the recom-
mended operating practices and maintenance pro-
cedures as provided in the products operating and
maintenance manuals.
This warranty does not obligate EDCO to bear any
transportationcharges inconnection with thereplace-
ment or repair of defective parts. This warranty does
notobligate EDCOto bearany expensefor traveltime
or of personnel in connection with any service calls.
Accessories or equipment furnished and installed on
the product by EDCO but manufactured by others,
including but not limited to engines, motors, electri-
calequipment, transmissions, etc., shall carrytheac-
cessory manufacturers’ own warranty.
THISWARRANTYISIN LIEU OFALLOTHERWAR-
RANTIES, EXPRESSED OR IMPLIED, OR STATU-
TORY, INCLUDING ANY WARRANTIES OF MER-
CHANTABILITY OR OF FITNESS FORAPARTICU-
LAR PURPOSE.
LIABILITY LIMITATIONS
The remedies of the user set forth under provisions
ofwarranty outlined above aretheexclusive and total
liability of EDCO with the respect to their sale or the
equipment and service furnished hereunder, in con-
ction with the performance or breach thereof, or from
the sale, delivery, installation, repair or technical di-
rection covered by or furnished under the sale,
whether based on contract, warranty, negligence, in-
demnity, strict liability, or otherwise shall not exceed
thepurchasepriceoftheunitofequipmentuponwhich
such liability is based.
EDCO will not in any event be liable to the user, any
successors in interest or any beneficiary or assignee
relating to this sale for any consequential, incidental,
indirect, special or punitive damages arising out of
this sale or any breach thereof, or any defects on, or
failure of, or malfunction of the equipment under this
sale based upon loss of use, lost profits or revenue,
interest, lost goodwill, work stoppage, impairment of
other goods, loss by reason of shutdown or non-
operation, increased expenses of operation of the
equipment, cost of purchase or replacement power
of claims of users or customers of the user for ser-
vice interruption whether or not such loss or damage
is based on contract, warranty, negligence, indem-
nity, strict liability, or otherwise.
EDCO reserves the right to modify, alter and improve
any part or parts without incurring any obligation to
replaceany part or parts previously soldwithout such
modified, altered or improved part or parts.
No person is authorized to give any other warranty or
to assume any additional obligation on EDCO’s be-
halfunless made in writingandsigned by an officerof
EDCO.
Equipment Development Company, Inc.
Table of contents
Other Edco Saw manuals

Edco
Edco SS-16A Assembly instructions

Edco
Edco SDE-14 Assembly instructions

Edco
Edco KL-18 Datasheet

Edco
Edco MS-20 Datasheet

Edco
Edco SK-14 Datasheet

Edco
Edco SS-26 Series Assembly instructions

Edco
Edco TMS10-1L Datasheet

Edco
Edco SS-26 Series Assembly instructions

Edco
Edco HSS-14-E Assembly instructions

Edco
Edco HSS-14 Assembly instructions

Edco
Edco KL-14 User manual

Edco
Edco SB-14 Datasheet

Edco
Edco TMS-10 Datasheet

Edco
Edco DS-18 Assembly instructions

Edco
Edco SS-24 Assembly instructions

Edco
Edco BB14G User manual

Edco
Edco BB14E User manual

Edco
Edco SS-20 Assembly instructions

Edco
Edco MASONRY GMS- 20 Assembly instructions

Edco
Edco DS-20 Assembly instructions