Contents
1. General information page
1.1 Safety . . . . . . . . . . . . . . . . . . . . . . . . . . . . . . . . . . . . . . . . . . . . . . . . . . . . . . . .4
1.2 EC Declaration of Conformity for Machinery . . . . . . . . . . . . . . . . . . . . . . . . . . . .5
1.3 Technical data . . . . . . . . . . . . . . . . . . . . . . . . . . . . . . . . . . . . . . . . . . . . . . . . . .6
2. Operator’s manual
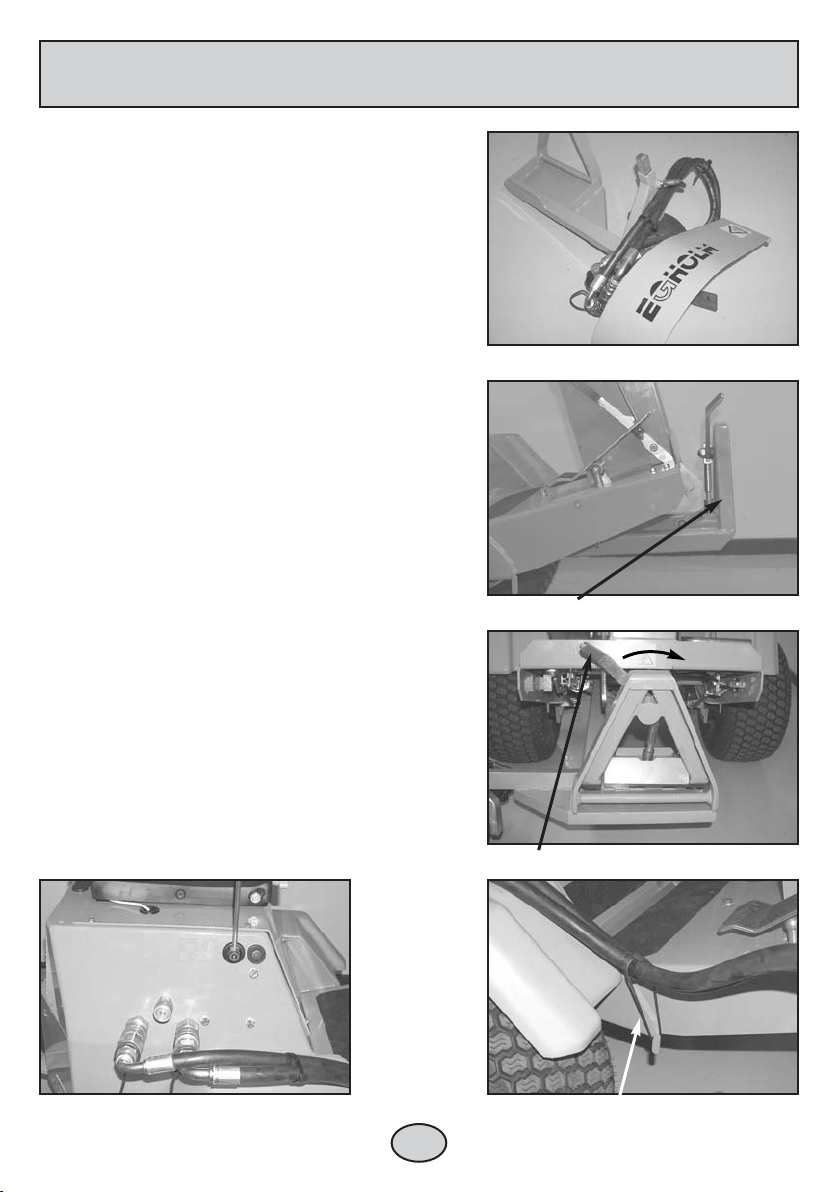
2.1 Assembly / Disassembly . . . . . . . . . . . . . . . . . . . . . . . . . . . . . . . . . . . . . . . . . .7
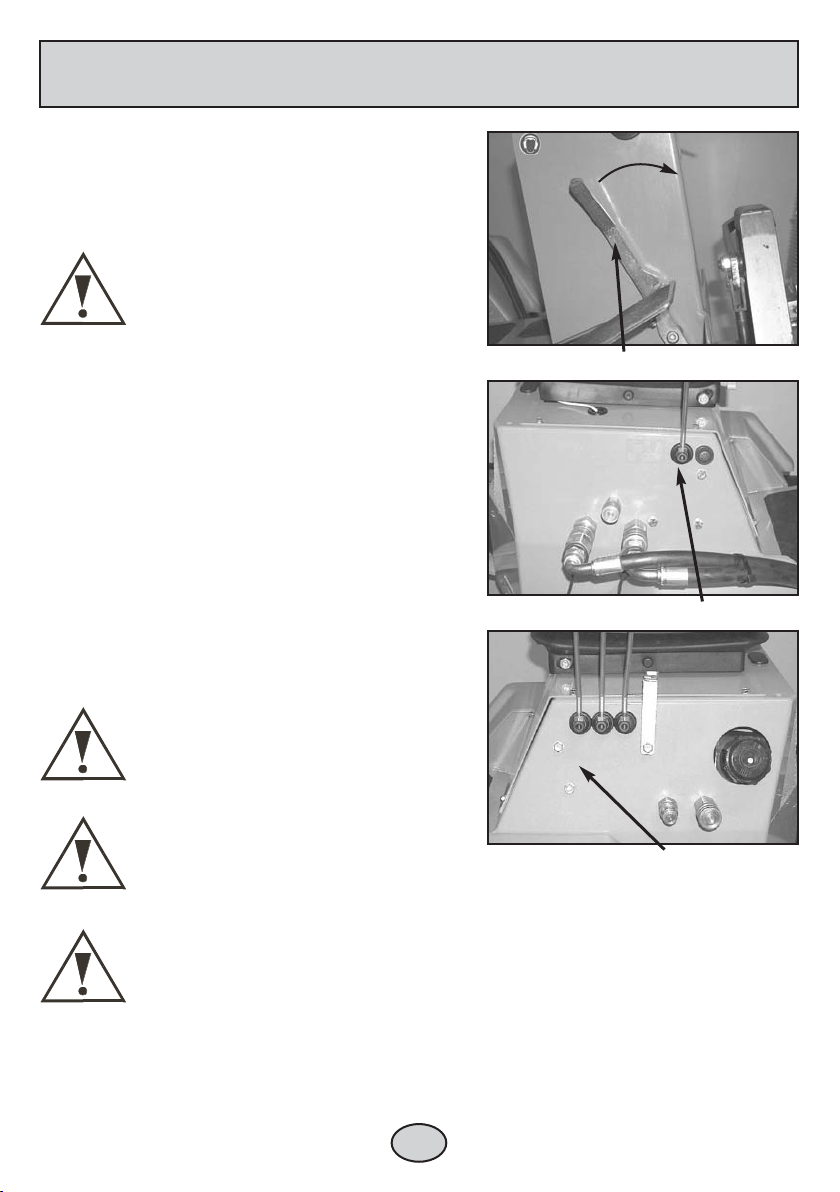
2.2 Important before start-up . . . . . . . . . . . . . . . . . . . . . . . . . . . . . . . . . . . . . . . . . .8
2.3 Start-up . . . . . . . . . . . . . . . . . . . . . . . . . . . . . . . . . . . . . . . . . . . . . . . . . . . . . . .8
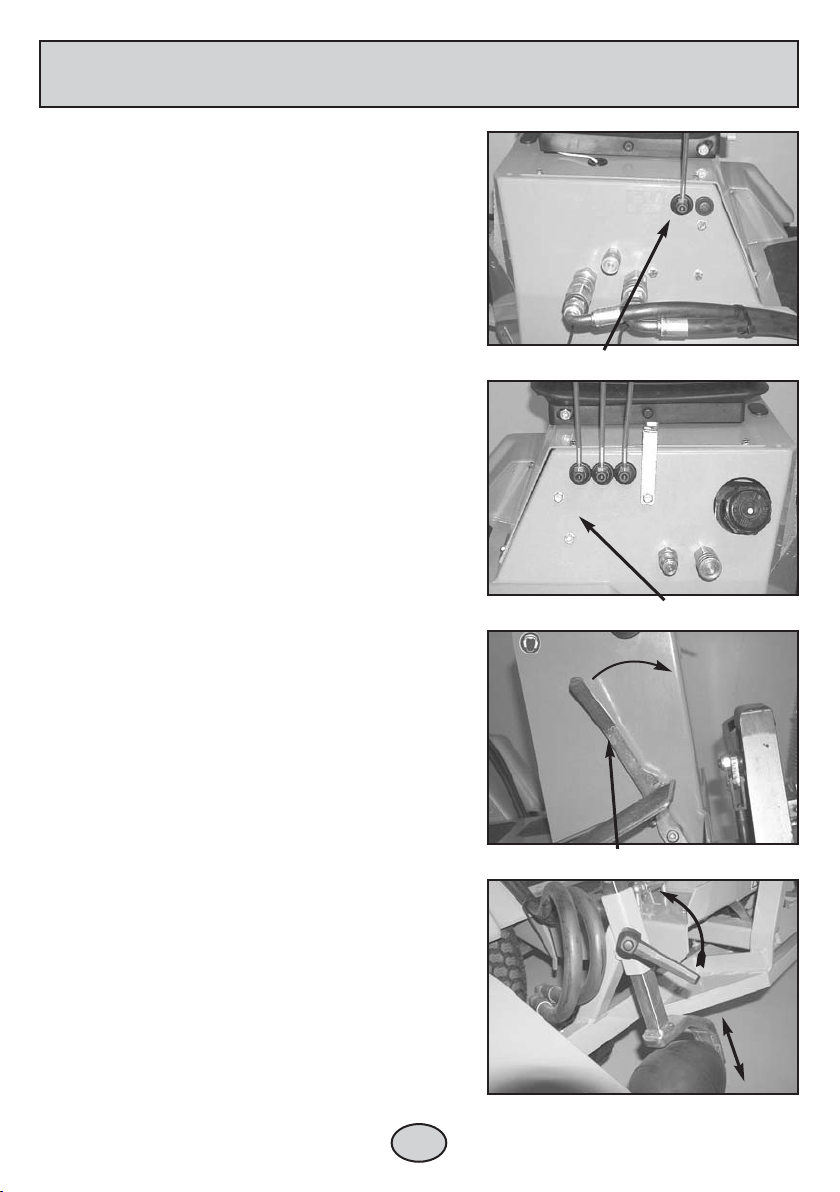
2.4 Adjustment . . . . . . . . . . . . . . . . . . . . . . . . . . . . . . . . . . . . . . . . . . . . . . . . . . . .9
3. Service and maintenance
3.1 Cleaning . . . . . . . . . . . . . . . . . . . . . . . . . . . . . . . . . . . . . . . . . . . . . . . . . . . . .10
3.2 Maintenance . . . . . . . . . . . . . . . . . . . . . . . . . . . . . . . . . . . . . . . . . . . . . . . . . .10
4. Conditions
4.1 Warranty . . . . . . . . . . . . . . . . . . . . . . . . . . . . . . . . . . . . . . . . . . . . . . . . . . . . .12
4.2 Complaints . . . . . . . . . . . . . . . . . . . . . . . . . . . . . . . . . . . . . . . . . . . . . . . . . . .13
4.3 Disposal . . . . . . . . . . . . . . . . . . . . . . . . . . . . . . . . . . . . . . . . . . . . . . . . . . . . .13
33
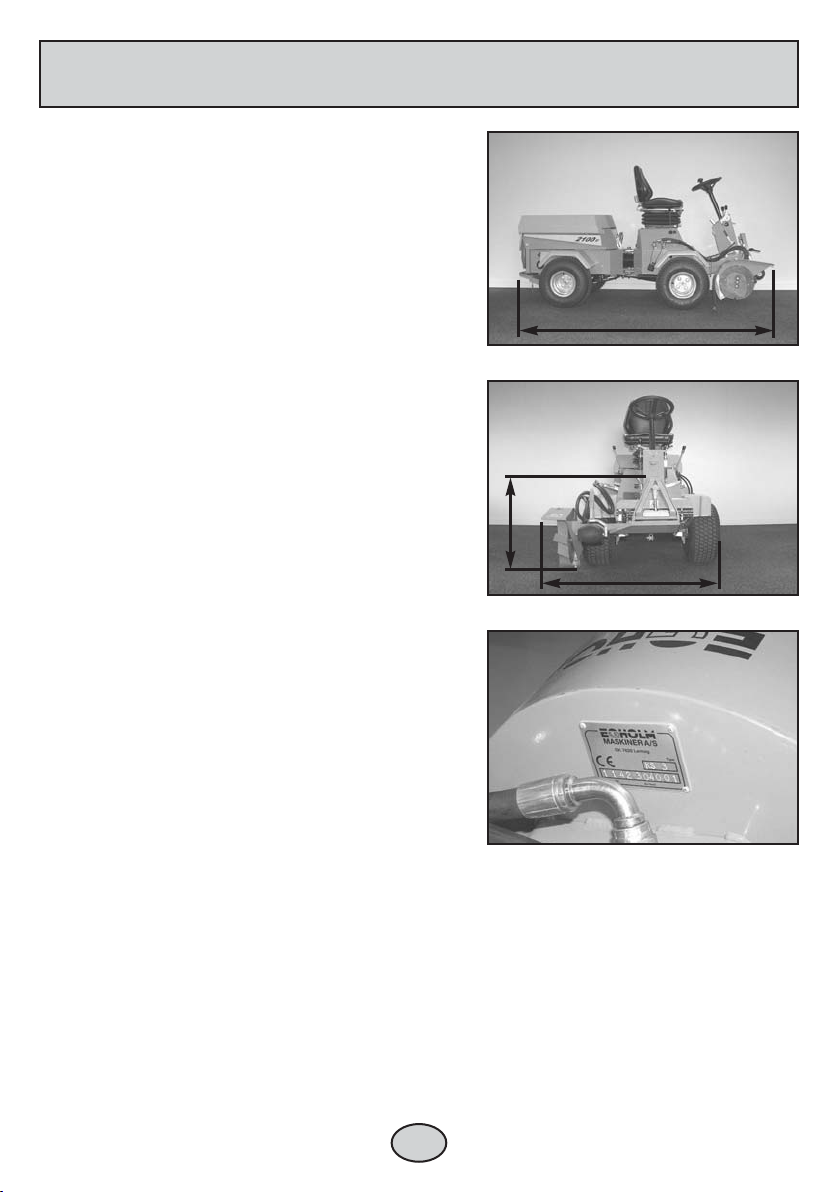
1. General information
To give the complete finish when cutting lawns
fix the Lawn Edger onto the Egholm 2100.
The Lawn Edger cuts the edges of the grass effi-
ciently and at an even pace, and the cut edge is
cultivated in one and the same procedure.
The Lawn Edger is fully hydraulic, and the work-
ing depth is adjusted to the situation with the
adjustable gauge wheel.
Useful tips
Best results are achieved when the ground is a
little damp.
Never drive too fast for the Lawn Edger to cut
the edge cleanly.
Wipe the snap couplings before fitting, as this
protects the hydraulic system.
Daily cleaning and maintenance will extend the
lifetime of both the machine and the attachment.