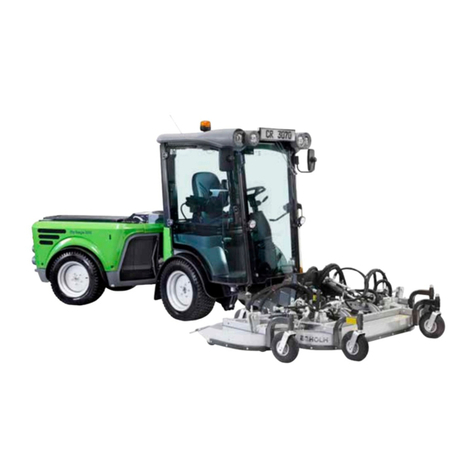
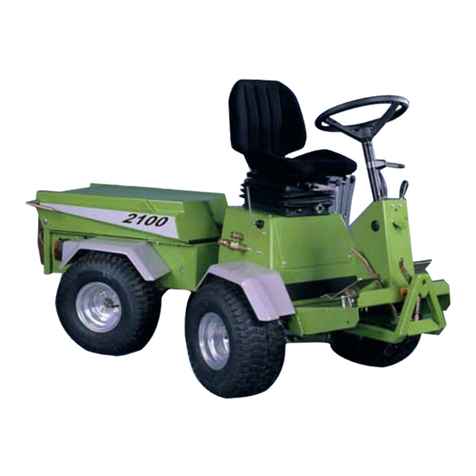
Egholm 2100 User manual

OPERATOR’S MANUAL
Flail Mower/Verticutter
90101351-02 UK

Introduction
Dear Customer
Thank you for buying an Egholm product
The Egholm 2100 is a Danish designed and manufactured product which offers a very flexible way
of maintaining outdoor areas.
Optimal performance of your Egholm Flail Mower/Verticutter:
To ensure the optimal performance of your Egholm Flail Mower/Verticutter, please read this operator’s
manual carefully before starting to use the machine. Failure to do so can result in personal injury and
damage to the machine.
Safety:
The Flail Mower/Verticutter is equipped with various devices to ensure optimal operational safety both
for the user and the surroundings. We therefore ask you to pay particular attention to Section 1.1
Safety. The machine must only be serviced by professionals.
The Flail Mower/Verticutter is designed only for use by professionals. On delivery, the user will be given
a thorough training in using the machine, so that he becomes a competent operator. Do not lend the
machine to anyone who has not been thoroughly trained and has not read this manual carefully.
The operator’s manual should be considered as a permanent part of the machine and so must
remain with it if the machine is sold.
Warnings:
Some items in this operator’s manual are marked with this warning symbol.
The warning indicates areas where extra care has to be taken to avoid personal
injury or damage to the machine and its accessories. The warning also shows
what you should pay special attention to.
Reservations:
As it is the Egholm policy to make continuous improvements, we reserve the right to alter the specifi-
cations and equipment at any time without notice. Egholm Maskiner A/S accepts no liability for errors
or shortcomings in the operator’s manual.
Contact us:
Should you have questions of any kind regarding your new Egholm product, do not hesitate to con-
tact Egholm Maskiner A/S.
Best regards
Egholm Maskiner A/S - Transportvej 27 - DK - 7620 Lemvig
Tel: (+45) 97 81 12 05 - Fax: (+45) 97 81 12 10
22

Contents
1. General information page
1.1 Safety . . . . . . . . . . . . . . . . . . . . . . . . . . . . . . . . . . . . . . . . . . . . . . . . . . . . . . . .4
1.2 EC Declaration of Conformity . . . . . . . . . . . . . . . . . . . . . . . . . . . . . . . . . . . . . . .6
1.3 Technical data . . . . . . . . . . . . . . . . . . . . . . . . . . . . . . . . . . . . . . . . . . . . . . . . . .7
2. Instructions for use
2.1 Assembly / Disassembly . . . . . . . . . . . . . . . . . . . . . . . . . . . . . . . . . . . . . . . . . .8
2.2 Important before start-up . . . . . . . . . . . . . . . . . . . . . . . . . . . . . . . . . . . . . . . . . .9
2.3 Start-up . . . . . . . . . . . . . . . . . . . . . . . . . . . . . . . . . . . . . . . . . . . . . . . . . . . . . .10
2.4 Adjustment . . . . . . . . . . . . . . . . . . . . . . . . . . . . . . . . . . . . . . . . . . . . . . . . . . .11
3. Service and maintenance
3.1 Cleaning . . . . . . . . . . . . . . . . . . . . . . . . . . . . . . . . . . . . . . . . . . . . . . . . . . . . .12
3.2 Maintenance . . . . . . . . . . . . . . . . . . . . . . . . . . . . . . . . . . . . . . . . . . . . . . . . . .13
4. Conditions
4.1 Warranty . . . . . . . . . . . . . . . . . . . . . . . . . . . . . . . . . . . . . . . . . . . . . . . . . . . . .16
4.2 Complaints . . . . . . . . . . . . . . . . . . . . . . . . . . . . . . . . . . . . . . . . . . . . . . . . . . .17
4.3 Disposal . . . . . . . . . . . . . . . . . . . . . . . . . . . . . . . . . . . . . . . . . . . . . . . . . . . . .17
33
1. General information
The Egholm 2100 is perfect for cutting very high
grass or for chemical-free weed-control of lawns.
TThheeFFllaaiillMMoowweerr
For rough grassed areas which are not regularly
mown, the Egholm Flail Mower is the perfect
tool. Watching it deal with very high grass, with a
cutting width of 1226 mm, is an impressive sight.
TThheeVVeerrttiiccuutttteerr
The Verticutter is the perfect means to keep a
lawn neatly mown and improve the resistance of
the grass to weeds without the use of weed-
killers. Grass needs lots of light and air, and so
the Verticutter removes moss and also cuts a
thin score in the lawn to allow air to the roots.
The Verticutter is fitted to the Egholm 2100 in a
floating position and has four wheels to ensure
the correct scoring depth. It operates very close
to the ground and so provides a thoroughly level
and even lawn surface.
The Flail Mower/Verticutter must not be used for
any purpose other than cutting grass and
removing moss from lawns in accordance with
this operator’s manual.

1. General information
1.1 Safety
Make sure no one is standing
close to the machine.
MMaakkeessuurreetthheerreeiissnnoooonneecclloosseettootthhee
mmaacchhiinneewwhheenniittiissiinnuussee..
N.B!
AAssiittiissaarrttiiccuullaatteedd,,tthheerreeaarreennddoofftthhee
mmaacchhiinneesswwiinnggssoouuttwwhheennttuurrnniinngg..
MMaakkeessuurreennoooonneeiissnneeaarrtthheemmaacchhiinnee
aasstthheerreeiissaaddaannggeerrooffccrruusshhiinngg..
Warning! Rotating parts!
MMaakkeessuurreennoooonneeppuuttsstthheeiirrffiinnggeerrssoorr
ttooeessuunnddeerrtthheemmoowweerrwwhhiilleeiittiissmmoovviinngg
ttooaavvooiiddppeerrssoonnaalliinnjjuurriieess..
Warning! Avoid flying stones:
RReemmoovveessttoonneessaannddbbrraanncchheessffrroommtthhee
llaawwnnaasstthheeyyccaannbbeeuunniinntteennttiioonnaallllyy
tthhrroowwnnoouuttaannddccaauusseeddaammaaggeet
tooppeeoo--
pplleeaannddpprrooppeerrttyy..RReegguullaarrllyycchheecckktthhee
pprrootteeccttiivveessccrreeeennssoonntthheeffrroonnttaanndd
bbaacckkeeddggeessoofftthheemmoowweerrgguuaarrddffoorr
ccrraacckkssoorrwweeaarr..
Reduction of noise and energy
consumption:
IIttiissrreeccoommmmeennddeeddnnoottttooddrriivveewwiitthh
aahhiigghheerreennggiinneessppeeeeddtthhaannnneecceessssaarryy,,
ttoorreedduucceetthheennooiisseeaannddtthheeeenneerrggyy
ccoonnssuummppttiioonn..
Avoid damage to hearing:
UUsseeaapppprroovveeddhheeaarriinnggpprrootteeccttoorrsswwhhiillee
tthheemmaacchhiinneeiissiinnuussee..
44
Prevent people from standing
in the working area.
Warning label
Warning label
Use approved hearing protectors
11
11
22
22
33
33
44
44

1. General information
Avoid roll-overs:
DDoonnoottddrriivveetthheemmaacchhiinneeiinnaappllaaccee
wwhheerreeiittccaannsslliiddee,,ttiippoorrrroollll..DDoonnoott
ddrriivveeoonnssllooppeesswwiitthhaanniinncclliinneeooffmmoorree
tthhaann1100°°..((PPiiccttuurree11))
Avoid roll-overs:
IIttiissrreeccoommmmeennddeeddtthhaattccoouunntteerrwweeiigghhttss
bbeeffiitttteeddttootthheerreeaarrwwhheeeellssttoopprreevveenntt
tthheemmaacchhiinneettiippppiinnggffoor
rwwaarrddss..((PPiiccttuurree22))
55
Use counterweights on the rear wheels
Max. 10°
11
11
22
22
Do not drive on slopes with an incline of
more than 10°

1. General information
66
1.2 EC Declaration of Conformity for Machinery
Manufacturer: Egholm Maskiner A/S
Address: Transportvej 27, DK-7620 Lemvig
Phone: (+45) 97 81 12 05
hereby declares that
-The machine: Flail Mower/Verticutter Type: SLK
Serial no.: ____________________________ Year: _________________
- is in conformity with the provisions of the Machine Directive, (directive
98/37/EC) and with national implementing legislation.
- is in conformity with the provisions of the following EC directive:
Directive 2000/14/EC
The Egholm 2100 fitted with the cab FH 2100 (ROPS approved)
- has been tested at the Danish Institute of Agricultural Sciences at Bygholm in
conformity with directive 86/298/EEC concerning rear mounted, roll-over pro-
tection structures of narrow-track wheeled agricultural and forestry tractors.
Place: Lemvig
Date: ______________
Signature: ______________
Managing Director Kaj Egholm

1. General information
77
Side view
Front view
Counterweights
Big radiator cover
HH
HH11
11
HH
HH
WW
WW
LL
LL
11
11
22
22
33
33
44
44
1.3 Technical data
Dimensions: Assembled: Storage dimensions:
Length (L): 2895 mm 955 mm
Width (W): 1475 mm 1475 mm
Height without cab (H) 435 mm
Height with cab (H1) 1935 mm
Technical data:
Type description: SLK
Sound power level, re Directive 2000/14/EU.
Sound pressure level, with cab (operator seat): 86 dB(A)
Sound pressure level, without cab (operator seat): 84 dB(A)
Rotor revolutions, max: 2800 rpm
FFllaaiillmmoowweerr::
Cutting width: 1226 mm
Cutting height: 0-110 mm
Number of flails: 76
Cutting area per hour, approx: 10,000 m2
VVeerrttiiccuutttteerr
Scoring width: 1172 mm
Scoring depth: 0-15 mm
Number of vertical blades: 38
N.B!
Specifications may be changed without prior notice.
Extra equipment:
VVeerrttiiccaallbbllaaddeess: used for scoring which provides air
to the root system of the lawn and removes moss.
CCoouunntteerrwweeiigghhttss: fitted to the rear wheels as stabilising
weights to the cutter. (Picture 3)
BBiiggrraaddiiaattoorrccoovveerr::recommended for frequent cutting
in dry periods. (Picture 4)

2. Operator’s manual
2.1 Assembly / Disassembly
1. It is recommended that the hydraulic hoses should
be run over the frame of the mower to keep them
clear and free from dirt when the mower is fitted.
(Picture 1)
2. The locking handle on the A-frame of the basic
machine must be in the open position. (Picture 2)
3. Drive the basic machine right up to the A-frame of
the mower, so the A-frames fit into each other.
4. Raise the A-frame with lever A on the left-hand side
of the basic machine until the support wheels are
freely suspended above the ground. (Picture 3)
5. Lock the mower in place with the locking handle on
the A-frame. (Picture 2)
6. Stop the machine. (See the operator’s manual for the
base machine, Section 2.2)
7. Attach the hydraulic hoses with the rubber ring under
the running board to ensure it runs correctly over the
screen. (Picture 4)
8. Fit the hydraulic hoses to the D-connectors on the
right-hand side of the machine.
The oil overflow hose D3 mmuussttbe fitted. (Picture 5)
88
Hydraulic hoses
Locking handle on the A-frame - open
D-connectors
The hoses are fastened with a
rubber strap
11
11
22
22
33
33
AA
AABB
BBCC
CC
55
55
DD
DD11
11
DD
DD33
33
DD
DD22
22
44
44
L
o
c
k
e
d
Lever A on the left-hand side of the machine

2. Operator’s manual
Fitting the counterweights:
1. Replace every second wheel bolt on both rear
wheels with the bolts supplied, with an internal
thread in the heads. (Picture 1)
2. Locate the counterweights on the wheel bolts and
fasten them with the bolts supplied to a torque of 65
Nm. (Picture 2)
Removing:
Follow the procedure for fitting in reverse order. Put
the protective caps on the snap couplings to protect
them from dirt. (Picture 3)
2.2 Important before start-up
Check the blades are sharp, intact and free from
cracks before fitting the mower. This avoids unnec-
essary breaks in operation while mowing. (Picture 4)
Warning!
RReemmoovveessttoonneessaannddbbrraanncchheessffrroommtthhee
llaawwnnaasstthheeyyccaannbbeeuunniinntteennttiioonnaallllyy
tthhrroowwnnoouuttaannddccaauusseeddaammaaggee
ttooppeeoo--
pplleeaannddpprrooppeerrttyy..
WWaarrnniinngg!!
MMaakkeessuurreettooaavvooiiddddrriivviinnggoovveerrwweellll
ccoovveerrssoorrssiimmiillaarroobbssttaacclleessttooaavvooiidd
ddaammaaggiinnggtthheebbllaaddeess,,wwhheeeellssoorrgguuaarrdd..
99
Change the wheel bolts
Fit and tighten the counterweights
Protective caps on the connectors
Checking the blades
11
11
22
22
33
33
44
44

2. Operator’s manual
2.3 Start-up
A) Start the machine. (See the operator’s manual for
the base machine, Section 2.2)
B) Lower the mower by pushing lever A on the left-
hand side of the machine down to position 2.
(Picture 1)
C) It is recommended to hold the lever down for about
2 seconds, as after this the mower is in a floating
position and follows the contours of the ground.
D) Turn the throttle until it is at least half open. (Picture 2)
E) Start the mower by slowly pushing lever D on the
right-hand side of the machine up to position 1.
(Picture 3)
F) Now open the throttle fully (full power) to achieve the
correct blade speed. Adjust the driving speed to suit
the conditions.
G) While mowing, make sure to keep the water cooler,
oil cooler and radiator cover free from grass, to
avoid overheating. (See Section 3.1 Cleaning).
Warning — Rotating parts:
MMaakkeessuurreennoooonneeppuuttsstthheeiirrffiinnggeerrssoorr
ttooeessuunnddeerrtthheemmoowweerrwwhhiilleeiittiissmmoovviinngg
ttooaavvooiid
dppeerrssoonnaalliinnjjuurriieess..
Warning!
MMaakkeessuurreetthheerreeiissnnoooonneecclloosseettootthhee
mmaacchhiinneewwhheenniittiissrruunnnniinngg..
N.B!
WWhheennttuurrnniinngg,,tthheerreeaarroofftthheemmaacchhiinnee
sswwiinnggssoouutt,,ssootthheerreeiissaarriisskkooffccrruusshh--
iinnggoorrccoolllliissiioonn..
1100
Lever A on the right-hand side
Turn the throttle until it is half open
Lever D on the right-hand side
11
11
22
22
33
33
AA
AA
DD
DD
BB
BBCC
CC

2. Operator’s manual
2.4 Adjustment
Adjusting the cutting height (Flail Mower):
Adjust the cutting height as follows:
1) Stop the machine and disconnect the hydraulic hoses.
2) Rough adjustments are made with the 7 adjusting
rings in the interval 0-110 mm (see table).
Remove the locking ring, take off the wheel and
place the required number of adjusting rings
between the wheel and the mower bracket (the
same number on both front wheels). (Picture 1).
For example, 4 adjusting rings between the wheel
and the mower bracket allow the mower to be finely
adjusted to a height of between 25 and 78 mm.
3) Fine adjustment is made with the stepless adjust-
ment handle, which adjusts the height of the rear
edge of the mower.
4) For very tall grass, the mower should have a bigger
opening at the back, big enough to eject the grass
without squeezing it into clumps. (Picture 2)
In other words it is an advantage to use as few adjusting
rings as possible to achieve the required cutting height.
Adjusting the scoring height (Verticutter):
Adjust the depth of the Verticutter as follows:
1) Stop the machine and disconnect the hydraulic
hoses. Remove the locking ring, take off the wheel
and place the required number of adjusting rings
between the wheel and the mower bracket (the
same number on both front wheels) to achieve the
required scoring depth. We recommend a depth of
between 5 and 10 mm.
2) For vertical cutting, the R-cotter pin must be
removed so that the mower is in floating position, as
this ensures an even depth and results in an even
and thorough treatment of the lawn. (Picture 2)
1111
Adjusting rings
R-cotter pin Fine adjustment handle
CCuuttttiinngghheeiigghhttooffFFllaaiillMMoowweerr
Adjusting rings
(number) Cutting height (mm)
00 - 50
13 - 58
211 - 63
318 - 70
425 - 78
533 - 95
640 - 103
747 - 110
11
11
22
22

3. Service and maintenance
3.1 Cleaning
Cleaning the cutter:
A) Stop the machine. (See the operator’s manual for
the base machine, Section 2.2)
B) Remove the mower. (See Section 2.1)
C) Tip the mower forward. (Picture 1)
D) Clean the mower with water.
It is recommended to clean the mower immediately
after mowing to stop the grass sticking to the guard
and the blades.
Cleaning the water cooler:
A) The cover of the water cooler is easily removed by
turning the two spring-loaded handles out to the side.
B) Blow the ribs and the cover clean with compressed air.
C) The ribs can be washed with clean water.
Warning!
DDoonnoottuusseehhaarrddiimmpplleemmeennttssffoorrcclleeaanniinngg
tthheeccoooolliinnggeelleemmeenntt,,aasstthhiissccaannddaammaaggee
tthheerriibbss..
Cleaning the oil cooler:
A) Remove the oil cooler cover (See the operator’s
manual for the basic machine, Section 1.8)
B) Blow the cover and cooler clean with compressed air.
Warning!
TThheeccoooolleerrmmuussttbbeecclleeaanneeddwwiitthhccoomm--
pprreesssseeddaaiirrbbeeffoorreeiittiisswwaasshheedd,,ootthheerrwwiissee
ddiirrttwwiillllssttiicckkttooiitt..
1122
Mower tipped forward
Radiator cover for the oil cooler
Radiator cover for the water cooler
Big radiator cover for the water cooler
11
11
22
22
33
33
44
44

3. Service and maintenance
3.2 Maintenance
Lubricating the bearings – checking and
adjusting the drive belts:
The rotor axle bearings must regularly (approx. every
50 hours of operation) be lubricated with good quali-
ty lubricating grease.
1. Stop the machine and remove the guard which pro-
tects the drive belts on the left-hand side of the cutter.
2. Clean the lubricating nipple and lubricate the bearing
while turning the axle until grease starts to come out
of the bearing. (Picture 1)
3. Wipe off the excess grease with a cloth so it does
not come into contact with the drive belts.
4. Check the drive belts for cracks and wear, replace
them if necessary. (Picture 2)
5.Tighten the drive belts so they can be twisted
approximately 90 degrees with two fingers.
6. Replace the guard on the right-hand side of the cutter.
7. Repeat the procedure for the bearing on the right-
hand side. (Picture 3)
Lubricating the castor wheel forks:
Clean the lubricating nipples and lubricate the castor
wheel forks as necessary with grease. Make sure to
remove excess grease. (Picture 4)
Protective screens
(avoid stones being thrown out):
Check the screens on the front and rear edges of
the mower guard for wear and replace if necessary.
1133
Lubricate the bearing on the left-hand side
Adjust the belts
Lubricate the bearing on the right-hand side
Lubricate the castor wheel forks
11
11
22
22
33
33
44
44

3. Service and maintenance
Replacing the flails:
Replace the flails as follows:
1. Stop the machine. (See the operator’s manual for
the base machine, Section 2.2)
2. Remove the mower. (See Section 2.1)
3. Tip the mower forward. (Picture 1)
4. Remove the nut from the bolt that holds the flails
and remove the flails. (Picture 3)
5. Put on the flails lying next to each other on the same
side of the bolt, at its head. The nut and bolt must
not be tightened so much that the flails cannot
move. (Picture 2)
Replacing the vertical blades:
1. Stop the machine. (See the operator’s manual for
the base machine, Section 2.2)
2. Remove the mower. (See Section 2.1)
3. Tip the mower forward. (Picture 1)
4. Remove the nut from the bolt that holds the vertical
blades and remove the vertical blades. (Picture 3)
5. Fit the vertical blades one by one onto the axle. The
nut and bolt must not be tightened so much that the
vertical blades cannot move. (Picture 4)
CChheecckktthheennuuttssaannddbboollttssffoorrwweeaarraanndd
rreeppllaacceewwhheennnneecceessssaarryy..
The nuts mmuussttbe self-locking.
New blades, nuts and bolts can be ordered from an
authorised Egholm distributor.
1144
Mower tipped forward
The flails are fitted together
Fitting bolt for blades
The vertical blades are fitted individually
11
11
22
22
33
33
44
44

3. Service and maintenance
Winter storage:
When it is time to store the mower for the winter, the fol-
lowing steps are recommended:
1. Remove any loose paint and repaint any
damaged areas.
2. Spray the mower with preservative oil.
1155

4. Conditions
1166
4.1 Warranty
The warranty period for the materials and manu-
facture of this Flail Mower/Verticutter is 12
months from the date of purchase.
In case of errors or defects on the machine with-
in the warranty period, Egholm Maskiner A/S will
carry out the necessary repairs without charge
for materials and working hours in accordance
with the terms and conditions listed below. The
customer is to cover the costs for transportation.
The scope of warranty:
1) The Egholm warranty is only valid on presen-
tation of the original receipt supplied with
model description, serial number and date of
purchase.
2) Regular checks, adjustments, services and
technical alterations are not covered by the
guarantee.
3) All inquiries concerning the warranty are to
be addressed to the place where the
machine was purchased.
4) This warranty does not cover faults and
defects which cannot be traced back to
defects in material or production errors.
5) Egholm Maskiner A/S reserves the right to
make improvements and design-related
alterations to the machine without being
obliged to modify previously delivered mod-
els in relation hereto.
6) This warranty is valid for persons who have
legally acquired the machine within the war-
ranty period.
The guarantee does not cover:
* Wear and tear, accidents, damage to the
equipment caused by operating errors,
improper utilization of the machine, changes
to the construction of the machine or use of
non-Egholm spare parts or implements.
* Machines with illegible serial numbers.
* Damage caused by force majeure such as
lightning, flood, fire, war, civil disturbance
etc. or other causes over which Egholm
Maskiner A/S has no control.

4. Conditions
4.2 Conditions of complaint
All inquiries regarding the machine should be made at the distributor from whom the machine was
purchased. This applies to inquiries concerning normal use, service, maintenance and spare parts
as well as to any complaints.
If there are questions that the distributor cannot answer, please do not hesitate to contact Egholm
Maskiner A/S directly. Also feel free to contact us with suggestions or requests for special imple-
ments and/or features for the machine. We wish you many years of safe and satisfied use of your
machine.
Best regards
Egholm Maskiner A/S - Transportvej 27 - DK -7620 Lemvig, telephone: +45 97 81 12 05, fax: +45 97 81 12 10
4.3 Disposal
When – many years from now – your Egholm Flail Mower/Verticutter comes to the end of its working life,
it should be disposed of in a responsible manner and conform with the relevant disposal regulations.
1. Used hydraulic oil is to be disposed of at an approved waste disposal facility or site.
2. Remove all plastic and rubber parts and discard in a dustbin.
3. After the parts mentioned have been removed, the machine is ready to be handed over to one of
your local approved scrap merchants.
1177

Notes
1188

Notes
1199

Egholm Maskiner A/S * Transportvej 27 * DK-7620 Lemvig
Tel.: +45 97 81 12 05 - Fax: +45 97 81 12 10
Other manuals for 2100
8
Table of contents
Other Egholm Lawn Mower manuals

Egholm
Egholm City Ranger 2260 User manual

Egholm
Egholm Triplex Rotary Mower 2500 User manual

Egholm
Egholm Park Ranger 2150 User manual

Egholm
Egholm Park Ranger 2150 Rotary/Mulch Mower 1000 User manual

Egholm
Egholm City Ranger 2200 User manual

Egholm
Egholm City Ranger 3070 User manual

Egholm
Egholm City Ranger 2250 User manual

Egholm
Egholm City Ranger 2250 User manual

Egholm
Egholm 2100 User manual

Egholm
Egholm 2100 User manual