Egholm Park Ranger 2150 User manual

Park Ranger 2150
LAWN EDGER
OperatOr’smanual

2
Introduction
Dear Customer,
Congratulations with your new Egholm product.
The Park Ranger 2150 is a Danish designed and manufactured utility machine, which allows you
to take a very exible approach to maintaining outdoor areas.
Optimal use of your Park Ranger 2150 lawn edger:
To ensure optimal performance from your Park Ranger 2150 lawn edger, please read this manual
carefully before using the machine. Failure to do so can result in personal injury and damage to
the machine.
Safety:
The lawn edger is equipped with various devices to ensure optimal operational safety both for
the user and the surroundings. We ask you to pay particular attention to section 1.1 Safety. The
machine must only be serviced by professionals.
The lawn edger is designed only for use by professionals. On delivery, the user will receive
thorough training to become a competent operator.
Do not lend the machine to anyone who has not been thoroughly trained and who has not read
this manual carefully.
The operator’s manual should be considered a vital accessory to the machine and so must remain
with it if the machine is sold.
Warnings:
Some items in this operator’s manual are marked with this warning symbol.
The warning indicates areas where extra care has to be taken to avoid personal
injury or damage to the machine and its accessories. The warning also explains
how you should pay special attention to the aspect in question.
Reservations:
As it is the Egholm policy to make continuous improvements, we reserve the right to alter the
machine’s specications and equipment at any time without notice. Egholm accepts no liability for
errors or shortcomings in the operator’s manual.
Contact Egholm:
Should you have questions of any kind regarding your Egholm product, do not hesitate to contact
Egholm.
Best regards
Egholm A/S · Transportvej 27 · DK-7620 Lemvig
T. +45 97 81 12 05 · F. +45 97 81 12 10
E-mail: info@egholm.dk · www.egholm.eu
!
Operator’s Manual – Park Ranger 2150 Lawn edger

3
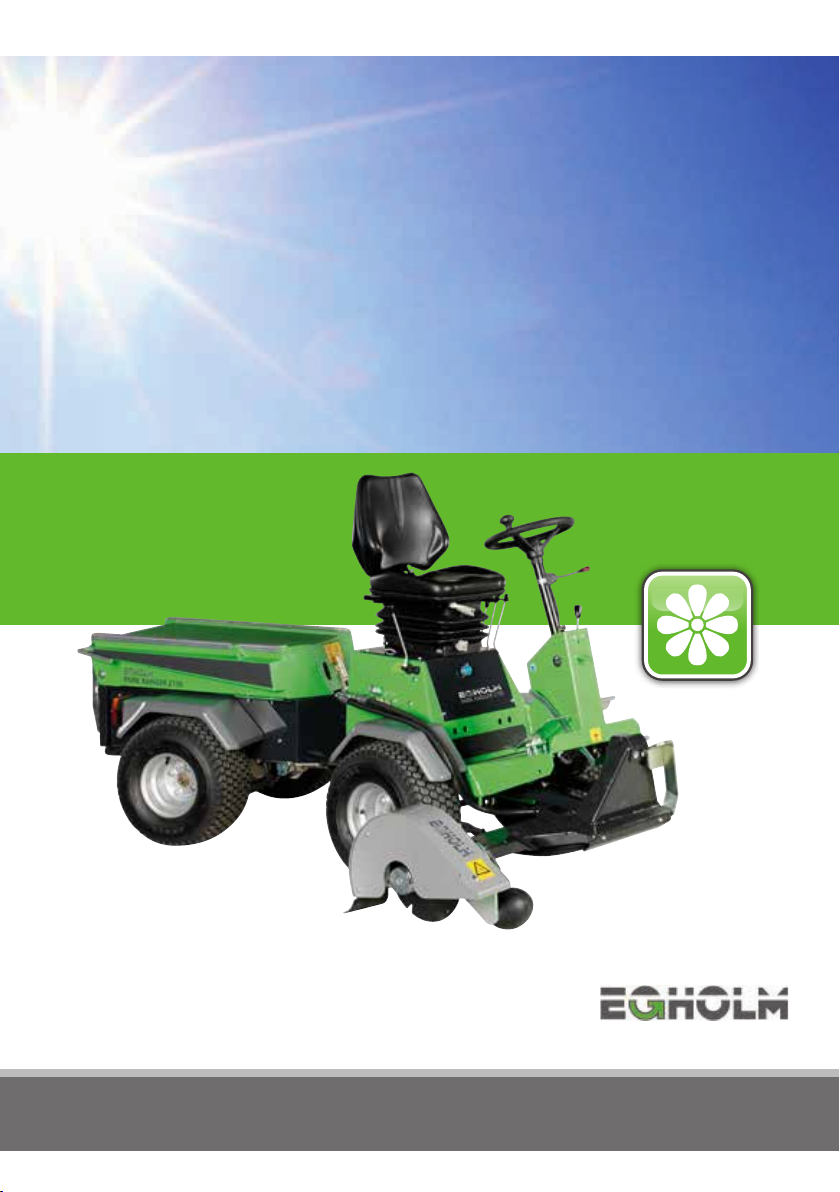
Fit the lawn edger to the Park Ranger 2150 for a perfect
nish to lawn work.
The attachment eciently tills and cuts lawn edges at a
steady tempo.
The lawn edger is fully hydraulic and the work depth can
be regulated by adjusting the support wheel.
The oset of the lawn edger can be manually adjusted.
The lawn edger can be used with both the Park Ranger
2150 and the City Ranger 2250. An adapter needs to be
tted when the lawn edger is used with the Park Ranger
2150, but the attachment can be used with the City
Ranger 2250 without an adapter.
Installation of the adapter is described in Section 3.3.
Useful tips
For best results, trim the lawn edges when the ground is
slightly damp.
Never drive faster than the lawn edger’s cutting speed.
Make sure the snap couplings are clean before attaching,
as this protects the hydraulic system.
Daily cleaning and maintenance will extend the lifetime of
both the machine and the attachment.
Table of contents
Operator’s Manual – Park Ranger 2150 Lawn edger
General information..............................................................................4
1.1 Safety ....................................................................................4
1.2 EC Declaration of Conformity.................................................................5
1.3 Technical data .............................................................................6
Operator’s manual ...............................................................................7
2.1 Assembly/Disassembly ......................................................................7
2.2 Before start-up ............................................................................9
2.3 Start-up...................................................................................9
2.4 Adjustment...............................................................................10
2.5 Replacing the blade. . . . . . . . . . . . . . . . . . . . . . . . . . . . . . . . . . . . . . . . . . . . . . . . . . . . . . . . . . . . . . . . . . . . . . . .12
Service and Maintenance.........................................................................13
3.1 Cleaning .................................................................................13
3.2 Maintenance .............................................................................13
3.3 Fitting instructions for the 2150/2200 lawn edger adapter ......................................16
Conditions .....................................................................................18
4.1 Warranty.................................................................................18
4.2 Complaints ...............................................................................19
4.3 Disposal..................................................................................19
Wearing parts ..................................................................................20
5.1 Wearing parts – Park Ranger 2150 lawn edger.................................................20
Notes .........................................................................................21

4
1
2
3
4Máx. 10°
1.1 Safety
Make sure no-one is standing close to
the machine while it is in use:
Make sure that no one is near the machine
while it is in use as there is a danger of
crushing.
NB:
As it is articulated, the rear end of the
machine swings out when turning. Make
sure that no one is standing near the
machine while it is in use. (Picture 1)
Avoid crushing ngers:
Keep your hands and ngers away from
areas where there is a danger of crushing.
Warning! Rotating parts!
To avoid personal injury, make sure no one
puts their ngers or toes under the lawn
edger while it is moving. (Pictures 2 and 3)
Avoid roll-overs:
Do not drive the machine in places where
there is a risk that it may slide, tip or roll. Do
not drive on slopes with an incline of more
than 10°. (Picture 4)
!
!
!
!
!
Prevent people from standing in the working area
Warning! Rotating parts
Do not drive on slopes with an incline of
more than 10°
Warning! Rotating parts
General information
Operator’s Manual – Park Ranger 2150 Lawn edger

5
1.2 EC Declaration of Conformity
Manufacturer: Egholm A/S
Address: Transportvej 27 · DK-7620 Lemvig
Tel. +45 97 81 12 05
hereby declares that
The machine: Lawn edger 2200
Type: 22VKS1
· has been manufactured in conformity with the provisions of the Machinery
Directive, Directive 2006/42/EU
The Park Ranger 2150 tted with the FH 2100 cab (ROPS approved)
· has been tested at the Danish Institute of Agricultural Sciences at Bygholm
in conformity with directive 86/298/EEC concerning rear mounted, roll-over
protection structures of narrow-track wheeled agricultural and forestry
tractors.
Place: Lemvig
Date:
Signature:
Knud Olsen, Senior Engineer
General information
Operator’s Manual – Park Ranger 2150 Lawn edger

6
1.3 Technical data
Dimensions:
Length (L)
Width (W)
Height with cab (H)
Height
Attached:
2,270 mm
1,200 - 1,350 mm
1,935 mm
Storage dimensions:
540 mm
920 mm
500 mm
Technical data:
Type
Weight of lawn edger
Ground clearance below scraping edge, lifted
Max. cutting depth
Oset
22VKS1
58 kg
140 mm
95 mm
150 mm
NB:
Specications may be changed without prior notice.
General information
Operator’s Manual – Park Ranger 2150 Lawn edger

7
2
3
1
A B C
2.1 Assembly/Disassembly
1. Make sure to keep the hydraulic hoses out of the way
and free from dirt when tting the lawn edger.
2. The locking handle on the A-frame of the base machine
must be in the unlocked position. (Picture 1)
3. Drive the base machine right up to the A-frame of the
lawn edger, so the A-frames t into each other.
4. Use lever A to lift the A-frame until the lawn edger is
raised clear of the ground. (Picture 2)
5. Switch o the engine.
6. Use the locking handle on the A-frame to lock the lawn
edger in place. (Picture 3)
U
n
l
o
c
k
e
d
Locking handle
Operator’s manual
L
o
c
k
e
d
Operator’s Manual – Park Ranger 2150 Lawn edger

8
2
1
D
2.1 Assembly/Disassembly – continued –
7. Fit the hydraulic hoses to the D-connectors. (Picture 1)
8. Push the lock button down to release the support strut;
pull the strut up until the lock clicks into place (Picture 2)
Removal:
Follow the procedure for tting in the reverse order. Lever D
Operator’s manual
Operator’s Manual – Park Ranger 2150 Lawn edger

9
1
2
3
D
A B C
B
2.2 Before start-up
During transport – use the transport lock to x the lawn
edger in its raised position. (Picture 1)
2.3 Start-up
1. Start the machine.
2. To start the lawn edger, push lever D up into position 1.
(Picture 2)
3. Move lever C down into position 2 to lower the lawn
edger. (Picture 3)
4. We recommend that you hold the lever down for about
2 seconds, as this will place the lawn edger in a oating
position, which allows it to follow ground contours.
Warning!
Make sure to avoid driving over manhole
covers or similar obstacles as this will
damage the blades and guard.
Warning!
Make sure no one is standing close to the
machine while it is in use.
NB!
When turning, the rear of the machine
swings out so there is a risk of crushing or
collision.
Transport lock – locked
Start the lawn edger – Lever D in position 1
!
!
!
Lower the lawn edger – Lever A in position 2
Operator’s manual
L
o
c
k
e
d
Operator’s Manual – Park Ranger 2150 Lawn edger

10
2
3
1
4
A
A B C
D
2.4 Adjustment
Adjusting the cutting depth:
Adjust the cutting depth to suit conditions
1. To stop the lawn edger, push lever D down into position
0. (Picture 1)
2. To raise the lawn edger, push lever A up into position 1.
(Picture 2)
3. Use the transport lock to secure the lawn edger in the
raised position. (Picture 3)
4. Switch o the machine.
5. Loosen the support wheel (Picture 4)
6. Adjust the support wheel to the desired depth.
7. Re-tighten the handle.
Lever D
Lever A
Transport lock
Operator’s manual
Operator’s Manual – Park Ranger 2150 Lawn edger

11
1
2
3
4
2
1
2
3
4
D
A B C
2.4 Adjustment – continued –
Adjusting the breadth:
If the machine is operating in areas with very sharp turns,
the blade can be moved farther out to the side.
1. To stop the lawn edger, push lever D down into position
0. (Picture 1)
2. To raise the lawn edger, push lever A up into position 1.
(Picture 2)
3. Use the transport lock to secure the lawn edger in the
raised position. (Picture 3)
4. Switch o the machine.
5. Loosen the sideways grip of the blade. (Picture 4)
6. Adjust the position of the blade as desired. The blade
must not be positioned beyond the arrow. (Picture 4)
7. Re-tighten the handle.
Operator’s manual
Lever D
Lever A
Transport lock
Operator’s Manual – Park Ranger 2150 Lawn edger

12
1
2
3
4
Removing the bolt
2.5 Replacing the blade
The lawn edger blade can be changed, allowing the
operator the choice of cutting towards/away from the
machine, depending on the driving direction of the
machine relative to the lawn edge.
1. To raise the lawn edger, push lever A up into position 1.
2. Switch o the machine.
3. Detach the guard by removing the wing nut under the
guard. (Picture 1)
4. Remove the bolt that holds the blade. (Picture 2)
5. Remove the end piece, pipe and blade. (Picture 2)
6. Fit the other blade on the other side of the pipe, t the
end piece and tighten again.
7. Ret the guard.
Blade for cutting away from the machine (Picture 3)
Blade for cutting towards the machine (Picture 4)
Detaching the guard
Sharp edge
Sharp edge
Operator’s manual
Operator’s Manual – Park Ranger 2150 Lawn edger

13
1
2
3
2
1
2
3
3.1 Cleaning
Daily cleaning and maintenance will extend the lifetime of
both the machine and the attachment.
Clean the lawn edger with water after use.
Avoid high pressure cleaning of the snap couplings.
Wipe snap couplings clean with a cloth
3.2 Maintenance
Replacing the cultivator blades:
1. To raise the lawn edger, push lever A up into position 1.
2. Switch o the machine.
3. Detach the guard by removing the wing nut under the
guard. (Picture 1)
4. Remove the bolt that secures the blade. (Picture 2)
5. Remove the end piece, pipe and blade. (Picture 2)
6. Disassemble the nuts and bolts that secure the
cultivator blades and remove the blades. (Picture 3)
7. To t the new cultivator blades, reverse the procedure.
Detaching the guard
Removing the bolt
Sharp edge
Service and Maintenance
Operator’s Manual – Park Ranger 2150 Lawn edger

14
1
2
Removing the bolt
Detaching the guard
Replacing the blade:
1. To raise the lawn edger, push lever A up into position 1.
2. Switch o the machine.
3. Detach the guard by removing the wing nut under the
guard. (Picture 1)
4. Remove the bolt that secures the blade. (Picture 2)
5. Remove the end piece, pipe and blade. (Picture 2)
6. To t the new blade, reverse the procedure.
Service and Maintenance
Operator’s Manual – Park Ranger 2150 Lawn edger

15
1
2
3
2
2
Replacing the wearing block:
1. To raise the lawn edger, push lever A up into position 1.
2. Switch o the machine.
3. Detach the guard by removing the wing nut under the
guard. (Picture 1)
4. Remove the bolt that holds the blade. (Picture 2)
5. Remove the end piece, pipe and blade. (Picture 2)
6. Unscrew the nuts and bolts that secure the wearing
block and remove the block. (Picture 3)
7. To t a new wearing block, reverse the procedure. The
milled edge of the wearing block should be facing the
blade and in towards the axle. (Picture 3)
New cultivator blades, blades and wearing blocks can be
ordered from an authorised Egholm distributor.
Winter storage:
When it is time to store the lawn edger for the winter, we
recommend the following steps:
1. Remove any loose paint and repaint any damaged areas.
2. Spray the lawn edger with protective lubricant.
Remove the bolt
Remove the guard
Screws that secure the wearing rail
Service and Maintenance
Operator’s Manual – Park Ranger 2150 Lawn edger

16
1
2
3
Service and Maintenance
Adapter frame
3.3 Fitting instructions for the 2150/2200
lawn edger adapter
1. Remove the covering material, clips and rubber foot
(Picture 1).
2. Place the adapter frame in the A-frame on the
attachment. (Picture 2)
3. Push the width bolts through the plate, and position the
plate in the adapter frame. (Picture 3)
Covering material
Width bolts
Operator’s Manual – Park Ranger 2150 Lawn edger

17
1
2
Service and Maintenance
3.3 Fitting instructions for the 2150/2200
lawn edger adapter - continued -
4. Place washers and nuts on the bolts, and then tighten.
(Picture 1)
5. Attach the hydraulic hoses. (Picture 2)
Male connector on opposite end Female connector on opposite end
Tighten the nuts.
Operator’s Manual – Park Ranger 2150 Lawn edger

18
Conditions
Operator’s Manual – Park Ranger 2150 Lawn edger
4.1 Warranty
The warranty period for the materials and manufacture of the lawn edger is 12 months from the date
of purchase.
In case of errors or defects on the machine within the warranty period, Egholm will carry out the
necessary repairs at no charge for materials and working hours in accordance with the terms and
conditions listed below.
The scope of warranty:
1. The Egholm warranty is only valid on presentation of the original receipt supplied with model
description, serial number and date of purchase.
2. Regular checks, adjustments, services and technical alterations are not covered by the warranty.
3. All inquiries concerning the warranty are to be addressed to the place where the machine was
purchased.
4. This warranty does not cover faults and defects which cannot be traced back to defects in material or
production errors.
5. This warranty is valid for persons who have legally acquired the machine within the warranty
period.
6. In the event of failure to perform and substantiate service in accordance with the applicable
instructions, Egholm reserves the right to reject any claim made within the warranty period.
7. Egholm reserves the right to make improvements and design-related alterations to the machine
without being obliged to modify previously delivered models in relation hereto.
The warranty does not cover:
Wear and tear, accidents, damage to the equipment caused by operating errors, changes to the
construction of the machine or use of non-Egholm spare parts or attachments.
Machines with illegible serial numbers.
Damage caused by force majeure, such as lightning, ood, re, war, civil disturbance, etc., or other
causes over which Egholm has no control.

19
4.2 Complaints
All inquiries regarding the machine should be made at the distributor from whom the machine was
purchased. This applies to inquiries concerning normal use, service, maintenance and spare parts as
well as to any complaints.
We wish you many years of safe and satisfactory use of your machine.
Best regards
Egholm A/S
4.3 Disposal
When, meny years from now, your lawn edger has reached the end of its working life, it should be
disposed of in a responsible manner that conforms with relevant disposal regulations.
1. Used hydraulic oil is to be disposed of at an approved waste disposal facility or site.
2. Remove the plastic and rubber parts and dispose of them in accordance with the applicable
environmental legislation.
3. After the parts mentioned have been removed, the machine is ready to be handed over to an
authorised municipal scrap merchant.
Conditions
Operator’s Manual – Park Ranger 2150 Lawn edger

20
09701270 Rubber wheel
01700040 Bearing for rubber wheel
09806930 Blade
90501481 Cultivator blade set for
lawn edger – left
5.1 Wearing parts – Park Ranger 2150 lawn edger
09722710 Rubber guard
09701070 Nylon wearing rail
90501701 Cultivator blade set for
lawn edger – right
Wearing parts
Operator’s Manual – Park Ranger 2150 Lawn edger
Other manuals for Park Ranger 2150
18
This manual suits for next models
1
Table of contents
Other Egholm Lawn Mower manuals

Egholm
Egholm Park Ranger 2150 Rotary/Mulch Mower 1000 User manual

Egholm
Egholm Triplex Rotary Mower 2500 User manual

Egholm
Egholm Park Ranger 2150 User manual

Egholm
Egholm 2100 User manual

Egholm
Egholm Park Ranger 2150 User manual

Egholm
Egholm City Ranger 2250 User manual

Egholm
Egholm Rotary/Mulch Mower 1600 User manual

Egholm
Egholm 2100 User manual

Egholm
Egholm 2100 User manual

Egholm
Egholm City Ranger 2250 User manual