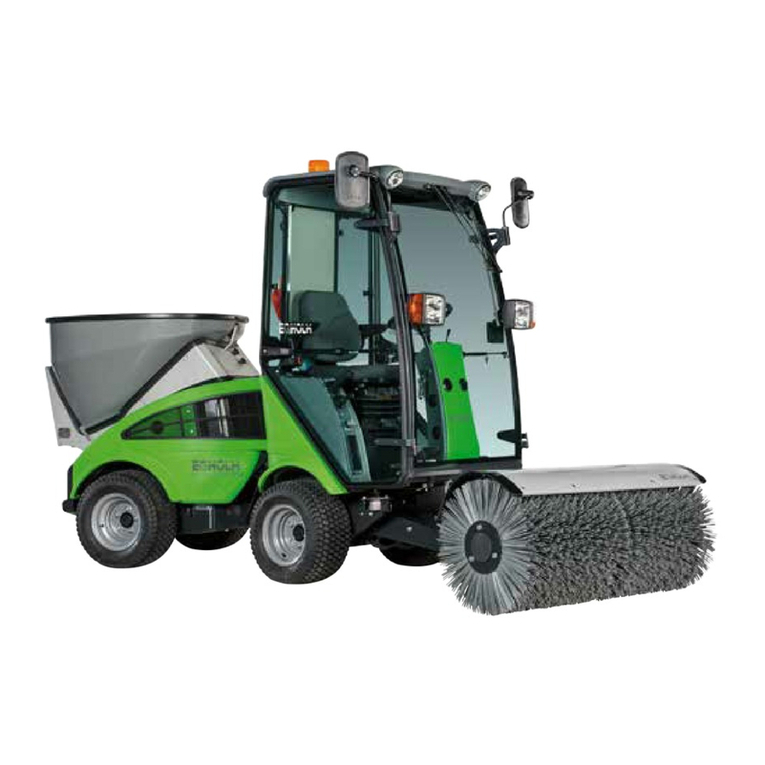
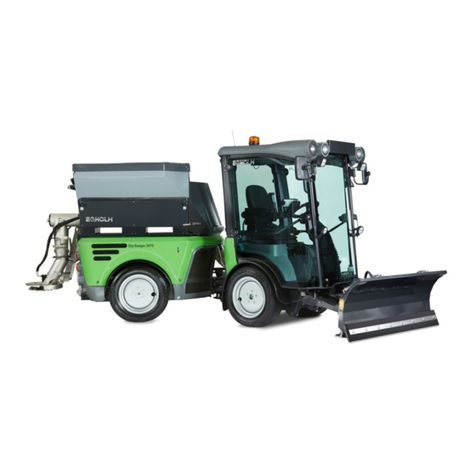
Egholm Park Ranger 2150 User manual

Operator´s
manual
Salt and sand spreader
Park Ranger 2150

22 Operator’s Manual Park Ranger 2150 Salt and sand spreader
Dear Customer
Congratulations with your Egholm product
The Park Ranger 2150 is a Danish designed and manufactured product, which offers a very flexible
way of maintaining areas.
Optimal use of your Park Ranger 2150 salt and sand spreader
To ensure optimal performance of your Park Ranger 2150 salt and sand spreader, please read this
manual carefully before using the machine. Failure to do so can result in personal injury and
damage to the machine.
Safety
The salt and sand spreader is equipped with various devices to ensure optimal operational
safety, both
for the user and the surroundings. We therefore ask you to pay particular attention to Safety section
1.1. The machine must only be serviced by professionals.
The salt and sand spreader is intended only for professional use, and on delivery, the user will
receive thorough instructions in the use of the machine and will thus become a competent operator.
Do not lend the machine to anyone who has not been thoroughly trained and has not read this
manual carefully.
The operator’s manual should be considered as a permanent part of the machine and so must
remain with it if the machine is sold.
Warnings
Some items in this operator’s manual are marked with this warning symbol.
The warning indicates areas where extra care has to be taken to avoid personal injury or
damage to the machine and its accessories. The warning also shows what you should
pay special attention to.
Reservations
As it is Egholm policy to make continuous improvements, we reserve the right to alter the
specications and equipment at any time without notice. Egholm accepts no liability
for errors or
shortcomings in the operator’s manual.
Contact us
Should you have questions of any kind regarding your new Egholm product, do not hesitate to
contact Egholm .
Best regards
Egholm A/S · Transportvej 27 · DK-7620 Lemvig
T. +45 97 81 12 05 · F. +45 97 81 12 10
e-mail: info@egholm.dk · www.egholm.eu
Introduction

33Operator’s Manual Park Ranger 2150 Salt and sand spreader
General information
The salt and sand spreader was designed
especially for the Egholm. It will ensure winter
maintenance by use of salt, sand, gravel and
grit.
The salt and sand spreader can ideally be
combined with the dozer blade and the snow
sweeper. In that way the driver is enabled to
remove snow and spread salt at one go and
thereby provide a safe route for the motorists
and pedestrians.
A special designed roller stand enables one
person to safely t or remove the spreader.
The salt and sand spreader features a stainless
steel container and a built-in air scoop,
supplying the cooler with fresh air and thereby
also protecting the engine of the basic unit from
the ne salt particles.
The construction features only robust
components. The new deflector plate with high
wear resistance handles salt, sand and gravel.
Contents
General information ..........................................................................5
1.1 Safety .................................................................................5
1.2 EC Declaration of Conformity for Machinery...............................................7
1.3 Technical data .........................................................................8
Operator’s manual ..........................................................................10
2.1 Assembly of the roller stand ............................................................10
2.2 Assembly/disassembly ................................................................10
2.3 Start-up ..............................................................................12
2.4 Adjustment...........................................................................13
2.5 Assembly/disassembly of the stirrer system.............................................14
2.6 Important.............................................................................15
2.7 Field of application ....................................................................15
Service and Maintenance ....................................................................17
3.1 Cleaning ..............................................................................17
Conditions. . . . . . . . . . . . . . . . . . . . . . . . . . . . . . . . . . . . . . . . . . . . . . . . . . . . . . . . . . . . . . . . . . . . . . . . . . . . . . . . . .20
4.1 Warranty. . . . . . . . . . . . . . . . . . . . . . . . . . . . . . . . . . . . . . . . . . . . . . . . . . . . . . . . . . . . . . . . . . . . . . . . . . . . . .20
4.2 Complaints ...........................................................................21
4.3 Disposal ..............................................................................21
Wearing parts...............................................................................23
5.1 Wearing parts - Park Ranger 2150 salt and sand spreader .................................23
Notes .....................................................................................24

General information

5
1
2
3
4
5Operator’s Manual Park Ranger 2150 Salt and sand spreader
1.1 Safety
Fitting
Before tting the salt and sand spreader, check
that the console cover is closed and locked.
(Picture 1)
Make sure the salt and sand spreader is tted
correctly and that the locking handle is left in locked
position. (See section 2.2)
Warning!
Rotating parts!
Keep ngers and feet well away from
the rotating spreader plate. (Picture 2)
Keep a safe distance to the salt and
sand spreader
Make sure there is no one close to the
machine when it is in use.
Avoid crushing ngers
Keep your hands and ngers away
from areas where there is a danger of
crushing. (Picture 3)
Avoid roll-overs
Do not drive the machine in a place
where it can slide, tip or roll. Do not
drive on slopes with an incline of more
than 10°.
N.B.
As it is articulated, the rear of the
machine swings out when turning.
Make sure no one is near the machine
while it is in use.
Avoid blows from the lever when
tting the spreader
Avoid blows from the lever when
lowering the spreader. Keep a rm grip
on the lever until the spreader rests
safely on the machine. (Picture 4)
Bonnet lock
Deflector plate
Lowering the salt and sand spreader
Lever
General information

6
1
2
3
4
6Operator’s Manual Park Ranger 2150 Salt and sand spreader
1.1 Safety - continued
Safety grating
Never use the salt and sand spreader unless the
container is covered by a meshed grid safety
grating. (Picture 1)
Filling in salt and gravel
Never ll the container with material to a higher
level than the container edges. The top point of
the material must not be higher than the edges
of the container.
Rear protective guard
The rear protective guard must always remain in
its holders except during cleaning.
(See section 3.1)
Before removing the guard, always stop the
machine and detach the hydraulic hoses to the
salt and sand spreader. Be very careful - there
are hot hydraulic parts, a rotating feed screw
as well as a rotating deflector plate behind the
guard.
Make sure you are fully familiar with the warning
labels on the guard. (Pictures 2-4)
The deflector plate
Keep away from the deflector plate when the
machine is in use.
Safety grating
General information

77Operator’s Manual Park Ranger 2150 Salt and sand spreader
1.2 EC Declaration of Conformity for Machinery
Manufacturer: Egholm A/S
Address: Transportvej 27 · DK-7620 Lemvig
Telephone: (+45) 97 81 12 05
hereby declares that
The machine: Salt and sand spreader 2150
Type: 2150SG
· has been manufactured in conformity with the provisions of the Machinery Directive 2006/42/EU
The Park Ranger 2150 tted with the FH 2100 cab (ROPS approved)
· has been tested at the Danish Institute of Agricultural Sciences at Bygholm in conformity with
directive 86/298/EEC concerning rear mounted, roll-over protection structures of narrow-track
wheeled agricultural and forestry tractors.
Place: Lemvig
Date:
Signature:
Knud Olsen, Senior Engineer
General information

88 Operator’s Manual Park Ranger 2150 Salt and sand spreader
1.3 Technical data
Dimensions
Length (L)
Width (B)
Height with cab
Height
Own weight
Weight Roller stand
Tank volume
Spread width
Loading height
Assembled
2,510 mm
1,015 mm
1,935 mm
Storage dimensions
1,175 mm
800 mm
1,350 mm
89 kg
31 kg
210 L
1 - 5 m
1,250 mm
Technical data
Type 2150SG
N.B
Specications may be changed without prior notice.
General information

Operator´s manual

10
1
2
3
4
10 Operator’s Manual Park Ranger 2150 Salt and sand spreader
2.1 Assembly of the roller stand
On delivery, you will nd the roller stand
collapsed. Before use the roller stand is to be
assembled as follows:
A) Unpack and unfold the roller stand.
B) Assemble the roller stand with the two bolts
included and it is ready for use. (Picture 1)
2.2 Assembly/disassembly
Fitting the valve lever bracket
Before starting use of the salt and sand
spreader, the bracket for the valve lever must
be tted in order for the valve lever to stay in
activated position. Unscrew the bolt to the right
of the valve block and t the bracket in the
shown position with the enclosed nut and bolt.
(Picture 2)
Fitting the salt and sand spreader
A) Make sure that the console cover is closed
before tting the salt and sand spreader.
(See page 5, Picture 1)
B) Back up the basic unit to the salt and sand
spreader which is stored on the roller stand.
When the console is placed directly beneath the
salt and sand spreader, stop the engine.
C) Press down the lever, the barb releases
the locking pawl and allows the salt and sand
spreader to be lowered onto the basic unit.
(Picture 3+4)
Two bolts on roller stand
Valve lever bracket
Lower the salt and sand spreader
Locking handle
Operator’s manual

11
1
2
11
Operator’s Manual Park Ranger 2150 Salt and sand spreader
2.2 Assembly/disassembly
- continued
Avoid crushing ngers
Avoid crushing ngers and feet when
the salt and sand spreader is being
lowered.
D) Release and pull away the roller stand.
E) Push the salt and sand spreader forward into
place.
F) The locking handle on the basic unit is
activated and the salt and sand spreader is now
in position.
G) Make sure that the locking handle is left in
locked position - the salt and sand spreader is
locked in place. (Picture 1). Pull the salt and sand
spreader to test a correct t - it must not move.
H) Connect the hydraulic hoses:
If tted, disconnect the snap couplings of the
rear lifter.
Connect the snap couplings of the salt and sand
spreader to the connectors C1 and C2. (Picture 2)
Disassembly
Reverse the above procedure.
Caution!
Make sure that all hydraulic
hoses (and the electrical plug) are
disconnected and that they are
not caught in something when
driving away from the salt and sand
spreader.
The salt and sand spreader is in place
C-connector
Operator’s manual

1212 Operator’s Manual Park Ranger 2150 Salt and sand spreader
2.3 Start-up
Start the basic unit. Then place lever C in the
bracket. (Picture 1)
NB!
Before start-up, make sure the rear
guard is positioned correctly.
Bracket
1
Operator’s manual

13
1
2
3
13
Operator’s Manual Park Ranger 2150 Salt and sand spreader
2.4 Adjustment
Amount spread
To adjust the amount spread, turn the front knob
on the left-hand side of the spreader. (Picture 1)
Turn the knob clockwise to reduce the amount
spread per m2.
Turn the knob counter-clockwise to increase the
amount spread per m2.
For additional details about spread settings, see
the enclosed spreading chart.
Spread width
Spread width is the width of material spread by
the spreader. The material will be spread in a
semicircular pattern with equal amounts spread
on either side of the basic unit.
To adjust the spread width, turn the rear knob.
The spread width is adjustable from 1 to 5 m.
(Picture 2)
Turn the knob clockwise to decrease and
counterclockwise to increase the spread width.
For additional details about spread settings, see
the enclosed spreading chart.
Spread pattern
The spread pattern refers to the way the material
is spread on the ground, when the basic unit is
not moving. Let the basic unit stand still for a few
seconds and the spread pattern will be visible on
the ground. To achieve an even spread pattern,
turn the adjusting knob on the back of the salt
and sand spreader. (Picture 3) This will alter the
spread pattern.
Turn the knob clockwise to increase the amount
spread to the left.
Turn the knob counter-clockwise to increase the
amount spread to the right.
For additional details about spread settings, see
the enclosed spreading chart.
Amount spread
Spread width
Spread pattern
Operator’s manual

14
1
2
3
4
14 Operator’s Manual Park Ranger 2150 Salt and sand spreader
2.5 Assembly/disassembly of the
stirrer system
The stirrer system is necessary when spreading
wet sand and is recommended for spreading
sand and salt. We do not recommend the stirrer
system when spreading grit or gravel as this
material can be too heavy for the stirrer system.
Disassembling the stirrer system
A) Stop the engine and deactivate the valve lever
for the salt and sand spreader.
B) Remove the safety grating by loosening the
four nuts on top. (Picture 1)
C) Remove the bracket holding the safety grating
in place and lift off the grid.
D) Find the two 10 mm bolts which connect
the stirrer system to the rest of the spreader.
(Picture 2)
The stirrer system can now be removed. Be aware
of the now unfastened sleeves!
Assembling the stirrer system
Reverse above procedure.
Do not forget the two sleeves!
Four nuts hold the safety grating in place
Bolts for the stirrer system
Bolts, nuts, sleeves, etc.
Sleeves, etc.
Operator’s manual

15
1
15
Operator’s Manual Park Ranger 2150 Salt and sand spreader
2.6 Important
Make sure never to put items
larger than 1 cm3in the salt and
sand spreader. These items can
become wedged between the feed
screw and the container and may
even cause damage.
The salt and sand spreader has been designed
to stop before any components are damaged.
Should the spreader stop, simply push the
lever which activates the spreader briefly in the
opposite direction.
This will shortly reverse the direction of the feed
screw and loosen any wedged objects. The
manoeuvre may have to be repeated.
Roller stand
When dismounting the spreader and moving the
spreader on the roller stand, always make sure
the roller stand is on a level and rm surface.
2.7 Field of application
The salt and sand spreader is only to be used
with the Egholm Powerflex, Egholm 2100 or
Park Ranger 2150.
Do not use the salt and sand spreader as a lime
or fertilizer spreader.
Do not store corrosive materials in the salt and
sand spreader.
The maximum load on the salt and sand
spreader stored on the roller stand is 100 kg.
For storage periods of less than a week, the
maximum load is 300 kg.
Operator’s manual

Service and
maintenance

17
1
2
17
Operator’s Manual Park Ranger 2150 Salt and sand spreader
3.1 Cleaning
Daily cleaning will extend the life of the salt and
sand spreader signicantly and ensure correctly
functioning parts.
Daily cleaning
A) Remove and clean the snap couplings.
B) Remove the rear guard to clean under it.
(Picture 1)
C) Dismount the salt and sand spreader from
the basic unit. (See section 2.2)
D) Clean the salt and sand spreader thoroughly
with water to ensure that all salt residue etc. has
been removed from the container, chute, and
deflector plate and from under the attachment.
(Picture 2)
Remember to also clean the basic unit
thoroughly.
Remove the rear guard
Clean
Service and Maintenance

1818 Operator’s Manual Park Ranger 2150 Salt and sand spreader
Bolts
Lubrication nipple
3.1 Cleaning - continued
Periodic/In-depth cleaning
At the end of the season or when storing the
spreader for a longer period of time, corrosion
prevention is essential.
A) Complete all procedures listed under ”Daily
cleaning”.
B) Disassemble the front screen by removing the
four bolts located at the bottom. Then simply
pull off the screen. Clean the underlying parts
thoroughly with water and dry them with a cloth.
Finally, smear the parts with a rust-preventing
fluid.
C) Grease the bearings.
Only grease the large bearing if the stirrer system
is not assembled. Also grease both of the joints if
the stirrer system is assembled.
D) Smear all parts of the spreader with rust-
preventing fluid - in time, even stainless steel can
corrode.
E) Wearing parts such as the feed screw are
not made of stainless steel. Therefore, please
pay extra attention to them when cleaning and
applying rust preventive.
F) Make sure to remove all salt residue etc. from
the roller stand.
G) As part of this procedure, make sure to check
all nuts and bolts and tighten them if required.
1
2
Service and Maintenance

Conditions

2020 Operator’s Manual Park Ranger 2150 Salt and sand spreader
4.1 Warranty
The warranty period for the materials and manufacture of this salt and sand spreader is 12 months
from the date of purchase.
In case of errors or defects on the machine within the warranty period, Egholm will carry out the
necessary repairs at no charge to the customer, including materials and working hours, in accordance
with the terms and conditions listed below.
The scope of warranty
1. The Egholm warranty is only valid on presentation of the original receipt supplied with model
description, serial number and date of purchase.
2
. Regular checks, adjustments, services and technical alterations are not covered by the warranty.
3. All inquiries concerning the warranty are to be addressed to the place where the machine was
purchased.
4. This warranty does not cover faults and defects which cannot be traced back to defects in
material or production errors.
5. This warranty is valid for persons who have legally acquired the machine within the warranty
period.
6. In the event of failure to perform and substantiate service in accordance with the applicable
instructions, Egholm reserves the right to reject any claim made within the warranty period.
7. Egholm reserves the right to make improvements and design-related alterations to the machine
without being obliged to modify previously delivered models in relation hereto.
The warranty does not cover
· Wear and tear, accidents, damage to the attachment caused by operating errors, changes to the
construction of the machine or use of non-Egholm spare parts or attachments.
· Machines with illegible serial numbers.
· Damage caused by force majeure such as lightning, flood, re, war, civil disturbance, etc, or other
causes over which Egholm has no control.
Conditions
Other manuals for Park Ranger 2150
18
Table of contents
Other Egholm Spreader manuals
Popular Spreader manuals by other brands

Earth Way
Earth Way Hand Crank Spreader Setting instructions

Earth Way
Earth Way EV-N-SPRED 2150 Assembly and operating instructions

Earth Way
Earth Way M20 Assembly instructions

Earth Way
Earth Way M80ECM Assembly instructions

Trynex
Trynex SnowEx Accu Pro SP-100 Owner's and operator's manual

Meyer
Meyer Blaster 350 Installation instructions and owner's manual