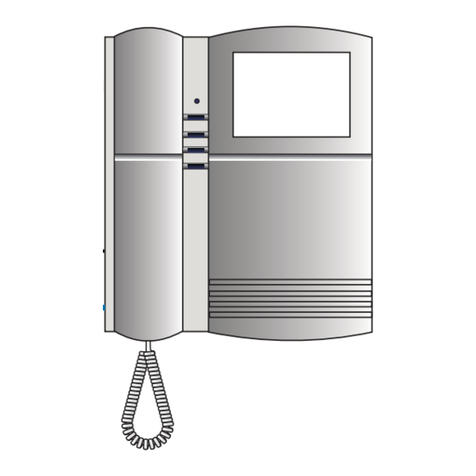
EGi Millennium 1201 User manual

C M Y CM MY CY CMY K
i
E
G
Electroacústica
General
Ibérica, S.A.
i
EG
Cód. 002466 • D.L.: Z-1.114/01
ESPAÑOL • ENGLISH
ESPAÑOL • ENGLISH
Manual del usuario
User’s manual
Empresa instaladora /
Installer
Fecha de instalación /
Installation date
Electroacústica
General
Ibérica, S.A.
Avda. Almozara, 79
50003 ZARAGOZA (Spain)
Tel. 976 40 53 53
Export phone +34 976 40 53 56
Fax +34 976 40 53 54
e-mail: info@egiaudio.com
http://www.egiaudio.com

27
1201 - Control console _________________________________________________ 28 - 29
1301 - Audio processor _____________________________________________________ 30
1202 - Control console _____________________________________________________ 31
Basic operation ______________________________________________________ 32 - 34
Access restrictions________________________________________________________ 34
Advanced functions ___________________________________________________ 35 - 38
Operation of the module for paging over the telephone ________________________ 39
Operation of the pre-recorded message player ___________________________ 40 - 42
Central Rack Modules ______________________________________________________ 43
1204 - 2-Channel 5 W control unit ___________________________________________ 44
1203 - Intercom unit _______________________________________________________ 44
1105 - Pre-amplified XLR microphone base ___________________________________ 45
1107 - Volume regulator for mic base 1105 ___________________________________ 45
1106 - Auxiliary input______________________________________________________ 46
1501 - Wall base for connection of control consoles and music sources __________ 46
1205 - 4-Channel 1 W control unit ___________________________________________ 47
1206 - Digital control keyboard _____________________________________________ 47
1207 - 4-Channel 2 W control unit ___________________________________________ 48
Adapting musical sources to the audio processors _____________________________ 49
Guarantee _________________________________________________________________ 51
Overview
Congratulations,youhavebeenprovidedwithaMILLENNIUMsound,intercommunication
and Public Address system that will offer you multiple services.
The MILLENNIUM system begins in the processor module that is in charge of receiving
and emitting the audio and control signals for the installation.
The control consoles manage and control all the features of the installation and messages
and warnings can be emitted from them.
In different parts of the installation, you can have local control units and signal emitters
(microphone inputs and external musical sources) or even intercommunicators between
different zones.
Finally, the speakers and acoustic diffusers will perform the diffusion of the sound,
messages, signals or warnings with power and quality.
Index

28
0840
1
1201
Control console 1201
Once the Console is turned ON, a menu will appear indicating the control keys for the zones (zone 1 , zone
2 , zone 3 ) and the dial position of the FM radio of the processor (only if the processor includes a FM
radio).
From this menu, and after selecting one or several zones, you will be able to decide what do you want to do
with them: emitting music, warnings or signals. Let us see each one of the control keys.
1Door opener 1
Push button that activates the electromagnetic door opening mechanism selected as 1. This push button
could manage any other output application using a relay.
2Door opener 2
Push button that activates the electromagnetic door opening mechanism selected as 2. This push button
could manage any other output application using a relay.
3Push button for selection of zone 3 (general line)
When it is pressed, the symbol >will appear to indicate that the zone has been selected. If zone has
been selected, it is only possible to browse the bell and messages menus (push buttons nr. and ).
4Push button for radio tuning
When pressed, you access to the FM tuner in the audio processor (if it includes one). With the key we
move up the dial and with the key we move it down.
5Reserved push button
Push button to be used in more advanced versions.
6Push button for turning ON/OFF a zone
Once the zone/s are selected, this push button allows you to turn ON or OFF the ambient music function.
The symbol OF or 1 will appear depending on whether it is turned OFF or ON.
7Bell menu button
Once the zone/s are selected, pressing this push button gives access to another menu, that allows you
to turn ON or OFF the option of listening to the bell in the selected zone, using button . You can also
adjust the volume of the bell, using the button to raise it and the button to lower it.
2 3 4
7 6 5

29
Control console 1201
8Push button for talking
Once the zone is selected and after pressing this button, first the clock symbol will appear while the
pre-warning tone sounds in the selected zone or zones. The system is ready to broadcast a message when
the icon appears.
9Push button for accessing the Messages menu
Oncethezoneisselectedandafterpressingthisbutton,youwillbeabletoadjustthevolumeofthemessages,
using the button to raise it and the button to lower it. By means of push button number we can
select if a pre-warning tone will be played or not.
10 Music menu push button
Once the zone is selected and after pressing this button you will be able to adjust the volume of the music,
using the button to raiser it and the button to lower it. By means of push button number we can
select channel 1 1or2FM. Ifzone 1hasbeen wiredin stereo,thekey will allowus theselectionbetween
mono and stereo.
11 Back to main menu push button
When pressed, it takes us back to the main menu.
12 Push button for selection of zone 2
When it is pressed, the symbol <will appear to indicate that the zone 2 has been selected.
13 Push button for selection of zone 1
When it is pressed, the symbol <will appear to indicate that the zone 1 has been selected.
14 Location of gooseneck microphone
Location for the microphone with gooseneck, only in 1201.11 version.
1201
1211
8910
14
13

30
ON
1301.1
o
1 2
3 4
1301
Audio processor 1301
Thisprocessorallowsyoutoprovidesoundforfacilitieswith2centralisedzonesplus1de-centralisedzone(general
line), being these “zones” understood as the different areas which must be considered for message broadcast.
Version 1301.1 incorporates a FM tuner and a dual RCA input for external musical sources.
1ON/OFF switch for the installation
2Input for 1201 module
Phone type input RJ45 for the connection of the 1201 control console. There is also the possibility of
connecting it internally.
3Antenna input
Coaxialinputfor FMantenna.It enablestheconnection ofaFM antenna toimprove the receptionof radio
stations.
4Input for external music source
RCA input for external music sources. It enables the connection of an external music source (CD, cassette
player, etc.).

31
0849
1202
Control console 1202
The control console 1202 is provided with a 4-line LCD display and a keyboard which allow the user to control
and program all the possible functions.
The operation language can be selected between a total of six at the function menus.
The console enables also the control of up to four radio tuners installed in the 1316 audio processor.
The 127 different zones which can be controlled by the console can be grouped, being 15 the maximum number
of groups. A name can be assigned to each zone or group of zones, and the selected names must have no more
than 7 characters (like “hall”, “room 1”, “room 2”, “lift”, “garage”, etc).
As many consoles as necessary can be used in the same installation, up to 127.
1Push button for talking
2Push button for controlling audio programs
3Push button for controlling voice messages
4Set-up push button
5Push button On/Off of the console
6Push buttons for menu browsing
6
4 5
6
13
2

32 Control console 1202. Basic operation 1202
1Turning the system "On" and "Off"
If three groups -for instance- have been
previously created:
YES
2Turning a zone "On" and "Off"
If three groups -for instance- have been
previously created:
GENERAL(Andthesign"< "appearsnext
to GENERAL)+ ZONE
If three zones -for instance- have been
previously named:
ZON001 (And the sign " < " appears next
to ZON 001)+
If the zone was previously off:
TURN ON
TURN OFF
3Changing the audio channel in a zone
If three groups -for instance- have been
previously created:
GENERAL (And the sign " < " appears
next to GENERAL)+ ZONE
ZON 001 (And the sign " < " appears
next to ZON 001)+
If the zone was previously on:
CHAN.1
Provided that at least 2 channels are
available at the system:
4Altering the volume level of a zone
If three groups -for instance- have been
previously created:
GENERAL (And the sign " < " appears
next to GENERAL)+ ZONE
If three zones -for instance- have been
previously named:
ZON 001 (And the sign " < " appears
next to ZON 001)+
+ or – alters the volume level of
the previously selected zone.

33
Control console 1202. Basic operation 1202
5Turning a Group of zones “On” and
“Off” in a specific channel
GR 01 (And then the sign “<”
appears next to GR 01) +
Provided that there are -for instance-
4 channels available at the system:
CHAN.1; CHAN. 2; CHAN. 3;
CHAN. 4 turn the group ON at the
selected channel or TURN OFF turns
the audio OFF in the selected group.
6Changing an audio channel from
external (AUX) music source to
internal radio
If three groups -for instance- have been
previously created:
Provided that there are -for instance-
4 channels available at the system:
CHAN.1
Provided that there is an internal RA-
DIO tuner available for CHANNEL 1, but
the channel is in AUXILIAR mode:
RADIO (And then the sign “<”
appears next to RADIO)
7Tuning of a channel with internal radio
Provided that there are -for instance-
4 channels available at the system:
CHAN.1
Provided that there is an internal ra-
dio tuner available for CHANNEL 1, and
the channel is in RADIO mode:
+ or – (short press) tunes the
radio 0.1 MHz up or down.
+ or – (long press) searches for
the next available radio station in a
higher or in a lower frequency.
8Making a call to zones which are not
in “private” mode
If three groups -for instance- have been
previously created:
GR 01 (And then the sign “<”
appears next to GR 01) +
As long as we keep the button pressed, what is
said to the microphone will be broadcast in all the zones
belongingto groupGR01.
IftheselectedgroupisGENERALthecallwillbebroadcast
in every zone of the installation.
Itisalsopossibleto selectseveralgroupsorzones,oreven
acombinationofgroupsandzones-takingintoaccountthat
ifweenteragroupto select some ofitszones,theselection
of that group (as a whole unit) will automatically be
cancelled-.
If the paging line is busy because another call is being
broadcast or a pre-recorded message is being played or
saved from another console 1202, instead of the last two
screens, the following message will appear:

34 Control console 1202. Basic operation 1202
9Making a call when any of the targeted
zones is in “private” mode
If three groups -for instance- have been
previously created:
GR 01 ((And then the sign “<” appears
next to GR 01) +
If, in the selected group, any of the
zones is in “private” mode:
If, instead of a group, a zone had been
selected which was in “private” mode,
the name given to that zone would
appear in the screen.
YES will send the message to the
whole group.
NO will send the message only to the
zones of the selected group which are
not in “private” mode.
1Enabling and disabling the general
access password
If three groups -for instance- have been
previously created:
SETUP
Provided that there is NEITHER a pre-recorded
message player (1103) NOR a module for sending
messages over the telephone (1104) in the system:
MORE
PASSWORD
NO disables the general access password.
1+ 2 + 3 + 4 will turn on the led
lamp next to YES.
If then we press YES then the code 1234 has
been enabled as general access password.
The 4 bottom keys ; ; SETUP and
act here as numeric keys.
2Entering the general access password
If the general access password is acti-
ve, whenever we want to access to the
advanced functions of the system, the
module for sending messages over the
telephone, or the pre-recorded
message player, a password will be
required by the following screen:
The 4 bottom keys ; ; SETUP
and act here as numeric keys.
If we make a mistake when entering the
password, it is possible to start again
by pressing ERASE.
For each entered digit, a " –" symbol
will be substituted by a " *" symbol.
Control console 1202. Access restrictions 1202
As long as we keep the button
pressed, what is said to the
microphone will be broadcast in all
the selected zones.
It is also possible to select several
groups or zones, or even a combination
of groups and zones -taking into
account that if we enter a group to
select some of its zones, the selection of
that group (as a whole unit) will
automatically be cancelled-.
If the paging line is busy because
another call is being broadcast or a
pre-recorded message is being played
or saved from another console 1202,
instead of the last two screens, the
following message will appear:

35
Control console 1202. Advanced functions 1202
1
Giving a number to each zone
This is the first thing that has to be done
in order to configure a system (and it
does not have to be done again if the
system configuration is not modified).
Provided that no groups have been
created yet:
SETUP
If the general access password is
NOT
active and there is NEITHER a pre-
recorded message player (1103) NOR
a module for sending messages over
the telephone (1104) in the system:
ZONES
ZONE SET
cancels all the numbers that
have been given to the zones until pressed
.
+
HERE
gives to the control console 1202 the
zone number 1 (the console needs a zone number
only if it must be ready to receive messages).
ZONE SET
When pressed, the system is ready
to assign number 1 to a zone, and all the
"zone set"
led lamps of the devices which can be given a zone
number will blink. If, in the mentioned devices,
one of the
ZONE SET
buttons is pressed, that
specific device will be identified as
ZONE NR. 1
,
and the system will get ready to assign number 2
to the following device / zone.
By following this procedure we can give
consecutive numbers to all the zones of the
installation without going back to the console
1202 (this is useful for the initial configuration of
the installation).
It is also possible to select a specific zone number
by pressing
+
or
–
and, after pressing
ZONE SET
and following the
ZONE SET
button of
the corresponding device, the selected number
will be given to that device (this is useful to replace
an old device by a new one which must have the
same zone number without repeating the set up
procedure).
When a zone number has been assigned to all the
zones of the installation, we will quit the labelling
procedure and all the
ZONE SET
led lamps of the
different devices will stop blinking.
Now it is recommended to start up the system
(point nr. 13) prior to label the zones with names.
2
Labelling the zones with names
If NO groups have been created yet:
GENERAL
(And the sign " < " appears next
to
GENERAL) + ZONE
If three zones -for instance- have been
previously created:
ZON 001
(And the sign " < " appears next
to
ZON 001
)+
If the general access password is NOT active
NAME
>>>
(thecursoris placed inletter
"O")+
+("O"
is replaced by
"P") +
3
Creating a group and giving it a number
If NO groups have been created yet:
GENERAL
(And then the sign “<”
appears next to
GENERAL
)
+
If the general access password is NOT
active:
NEW
YES
If the general access password is active the system will require us to introduce it every time we
try to operate one of the advanced functions (see point 2 of “access restrictions”).

Control console 1202. Advanced functions 1202
4
Labelling groups with names
If one group has already been created:
GR 01
(And then the sign “<”
appears next to
GR 01) +
If the general access password is NOT
active:
NAME
>>>
(the cursor is placed in letter
"R"
)
+ –
(
"R"
is replaced by
"Q"
)
+
5
Assigning a zone to a group
If one group has already been created:
GR 01
(And then the sign “<”
appears next to
GR 01
)
+
If the general access password is NOT
active:
ZONES
Provided that there are 3 numbered
zones in the system and zone number 2
belongs to group number 1.
ZON 001 +
ZON 002
Now zone number 1 belongs to group
number 1 and zone number 2 does not.
6
Changing the order of appearance of
groups in the screen
If three groups -for instance- have been
previously created:
GR 01
(And then the sign “<”
appears next to
GR 01
)
+
If the general access password is NOT
active:
CHANGE
GR 03
Now it is recommended to initialise the
system again (like in point number 13) so
that the system checks again the
relationships between groups and zones.
7
Erasing a group
If three groups -for instance- have been
previously created:
GR 03
(And then the sign “>”
appears next to
GR 03
)
+
If the general access password is NOT
active:
ERASE
YES
If the general access password is active the system will require us to introduce it every time we
try to operate one of the advanced functions (see point 2 of “access restrictions”).
36

37
Control console 1202. Advanced functions 1202
8
Changing the Public Address volume
level in a zone
If three groups -for instance- have been
previously created:
GENERAL
(And then the sign “<”
appears next to
GENERAL) + ZONE
Provided that there are 3 numbered
zones in the system:
ZON 001
(And then the sign “<”
appears next to
ZON 001
)+
+
or
–
modifies the volume level
of the paging in the selected zone.
9
Enabling and disabling the “private”
mode in a zone
If three groups -for instance- have been
previously created:
GENERAL
(And then the sign “<”
appears next to
GENERAL) + ZONE
Provided that there are 3 numbered
zones in the system:
ZON 001
(And then the sign “<”
appears next to
ZON 001
)+
PRIVATE
ENABLE
or
DISABLE
enables or
disables the private mode of a zone.
10
Changing the pre-warning tone of an
announcement
If three groups -for instance- have been
previously created:
SETUP
Provided that the general access
password is NOT active, and there is
NEITHER a pre-recorded message
player (1103) NOR a module for
sending messages over the telephone
(1104) in the system:
BELL
TONE 2
(And then the sign “<”
appears next to
TONE 2)
changes the
pre-warning tone of the announcement.
11
Changing the operation language
If three groups -for instance- have been
previously created:
SETUP
Provided that the general access
password is NOT active, and there is
NEITHER a pre-recorded message
player (1103) NOR a module for
sending messages over the telephone
(1104) in the system:
LANG.
ENGLISH
(And then the sign “<”
appears next to
ENGLISH
) changes the
operation language.
If the general access password is active the system will require us to introduce it every time we
try to operate one of the advanced functions (see point 2 of “access restrictions”).

38 Control console 1202. Advanced functions 1202
12 Checking the software versions
If three groups -for instance- have been
previously created:
SETUP
Provided that the general access
password is NOT active, and there is
NEITHER a pre-recorded message
player (1103) NOR a module for
sending messages over the telephone
(1104) in the system:
MORE
SOFTWARE VERSION
13 Initialising the system
It is recommended to proceed with this
operation after the options described
in points 1and 6.
If three groups -for instance- have been
previously created:
SETUP
Provided that the general access
password is NOT active, and there is
NEITHER a pre-recorded message
player (1103) NOR a module for
sending messages over the telephone
(1104) in the system:
MORE
START UP
If the general access password is active the system will require us to introduce it every time we
try to operate one of the advanced functions (see point 2 of “access restrictions”).
YES

39
Controlconsole 1202. Operationofthe module forsendingmessages over thetelephone 1202
1Changing the length of the time while
a message over the telephone can be
broadcast
If three groups -for instance- have been
previously created:
SETUP
Provided that the general access
password is NOT active, and there is
NOT a pre-recorded message player
(1103) in the system but THERE IS a
module for sending messages over the
telephone (1104):
T-PHONE
+ or – modifies the maximum
time length while a message can be
broadcast.
2Assigning a telephone number to a zone
If three groups -for instance- have been
previously created:
SETUP
Provided that the general access password is
NOT active, and there is NOT a pre-recorded
message player (1103) in the system but
THERE IS a module for sending messages
over the telephone (1104):
T-PHONE
ASSIGN
+ or – modifies the telephone number.
+ or – modifies the zone number.
ASSIGN assigns the selected telephone
number to the desired zone number.
If the general access password is active the system will require us to
introduce it every time we try to operate this module (see point 2 of
“access restrictions”).
3Assigning a telephone number to a group
If three groups -for instance- have been
previously created:
SETUP
Provided that the general access password is
NOT active, and there is NOT a pre-recorded
message player (1103) in the system but
THERE IS a module for sending messages
over the telephone (1104):
T-PHONE ASSIGN
ZONE
+ or – modifies the telephone number.
+ or – modifies the group number.
ASSIGN assigns the selected telephone
number to the desired group number.
4Enabling and disabling the password
for messages over the telephone
If three groups -for instance- have been
previously created:
SETUP
Provided that the general access password is NOT
active, and there is NOT a pre-recorded message
player (1103) in the system but THERE IS a module
for sending messages over the telephone (1104):
T-PHONE PASSWORD
NO disables the password for messages over
the telephone.
1+ 2+ 3+ 4will turn on the led lamp
next to YES. If then we press YES then the code
1234 has been enabled as password for messages
over the telephone.
The 4 bottom keys ; ; SETUP and
act here as numeric keys.
This password will have to be entered in the
telephone keyboard whenever the user tries to
broadcast a message over the telephone. This will
be requested by means of a set of commands
recorded in the module 1104. The user will listen
to these commands in his telephone handset after
dialling the extension reserved for the Public
Address system.

40 Control console 1202. Operation of the pre-recorded message player 1202
1Broadcasting a message at a definite time
If three groups -for instance- have been
previously created:
SETUP
Provided that the general access password is
NOT active, and there is a pre-recorded
message player (1103) in the system but NOT
a module for sending messages over the
telephone (1104):
MESSAGE MSG. 1
TIME YES
HOUR + or – changes the hour.
MINUTE + or – changes the minute.
programs message number one
to be launched at the selected time.
2Broadcasting a message as a reaction
to an event
If three groups -for instance- have been
previously created:
SETUP
Provided that the general access password is
NOT active, and there is a pre-recorded
message player (1103) in the system but NOT
a module for sending messages over the
telephone (1104):
MESSAGE MSG. 2
EVENT
– – – – – – –; EVENT 1; EVENT2 or
EVENT3(and then thesign“>”appears
next to the selected option).
Assigns message number 2 to no
event,ortoevent1,2or3(dependingonthe
previously pressed key).
If the general access password is active the system will require us to
introduce it every time we try to operate this module (see point 2 of
“access restrictions”).
3Selecting the destination of a message
If three groups -for instance- have been
previously created:
SETUP
Provided that the general access password is
NOT active, and there is a pre-recorded message
player (1103) in the system but NOT a module for
sending messages over the telephone (1104):
MESSAGE MSG. 3
ZONES +
assigns ZON 001 as first destination of message
number 3, and leaves empty the three other possible
destinations. In order to assign a 2nd, 3rd or 4th
destination, move vertically the symbol “>” with the
4 buttons on the right and select destination between
the different zones and groups by pressing + or
– . When everything is according to our preferences,
we must press
4Respecting or overriding the
“private” mode of the zones
If three groups -for instance- have been
previously created:
SETUP
Provided that the general access password is
NOT active, and there is a pre-recorded message
player (1103) in the system but NOT a module for
sending messages over the telephone (1104):
MESSAGE MSG. 4
PRIVATE
YES (and then the sign “>” appears next to
YES)+ ensures the broadcast of the
message in ALL the destination zones.
NO (and then the sign “>” appears next to
NO)+ will only broadcast the message in
those destination zones which are not in
“private” mode.

41
Control console 1202. Operation of the pre-recorded message player 1202
5Replay of a message
If three groups -for instance- have been
previously created:
SETUP
Provided that the general access password is
NOT active, and there is a pre-recorded
message player (1103) in the system but NOT
a module for sending messages over the
telephone (1104):
MESSAGE
MSG. 5
REPEAT
Provided that message number 5 is
already recorded:
+ + +
INTERVAL
+
+ programs message 5 to
be played 2 times, with an interval of 1
minute between 2 repeats.
If the general access password is active the system will require us to
introduce it every time we try to operate this module (see point 2 of
“access restrictions”).
6Changing the volume level of a
message
If three groups -for instance- have been
previously created:
SETUP
Provided that the general access password is
NOT active, and there is a pre-recorded
message player (1103) in the system but NOT
a module for sending messages over the
telephone (1104):
MESSAGE MSG. 6
MORE VOLUME
+ or – modifies the volume level of the
message. If reduced to 0, the message will be
played in each target zone at the volume level
that is set for paging there.
7Monitoring a message
If three groups -for instance- have been
previously created:
SETUP
Provided that the general access password is
NOT active, and there is a pre-recorded
message player (1103) in the system but NOT
a module for sending messages over the
telephone (1104):
MESSAGE
MSG. 7 MORE
MONITOR plays the message number 7(if
previouslyrecorded)bythe built-in speaker at the
control console 1202.If the paging line is busy
because another message is being broadcast or
a pre-recorded message is being played or saved
from another console 1202, instead of playing
the message the following message will appear:

42 Control console 1202. Operation of the pre-recorded message player 1202
8Recording a message
If three groups -for instance- have been
previously created:
SETUP
Provided that the general access
password is NOT active, and there is a
pre-recorded message player (1103)
in the system but NOT a module for
sending messages over the telephone
(1104):
MESSAGE
MSG. 8
MORE
RECORD
EXT MIC (And then the sign “>”
appears next to EXT MIC)
Starts recording the message from the
gooseneck microphone in the control console
or from an external microphone connected to
the RCA socket in the pre-recorded message
player,dependingonwherethesymbol“>”is.
As long as we keep the key pressed a
countdown -starting from 15- will let us know
thetime remaining to finish up the record.The
messagerecordwillfinishwhenthecountdown
reaches0 or whenwereleasethe button ,
whatever comes first.
If the paging line is busy because another
message is being broadcast or a pre-recorded
messageisbeingplayed orsavedfromanother
console1202,insteadofstartingtherecordthe
following message will appear:
If the general access password is active the system will require us to
introduce it every time we try to operate this module (see point 2 of
“access restrictions”).
9Erasing a message
If three groups -for instance- have been
previously created:
SETUP
Provided that the general access
password is NOT active, and there is a
pre-recorded message player (1103)
in the system but NOT a module for
sending messages over the telephone
(1104):
MESSAGE MSG. 1
MORE ERASE
YES erases message number 1.
10 Time setting
If three groups -for instance- have been
previously created:
SETUP
Provided that the general access
password is NOT active, and there is a
pre-recorded message player (1103)
in the system but NOT a module for
sending messages over the telephone
(1104):
TIME
+ or – modifies the hour.
+ or – modifies the minute.
adjusts the time of the system.

43
Central Rack Modules
1
1315 Power Supply Unit.
Once connected to 230 V~, it supplies 15 Vdc for the other devices in the central rack and for the
general line as well.
2
Central Processing Unit 1316.
Itisthemaindevicethat controlsthedifferentelementsof thesystem.Itcommunicateswiththesystem
devices, monitoring the control parameters. It allows the adjustment of such parameters through
the control console 1202.
3
Pre-Amplified Audio Input 1101.1.
It allows the insertion into the system of low level audio signals (like the ones supplied by standard audio
sources like CD Players, Cassette Players, etc). Each 1101.1 module provides two audio programs, what
means that no more than two modules of this type can be present in one system.
4
FM Radio tuner 1102.1.
Radio tuner that operates in the FM band (88 – 108 MHz). It can be operated from the control console
1202.
It is equipped with a low level audio input that can be switched with the radio tuner. The 1102.1 module
provides only one audio program, what means that up to four modules of this type could be installed in
one system.
5
Pre-recorded message player 1103.1.
It allows to save and to store in digital format up to eight messages. The maximum length of each message
will be of fifteen seconds.
6
Interface for telephone systems 1104.1x.
It allows the connection, through an analogue extension, of a telephone central unit. By doing this it is
possible to broadcast messages through any telephone handset.
1 2 3
4 5 6

44 1204
2-Channel, 5 W Control unit 1204
1Push button ON/OFF
On press turns on and the next press turns off the sound system in that zone.
NOTE: The control unit can be turned on at a moderate volume level by pressing while the unit is still OFF.
2Volume regulator
To turn up or down the volume level of the control unit.
3Channel selector
This push-button enables the user to select the sound channel that will be played in a zone. Each push will
change between the two available channels, and the selection will be showed by the light of a red lamp.
2
1
3
Intercom unit 1203
1Push button to select zone 1
By pressing this push button a call will be made to zone 1. It is possible to talk to zone 1 as long as you
keep on pressing the button.
2Push button to select zone 2
By pressing this push button a call will be made to zone 2. It is possible to talk to zone 2 as long as you
keep on pressing the button.
3Push button LOCK
By pressing this push button the zone 2 will stay permanently selected: you can talk to zone 2 even if the
pushbutton 2 is released. A red lampinforms you that the communication with zone2 is permanently open.
If this button is pressed again the lock function is disabled.
4Volume regulator zone 1
By turning this screw clockwise we will raise the volume level of the message broadcast in zone 1.
5Volume regulator zone 2
By turning this screw clockwise we will raise the volume level of the message broadcast in zone 2.
1203
2
2
1
5
3
4

45
1105
Pre-amplified XLR microphone base 1105
1Professional XLR microphone socket
2Microphone type selector
ThisswitchenablestheusertoselectwhichtypeofmicrophonewillbeconnectedtotheXLRsocket:dynamic,
electret without power supply or electret with phantom power supply.
3Pilot lamp ON
Itkeepsonlightedwhilethe deviceisworkingcorrectly,no matterifthereisa microphoneconnected
or not.
1107
MIC
Volume regulator for mic base 1105 1107
1Push button ON/OFF
One press turns on and the next press turns off the microphone base 1105.
2On lamp
Indicates that the microphone base is avaible to be used.
3Volume regulator
To turn up or down the volume level of the microphone signal.
4Pilot lamp for volume regulation
It blinks when the volume level of the microphone reaches its maximum.
2
1
3
1
3
2
4
This manual suits for next models
11
Table of contents
Popular Intercom System manuals by other brands
Intelligent Home
Intelligent Home IH-6912 Slave user manual

Jupiter Avionics
Jupiter Avionics wiJAC2-002 operating manual
Grandstream Networks
Grandstream Networks GDS3710 user manual
Commax
Commax CDV-70UX user manual

Telex Communications
Telex Communications RadioCom BTR-24 Features & specifications
Harding Instruments
Harding Instruments dxi MicroComm ICM-400 Series installation instructions
