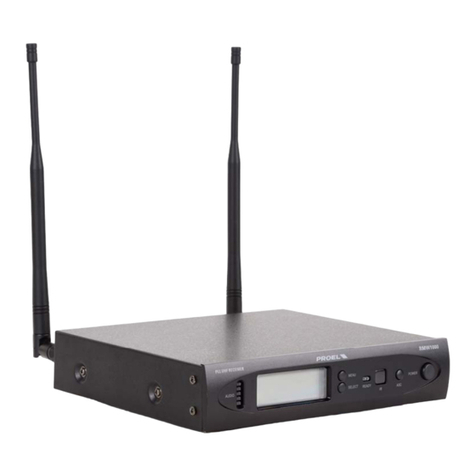
Eikon AETHER RM1 User manual

RM1
Wireless Microphone System
USER’S MANUAL
ENGLISH
ITALIANO
96MAN00RM1-REV.09/21

2
INDEX
DISPOSAL OF OLD ELECTRICAL & ELECTRONIC EQUIPMENT ................................................................................................................................................................................ 3
SAFETY INSTRUCTIONS ................................................................................................................................................................................................................................. 3
IN CASE OF FAULT......................................................................................................................................................................................................................................... 3
PACKAGING, SHIPPING AND COMPLAINT ..................................................................................................................................................................................................... 3
WARRANTY AND PRODUCTS RETURN........................................................................................................................................................................................................... 3
MAINTENANCE AND DISCLAIMER................................................................................................................................................................................................................. 4
POWER SUPPLY............................................................................................................................................................................................................................................. 4
USER’S WARNINGS AND CE CONFORMITY........................................................................................................................................................................................................... 4
LICENSING INFORMATION: ........................................................................................................................................................................................................................... 4
INTRODUCTION ................................................................................................................................................................................................................................................... 6
DESCRIPTION....................................................................................................................................................................................................................................................... 6
RM1 RECEIVER.............................................................................................................................................................................................................................................. 6
RM1 MENU ......................................................................................................................................................................................................................................................... 8
SET UP RECEIVER .......................................................................................................................................................................................................................................... 8
RM1HT HANDHELD MICROPHONE TRANSMITTER............................................................................................................................................................................................... 9
RM1BT BODYPACK TRANSMITTER......................................................................................................................................................................................................................11
BATTERY REPLACEMENT.....................................................................................................................................................................................................................................12
TECHNICAL SPECIFICATION.................................................................................................................................................................................................................................13
TROUBLESHOOTING ....................................................................................................................................................................................................................................14
AVVERTENZE PER LA SICUREZZA.........................................................................................................................................................................................................................15
IN CASO DI GUASTO.....................................................................................................................................................................................................................................15
IMBALLAGGIO, TRASPORTO E RECLAMI.......................................................................................................................................................................................................15
GARANZIE E RESI..........................................................................................................................................................................................................................................16
AVVERTENZE PER L’UTILIZZO E CONFORMITÀ EU...............................................................................................................................................................................................17
INFORMATIVA SULLA LICENZA:....................................................................................................................................................................................................................17
INTRODUZIONE ..................................................................................................................................................................................................................................................18
DESCRIZIONE ......................................................................................................................................................................................................................................................18
RICEVITORE RM1 .........................................................................................................................................................................................................................................18
RM1 MENU ........................................................................................................................................................................................................................................................20
SET UP RICEVITORE......................................................................................................................................................................................................................................20
TRASMETTITORE A MANO RM1HT .....................................................................................................................................................................................................................21
TRASMETTITORE BODYPACK WM1B...................................................................................................................................................................................................................22
SOSTITUZIONE BATTERIE....................................................................................................................................................................................................................................24
FIG.1...................................................................................................................................................................................................................................................................26
FIG.2...................................................................................................................................................................................................................................................................26
FREQUENCY CHART ............................................................................................................................................................................................................................................29
Soluzione dei problemi.......................................................................................................................................................................................................................................30
in the box (Contenuto della confezione) ............................................................................................................................................................................................................30

3
DISPOSAL OF OLD ELECTRICAL & ELECTRONIC EQUIPMENT
This marking shown on the product or its literature, indicates that it should not be disposed with
other household wastes at the end of its working life. To prevent possible harm to the enviroment
or human health from uncontrolled waste disposal, please separate this from other types of wastes
and recycle it responsibly to promote the sustainable reuse of material resources. Household users
should contact either the retailer where they purchased this product, or their local government
office, for details of where and how they can take this item for environmentally safe recycling. Business users
should contact their supplier and check the terms and conditions of the purchase contract. This product should
not be mixed with other commercial wastes for disposal.
SAFETY INSTRUCTIONS
•CAUTION - Before using this product carefully read the following safety instructions. Look of this manual
entirely and preserve it for future reference. When using any electric product, basic precautions should
always be taken, including the following:
•To reduce the risk, close supervision is necessary when the product is used near children.
•Protect the apparatus from atmospheric agents and keep it away from water, rain and high humidity
places.
•This product should be site away from heat sources such as radiators, lamps and any other device that
generate heat.
•Care should be taken so that objects and liquids do not go inside the product.
•The product should be connected to a power supply only of the type described on the operating
instructions or as marked on the product.
IN CASE OF FAULT
•In case of fault or maintenance this product should be inspected only by qualified service personnel when:
▪Liquids have spilled inside the product.
▪The product has fallen and been damaged.
▪The product does not appear to operate normally or exhibits a marked change in performance.
•Do not operate on the product, it has no user-serviceable parts inside.
•Refer servicing to an authorized maintenance center.
PACKAGING, SHIPPING AND COMPLAINT
•This unit package has been submitted to ISTA 1A integrity tests. We suggest you control the unit
conditions immediately after unpacking it.
•If any damage is found, immediately advise the dealer. Keep all unit packaging parts to allow inspection.
•Proel is not responsible for any damage that occurs during shipment.
•Products are sold “delivered ex warehouse” and shipment is at charge and risk of the buyer.
•Possible damages to unit should be immediately notified to forwarder. Each complaint for manumitted
package should be done within eight days from product receipt.
WARRANTY AND PRODUCTS RETURN
•Proel products have operating warranty and comply their specifications, as stated by manufacturer.
•Proel warrants all materials, workmanship, and proper operation of this product for a period of two years
from the original date of purchase. If any defects are found in the materials or workmanship or if the
product fails to function properly during the applicable warranty period, the owner should inform about
these defects the dealer or the distributor, providing receipt or invoice of date of purchase and defect
detailed description. This warranty does not extend to damage resulting from improper installation,

4
misuse, neglect, or abuse. Proel S.p.A. will verify damage on returned units, and when the unit has been
properly used and warranty is still valid, then the unit will be replaced or repaired. Proel S.p.A. is not
responsible for any "direct damage" or "indirect damage" caused by product defectiveness.
MAINTENANCE AND DISCLAIMER
•Clean only with dry cloth.
•Proel products have been expressly designed for audio application, with signals in audio range (20Hz to
20kHz). Proel has no liability for damages caused in case of lack of maintenance, modifications, improper
use, or improper installation non-applying safety instructions.
•Proel S.p.A. reserves the right to change these specifications at any time without notice.
•Proel S.p.A. declines any liability for damages to objects or persons caused by lacks maintenance, improper
use, installation not performed with safety precautions and at the state of the art.
POWER SUPPLY
•This apparatus should only be connected to power source type specified in this owner’s manual or on the
unit.
•If the supplied AC power cable plug is different from the wall socket, please contact an electrician to
change the AC power plug.
•Hold the plug and the wall outlet while disconnecting the unit from AC power.
•If the unit will not be used for a long period of time, please unplug the power cord from AC power outlet.
•To avoid unit power cord damage, please do not strain the AC power cable and do not bundle it.
•In order to avoid unit power cord damage, please ensure that the power cord is not stepped on or pinched
by heavy objects.
USER’S WARNINGS AND CE CONFORMITY
•Changes or modifications not expressly approved by PROEL S.p.A. could void your authority to operate the
equipment.
LICENSING INFORMATION:
•Frequency Range of RM1: 514 - 542; 606 - 614; 655 - 679; 823 - 832; 863 - 865 MHz.
•A ministerial license may be required to operate this equipment in certain areas. The use of this
professional wireless microphone equipment in some countries could be intended for professional use, so
the licensability depends on the country it operates. Proel suggests the user to contact the appropriate
telecommunications authority concerning proper licensing.
•This equipment may be capable of operating on some frequencies not authorized in your country. Please
contact your national authority to obtain information on authorized frequencies for wireless microphone
products in your region.
•Licensing of professional wireless microphone equipment is the user’s responsibility, and licensability
depends on the user’s classification and application, and on the selected frequency.
•The product is in compliance with 2014 / 30/ EU EMC Directive & 2014 /35 / EU LVD Directive.
•PROEL S.p.A hereby, declares that this wireless microphone system complies with the essential
requirements of Radio Equipment Directive (RED) 2014 / 53 / EU.
•The full and detailed declaration of conformity can be downloaded from the web site:
www.eikon-audio.com

5
TABLE OF THE AUTHORIZED FREQUENCIES FOR THE RM1 WIRELESS MICROPHONE SYSTEM IN EUROPE
UPDATED WITH REFERENCE TO ERC-REC 70-03E DOCUMENT DATED FEBRUARY 7 2014
COUNTRY CODE
RM1HT / RM1BT TRANSMITTING FREQUENCIES (MHz)
514-542; 606-614; 655-679; 823-832
863.000 - 865.000
BE CZ DK FI DE IS IE LI LU CH ES SI AL MD
TR
Individual license required
no personal license
required
AT EE FR IT LT PL SE GB
Individual license required and/or
Limited implementation
BG CY HR GR HU LV MT NL NO PT RO SK
BA MK ME RU RS UA
NOT IMPLEMENTED
GE
NOT IMPLEMENTED
IN ALL COUNTRIES THE USE OF WIRELESS MICROPHONES SYSTEMS IS SUBJECT TO ANY TELEVISION AND
BROADCAST TRANSMISSION
CONSULT LOCAL OR NATIONAL RADIO SPECTRUM AUTHORITIES FOR INFORMATION ON POSSIBLE
RESTRICTIONS OR NECESSARY AUTHORIZATIONS BEFORE USING THIS SHORT-RANGE DEVICE.

6
INTRODUCTION
Thank you for choosing this EIKON product and for your trust in our brand, synonymous of professionalism,
accuracy, high quality and reliability. All our products are CE approved and designed for continuous use in
professional systems.
DESCRIPTION
The RM1 Wireless Microphone is a UHF, PLL controlled, true diversity system providing a reliable and high-
quality signal transmission and equipped with automatic channel scan and IR sync.
RM1 Wireless Microphone system features 3 units: RM1 receiver, RM1HT handheld transmitter and RM1BT
body pack transmitter. The system is available in two different configurations:
Aether RM1M: RM1 + RM1HT
Aether RM1H: RM1 + RM1BT + headset microphone
388 total channel frequencies are available allowing the simultaneous use of 12 devices without interference
between them.
RM1 RECEIVER
See FIG. 1 at page 24:
1. POWER
On/off switch: press and hold for two seconds to switch on or off the receiver.
2. ASC
Press this key to start the infrared frequency transmitter.
3. IR DATA SYNC
This is the infrared port to send the channel setting to the transmitter.
4. DISPLAY LCD
The LCD display shows various information. Some of them are described here, for in-depth instructions see
further in this manual.
a. This is the currently used antenna, A and B.

7
b. RF: this meter shows the radio frequency signal level. If the transmitter is ON, the meter must be close
to the top. If the transmitter is OFF the meter is completely down. In this condition, if some signal is
shown on the meter, it means that there is a RF disturbance: to avoid it you must select a different RF
channel.
c. AF: this meter shows the audio frequency signal send to the outputs. If no AF signal is present when
the user speaks into the microphone, check the RF and MUTE indicators in the transmitter. If the RF
signal is null, check if the transmitter is operative and if it is set on the same RF channel as the
receiver.
d. GR –CH: this is the number of the selected group and the channel stored in the receiver memory.
e. This is the number of the selected frequency stored in the receiver memory.
f. when this symbol is on the receiver is locked, it is not possible to change the setting parameters.
5. AUTO
Press this button for the automatic search of the free frequency.
6. SET
Press this button during the normal operation to scroll between the menu options.
7. UP
Pressing this button you can increases the value of the correspondent menu option.
8. DOWN
Pressing this button you can decreases the value of the correspondent menu option.
9. 12VDC
Socket for the AC/DC adaptor: use only the adaptor supplied with the system.
10. OUTPUT (BAL)
Balanced output with mic level: connect it through a XLR cable to a mixer MIC input. This output is used
preferably for long runs.
11. OUTPUT (UNBAL)
Unbalanced output with line level: connect it through a mono 6.3mm jack cable to a mixer or instrument
amplifier input. This output is used preferably for short runs.
12. ANT A ANT B
These are the receiving antennas. Screw them in and raise them up during the use. In order to obtain a
good transmission angle, them at 90° and place the receiver away from other metal objects and far away
no more than 40 m from the transmitter. The internal diversity receiving circuit chooses the best signal
from one of the two antennas.

8
RM1 MENU
SET UP RECEIVER
Menu setting: press the "SET" button for two seconds, the icon disappears, the receiver enters
EDIT mode. Now it is possible to move, by pressing the SET button in sequence within the 7 functions.
GROUP: press the "SET" button once, the GR icon will start flashing, press the button
to select the desired group.
CHANNEL: press the "SET" button once, the CH icon will start flashing, press the button
to select the desired group.
SQUELCH: press the "SET" button once, the SQL icon will start flashing, press the button
to select the level desired.
RF POWER Transmitter: press the "SET" button once, the RF icon will start flashing, press the button
to select the level desired.
TX SET GAIN: press the "SET" button once, the GAIN icon will start flashing, press the button
to select the level desired.

9
VOLUME AUDIO RECEIVER: press the "SET" button for two seconds, the icon disappears press the
button to select the output level desired.
AUTO SCAN: press the "SET" button for two seconds, the icon disappears press the button AUTO, icon
AUTO flashing, the receiver scrolls all the channels in select group to find a free one and selects the best.
Please note that when you have more than one RM1 systems to set up, you must leave ON any transmitter
you have already set up and synced with its receiver, except the transmitter that you want to set up, which
must be off.
SYNC IR DATA
To synchronize the receiver with the transmitter, expose the IR sensor by bringing it closer to the receiver's
IR DATA SYNC window. Press the ASC button, the IR icon will start flashing together with the receiver's IR
sensor. After synchronization, the LED will stop flashing. Check that the transmitter shows the same
frequency on the receiver display.
RM1HT HANDHELD MICROPHONE TRANSMITTER
See FIG. 2 at page 25

10
13. MICROPHONE GRILLE
The grille protects the microphone capsule and includes a pop filter. The microphone capsule is dynamic
with a cardioid polar pattern.
14. DISPLAY LCD
The LCD display shows various information:
a) Frequency
b) RF level of the transmitter
c) Audio Gain of the transmitter
d) Charge level of the battery. Three segments show the state of charge as a percentage. When the
voltage drops below 1.8 Volts the segments are not visible, and the icon starts flashing indicating
that the transmitter is shutting down.
15. ON-OFF MUTE BUTTON
Press this button for 1 second and the transmitter starts working. To disable the sound of the transmitter,
press the ON-OFF button once the symbol appears on the display of the transmitter and receiver, a
subsequent press re-enables the sound, and the symbol disappears.
To turn off the transmitter, press the ON-OFF key for one second and the message “OFF” appears on the
display.
16. BATTERY COMPARTMENT COVER
17. FREQUENCY TRANSMITTER
This label shows the operating frequency of the transmitter.
18. IR
This is the IR infrared sensor port to receive channel settings from the RM1 receiver. Bring the transmitter
close to the IR port to the receiver’s and expose the sensor during the frequency sync procedure and to
transmit settings parameters.
19. BATTERY INLET
Open the handheld microphone as show in figure to access at the battery compartment. Respect always
the polarity marked inside the battery compartment.

11
RM1BT BODYPACK TRANSMITTER
See FIG. 2 at page 25
20. ANTENNA
This is the transmitting antenna: do not force it, disconnect it or try to replace it with a different one.
21. LED POWER
when the power button is pressed, the LED lights up indicating that the transmitter is in operation.
22. DISPLAY LCD
The LCD display shows various information:
a) Frequency
b) RF level of the transmitter.
c) Audio Gain of the transmitter.
d) Charge level of the battery. Three segments show the state of charge as a percentage. When the
voltage drops below 1.8 Volts the segments are not visible, and the icon starts flashing indicating
that the transmitter is shutting down.
23. SET BUTTON
Press and hold this button for 1 seconds and you can access the BODYPACK SET UP. Using the set button,
you can scroll the available options.
24. UP BUTTON
Pressing this button after the SET button you can change the value of the option selected.
25. IR
This is the IR infrared sensor port to receive channel settings from the RM1 receiver. Bring the Bodypack
close to the IR port to the receiver’s and expose the sensor during the frequency sync procedure and to
transmit settings parameters.
26. BATTERIES INLETS
To access the battery compartment and the IR sensor, lightly press the side flaps indicated by a raised dash
on the cover and slide down the battery cover. When replacing the batteries respect always the polarity
marked inside the battery inlet.
27. ON-OFF BUTTON

12
Press this button for 1 second and the bodypack starts working. To disable the sound of the transmitter,
press the ON-OFF button once and the symbol appears on the display of the bodypack and receiver,
a subsequent press re-enables the sound, and the symbol disappears.
To turn off the transmitter, press the ON-OFF key for one second and the message “OFF” appears on the
display.
28. AUDIO INPUT
Mini XLR 3P input socket to connect the supplied microphone or other microphones.
BATTERY REPLACEMENT
For the Battery replacement use always 2x 1.5V AA size LITHIUM or ALKALINE type for the best performances.
You can use also rechargeable batteries but, in this case, the operating time is shorter. Good quality ALKALINE
batteries guarantee an operating time of about 10 hours.
Be careful to respect always the polarity marked inside the battery inlet.
Always remember to remove the batteries if you do not use the microphone for a long period of time: this will
avoid the corrosion of the battery contacts.
ACCESSORIES
The following table shows all the accessories available for the RM1 system (for more information visit the web
site www.eikon-audio.com):
Code
Description
AETHERSPLIT
Antenna Splitter with booster for 4 RM1 units, 1 rack unit (BNC connector)
AETHERANT
4 dB GAIN Yagi directional Antenna for mic stand (BNC connector)
AETHERBOOST
Antenna boost
HCM14EK
High performance Cardioid Headset Microphone for singers (body colour)
HCM12EK
High performance Omni-directional Headset Microphone for actors (body colour)
HCM10V2
High performance Cardioid Headset Microphone for singers (body colour)
HCM08PRO
High performance Omnidirectional Headset Microphone for actors (body colour)
HCM23AK
Premium Omnidirectional Headset Microphone (body colour)
HCM25AK
Premium Cardioid Headset Microphone for singers (black colour)
LCH370
High-quality Cardioid miniature Broadcast Lavalier Microphone (black colour)
LCH100AK
Omnidirectional miniature Lavalier Microphone (black colour)

13
TECHNICAL SPECIFICATION
RM1 –UHF PLL Receiver
RF Channels
388 total preset frequencies
RF Frequency Band
UHF A: 514 - 542 MHz (144 Ch)
UHF B: 606 - 614 MHz (40 Ch)
UHF C: 655 - 679 MHz (120 Ch)
UHF D: 823 - 832; 863 - 865 MHz (84 Ch )
RF Receiver Type
PLL UHF Synthesized
RF Modulation type
FM (F3E)
RF Sensitivity
-105 dBm / 12 dB SINAD
RF Image/Spurious Rejection
> 70 dB
RF Interference Rejection
> 70 dB
RF Frequency Stability
± 0.005% (-10 ÷ +50 °c)
THD Distortion
< 1 %
S/N Ratio
> 90 dB
Dynamic Ratio
> 100 dB
Frequency Response
60 Hz –18000 Hz (±3 dB)
XLR balanced nominal audio output
-10 dBu (245 mVrms)
JACK unbalanced nominal audio output
0 dBu (775 mVrms)
Power Supply
12 V DC 500 mA
Dimensions
H 43 x L 213 x W 173 mm
Weight
880 g
RM1HT –Handheld Microphone UHF PLL Transmitter
RF Channels
388 total preset frequencies
RF Frequency Band
UHF A: 514 - 542 MHz (144 Ch)
UHF B: 606 - 614 MHz (40 Ch)
UHF C: 655 - 679 MHz (120 Ch)
UHF D: 823 - 832; 863 - 865 MHz (84 Ch)
RF Power
max 10 mW
Modulation method
FM (F3E)
RF Max deviation
± 50 KHz compressor-expander system
RF Frequency Stability
± 0.005% (-10 ÷ +50 °c)
Spurious Emission
under limits EN 300422
Frequency Response
50 Hz –15000 Hz (±3 dB)
Microphone type
Dynamic Iper-Cardioid
Power Supply
2x1.5V AA alkaline battery
Dimensions (DxH)
51 x 257 mm
Weight
360 g
RM1BT –Bodypack UHF PLL Transmitter
RF Channels
388 total preset frequencies
RF Frequency Band
UHF A: 514 - 542 MHz (144 Ch)
UHF B: 606 - 614 MHz (40 Ch)
UHF C: 655 - 679 MHz (120 Ch)
UHF D: 823 - 832; 863 - 865 MHz (84 Ch)
RF Power
max 10 mW
Modulation method
FM (F3E)
RF Max deviation
± 50 KHz compressor-expander system
RF Frequency Stability
± 0.005% (-10 ÷ +50 °c)
Spurious Emission
under limits EN 300422
Frequency Response
50 Hz –15000 Hz (±3 dB)
Microphone included
Headset condenser
Input connector
Mini Xlr 3P
Power Supply
2x1.5V AA alkaline battery
Dimensions (HxWxD)
98 x 63 x 24 mm
Weight
130 g

14
TROUBLESHOOTING
Issue
Indicator Status
Solution
No sound or faint sound
Receiver LCD off
• Make sure AC adapteris securely plugged into electrical outlet
and into DC input connector on rear panel of receiver.
• Make sure AC electrical outlet works and is supplying proper
voltage.
Transmitter power light off
• Turn transmitter on
• Make sure the +/- indicator on battery match the transmitter
terminals.
• Insert a fresh battery.
Receiver display indicates
antenna activity.
• Press mute switch on transmitter
• Turnup reveir volume control.
• Increase transmitter ain switch setting.
• Check the cable connection between receiver and mixer.
Receiver: Reception is not
displayed on antenna A or B;
Transmitter and receiver power
ligths glowing.
• Extend receiver antennas vertically.
• Move receiver away from metal objects.
• Check for line of sight between transmitter and receiver.
• Move receiver closer to transmitter.
• Check that receiver are using the same frequency.
Transmitter Display indicates
" LO BAT ".
• Insert a fresh battery.
Distortion or unwanted
noise bursts
Receiver display indicates
antenna activity.
• Remove nearby sources of RF interferences (CD players,
computer, digital effects, in-ear monitor).
• Change receiver and transmitter to a different frequency.
• Reduce transmitter Gain.
• Replace transmitter battery.
• Increase the frequency spread between systems.
Distortion suond
• Reduce transmitter Gain.
• Replace transmitter battery.

15
TRATTAMENTO DEL DISPOSITIVO ELETTRICO OD ELETTRONICO A FINE VITA
Il marchio riportato sul prodotto o sulla documentazione indica che il prodotto non deve essere
smaltito con altri rifiuti domestici al termine del ciclo di vita. Per evitare eventuali danni
all’ambiente si invita l’utente a separare questo prodotto da altri tipi di rifiuti e di riciclarlo in
maniera responsabile per favorire il riutilizzo sostenibile delle risorse materiali. Gli utenti domestici
sono invitati a contattare il rivenditore presso il quale è stato acquistato il prodotto o l’ufficio locale preposto
per tutte le informazioni relative alla raccolta differenziata e al riciclaggio per questo tipo di prodotto. Gli
utenti aziendali sono invitati a contattare il proprio fornitore e verificare i termini e le condizioni del contratto
di acquisto. Questo prodotto non deve essere smaltito unitamente ad altri rifiuti commerciali.
AVVERTENZE PER LA SICUREZZA
•ATTENZIONE - Prima di utilizzare il prodotto, si prega di leggere attentamente le seguenti istruzioni per la
sicurezza. Prendere visione del manuale d’uso e conservarlo per successive consultazioni. Durante l’uso di
un prodotto elettrico devono essere sempre prese precauzioni di base onde evitare danni a cose o
persone, incluse le seguenti:
•In presenza di bambini, controllare che il prodotto non rappresenti un pericolo.
•Posizionare l’apparecchio al riparo dagli agenti atmosferici e a distanza di sicurezza dall’acqua, dalla
pioggia e dai luoghi ad alto grado di umidità.
•Collocare o posizionare il prodotto lontano da fonti di calore quali radiatori, griglie di riscaldamento e ogni
altro dispositivo che produca calore.
•Evitare che qualsiasi oggetto o sostanza liquida entri all’interno del prodotto.
•Il prodotto deve essere connesso esclusivamente alla alimentazione elettrica delle caratteristiche descritte
nel manuale d’uso o scritte sul prodotto.
IN CASO DI GUASTO
•In caso di guasto o manutenzione questo prodotto deve essere ispezionato da personale qualificato
quando:
▪Sostanze liquide sono penetrate all’interno del prodotto.
▪Il prodotto è caduto e si è danneggiato.
▪Il prodotto non funziona normalmente esibendo un marcato cambio di prestazioni.
•Non intervenire sul prodotto.
•Rivolgersi a un centro di assistenza autorizzato.
IMBALLAGGIO, TRASPORTO E RECLAMI
•L’imballo è stato sottoposto a test di integrità secondo la procedura ISTA 1A. Si raccomanda di controllare
il prodotto subito dopo l’apertura dell’imballo.
•Se vengono riscontrati danni informare immediatamente il rivenditore. Conservare quindi l’imballo
completo per permetterne l’ispezione.
•Proel declina ogni responsabilità per danni causati dal trasporto.
•Le merci sono vendute “franco nostra sede” e viaggiano sempre a rischio e pericolo del distributore.
•Eventuali avarie e danni dovranno essere contestati al vettore. Ogni reclamo per imballi manomessi dovrà
essere inoltrato entro 8 giorni dal ricevimento della merce.

16
GARANZIE E RESI
•I Prodotti Proel sono provvisti della garanzia di funzionamento e di conformità alle proprie specifiche,
come dichiarate dal costruttore.
•La garanzia di funzionamento è di 24 mesi dopo la data di acquisto. I difetti rilevati entro il periodo di
garanzia sui prodotti venduti, attribuibili a materiali difettosi o difetti di costruzione, devono essere
tempestivamente segnalati al proprio rivenditore o distributore, allegando evidenza scritta della data di
acquisto e descrizione del tipo di difetto riscontrato. Sono esclusi dalla garanzia difetti causati da uso
improprio o manomissione. Proel SpA constata tramite verifica sui resi la difettosità dichiarata, correlata
all’appropriato utilizzo, e l’effettiva validità della garanzia; provvede quindi alla sostituzione o riparazione
dei prodotti, declinando tuttavia ogni obbligo di risarcimento per danni diretti o indiretti eventualmente
derivanti dalla difettosità.
MANUTENZIONE E LIMITAZIONI D’USO
•Pulire il prodotto unicamente con un panno asciutto.
•I Prodotti Proel sono destinati esclusivamente ad un utilizzo specifico di tipo sonoro: segnali di ingresso di
tipo audio (20Hz-20kHz). Proel declina ogni responsabilità per danni a terzi causati da mancata
manutenzione, manomissioni, uso improprio o installazione non eseguita secondo le norme di sicurezza.
•Proel S.p.A. si riserva di modificare il prodotto e le sue specifiche senza preavviso.
•Proel S.p.A. declina ogni responsabilità per danni a terzi causati da mancata manutenzione, manomissioni,
uso improprio o installazione non eseguita secondo le norme di sicurezza e a regola d'arte.
ALIMENTAZIONE
•Il prodotto deve essere connesso esclusivamente alla alimentazione elettrica delle caratteristiche descritte
nel manuale d’uso o scritte sul prodotto.
•Se la spina in dotazione non combacia con la presa, rivolgersi ad un elettricista per far installare una presa
appropriata.
•Quando si scollega l’apparato alla rete tenere saldamente sia la spina che la presa.
•Quando l’unità non viene utilizzata per un periodo prolungato, interrompere l’alimentazione estraendo la
spina dalla presa dell’alimentazione.
•Per evitare danni alla linea d’alimentazione dell’apparato, non mettere in trazione il cavo d’alimentazione
e non utilizzare un cavo attorcigliato.
•Per evitare il danneggiamento del cavo d’alimentazione dell’apparato, assicurarsi che questo non venga
calpestato o schiacciato da oggetti pesanti.

17
AVVERTENZE PER L’UTILIZZO E CONFORMITÀ EU
•Eventuali modifiche di qualsiasi tipo non espressamente autorizzate dalla PROEL S.p.A. possono annullare
il permesso di utilizzo di questo apparecchio.
INFORMATIVA SULLA LICENZA:
•RM1 opera nelle bande di frequenze: 514 - 542; 606 - 614; 655 - 679; 823 - 832; 863 - 865 MHz.
•Una licenza ministeriale è richiesta per l’uso di questo apparecchio. In alcuni paesi potrebbe essere inteso
per uso professionale ed essere soggetto all’ottenimento di una autorizzazione che dipende dal paese in
cui lo si usa. Proel suggerisce all’utilizzatore di contattare l’autorità nazionale alle telecomunicazioni a
proposito della licenza appropriata.
•Questo apparecchio potrebbe essere in grado di funzionare a frequenze non autorizzate nella nazione e/o
regione in cui si trova l’utente, contattare la autorità nazionale alle telecomunicazioni a riguardo delle
frequenze autorizzate per l’uso dei radiomicrofoni nella propria regione.
•La Proel S.p.A dichiara che Il radio-microfonico EIKON è conforme alla direttiva 2014 / 30/ EU Direttiva
EMC & 2014 /35 / EU Direttiva LVD.
•La Proel S.p.A dichiara che Il radio-microfonico EIKON è conforme ai requisiti essenziali ed alle altre
disposizioni pertinenti stabilite dalla direttiva RED 2014 /53 / EU.
•La dichiarazione di conformità completa e dettagliata può essere consultata sul sito:
www.eikon-audio.com
TABELLA FREQUENZE AUTORIZZATE PER IL RADIO MICROFONO RM1 IN EUROPA AGGIORNATA CON ERC-
REC 70-03E DEL 7 FEBBRAIO 2014
CODICE NAZIONE
FREQUENZE DI TRASMISSIONE RM1HT / RM1BT (MHz)
514-542; 606-614; 655-679; 823-832
863-865
BE CZ DK FI DE IS IE LI LU CH ES SI AL MD
TR
Licenza individuale richiesta
Licenza non
richiesta
AT EE FR IT LT PL SE GB
Licenza individuale richiesta e/o
implementazione limitata
BG CY HR GR HU LV MT NL NO PT RO SK
BA MK ME RU RS UA
Non implementato
GE
NON IMPLEMENTATO
IN QUALSIASI NAZIONE L’USO DEI RADIOMICROFONI È SUBORDINATO AD EVENTUALI RADIOTRASMISSIONI
TELEVISIVE
RIFERIRSI SEMPRE ALLE AUTORITA NAZIONALI DELLE FREQUENZE DEL PROPRIO PAESE PER INFORMAZIONI
SULLE DISPOSIZIONI DELLE FREQUENZE AUTORIZZATE E PER IL LORO USO A NORMA DI LEGGE

18
INTRODUZIONE
Grazie per aver scelto un prodotto EIKON e della fiducia riposta nel nostro marchio, sinonimo di
professionalità, accuratezza, elevata qualità ed affidabilità. Tutti i nostri prodotti sono conformi alle normative
CE per utilizzazione continua in impianti di diffusione sonora.
DESCRIZIONE
I radiomicrofoni serie Aether RM1 sono sistemi UHF con frequenza controllata da PLL e doppia antenna True
Diversity, caratterizzati da una trasmissione affidabile e di ottima qualità dotati di scansione automatica dei
canali con sincronizzazione mediante porta IR infrarossi.
Il sistema radio microfonico RM1 è composto da 3 parti: ricevitore RM1, trasmettitore a mano RM1HT e
trasmettitore tascabile RM1BT. Il sistema è disponibile in 2 diverse configurazioni, ognuna dotata di una
valigetta in ABS per il trasporto:
Aether RM1M: RM1 + RM1HT
Aether RM1H: RM1 + RM1BT
Sono disponibili 388 canali/frequenze complessivi, che permettono l’uso simultaneo fino a 12 apparati senza
che questi interferiscano fra di loro.
RICEVITORE RM1
Vedi FIG. 1 a pagina 24:
1. POWER
Interruttore On/Off: premere e tenere premuto per 2 secondi per accendere/spegnere il ricevitore.
2. ASC
Tasto che abilita la trasmissione IR. Premere il tasto per iniziare la sincronizzazione con il trasmettitore.
Durante la sincronizzazione la porta IR lampeggia, a sincronizzazione avvenuta il lampeggio termina.
3. IR Data Sync
Porta a infrarossi per inviare le impostazioni del canale. Avvicinare la porta del trasmettitore a circa 10
cm dalla porta del ricevitore.
4. DISPLAY LCD
Il display LCD mostra varie informazioni, qualcuna è spiegata qui sotto ma per maggiori istruzioni vedi più
avanti in questo manuale
a. Questa è l’antenna correntemente usata, A e B.
b. RF: mostra il livello del segnale in radio frequenza. Se il trasmettitore è acceso l’indicatore deve essere
prossimo al massimo. Se il trasmettitore è spento l’indicatore è completamente assente. Se, a
trasmettitore spento, viene visualizzato un segnale, si tratta di un disturbo RF: per evitarlo scegliere un
altro canale RF.

19
c. AF: mostra il segnale audio inviato alle uscite. Se nessun segnale AF è presente quando l’utilizzatore
parla al microfono, controllare gli indicatori RF e MUTE. Se il simbolo MUTE è acceso, disattivare il
MUTE dal trasmettitore. Se il segnale RF è assente, controllare se il trasmettitore è operativo e se è
impostato sullo stesso canale RF del ricevitore.
d. Indicazione del gruppo e del numero di canale
e. Indicazione della frequenza RF selezionata corrispondente al gruppo / canale selezionato.
f. Quando acceso questo simbolo indica che il ricevitore è bloccato: quando il ricevitore è bloccato, non è
possibile intervenire sui parametri di settaggio.
g. Queste sono le funzioni del menu, vedi il capitolo successivo.
5. AUTO
Tasto per la ricerca automatica della frequenza libera.
6. SET
Premendo questo tasto durante le normali operazioni si scorrono le opzioni di menu
7. UP
Premendo questo tasto si può cambiare il valore in aumento della corrispondente opzione di menu
selezionata.
8. DOWN
Premendo questo tasto si può cambiare il valore in diminuzione della corrispondente opzione di menu
selezionata.
9. 12VDC IN
Connettore per il collegamento dell’adattatore AC/DC: usare esclusivamente l’adattatore fornito con il
sistema.
10. OUTPUT (BAL)
Uscita bilanciata livello microfono: collegare mediante un cavo XLR all’ingresso del mixer. Questa è l’uscita
preferita per collegamenti lunghi.
11. UNBALANCED OUTPUT
Uscita sbilanciata jack 6,3mm per collegamenti tipo linea.
12. ANT A e ANT B
Queste sono le antenne di ricezione. Avvitarle e alzarle in posizione verticale durante l’uso. Per una
migliore ricezione angolarle a 90° e posizionare il ricevitore lontano da altri oggetti metallici e a non più di
40m dal trasmettitore. Il circuito di ricezione interno “true diversity” sceglie il miglior segnale da una delle
due antenne.

20
RM1 MENU
SET UP RICEVITORE
Settaggio del menu: premere il pulsante “SET” per due secondi, l’icona scompare, il ricevitore entra
in modalità EDIT. Ora è possibile muoversi, attraverso la pressione in sequenza del tasto SET all’interno
delle 6 funzioni.
Gruppo: premere una sola volta il pulsante “SET” l’icona GR inizierà a lampeggiare, premere il pulsante
per selezionare il gruppo desiderato
CANALE: premere il pulsante “SET” una sola volta, l’icona CH inizierà a lampeggiare, premere il pulsante
per selezionare il canale desiderato
SQUELCH: premere il pulsante “SET” una sola volta, l’icona SQL inizierà a lampeggiare, premere il pulsante
per selezionare il livello desiderato
RF POWER Trasmettitore: Premere il pulsante “SET”una sola volta, l’icona RF inizierà a lampeggiare,
premere il pulsante
per selezionare il livello desiderato
TX SET GAIN: Premere il pulsante “SET”una sola volta, l’icona GAIN inizierà a lampeggiare, premere il
pulsante
Table of contents
Languages:
Other Eikon Microphone System manuals
