manuals.online logo
Brands
  1. Home
  2. •
  3. Brands
  4. •
  5. Lightspeed
  6. •
  7. Microphone System
  8. •
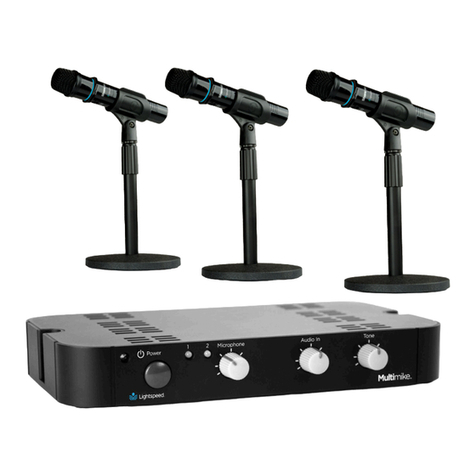
  9. Lightspeed MULTIMIKE User manual

Lightspeed MULTIMIKE User manual

STANDARD REGISTRATION
FLEXMIKE REGISTRATION (OTHER REGISTERED COMPONENTS IN PLACE)
(Particularly valuable when Multimike is not easily accessible)
Note: Multimike systems do not use MIC 2 status lights.
For users adding a second Flexmike or replacing a lost or malfunctioning Flexmike.
1. Start with the Multimike plugged in and powered on.
2. If replacing a Flexmike, make sure the malfunctioning Flexmike is powered o.
3. If a other Flexmikes, Sharemikes or a Media Connector is present, power them
on and wait until each has a solid blue light (“Ready”).
4. Power on the new Flexmike. The microphone 1 light should start blinking.
5. Open the new Flexmike battery compartment and pull the battery out (leaving
it plugged in) to reveal the registration button.
9. The registration is complete. You can begin speaking into the new
Flexmike to verify there is audio.
10. Place system ID number (attached to the Multimike Quickstart
Guide) on the new Flexmike.
NOTE: if at any point, the Multimike or Flexmike lights begin
blinking rapidly, that indicates a registration error. Turn the new
Flexmike o and repeat steps 4-9.
Power On
Solid light
(Existing Good Flexmike)
6. Use another registered functional component (existing Flexmike, Sharemike or
Media Connector) to trigger the registration function in Multimike.
• Using a paperclip with the end straightened out, press and hold the registration
button for 3 seconds inside the functioning Flexmike. This triggers registration in
the Multimike and the Multimike’s #1 amber light will begin blinking.
7. Briefly press the registration button on the new or replacement Flexmike. The #1
blue light will start blinking alternately.
8. Aer several seconds, the #1 light on the Multimike will turn solid and the #1 light on the Flexmike will remain blinking, then turn solid.
AUDIO INMICROPHONE TONE
POWER
MIN
1
MAX MIN MAX TREBLE BASS
2
Solid lights
AUDIO INMICROPHONE TONE
POWER
MIN
1
MAX MIN MAX TREBLE BASS
2
Blinking lights
Power On
Blinking lights
(NEW Flexmike)
Registration
Button
SYSTEM ID#
SYSTEM ID#
SYSTEM ID#
SYSTEM ID#
SYSTEM ID#
RETAIN EXTRALABELS IN THE EVENT A COMPONENT IS REPLACED OR ADDED.
Match components
to this system ID#
Apply to system components to indicate which parts are registered
as a system. Keep registered items together when storing away.
Registration ID Labels
00-01
00-01
00-01
00-01
00-01
00-01
00-01
00-01
00-01
00-01
00-01
00-01
00-01
00-01
00-01
00-01
00-01
00-01
00-01
00-01
00-01
00-01
00-01
00-01
00-01
00-01
00-01
00-01
00-01
00-01
00-01
00-01
00-01
00-01
334-0162-02-00-01 10101
MULTIMIKE REGISTRATION GUIDE
REGISTER
USB POWER
5V/0.2A
+
AUDIOIN BAL. AUDIO OUT AUDIOOUT
MIC LINE
AUDIOOUT/DC IN
USB POWER
5V/1.5A
STANDARD REGISTRATION
REPLACING A FLEXMIKE (NO OTHER REGISTERED COMPONENTS IN PLACE)
Note: Multimike systems do not use MIC 2 status lights.
For users replacing a lost or malfunctioning Flexmike.
1. Start with the Multimike plugged in and powered on.
2. If replacing a Flexmike, make sure the malfunctioning Flexmike is powered o.
3. Power on the new Flexmike. Both microphone 1 and 2 blue lights should start
blinking.
4. Open the Flexmike battery compartment and pull the battery out (leaving it
plugged in) to reveal the registration button.
7. Aer several seconds, the #1 light on the Multimike will turn solid and the
#1 light on Flexmike will remain blinking, then turn solid.
8. The registration is complete. You can begin speaking into the new
Flexmike to verify there is audio.
9. Place system ID number (attached to Multimike Quickstart Guide) on the
new Flexmike.
Power On
Blinking lights
(NEW Flexmike)
5. Using a paperclip with the end straightened out, briefly press the registration button on the back of the Multimike. The 1 and 2
lights will begin blinking on the Multimike.
6. Briefly press the registration button on the Flexmike. The 1 and 2 lights will start blinking alternately.
NOTE: if at any point, the Multimike or Flexmike lights begin blinking
rapidly, that indicates a registration error. Turn the new Flexmike o and
repeat steps 4-9.
REGISTER
USB POWER
5V/0.2A
+–
AUDIO IN BAL. AUDIO OUT AUDIO OUT
MIC LINE
AUDIO OUT/DC IN
Registration
Button
SYSTEM ID#
SYSTEM ID#
SYSTEM ID#
SYSTEM ID#
SYSTEM ID#
RETAIN EXTRALABELS IN THE EVENT A COMPONENT IS REPLACED OR ADDED.
Match components
to this system ID#
Apply to system components to indicate which parts are registered
as a system. Keep registered items together when storing away.
Registration ID Labels
00-01
00-01
00-01
00-01
00-01
00-01
00-01
00-01
00-01
00-01
00-01
00-01
00-01
00-01
00-01
00-01
00-01
00-01
00-01
00-01
00-01
00-01
00-01
00-01
00-01
00-01
00-01
00-01
00-01
00-01
00-01
00-01
00-01
00-01
334-0162-02-00-01 10101
MULTIMIKE REGISTRATION GUIDE
AUDIO INMICROPHONE TONE
POWER
MIN
1
MAX MIN MAX TREBLE BASS
2
Blinking lights
AUDIO INMICROPHONE TONE
POWER
MIN
1
MAX MIN MAX TREBLE BASS
2
Solid lights
REGISTER
USB POWER
5V/0.2A
+
AUDIO IN BAL. AUDIO OUT AUDIO OUT
MIC LINE
AUDIO OUT/DC IN
USB POWER
5V/1.5A
SHAREMIKE REGISTRATION (OTHER REGISTERED COMPONENTS IN PLACE)
(Particularly valuable when Multimike is not easily accessible)
Note: Multimike systems do not use MIC 2 status lights.
For users adding a Sharemike or replacing a lost or malfunctioning Sharemike.
1. Start with the Multimike plugged in and powered on.
2. If replacing a Sharemike, make sure the malfunctioning Sharemike is powered o.
3. If there are Flexmikes, other Sharemikes or a Media Connector present, power them
on and wait until each has a solid blue or red light (“Ready”).
4. Power on the new Sharemike. The microphone #1 blue light should start
blinking.
5. Slide open the Sharemike battery compartment. The registration button is
located below the battery on the le side, marked REG.
7. Aer several seconds, the #1 light on the Multimike will turn solid
and the #1 light on Sharemike will remain blinking, then turn solid.
8. The registration is complete. You can begin speaking into the new
Sharemike to verify there is audio.
9. Place system ID number (attached to the Multimike Quickstart
guide) on the new Sharemike.
Power On
Solid light
(Existing Good Flexmike)
6. Use another registered functional component (existing Flexmike, Sharemike, or
Media Connector) to trigger the registration function in Multimike.
• Using a paperclip with the end straightened out, press and hold the registration
button inside the registered component for 3 seconds. (For the purpose of
these instructions, it is assumed that a Flexmike is the the existing registered
component.)
• The #1 amber light will begin blinking on the Multimike.
• Briefly press the registration button on the Sharemike. The Sharemike’s
#1 light will start blinking alternately.
NOTE: if at any point, the Multimike or Sharemike lights begin
blinking rapidly, that indicates a registration error. Turn the new
Sharemike o and repeat steps 4-9.
AUDIO INMICROPHONE TONE
POWER
MIN
1
MAX MIN MAX TREBLE BASS
2
Blinking lights
Power On
Blinking lights
Registration
Button
Registration
Button
STANDARD REGISTRATION
SYSTEM ID#
SYSTEM ID#
SYSTEM ID#
SYSTEM ID#
SYSTEM ID#
RETAIN EXTRALABELS IN THE EVENT A COMPONENT IS REPLACED OR ADDED.
Match components
to this system ID#
Apply to system components to indicate which parts are registered
as a system. Keep registered items together when storing away.
Registration ID Labels
00-01
00-01
00-01
00-01
00-01
00-01
00-01
00-01
00-01
00-01
00-01
00-01
00-01
00-01
00-01
00-01
00-01
00-01
00-01
00-01
00-01
00-01
00-01
00-01
00-01
00-01
00-01
00-01
00-01
00-01
00-01
00-01
00-01
00-01
334-0162-02-00-01 10101
MULTIMIKE REGISTRATION GUIDE
AUDIO INMICROPHONE TONE
POWER
MIN
1
MAX MIN MAX TREBLE BASS
2
Solid lights
REGISTER
USB POWER
5V/0.2A
+
AUDIOIN BAL. AUDIO OUT AUDIO OUT
MIC LINE
AUDIOOUT/DC IN
USB POWER
5V/1.5A
STANDARD REGISTRATION
MEDIA CONNECTOR REGISTRATION (OTHER REGISTERED COMPONENTS IN PLACE)
(Particularly valuable when Multimike is not easily accessible)
Note: Multimike systems do not use MIC 2 status lights.
1. Start with the Multimike plugged in and powered on.
2. If replacing a Media Connector, make sure the malfunctioning Media Connector is
unplugged.
3. Plug in the new Media Connector. The blue power light will turn on.
4. Locate the registration button on the back panel marked “REGISTER”
7. Aer several seconds, the #1 light on the Multimike will turn
solid. The LINK light on front of the Media Connector will
begin blinking, then turn solid.
8. The registration is complete. You can now plug any audio
source into the Media Connector to verify there is audio.
9. Place system ID number (attached to the Multimike
Quickstart Guide) on the new Flexmike.
NOTE: if at any point, the Multimike or Media Connector
lights begin blinking rapidly, that indicates a registration
error. Unplug the Media Connector, then repeat steps 3-8.
5. Use another registered functional component (existing Flexmike or Sharemike)
to trigger the registration function in Multimike. (For the purpose of these
instructions, it is assumed that a Flexmike is the the existing registered
component.)
• Using a paperclip with the end straightened out, press and hold the
registration button for 3 seconds inside the registered Flexmike.
• The #1 amber light will begin blinking on front of the Multimike.
6. Briefly press the registration button on the Media Connector. The REGISTER light will begin blinking.
Registration
Button
1 4
322
1
AUDIO INAUDIO OUT
REGISTER
USB POWER
5V/1.5A
TONE
TREBLE BASS
1 4
322
1
AUDIO INAUDIO OUT
REGISTER
USB POWER
5V/1.5A
TONE
TREBLE BASS
1 4
322
1
AUDIO INAUDIO OUT
REGISTER
USB POWER
5V/1.5A
TONE
TREBLE BASS
Registration
Button
AUDIO INMICROPHONE AUDIO OUT
POWER
MIN
LINK
MAX MIN MAX MIN MAX
For users adding a Media Connector or replacing a lost or malfunctioning Media Connector.
SYSTEM ID#
SYSTEM ID#
SYSTEM ID#
SYSTEM ID#
SYSTEM ID#
RETAIN EXTRALABELS IN THE EVENT A COMPONENT IS REPLACED OR ADDED.
Match components
to this system ID#
Apply to system components to indicate which parts are registered
as a system. Keep registered items together when storing away.
Registration ID Labels
00-01
00-01
00-01
00-01
00-01
00-01
00-01
00-01
00-01
00-01
00-01
00-01
00-01
00-01
00-01
00-01
00-01
00-01
00-01
00-01
00-01
00-01
00-01
00-01
00-01
00-01
00-01
00-01
00-01
00-01
00-01
00-01
00-01
00-01
334-0162-02-00-01 10101
MULTIMIKE REGISTRATION GUIDE
AUDIO INMICROPHONE TONE
POWER
MIN
1
MAX MIN MAX TREBLE BASS
2
Blinking lights
Multimike Front Media Connector Front
Media Connector Back
AUDIO INMICROPHONE AUDIO OUT
POWER
MIN
LINK
MAX MIN MAX MIN MAX
AUDIO INMICROPHONE TONE
POWER
MIN
1
MAX MIN MAX TREBLE BASS
2
Solid lights
Multimike Front Media Connector Front
Media Connector Back
Multimike Back
REGISTER
USBPOWER
5V/0.2A
+
AUDIOIN BAL.AUDIO OUT AUDIOOUT
MIC LINE
AUDIOOUT/DC IN
USBPOWER
5V/1.5A

Other Lightspeed Microphone System manuals

Lightspeed Flexmike User manual

Lightspeed

Lightspeed Flexmike User manual

Lightspeed DELTA PA User manual

Lightspeed

Lightspeed DELTA PA User manual

Lightspeed FP 1000 User manual

Lightspeed

Lightspeed FP 1000 User manual

Lightspeed Delta X6 User manual

Lightspeed

Lightspeed Delta X6 User manual

Lightspeed Delta X6 User manual

Lightspeed

Lightspeed Delta X6 User manual

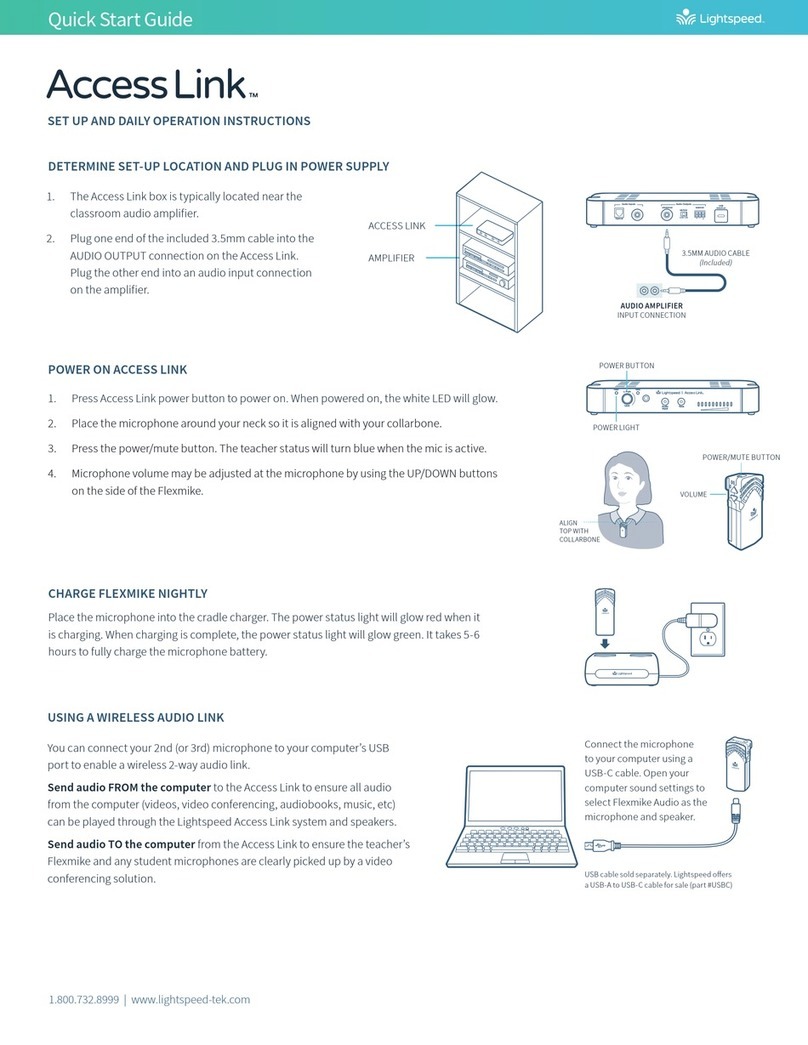
Lightspeed Access Link User manual

Lightspeed

Lightspeed Access Link User manual

Lightspeed Access Link User manual

Lightspeed

Lightspeed Access Link User manual

Lightspeed TOPCAT User manual

Lightspeed

Lightspeed TOPCAT User manual

Popular Microphone System manuals by other brands

MC Crypt 31 24 89 instruction manual

MC Crypt

MC Crypt 31 24 89 instruction manual

Vivanco FMC 4000 instruction manual

Vivanco

Vivanco FMC 4000 instruction manual

Samson AIRLINE CR77 owner's manual

Samson

Samson AIRLINE CR77 owner's manual

SilverNet Pro RANGE 95 user manual

SilverNet

SilverNet Pro RANGE 95 user manual

Broadata LBC-HDBT-T/R-48-Lite user manual

Broadata

Broadata LBC-HDBT-T/R-48-Lite user manual

Meridian RGB-T-0 Installation & operation instructions

Meridian

Meridian RGB-T-0 Installation & operation instructions

Audio Technica ATW-1821 owner's manual

Audio Technica

Audio Technica ATW-1821 owner's manual

DÖRR AF-50 instruction manual

DÖRR

DÖRR AF-50 instruction manual

Shure PGXD quick start guide

Shure

Shure PGXD quick start guide

Azden SMX-100 operating manual

Azden

Azden SMX-100 operating manual

Samson QV owner's manual

Samson

Samson QV owner's manual

The Singing Machine SMM-107 instruction manual

The Singing Machine

The Singing Machine SMM-107 instruction manual

Shure BLX4RE-H8E Online user's guide

Shure

Shure BLX4RE-H8E Online user's guide

Shure MV88+ manual

Shure

Shure MV88+ manual

thomann t.bone IEM 100 user manual

thomann

thomann t.bone IEM 100 user manual

JTS ST-6060 quick start guide

JTS

JTS ST-6060 quick start guide

Luxul XWS-1810 Quick install guide

Luxul

Luxul XWS-1810 Quick install guide

Granit 50700306 instruction manual

Granit

Granit 50700306 instruction manual

manuals.online logo
manuals.online logoBrands
  • About & Mission
  • Contact us
  • Privacy Policy
  • Terms and Conditions

Copyright 2025 Manuals.Online. All Rights Reserved.