2
user´s manual
1.- Quick Reference Guide for Remote Control Unit Operation 3
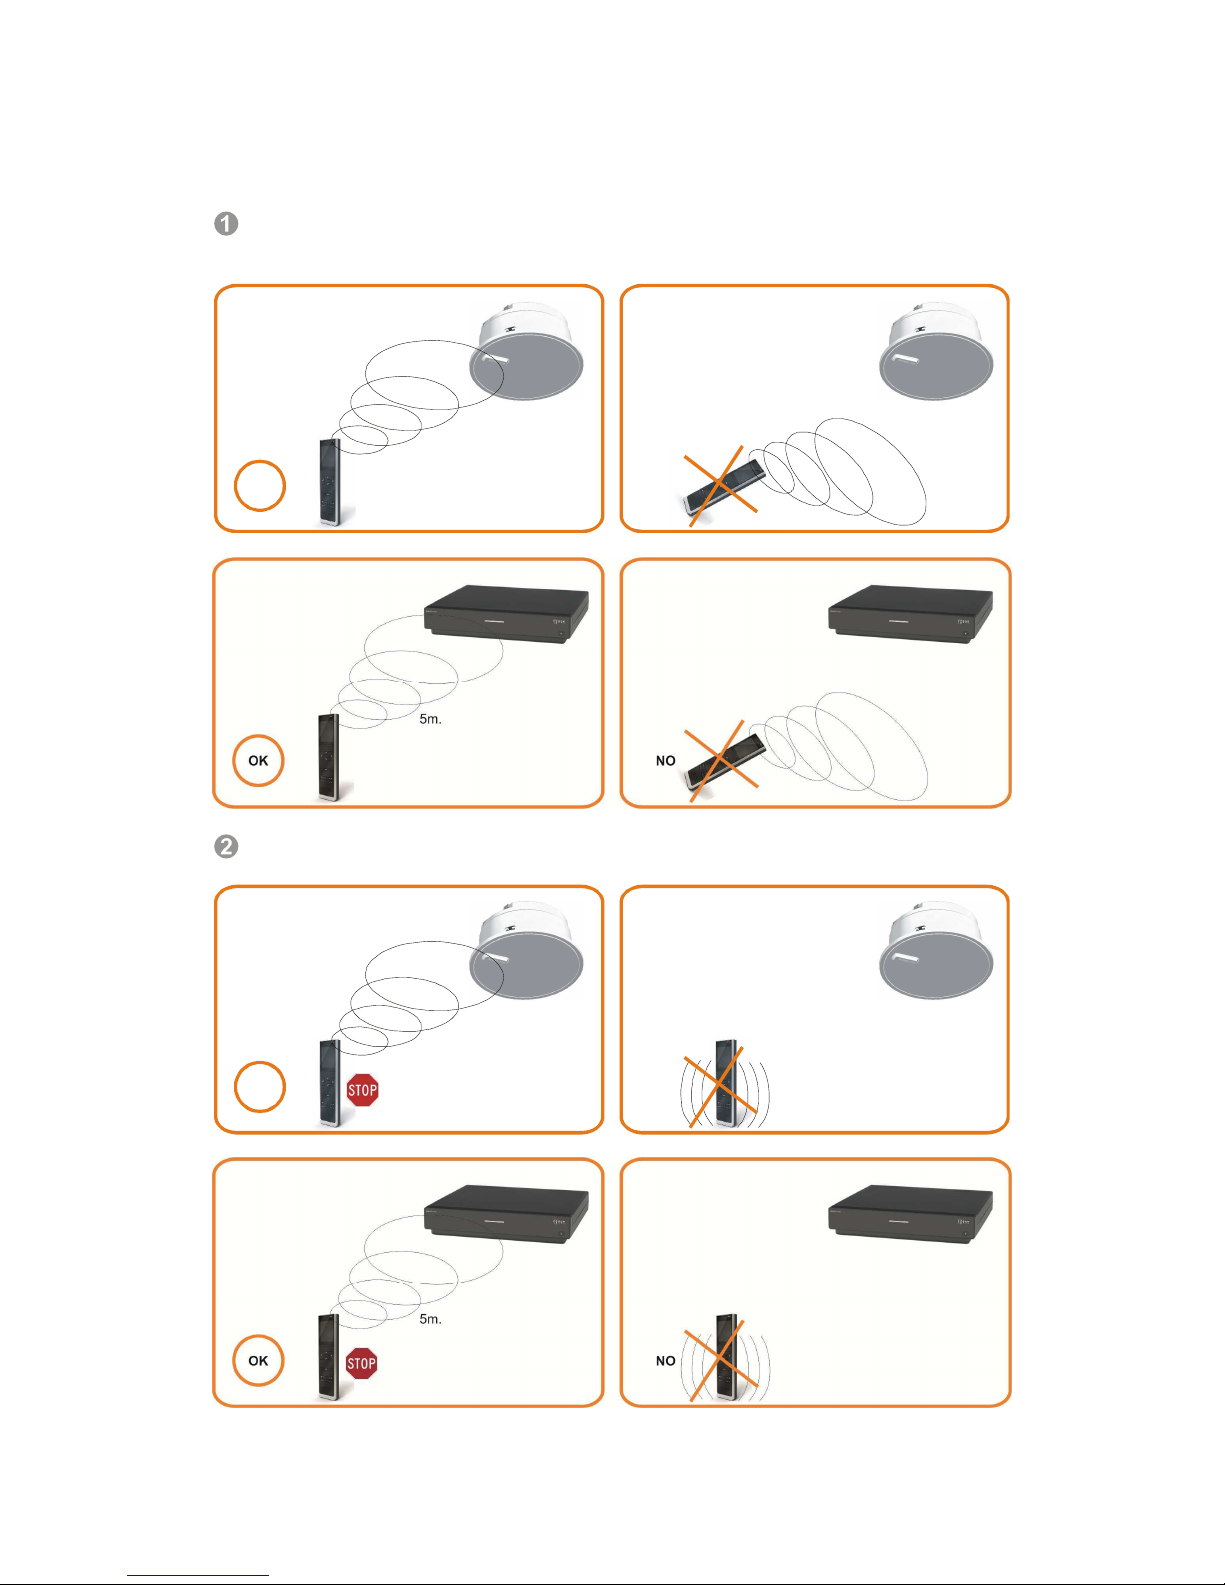
Recommendations to achieve enhanced communication between the Remote
Control Unit and the Main Speaker or Zone Controller 4
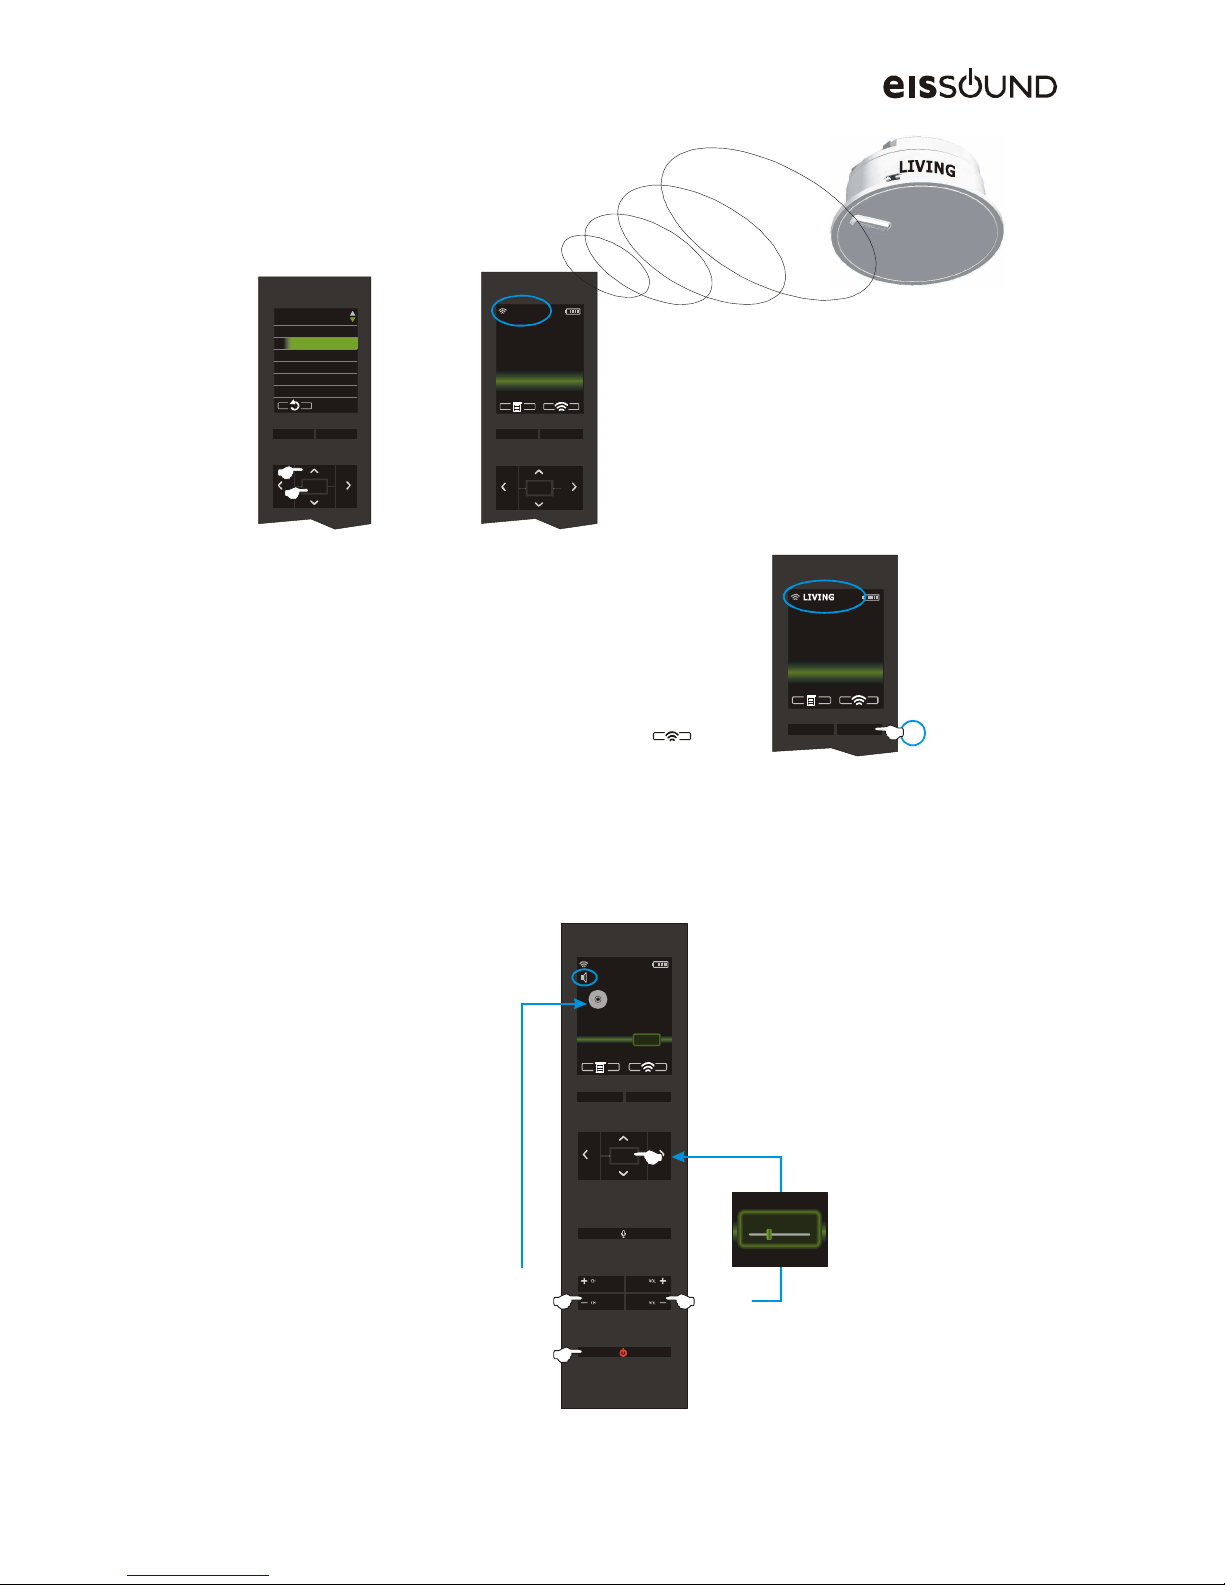
2.- Link Remote Control Units and Main Active Speakers 5
3.- Operating the Sound System 6
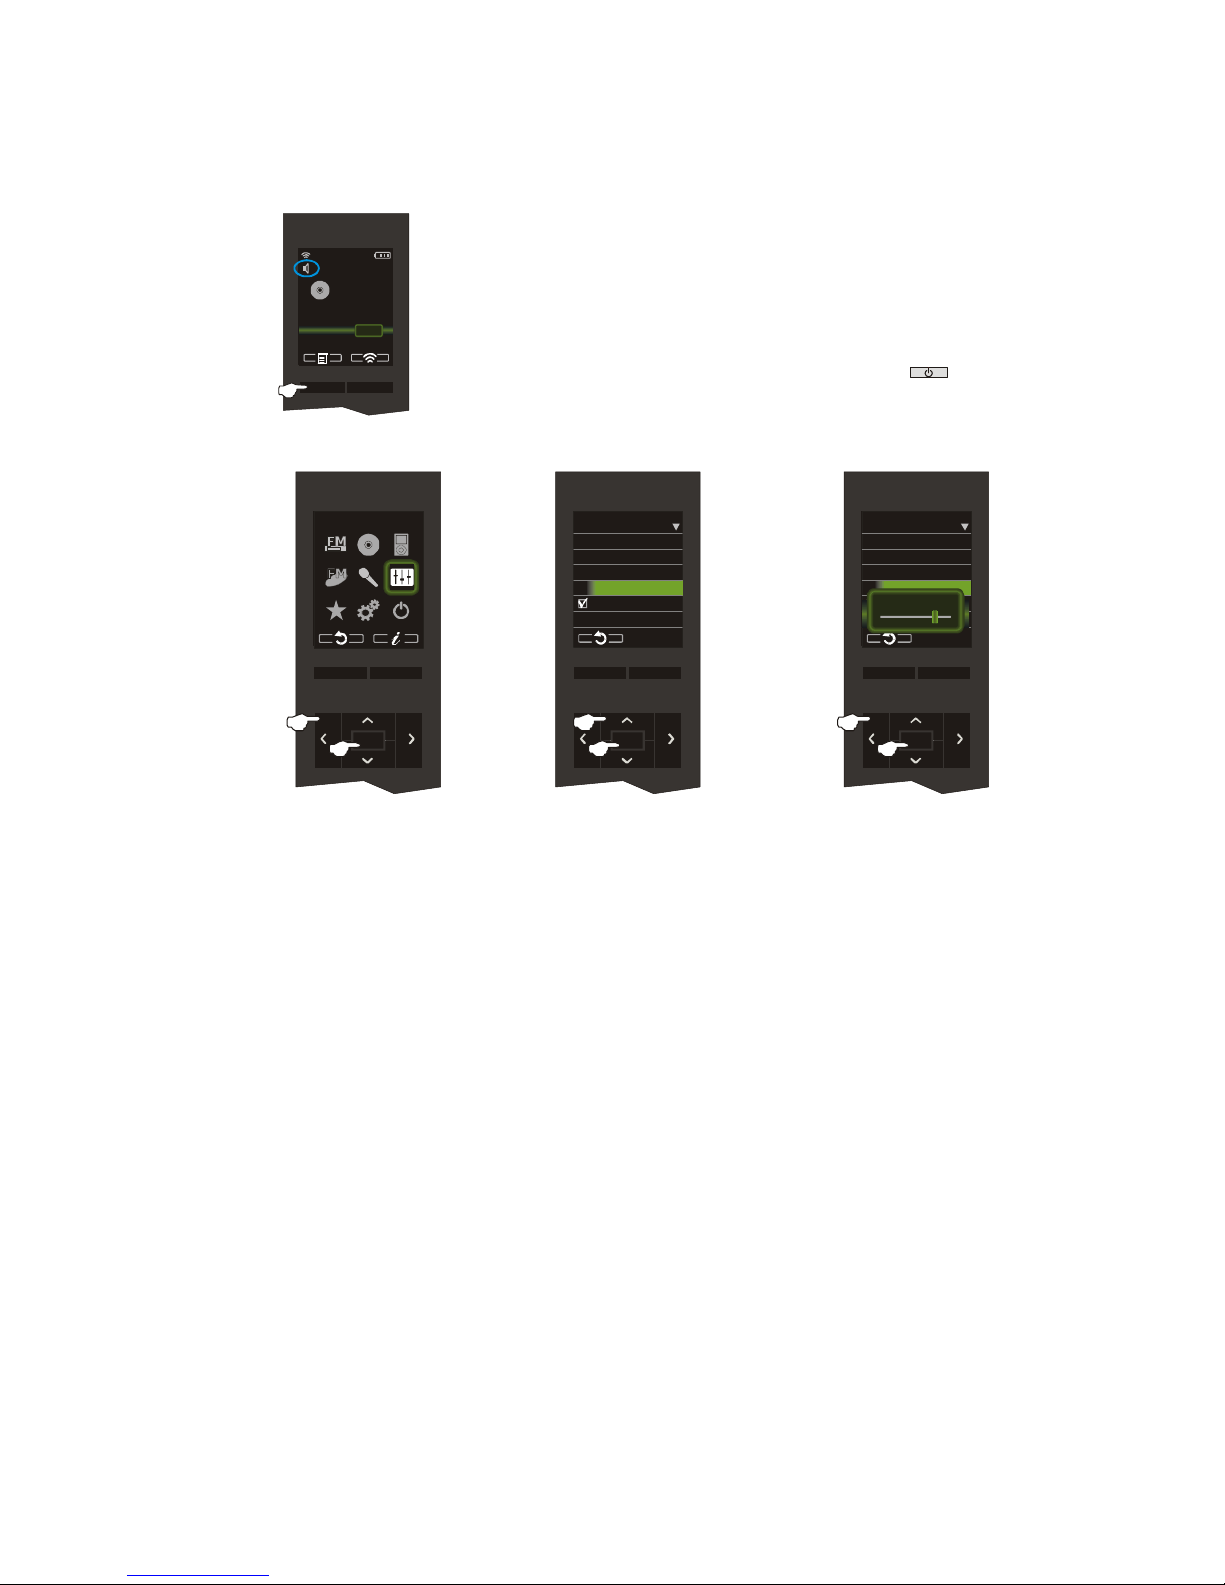
3.1.- Basic Controls 6
3.2.- Equalization and timer 6
3.3.- FM tuners 7
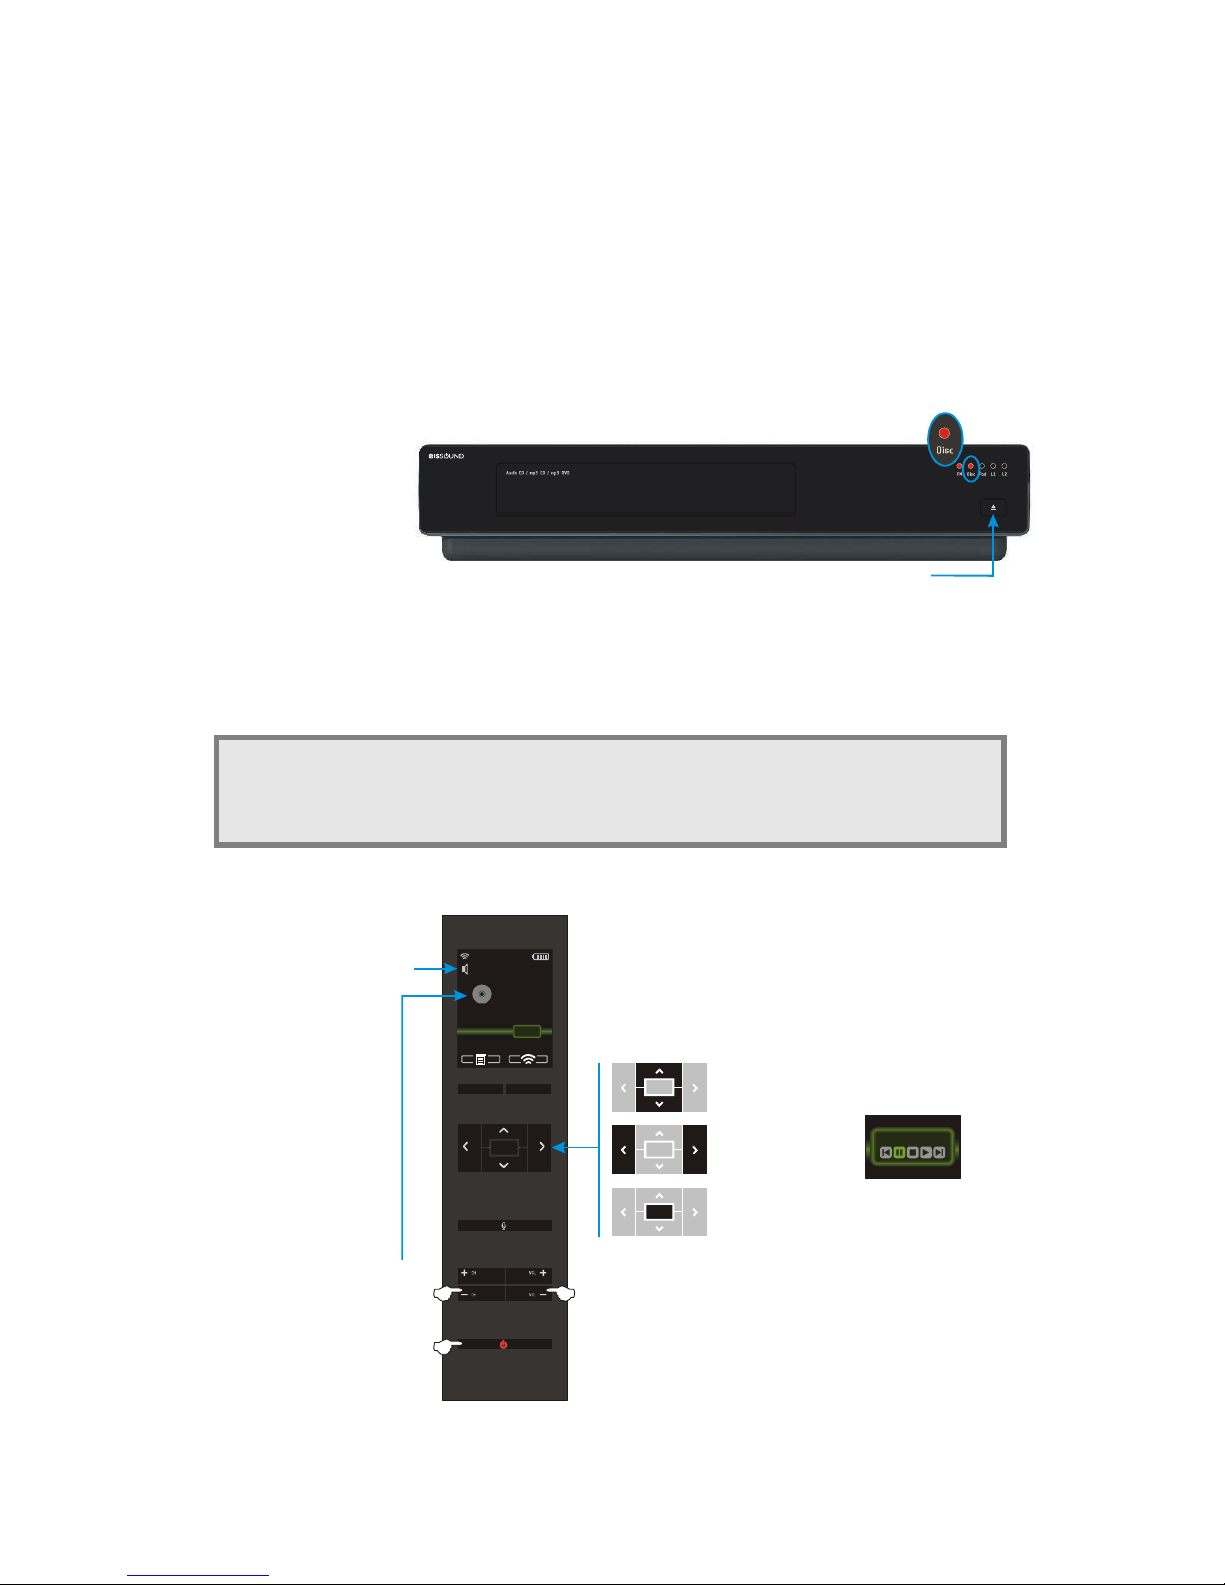
3.4.- CD/DVD-audio Player 8
3.5.- iPod 9
3.6.- L1 and L2 external sound inputs 11
3.7.- In-Room sound input 12
3.8.- “Ideal” function 13
3.9.- General standby for the entire system 14
3.10.- Standby for Auxiliary Active Speaker 14
4.- Clock functions 15
4.1.- Clock-calendar 15
4.2.- Alarms 15
4.3.- Auto-standby 16
5.- Intercom 17
5.1.- Intercom call-response operation mode 17
5.2.- Electronic baby monitor 18
5.3.- Intercom settings 19
6.- Display settings 20
FAQ's Frequently Asked Questions 21
iPod is trademark of Apple Inc. registered in teh U.S. and other countries.
"Made for iPod" means that an electronic accessory has been designed to connect specifically to iPod and has been certified by
Electrónica Integral de Sonido S.A. to meet Apple performance standards.
Apple is not responsible for the operation of this device or its compliance with safety and regulatory standards.
Electrónica Integral de Sonido S.A. is not responsible for any error or omissions that may appear in this manual, and reserves the right to
make changes without prior notice.