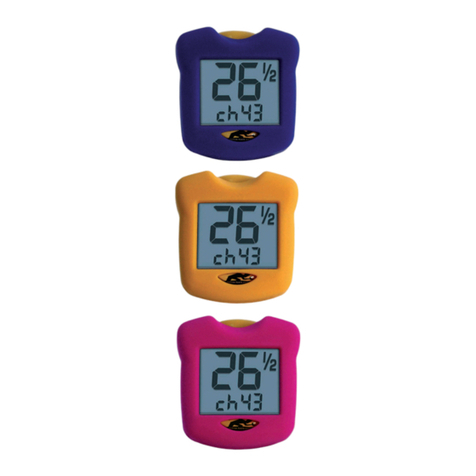
EKF Diagnostics Lactate Scout Sport User manual

Lactate Scout Sport
Instruction manual

Copyright © 2023
EKF-diagnostic GmbH
This document is protected by
copyright. Any duplication,
copying or distribution is prohibited
without the prior written consent of
EKF-diagnostic GmbH
Part-No: 7023-9018-0128
Rev.01 08/2023
Lactate Scout Sport instruction manual
Country of origin Germany
Manufacturer:
EKF-diagnostic GmbH
Ebendorfer Chaussee 3, 39179 Barleben
Germany
Sales and service:
EKF-diagnostic GmbH
Service: +49 (0) 39 203 511 414
Email: [email protected]
www.ekfdiagnostics.com
Scan QR Code for additional
Instruction manual languages

Contents
0Intended use, safety instructions and required accessories 5
1Introduction 7
1.1 Lactate Scout Sport measuring device 7
1.2 Lactate Scout Test Strips 7
1.3 Inserting the batteries 8
1.4 Switching the device on and o 9
1.5 Display 9
1.6 Code setting for the Lactate Scout test strips 10
2Performing a test 11
2.1 Preparing for a test 11
2.2 Sample collection and testing 12
2.3 Checking the code setting 15
2.4 Checking the ambient temperature 15
3Settings, functions and displays 16
3.1 Device settings 17
3.1.1 Volume control 17
3.1.2 Date and time settings 18

3.1.3 Activating and De-activating the bluetooth function 20
3.1.4 Connecting to a heart rate monitor 21
3.1.5 Displaying information about the device 22
3.2 Heart Rate 23
3.3 Functionality test 25
3.4 Stopwatch 28
3.5 Displaying stored values 29
3.6 Battery level indicator 30
4Performing a step test 31
4.1 Step test mode 31
4.2 Heart rate during step tests 33
4.3 Displaying the post exertion phase 33
5Data Transfer 34
6Storage, cleaning and disposal 35
7Error messages and warning indicators 36
8Technical specifications 42
9Symbols 44
10 Consumables and accessories 46

5
The Lactate Scout Sport measuring system
is designed to measure lactate concentration
in capillary blood in order to assess changes
in physical performance and conditioning in
healthy people in the field of sport.
The Lactate Scout Sport measuring system is
not designed for taking quantitative
lactate measurements to support clinical
decisions in medical applications. No
diagnosis or medical action should be taken
on the basis of the values.
For use outside the body only.
Lactate Scout Sport analyzer may only
be used with Lactate Scout Test Strips
and check solutions..
Lactate Scout Test Strips are only for
single use.
Safety instructions
PLEASE READ THE INSTRUCTION MANUAL BEFORE
USE AND KEEP IT IN A SAFE PLACE!
Failure to comply with any text marked as
a “WARNING” can result in serious damage
to health.
Failure to comply with any text marked
“ATTENTION” can lead to incorrect tests or
damage to the device.
Please ensure you observe the warning and
safety instructions specified on the labels of the
batteries and lancets that you are using.
WARNING
There is a risk of small parts being ingested,
such as batteries, test strips, screw caps or drop
dispensers on Check Solution bottles.
The Lactate Scout Sport measuring device and
all related accessories must be kept out of the
reach of children.
Intended use
0 Intended use, safety instructions and required accessories

6
WARNING
The method for obtaining samples for lactate
tests involves a risk of infection. Test strips,
lancets, soft lint free cloth and measuring
devices contaminated with sample carry a risk
of infection.
Safety gloves must be worn when performing
tests for third parties.
Please make sure that lancets and test strips
are intact and unused before use.
Make sure you dispose of any used test strips,
lancets and soft lint free cloth safely in the
household waste.
Make sure you only use the Lactate Scout
Sport measuring system for the purpose
specified in this instruction manual.
ATTENTION
Make sure you only use accessories that
have been provided or recommended by the
manufacturer.
The measuring device must not be used
if it is not functioning correctly or has
been damaged.
Required accessories
To carry out lactate measurements the
following materials are needed:
- Sterile lancets
- Lint free paper tissues/cloths
- Clean water
Please note that sterile lancets (we
recommend safety lancets), lint free cloths
and water are not included and need to be
provided separately.
To carry out functionality tests Lactate Scout
Check Solution is required. Lactate Scout
Check Solution is available in dierent
concentrations (see chapter 10).

7
1 Introduction
1.1 Lactate Scout Sport measuring device 1
Opening (1A) for inserting the test strip
Display (1B)
Display screen will indicate the following:
device ready, blood lactate
concentration, warning messages,
configuration options and status information.
Keypad for operating the measuring device
• Arrow keys (1C):
- for moving between menus, sub-menus and
menu items
- for adjusting values, e.g. time and date
• OK button (1D):
- for enabling menus, sub-menus and
menu items
- for confirming choices
- for activating and deactivating
configuration mode
• Back button (1E):
undo or cancel the last step
• Temperature sensor (1F):
for reading the ambient temperature
1.2 Lactate Scout Test Strips 2
The test strip has an opening for the blood
sample (2A). This opening is connected to
the measuring chamber. The contacts (2B)
connect the test strip to the measuring device.
1A
1B
2B
1E 1C 1D
2A
21
1F

8
1.3 Inserting the batteries
The Lactate Scout Sport requires two CR2450
(3V lithium button cell) batteries.
The device is supplied with batteries included.
First, remove both of the battery insulating
strips 3.
The measuring device must be turned o to
replace the batteries. Gently push the battery
cover on the back of the instrument outwards.
Remove the discharged batteries. When
inserting the new batteries, ensure that the
polarity is correct.
Push the battery cover back in until it
completely locks into place 4.
If the time to replace the batteries exceeds 30
seconds, the date and time setting will be lost
and must be re-entered. However, stored data
and settings will be retained.
3
4
PLEASE NOTE
Used batteries must not be disposed of with household
waste. End users have a statutory obligation to
ensure used batteries are returned for recycling. Used
batteries can be returned free of charge to retailers or
collection points.

9
1.4 Switching the device on and off
The Lactate Scout Sport has a configuration/
display mode and a measuring mode,
both of which can be switched on and o
independently.
Configuration and display mode can be
switched on or o by holding down the OK
button for two seconds.
Measuring mode is switched on or o
when a test strips is inserted into the
measuring device, even if the measuring
device was previously switched o or is in
configuration and display mode. Removing
the test strips from the device will switch the
measuring mode o.
The Lactate Scout Sport can be switched
o by holding down the OK button for
two seconds.
The device will switch itself o if it is not used
for two minutes in configuration and display
mode or if the device is not used for two
minutes while the test strip is inserted in the
measuring device.
1.5 Display
An information line will be displayed in both
modes at the top of the display when the
device is switched on 5. This line provides
information about the battery level, the
current time and the active functions of the
measuring device (5A).
In configuration and display mode, a symbol
line will also be displayed beneath the info line
(5B). This line uses corresponding symbols
to indicate the configuration and display
mode menu/sub-menu that the measuring
device is in.
If symbols or numbers have a black back-
ground, this means they can be selected.
If symbols or numbers have a grey
background, this means they cannot be
selected and confirmed. The associated
function needs to be activated in the main
menu (chapter 3).
5A
5B
5

10
A two-digit code must be entered when
setting up the measuring device or when
using test strips from a new container; this
code is printed on the label of the test strips
container.
First, switch the configuration and display
mode on by holding down the OK button for
two seconds 6. Then press the OK button
again. The code setting menu will open. The
symbol line will display the “CODE” symbol 7.
Enter the two digits of the code, starting from
the left. Enter the digits of the code using
the two arrow keys and confirm by pressing
the OK button 7- 9. You will then hear a
signal tone to confirm that the code has been
set. The measuring device is now ready to
take measurements using test strips with this
code 10 - 11 .
You can now either insert a test strip or switch
o the device.
6
8
10 11
9
7
1.6 Code setting for Lactate Scout Test Strips

11
2 Performing a test
2.1 Preparing for a test
Remove a test strip from the container. Make
sure you do not touch the opening for the
sample 1. As soon as you have removed the
test strip, insert it into the measuring device
opening in the direction of the arrow until you
can feel resistance 2. The contacts must be
facing up.
3
3
The display will briefly show the code which
is currently configured. A blinking drop
symbol will then be displayed to indicate
that the measuring device is ready to take a
measurement. The ambient temperature of the
measuring device will be displayed beneath
the info line 3.
ATTENTION
Before you use a test strip from a new test strip
container, you must check that the code on the
label is the same as the code currently configured
in the device. If the code does not match, then it
must be configured again in the device.
2
1

12
ATTENTION
The test strips and the measuring device must
be at the same temperature when performing
a test. If you take the test strip container
out of the fridge, you must wait for at least
20 minutes until the test strip container has
reached the ambient temperature before you
open the container. If you take the test strip
container out of the freezer, you must wait at
least 2 hours until the test strips container has
reached ambient temperature. Only remove
test strip from test strip vial to be used
immediately (within 2 minutes) for testing
purposes. Close the container immediately
after removing the test strip. Never leave the
container open.
2.2 Sample collection and testing
Wash your fingers or earlobes with clean
water at the puncture site (to remove residues
of blood circulation stimulating creams, dried
blood or sweat). Dry the puncture site with a
lint free paper tissue/cloth to avoid dilution or
“running” of the blood droplet. Puncture the
washed sample site using a suitable lancet.
Waiting too long can result in new sweat.
The two steps “sweat removal” and “pricking
and measuring” must not take more than
60 sec in total, as interrupting the step test
beyond this time will reduce the loading
conditions.
ATTENTION
Impurities such as sweat, alcohol or disinfectant
on the skin may cause problems with the
sampling or cause incorrect results. Ensure that
the sample site is cleaned carefully with water
and dried before puncturing the finger. Use only
fresh blood samples for measurement. The intake
of drugs such as paracetamol, antioxidants such
as ascorbic acid or diseases, infections, diets,
carbohydrate-rich food or stress can influence
individual test results.

13
Wipe away the first droplet of blood. Apply
gentle pressure to the puncture site. The
second droplet must be large enough to fill
the measurement chamber of the test strip
in one go.
ATTENTION
Avoid pressing on the puncture site too
heavily as sweat and/or tissue fluid can merge
with the sample and affect the test result.
Contamination of the blood sample with
sweat (lactate concentration in sweat approx.
16 - 30 mmol/L) can cause considerably
higher lactate values.
The sample droplet must not run. Bring the
sample site to the tip of the inserted test strip.
The test strip will draw the sample into the
measuring chamber 4.
4

14
ATTENTION
The test strip must draw the sample in one go.
Failure to do so results in the risk of
insufficient filling of the test strip.
Do not touch the skin with the Test strip.
If performing lactate tests on someone else,
move the measuring device with its inserted
test strip to the sample site of the subject.
Once the measurement chamber on the test
strips tip is completely filled, an acoustic signal
will sound and the test will begin. A circular
symbol with a progress bar will be displayed.
5After ten seconds, a second acoustic
signal will sound and the test result will be
displayed in the measurement unit “mmol/L”.
The allocated memory space number will be
displayed next to the memory symbol. The test
result is stored along with the date and time of
the test and the memory space number 6.
5
WARNING
Lancets and test strips must only be used once.
Used lancets and test strips carry a risk of
infection.
Ensure used lancets, test strips and other
materials used for sample collection are
disposed of properly.
6

15
8
7
9
2.4 Checking the ambient temperature
To ensure consistent and reliable test
results are achieved under dierent climatic
conditions, the measuring device is equipped
with a temperature sensor. The temperature
sensor is located underneath the opening for
the test strips 9.
2.3 Checking the code setting
The code is displayed briefly when you
switch measuring mode on 7. If more than
25 tests are performed with the same code, a
reminder to check the code will be displayed
for three seconds 8. Pressing the OK button
within three seconds will take you to the code
configuration menu.
WARNING
Do not touch or cover the temperature sensor
with your hand. Failure to do so results in
the risk that the temperature sensor will read
the ambient temperature incorrectly and
the measuring device may record incorrect
test results.

16
Navigate symbols using the up and down
arrow keys. The selected symbol is displayed
with a black background. Pressing the OK
button takes you to the sub-menu. Once
configuration is complete, confirm your
selection with the OK button and you will
be returned to the main menu. Pressing the
Back button will also take you back to the
main menu. If you use the back button, your
changes will not be saved.
3 Settings, functions and displays
Settings can be changed in configuration and
display mode. In order to go to configuration
and display mode, there must not be a test
strip inserted in the measuring device. The
configuration and display mode can be
switched on or o by holding down the OK
button for two seconds. An acoustic signal will
sound, and the main menu will be displayed
along with its symbols. The symbols display
the sub-menus 1:
• Stored test results (1A)
• Device settings (1B)
• Functionality test (1C)
• Test strip code configuration (1D)
• Stopwatch function (1E)
• Heart rate (1F)
1D
1E
1A
1B
1C
1
Choose a symbol to move to the associated
sub-menu.
1F

17
3.1 Device settings
If you choose the symbol 1B in the main
menu and confirm your selection by press-
ing the OK button, you will be taken to the
device settings 2. The following settings are
available:
• Date and time settings (2A)
• Search for heart rate monitor and
connect (2B)
• Activating/deactivating the Bluetooth®
function (2C)
• Volume control for acoustic signals (2D)
• Device information (2E)
3.1.1 Volume control
If you choose the symbol 2D in the “Device
settings” menu and confirm your selection by
pressing the OK button, you will be taken to
the volume control settings 3. The following
settings are available:
• mute (3A)
• medium volume (3B)
• loud (3C)
Set the volume using one of the two arrow
keys and confirm your selection by pressing
the OK button. Once you have confirmed your
selection, you will be taken directly back to
the “Device settings” menu.
1B 2
2A
2B
2C
2D
2E
2D
3A
3B
3C
3

18
3.1.2 Date and time settings
If you choose the “Date and time settings”
symbol in the “Device settings” menu 2A
and confirm your selection by pressing the
OK button, you will then have the option to
set the year. A calendar will appear in the
symbol line 4.
Set the year using one of the two arrow keys
and confirm your selection by pressing the
OK button. Once you have confirmed your
selection, you will then have the option to set
the month and day. Two calendar symbols for
the month and day will appear in the symbol
line 5- 6. Set the month and day using
one of the two arrow keys and confirm your
selection by pressing the OK button. Once
you have confirmed your selection, you will
then have the option to set the time. A clock
will appear in the symbol line. First, choose a
time display format. The following settings are
available 7:
• 24-hour clock
• 12-hour clock
Once you have confirmed your selection,
you can set the time. Set the hours and
minutes using one of the two arrow keys
8and confirm your selection by pressing
the OK button. Once you have confirmed
your selection, you will be taken back to the
“Device settings” menu.
If the date and time are not (re)set when
the device is configured or reset, the time
will be displayed in the info line with a black
background.

19
2A 4 5 6
7 8
23

20
3.1.3 Activating and deactivating the
Bluetooth®function
You need to activate the Bluetooth® wireless
technology function if you want to connect
the Lactate Scout Sport to a heart rate
monitor or if you want to transfer data to a
PC. When in the “Device
settings” menu, select the symbol for
activating and deactivating the Bluetooth®
function 2C. Confirm your selection by
pressing the OK button. The sub-menu will
then open 9. To activate the Bluetooth®
function, use one of the two arrow keys to
select the “Activation” symbol (check box with
vertical stroke) and confirm your selection
by pressing the OK button. The Bluetooth® 10
symbol will now be displayed in the info line.
The function requires additional power and
should therefore only be activated when it is
needed.
To deactivate the Bluetooth® function, use
one of the two arrow keys to select the
“Deactivation” symbol (check box with circle)
and confirm your selection by pressing the
OK button. A
2C
9 10
Other manuals for Lactate Scout Sport
1
Table of contents
Other EKF Diagnostics Measuring Instrument manuals
Popular Measuring Instrument manuals by other brands
Valeport
Valeport fastCTD operating manual

PCB Piezotronics
PCB Piezotronics IMI SENSORS 628F11/-0005 Installation and operating manual
Lovibond
Lovibond PM 620 instruction manual
halstrup-walcher
halstrup-walcher PU Original instruction manual

Conrad
Conrad 2890418 operating instructions

Vaisala
Vaisala CARBOCAP GM70 user guide
