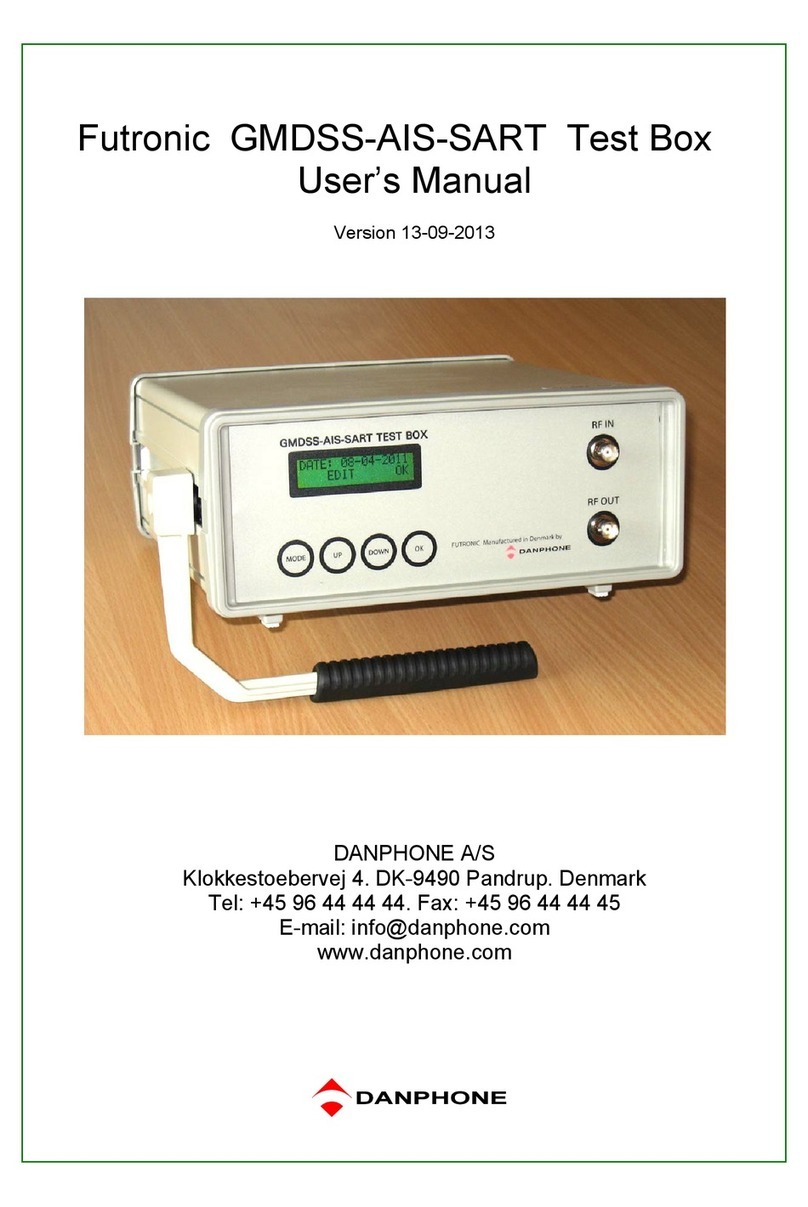
EKO Instruments MP-01 User manual

500V
250V 1000V
V
ISO
NULL
Auto
R
PE
+ -
0.00
ARRAY TESTER
MP-01
NULL
NULL
500V
250V 1000V
V
ISO
NULL
Auto
R
PE
+ -
0.00
ARRAY TESTER
MP-01
250V
500V
1000V
250V
500V
1000V
I
S/C
R
ISO
V
+
V
DC
A
DC
M
>
500V
250V 1000V
V
ISO
NULL
Auto
R
PE
+ -
0.00
ARRAY TESTER
MP-01
R
PE
QuickStartGuide
クイックスタートガイド
ArrayTester
アレイテスター
MP‑01
PackageContents 梱包内容確認
SafetyInformation
安全にお使いいただくために
First,pleasecheckthepackagecontents.Ifanypartismissingordamaged,please
contactEKO.
ご使用前に、梱包内容をご確認ください。不足、または破損がある場合は、直ちにご連絡
ください。
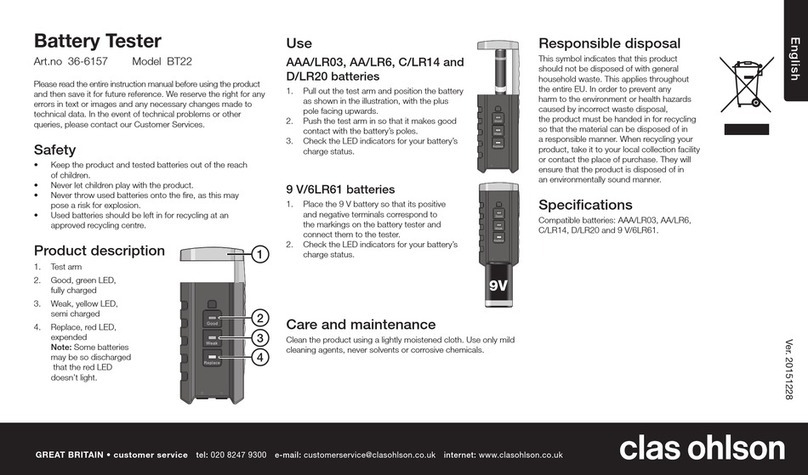
ArrayTesterMP‑01,6x1.5VAlkalineLR06
(UseSupplied)
アレイテスター MP‑01、
1.5V単三アルカリ電池6本付属
ClampTester,9Vbattery
(UseSupplied)
クランプテスター
(黒ソフトケース付)
、9V電池付属
CarryBag
キャリーバッグ
MC4TestLeadAdaptors(Red&Black)
MC4テストリード(赤と黒)
SunclixTestLeadAdaptors(Red&Black)
Sunclixテストリード(赤と黒)
Testprobe(Red&Black)withdetachable
alligatorclips,cap,bananaplug
テストプローブ、ワニグチクリップ、
キャップ、バナナプラグ付き
USBCable
USBケーブル
Warranty(onlyinJapan)保証書
CalibrationCertificate 校正証明書
QuickStartGuide
クイックスタートガイド (本書)
QuickStart Guide
クイックスタートガイド
SupportCD(Software,Manual)
サポートCD(ソフト、取扱説明書)
AutoTest(Voc,Isc&InsulationResistance)
Voc開放電圧、Isc短絡電流、及び、絶縁抵抗の自動テスト
READTHEOPERATINGINSTRUCTIONSBEFOREUSINGTHEARRAYTESTERMP‑01.
● TheMP‑01shouldonlybeusedbysuitablytrainedpersonnel.
● TheMP‑01isintendedforuseinadryenvironmentonly.
● Theredandblack4mmtestterminalsmaybeusedtomakemeasurementsoncircuits
rateduptoCATIII300VAC/DCwithreferencetoearth/ground.Donotconnectthe
MP‑01tovoltageswhichmayexceedthisrating.
● PVtestterminalsmaximumrating:1000VDCopencircuitvoltage.15Ashortcircuit
current.Donotexceedthisrating.
● TheDCsupplymustbeisolatedfromearth/groundduringtesting.
● ChecktheMP‑01andallassociatedcablesandleadsbeforeoperatingtheequipment.
Donotuseiftherearesignsofdamage.Onlyusethetestleadssuppliedwiththe
MP‑01.
● DonotleavetheMP‑01permanentlyconnectedtoaPVinstallation.Alwaysdisconnect
immediatelyafteruse.
● Highvoltagesarepresentattheprobetipsduringinsulationresistance
measurement.Alwaysholdthetestprobesbehindthebarriers.
● DonottouchanyexposedmetalpartsofthePVinstallationduringtesting.
● Alwaysensurethatthecircuitundertestiselectricallyisolatedbeforeattempting
aprotectiveearth/groundresistancemeasurement.
MP‑01を使用する前には必ず本書を熟読してください。
● MP‑01は必ず電気知識のある熟練者が使用するようにしてください。
● MP‑01は雨天時などには使用できませんのでご注意ください。
● 4mmの赤と黒のテスト端子は設置カテゴリIII(300VAC/DC)に適合しています。
この定格を超える電圧でMP‑01を使用しないでください。
● PVテスト端子の最大定格は、開放電圧で1000VDC、また短絡電流は15Aです。
これらの定格を超えて使用しないでください。
● 試験時、太陽電池モジュール(またはアレイ)は接地面からの絶縁が必要です。
● 使用する前には、MP‑01および全てのケーブルが揃っていることを確認してください。
損傷が認められる場合は使用を中止してください。MP‑01に付属のケーブル以外の物は使用
しないでください。
● MP‑01をPV設備に接続したまま放置しないでください。使用後、必ず直ちに接続を外してください。
● PV設備の絶縁抵抗測定時はプローブの先端には高電圧が印加されています。必ずハンドガード
の後ろでテストプローブを持ってください。
● 試験時、PV設備の金属が露出している部分には絶対に触れないでください。
● アレイ導電部と接地間の導通抵抗の測定をする際には、被測定回路が電気的に絶縁されていること
を確認してください。
① ConnecttheMP‑01tothePVmoduleas
shown,usingthePVtestleadadaptors.
IfthePVmoduleframeisnotbondedto
earth,dotestsbetweennotonlyarray
cablesandearth,butalsoarraycables
andframeasshownbybrokenline.
図のようにテストリードのアダプタを使用し
て、PV設備にMP‑01を接続します。ただし、
PVモジュールのフレームが接地されていない
場合には、破線で示される接続でのテストも
必要です。
② Vocisautomaticallydisplayed.
Voc開放電圧は自動的に表示されます。
③ Ifthevoltagepolarityisincorrect,
thereversedpolarityiconwillappear
ontheLCD.Theautotestsequenceis
inhibitedifthepolarityisreversed.
電圧の極性が間違っている場合には、逆極
性のアイコンがLCD画面に表示されます。
逆極性の場合、自動テストシーケンスが使
用不可となります。
④ Usingthe buttontoselect250V,
500Vor1000Vinsulationtestvoltage.
キーを押して絶縁抵抗試験電圧を250V、
500Vまたは1000Vから選択します。
⑤ Pressthe buttontoautomatically
measureShortCircuitCurrentand
InsulationResistance.
キーを押して、短絡電流と絶縁抵抗の
自動測定を行います。
Note:Theredtestprobeisrequiredfor
theinsulationresistancemeasurement.
(注)絶縁抵抗測定には赤のテストプローブ
が必要です。
V
ISO
Auto
Auto
V
ISO
TestLeadResistanceNull
ケーブルの抵抗のゼロ補正
ProtectiveEarth/GroundResistance
アレイ導電部と接地間の導通抵抗測定
① Connecttestleadsasshown.
図のようにテストリードを接続します。
② Tomakeasinglemeasurement,pressand
releasethe key.
1回の接地抵抗測定を行うには、 キーを
押し、すぐ離します。
③ Tomakeacontinousmeasurement,press
andholdthe keyforafewseconds
untilthelockiconappearsontheLCD.
連続測定を行うには、LCD画面にLOCKアイコ
ンが表示されるまで キーを数秒間押し
続けます。
④ Pressthe keytoterminatethe
continousmeasurementmode.
連続測定を停止するには、 キーを押します。
R
PE
R
PE
R
PE
R
PE
R
PE
R
PE
① Connecttestleadstoredandblack4mm
socketsontheMP‑01.
テストリードをMP‑01の赤と黒の4mmのソケット
に接続します。
② Holdthetestprobetipstogetheror
connecttogetherusingthesupplied
alligator.
テストプローブの先端を互いに接触させ
保持するか、または付属のワニグチ・クリ
ップを使用して接続します。
③ Pressandholdthe keyuntilthe
unitbeepsandNULLiconappearson
LCD.
MP‑01からビープ音が鳴り、LCD画面にNULL
アイコンが表示されるまで キーを押し
続けます。
④ Nullvalueisstoredwhenunitis
switchedoff.
NULL値(ゼロ補正値)はMP‑01の電源をOFF
しますと保存されます。
⑤ Todisable,press keyuntilicon
isremovedfromLCD.
NULLを解除するには、NULLアイコンがLCD画
面から消えるまで キーを押し続けます。
Note:Maximumtestproberesistance=10
Ω
(注)テストプローブ抵抗の最大ゼロ補正値は10Ω
です。
NULL
NULL
NULL
NULL
①
③
④
⑤
①
②
③
④
③
①
②
③
③
⑤
⑤
④
500V
250V 1000V
V
ISO
NULL
Auto
R
PE
+ -
0.00
R
PE
I
S/C
R
ISO
V
+
500V
NULL
V
DC
A
DC
M
>
<5%
ARRAY TESTER
MP-01
Beforethismeasurement,compensateforthe
resistanceofthetestleadsasinstructed
inthe"TestleadResistanceNull"section.
本測定を行う前に、"ケーブル抵抗のゼロ補正"に
示されている方法でケーブル抵抗のゼロ補正を
行ってください。
ThankyouforpurchasingEKOproducts.
この度は英弘精機のアレイテスターをお求めいただきありがとうございます。
Thissheetprovidesthebasicinstructionsforsetup.
Seetheincludedmanualforfurtherdetailedinformationaboutthisproduct.
本書は簡便に設置、ご使用いただくだめのガイドです。
詳細は取扱説明書をお読みいただき、製品を正しくご使用ください。
ProductWarranty 保証について
Forwarrantytermsandconditions,please
contactEKOInstrumentsoryourdistributor
forfurtherdetails.Thewarrantyisonly
subjectedtotheinstrumentwhichis
installedandusedincorrectmanner.
EKOwillnotbereliableforanylossor
damagecausedfromimproperinstallation
oruse.
本製品の無償保証期間および保証規定につき
ましては、本製品に添付されている「保証書」
を参照、または直接英弘精機までお問い合せ
ください。
300A
40A
OFF
ZERO.A
40A:10mV/A
300A:1mV/A
BAT
LOW PWR
ON
AC/DCCURRENTCLAMP
300A
500V
250V 1000V
V
ISO
NULL
Auto
R
PE
+ -
0.00
R
PE
I
S/C
R
ISO
V
+
500V
NULL
V
DC
A
DC
M
>
<5%
ARRAY TESTER
MP-01
300A
40A
OFF
ZERO.A
40A:10mV/A
300A:1mV/A
BAT
LOW
PWR
ON
AC/DCCURRENTCLAMP
300A
Clippingtestlead(Red&Black)with
detachablealligatorclips,cap
クリップ用テストリード、
ワニグチクリップ、キャップ付き

④
③
OK
HOLD
LOG
ON/OFF
W
m2
+
SOLAR METER
MS-02
0
244
- - -
②
⑤
⑤
MS‑02
500V
250V 1000V
V
ISO
NULL
Auto
R
PE
+ -
0.00
ARRAY TESTER
MP-01
250V
500V
1000V
I
S/C
R
ISO
V
V
DC
A
M
④
③
MP‑01
NULL
W/m
2
W/m
2
ZERO 40A
500V
250V 1000V
V
ISO
NULL
Auto
R
PE
+ -
0.00
ARRAY TESTER
MP-01
I
V
+V
DC
A
DC
kW
ZERO 40A
500V
250V 1000V
VISO
NULL
Auto
RPE
+ -
0.00
ARRAY TESTER
MP-01
I
A
DC
本社 www.eko.co.jp
〒151‑0072 東京都渋谷区幡ヶ谷1‑21‑8
TEL 03‑3469‑6714 FAX 03‑3469‑6719
カスタマーサポートセンター
TEL 03‑3469‑5908 FAX 03‑3469‑5897
HeadOffice www.eko.co.jp
1‑21‑8Hatagaya,Shibuya‑ku,Tokyo151‑0072JAPAN
TEL +81(3)3469‑6713 FAX+81(3)3469‑6719
EKOINSTRUMENTSEuropeB.V. www.eko‑eu.com
Lulofsstraat55,Unit32,2521ALDenHaag,TheNetherlands
TEL +31(0)703050117 FAX+31(0)703840607
EKOINSTRUMENTSUSAINC. www.eko‑usa.com
95SouthMarketStreet,Suite300SanJose,CA95113USA
TEL +1408‑977‑7751 FAX+1408‑977‑7741
2013 EKOINSTRUMENTS
CO.,LTD.
C
MP‑01QSG20130925V3
Others
その他
PairingwithSolarMeterMS‑02andSettingDataTransferMode
ソーラーメーターMS‑02との無線接続と伝送モードの設定
AC/DCCurrentMeasurement
AC/DC電流測定
① DisconnectallcablesfromtheMP‑01
testinputs.
MP‑01のテスト入力端子から全てのケーブル
を外します。
② Connectthecurrentclamptothered&
black4mminputs.
電流クランプを4mmの赤と黒の入力端子に接
続します。
③ Movethecurrentclampswitchtothe
40Aposition.
電流クランプのスイッチを40Aの位置にします。
④ Pressandholdthezerobuttonforfew
secondsonthecurrentclamp.
電流クランプのZEROボタンを数秒間押し続け
ます。
⑤ Pressthe button.Theclampiconwill
appearontheLCD.
キーを押しますと、電流クランプのアイ
コンがLCD画面に表示されます。
⑥ ThemeasuredcurrentisshownontheLCD.
LCD画面に測定電流値が表示されます。
Auto
Auto
DCPowerMeasurement
DC電力測定
① Connectthecurrentclampto4mminputs.
電流クランプを4mm入力端子に接続します。
② Press buttonuntiltheclampicon
appearsontheLCD.
電流クランプのアイコンがLCD画面に表示され
るまで キーを押します。
③ Movethecurrentclampswitchtothe40A
position.
電流クランプのスイッチを40Aの位置にします。
④ Pressandholdthezerobuttonforafew
seconds.
電流クランプのZEROボタンを数秒間押し続け
ます。
⑤ PresstheclamparoundtheDCcableofthe
solarinstallation.
PV設備のDCケーブルに電流クランプを取り付け
ます。
⑥ DCcurrentisshownontheLCDnexttothe
clampicon.
LCD画面に表示された電流クランプのアイコン
の横にDC電流値が表示されます。
⑦ ConnectthePVvoltagetothePVinputs
withMC4testleadadaptersandClipping
testleads.
MC4テストリードおよびクリップ用テストリード
を用いて、PV設備電圧をPV入力端子に接続し
ます。
⑧ TheDCvoltage,currentandpowerwillbe
displayed.
DC電圧、電流および電力が表示されます。
V
ISO
V
ISO
CaptureallmeasurementscurrentlyontheLCD.
LCD画面上の測定値全てを取得します。
RecallmeasurementsontheLCD.
LCD画面上に測定値を読み出して表示します。
Inrecallmode,scrollbackmemory.
RECALLモード時、メモリ内容をスクロールします。
Clearallresultsfrommemory.
メモリから全ての値を削除します。
MemoryFunctions
メモリ機能
+
InsulationLimits 絶縁測定範囲
250V
MinimumInsulationResistance
最少絶縁抵抗値
500V
1000V
0.5MΩ
Viso
1.0MΩ
1.0MΩ
Theinternalfusehasblown.Refertosection6.1intheoperatinginstructions
fordetailsonhowtoreplacethefuse.
内蔵ヒューズが切れています。ヒューズの交換方法の詳細については取扱説明書の6.1節
を参照。
WarningMessage 警告メッセージ
Remedy
状況と対処
ErrorMessage
エラーメッセージ
TheelectronicswithintheMP‑01havereachedthemaximumsafetemperature.
Thiscanoccurafterrepeatedshortcircuitcurrentmeasurementsathigh
currentlevels.Allowtheunittocooldownbeforefutheruse.
MP‑01計器内蔵の電子部品が最大許容温度に達しています。この現象は高電流の短絡電流
測定を繰り返した場合に生じます。回路が冷却されるまで使用しないでください。
TheDCshortcircuitcurrenthasexceededthemaximumratedvalueof15A.The
measurementsequencehasbeenaborted.
DC短絡回路電流が定格電流の15Aを超えています。測定シーケンスを中止します。
MeasuringRanges 測定範囲
Rpe 接地抵抗*Range 範囲
Voc 開放電圧
Isc 短絡電流
0Ω ‑199Ω/300V‑440V
Function 機能
5V‑1000V
0.5A‑15A
Iac/dc AC/DC電流 0.1A‑40A
Insulation 絶縁抵抗 0.05MΩ ‑199MΩ
① ConnecttheMP‑01toPCusingtheUSBcable.
(ThiswillcreateaCOMportonthePC).
USBケーブルを使用してMP‑01とコンピュータを接続します。
(これによりコンピュータのCOMポートが生成されます。)
② RuntheSupportSoftwareonthePC.
付属ソフトのアプリケーションをコンピュータで起動します。
③ SelectthecorrectCOMport.Usethe
Helpmenu‑Troubleshootingguide,
tohelpfindthecorrectCOMport.
COMポートを選択します。(HELPのトラブル
シューティングガイドを参照し、
正しいCOMポートを確認してください。)
④ ClicktheDownloadbutton.
ダウンロードボタンをクリックします。
⑤ Pressandholdthe keyforfew
secondsontheMP‑01.
MP‑01の キーを数秒間押し続けます。
⑥ Specifyafolderandfilenametosave
thedata,thensaveit.
保存するフォルダ、ファイル名を指定して
データを保存します。
DownloadingtoPC
コンピュータへのダウンロード
① TurntheMP‑01unitoff.
MP‑01の電源をOFFにします。
② Pressandholdthe key,thenpressboththe / keystogether.
Keepholdingthe key.
キーを押したまま、 / キーを同時に押します。
キーは押したままにします。
③ Thedisplaywillshow"OFF"ontheline1,andtheturnofftimeonthe
line2(inmiutes).
画面上の1行目には"OFF"が、2行目には電源オフ時間が表示されます(単位:分)。
④ Keepholdingthe keyandpressthe key.Eachpressofthe key
willincrementtheturnofftime.Incrementbeyond10tosetthetimeback
to1minute.
キーを押したまま、 キーを押します。 キーを押すたびに電源オフ時間が
増加します。電源オフ時間は10分を超えると1分に戻ります。
⑤ Releasethe key,andsavethesetting.
キーを離して、設定を保存します。
ChangingAutoShutdownTime
自動シャットダウン時間の変更
NULL
NULL
Auto
R
PE
R
PE
NULL
NULL
NULL
NULL
V
ISO
V
ISO
V
ISO
V
ISO
Auto
①
②
④
③
②
⑤
⑦
④
③
②
⑤
⑤
+‑
+‑
PVModule
orArray
太陽電池
モジュール
またはアレイ
Connection
Boxor
Inverter
中継ボックス
または
インバータ
*アレイ導電部と接地間の導通抵抗
MC4TestLeadAdapters
MC4テストリード
ClippingTestLead
クリップ用テストリード
① Makesuretherearenootherunitsoperatingnearly.
その他の機器が近くで使用されていないことを確認します。
② TurntheMP‑01off.
MP‑01の電源をOFFにします。
③ PressandholdtheMP‑01 and keys,keepbothbuttonspressed.
Keepbothbuttonsfor10seconds.
MP‑01の と キーの両方のキーを10秒間押し続けます。
④ TheMP‑01willthenbeepandclearitsscreen.Theunitisnolonger
pairedwithaSolarMeterMS‑02.
MP‑01からビープ音が鳴り、LCD上の表示が消え、
ソーラーメーターMS‑02との接続が切断されます。
⑤ ThetoplineoftheMP‑01LCDwillshowthe
Rpeohms.
MP‑01のLCD画面の最上行にRpeΩ値が表示されます。
Un‑pairingfromSolarMeterMS‑02
ソーラーメーターMS‑02との無線接続の切断
Auto
R
PE
Auto
R
PE
DataTransferringbyPairing
無線接続によるデータ連携
Pairing
無線接続
DataTransferring
伝送モード設定
① TurnoffboththeMP‑01andSolarMeterMS‑02.
MP‑01とソーラーメーターMS‑02の両方の電源をOFFにします。
② PressandholdtheMS‑02ON/OFF keys,keepboth
keyspressed.TheMS‑02makestheintermittentbeepsound.
MS‑02のON/OFF キーの両方のキーを押し続けます。
MS‑02から間欠的なビープ音が鳴ります。
③ PressandholdtheMP‑01 and keys,keepbothkeys
pressed.WhentheMP‑01hassuccessfullypairedwiththe
MS‑02,theMP‑01willalsomaketheintermittentbeepsound.
MP‑01の と キーの両方のキーを押し続けます。
MP‑01からも間欠的なビープ音が鳴り、接続が完了します。
④ Releaseallkeys.ThetoplineoftheMP‑01LCDwillshow
theflashingW/m
2
icon.
全てのキーを離します。MP‑01のLCD画面の最上行にW/m2アイコン
が点滅表示されます。
⑤ PressandholdtheMS‑02Temperature key,then
momentarilypresstheOKkey.Whenthedatatransferring
bypairingisactive,thereisaflashing iconabove
theMS‑02temperature key.
TheMP‑01willindicatethemeasuredirradiance.
MS‑02の温度 キーを押したまま、すぐにOKキーを押します。
伝送モードが設定されると、MS‑02の温度 キー上の アイコンが点滅します。
MS‑02で測定された日射強度がMP‑01上に表示されます。
Auto
R
PE
Auto
R
PE
AslongasyouhavesetthepairingbetweenMP‑01andMS‑02once,eveniftheyare
turnedoff,theywillbeautomaticallypairedagainwhentheyareturnedonnext.
But,thedatatransferringisdisabledwhentheyareturnedoff.Afterrestarting,
dotheonlyabovestep⑤ toenablethedatatransferring.
一度無線接続されたMP‑01とMS‑02は、電源をOFFにしても、次にONにした際には自動接続され
ます。但し、伝送モードは次の電源ON時に、上記ステップ⑤にて再設定して下さい。
NoteonRestarting 再起動時の注意
NULL
NULL
Noun‑paringoperationis
necessaryexceptthecaseof
paringanotherMS‑02.
別のMS‑02と新たにペアリング
する場合以外は、接続の切断は
必要ありません。
