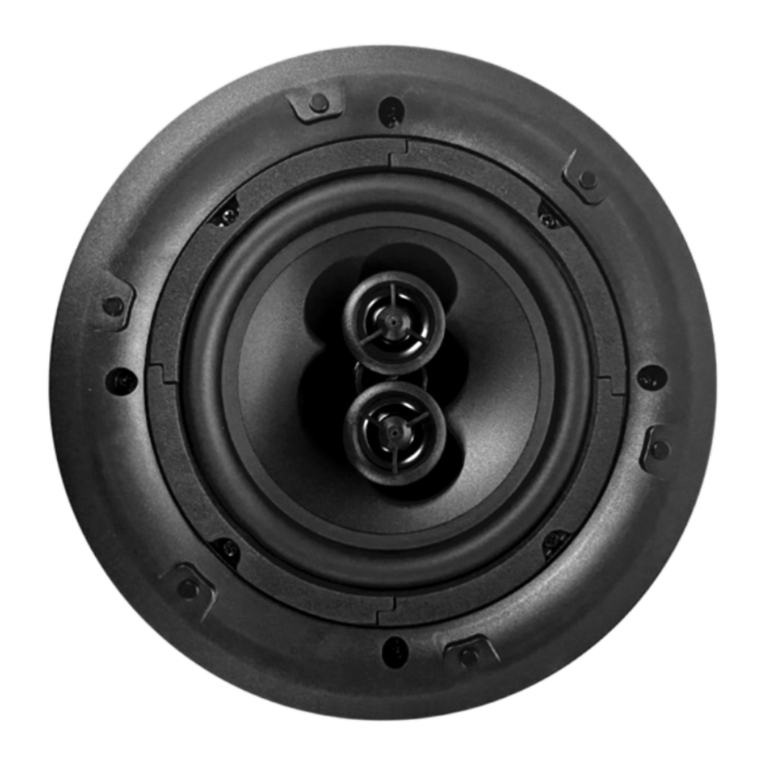
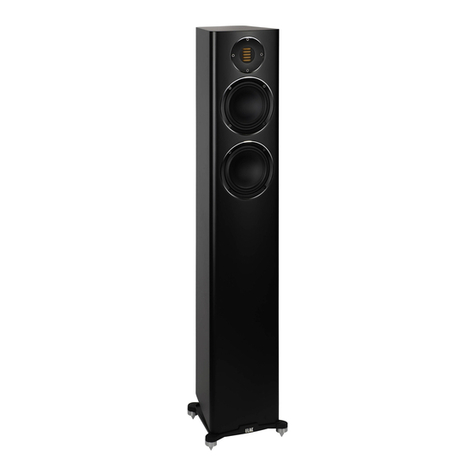
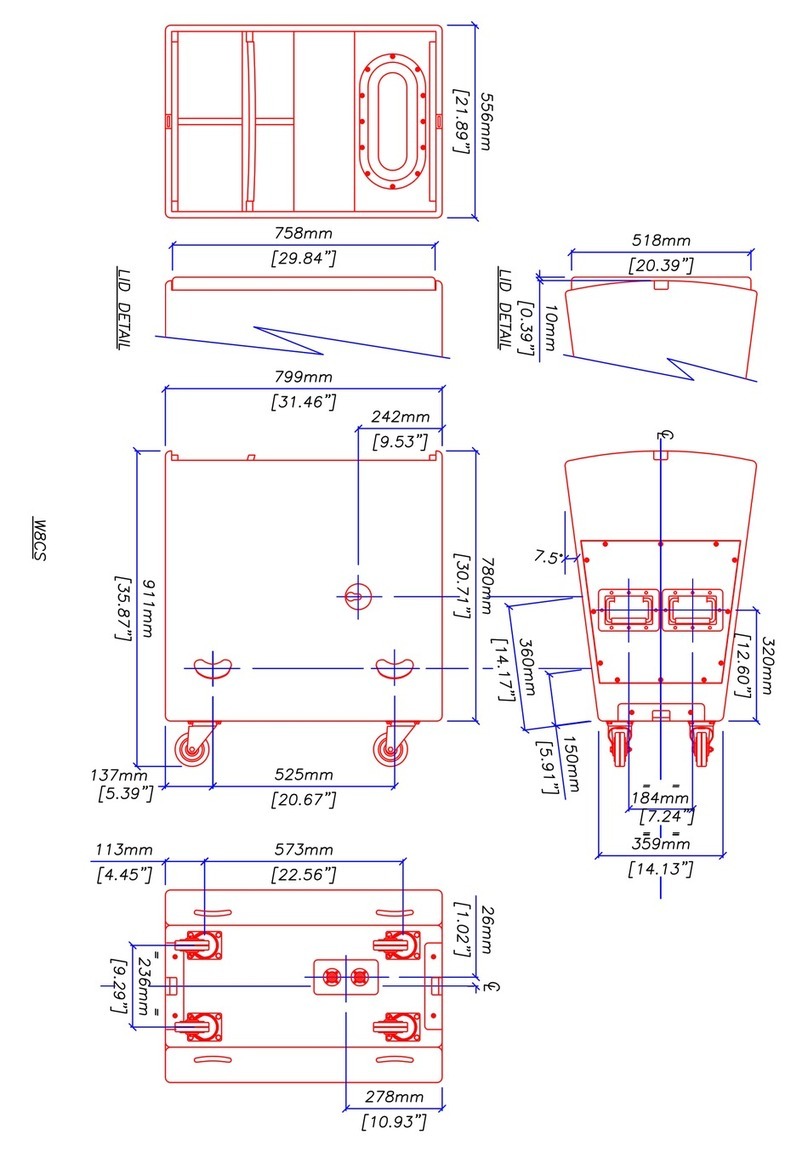
ELAC CONCENTRO Assembly instructions

Bedienungsanleitung & Sicherheitshinweise.
Operating & Safety Instructions
Bedienungsanleitung & Sicherheitshinweise.
Operating & Safety Instructions

Gewährleistung / Werksgarantie
I. Die folgenden Garantiebestimmungen gelten für innerhalb der Europäischen Union und der Schweiz von einem
autorisierten Fachhändler erworbene Produkte von ELAC, die unter X. dieser Bestimmungen aufgeführt werden.
II. Die folgenden Bestimmungen erweitern die Rechte des Erwerbers und beeinflussen in keiner Weise die nach der
jeweiligen Rechtsordnung zusätzlich bestehenden Rechte wie beispielsweise die Gewährleistungsrechte.
III. Aus den Garantiebestimmungen entstehen Ansprüche nur für diejenigen Käufer, die das betreffende Produkt
von einem autorisierten Fachhändler erworben haben. ELAC betreibt ein selektives Vertriebssystem. Wird das
Produkt von einem nicht autorisierten Händler erworben, entstehen keine Garantieansprüche.
Etwaige Gewährleistungsansprüche gegen den Verkäufer bleiben davon unberührt.
IV. Voraussetzung für die Geltendmachung von Garantieansprüchen ist, dass sich der Käufer innerhalb von drei
Monaten ab Kaufdatum des jeweiligen ELAC-Produktes registrieren lässt.
ELAC Electroacustic GmbH | Fraunhoferstraße 16 | 24118 Kiel | Deutschland | Stichwort: Garantie
V. Die Garantie erstreckt sich nur auf Material-, Konstruktions- oder Verarbeitungsmängel.
VI. Die Garantie erstreckt sich nicht auf Schäden, die auf grobe Behandlung oder unsachgemäßen Gebrauch
zurückzuführen sind oder auf natürliche oder übliche Abnutzungen. Die Garantie erstreckt sich nicht auf optisch un-
einheitliche Furnierstruktur oder Verfärbungen des Furniers, da es sich hierbei um natürliches Material handelt. Die
Garantie erstreckt sich auch nicht auf sonstige Ereignisse, die nicht im zumutbaren Bereich von ELAC liegen.
Die Garantie erstreckt sich nicht auf Mängel, die in Verbindung mit anderen Produkten auftreten, die nicht von ELAC
hergestellt wurden oder in sonstiger Weise durch nicht bestimmungsgemäßen Gebrauch auftreten. Auf die sach-
gerechte Bedienung gemäß der den Produkten beiliegenden Bedienungsanleitung wird ausdrücklich hingewiesen.
Die Garantie erstreckt sich nicht auf Mängel, die durch unsachgemäßes Aufstellen oder unsachgemäße Lagerung
entstehen. Unsachgemäß ist beispielsweise das Aufstellen oder die Lagerung in feuchter Umgebung oder in einer
Umgebung, in welcher das Produkt extremen Temperaturen und/oder Temperaturschwankungen, Oxidation oder
Korrosion ausgesetzt ist. Mängel, die durch Verschütten von Flüssigkeiten oder Nahrungsmitteln oder sonstige che-
mische Substanzen an die Produkte gelangen und auf sie einwirken, sind von der Garantie ebenfalls nicht umfasst.
VII. Die Garantie erlischt, wenn das Produkt nicht durch ELAC oder einen autorisierten Fachhändler geöffnet, verän-
dert oder repariert wird. Die Garantie erlischt, wenn die Seriennummer entfernt oder unleserlich gemacht wird.
VIII. Material-, Konstruktions- oder Verarbeitungsmängel werden innerhalb der Garantiefrist von ELAC oder von
einem autorisierten Fachhändler des Landes, in welchem das Produkt erworben wurde, kostenlos behoben. Dies
geschieht innerhalb einer wirtschaftlich angemessenen Frist. Nach Ermessen von ELAC oder des autorisierten
Fachhändlers kann die Garantieleistung auch in einem Austausch des betroffenen Produktes erfolgen. Soweit
baugleiche Produkte nicht mehr verfügbar sind, kann ein Austausch in Form eines anderen Produktes erfolgen,
welches der gleichen Preis- und Qualitäts-Klasse entspricht.
Das Eigentum der ausgetauschten Ersatzteile oder der ausgetauschten Produkte geht auf ELAC über.
IX. Eine Bemängelung muss innerhalb der Garantiezeit gegenüber ELAC oder einem autorisierten Fachhändler
innerhalb angemessener Frist nach Entdeckung des Mangels bekanntgegeben werden. Im Garantiefall muss ELAC
oder dem autorisierten Fachhändler das bemängelte Produkt und eine Kopie des Original-Kaufbeleges übergeben
werden. Aus diesen Belegen müssen sich folgende Informationen ergeben:
a) Name und Adresse des Fachhändlers, b) Datum und Ort des Kaufes, c) Artikelbezeichnung, Produkttyp und
Seriennummer
Zur Bearbeitung des Garantiefalles und Rücksendung etwaig reparierter oder ausgetauschter Produkte ist eben-
falls die Angabe des Namens und der Adresse des Käufers erforderlich.
ELAC Electroacustic GmbH | Fraunhoferstraße 16 | 24118 Kiel | Deutschland
Informationen über die autorisierten Fachhändler erfahren Sie auch über die Homepage www.elac.de.
Für den Fall einer Bearbeitung eines nicht unter diese Bedingungen fallenden Produktes, kann ELAC dem An-
spruchsteller eine angemessene Bearbeitungsgebühr in Rechnung stellen.
X. Die Garantiefrist beginnt mit Auslieferung des Produktes an den erstmaligen Endkunden.
Die Garantiefrist beträgt für Concentro Produkte der ELAC Electroacustic GmbH: 2 Jahre gesetzliche Gewährleis-
tung. Sie verlängert sich um acht weitere Jahre Werksgarantie,wenn sich der Käufer bei
ELAC registrieren läßt.
XI. Diese Herstellergarantie ist die einzige Garantie, welche ELAC für ihre Produkte gewährt. Sie geht allen sons-
tigen, mündlichen oder schriftlichen Garantiebedingungen vor. Eine Garantieleistung bewirkt keine Verlängerung
der Garantiefrist und setzt auch keine neue Garantiefrist in Gang.
Die Haftung ist auf den Wert des Produktes beschränkt. ELAC haftet nicht für weitere eintretende Schäden oder
Verluste direkter oder indirekter Art. Dies gilt nicht für Schäden, welche aufgrund Vorsatzes oder grober Fahr-
lässigkeit durch ELAC herbeigeführt wurden.
Herstellergarantie Concentro 11_2017 903347

Herzlichen Glückwunsch!
Sie sind stolzer Besitzer der
Genießen Sie Ihr Klangerlebnis
der Superlative

SICHERHEITSHINWEISE
1. Allgemeines
Lesen und beachten Sie die folgenden Sicherheitshinweise und bewahren Sie diese sorgfältig auf.
Beachten Sie alle Warnungen, die auf dem Lautsprecher und in der Bedienungsanleitung vermerkt
sind. Überprüfen Sie den Lautsprecher vor der Inbetriebnahme auf vorhandene Schäden. Der
Lautsprecher muss sich in einem einwandfreien Zustand befinden. Beschädigte Teile können zu Ver-
letzungen führen.
2. Bestimmungsgemäßer Gebrauch
Schließen Sie den bzw. die Lautsprecher gemäß der Vorgaben in der Bedienungsanleitung an.
Viele ELAC Lautsprecher sind mit Spikes und/oder rutschfesten Füßen ausgestattet. Diese sind für
den Niveauausgleich des Lautsprechers und zur Entkoppelung des Lautsprechers vorgesehen. Um
Niveauunterschiede bei unebenen Böden auszugleichen, drehen Sie die Spikes oder rutschfesten
Füße um 2 bis 3 Gewindeumdrehungen heraus. Der Lautsprecher muss stets senkrecht stehen: Die
Standfestigkeit des Lautsprechers darf durch die Verwendung von Spikes oder rutschfesten Füßen
nicht beeinträchtigt werden, da der Lautsprecher andernfalls kippen kann.
3. Aufstellungsort
Die Lautsprecher dürfen nur auf ebenen Untergründen aufgestellt werden. Vermeiden Sie als Auf-
stellort für die Lautsprecher Orte mit direkter Sonneneinstrahlung mit hoher Feuchtigkeit
die vibrationsanfällig sind an denen besonders heiße oder kalte Temperaturen auftreten
die sich in der Nähe von Röhren-Fernsehgeräten befinden (die Lautsprecher sind nicht magnetisch
abgeschirmt und können das Farbbild von Röhren-Fernsehgeräten beeinträchtigen)
in unmittelbarer Nähe von magnetischen Karten (die Lautsprecher sind nicht magnetisch abge-
schirmt, wodurch magnetische Karten wie z.B. Kreditkarten oder Fahrkarten mit Magnetstreifen
Schaden nehmen können).
WARNUNG! Achten Sie bei dem Produkt auf einen sicheren Stand, um mögliche Verletzungen durch
Umkippen zu vermeiden. Die Standfestigkeit auf Teppichboden lässt sich durch die Verwendung
von Spikes verbessern. Achten Sie beim Anbringen von Spikes darauf, sich nicht an deren scharfen
Enden zu verletzen. Auf glatten Böden lässt sich die Standfestigkeit mithilfe von Klettverschlüssen
oder doppelseitigen Klebestreifen erhöhen. Positionieren Sie den Lautsprecher nicht in der Nähe von
Wärmequellen wie Heizungen, Heizungsventilen, Öfen oder anderen Geräten (einschließlich Verstär-
kern), die Hitze entwickeln, oder in explosionsgefährdeten Bereichen.
Blockieren Sie niemals Lüftungsschlitze.
Beachten Sie beim Aufstellen die Anweisungen des Herstellers.
Stellen Sie den Lautsprecher nicht in ein geschlossenes Regal oder einen geschlossenen Schrank.
Stellen Sie keine brennenden Kerzen auf den Lautsprecher bzw. in dessen unmittelbare Nähe.
Positionieren Sie den Lautsprecher nicht in unmittelbarer Nähe eines Transformators, da es sonst
durch elektromagnetische Einstreuung des Transformators zu einem Brummen der Tieftöner kom-
men kann.
Rutschfeste Füße oder Unterlegscheiben für Spikes können bei bestimmten Werkstoffen/Lackierun-
gen/ Materialoberflächen Verfärbungen bzw. Abdrücke verursachen.

4. Überlastung
Bei extremer Überlastung des Geräts durch einen sehr hohen Lautstärkepegel kann es zu einer
Beschädigung einzelner Bauteile kommen. Daher sollten Sie Lautsprecher bei Betrieb mit extrem
hohem Pegel nicht unbeaufsichtigt lassen.
5. Wartungsarbeiten
GEFAHR! Öffnen Sie niemals das Gehäuse, da die Bauelemente und Leiter Spannungen führen kön-
nen! Wartungsarbeiten dürfen ausschließlich von qualifiziertem Fachpersonal durchgeführt werden.
Der Lautsprecher muss gewartet werden, wenn er in irgendeiner Weise beschädigt wurde, z.B.
wenn das Netzkabel oder der Netzstecker beschädigt wurde, Flüssigkeiten auf dem Lautsprecher
verschüttet wurden oder Gegenstände auf den Lautsprecher gefallen sind, der Lautsprecher Regen
oder Feuchtigkeit ausgesetzt wurde, er nicht ordnungsgemäß funktioniert oder fallen gelassen wur-
de. Öffnen Sie niemals den Lautsprecher, um eine Gefährdung durch elektrischen Strom möglichst
zu vermeiden. Wartungsarbeiten dürfen ausschließlich von qualifiziertem Fachpersonal durchgeführt
werden.
6. Reinigung
HINWEIS: Verwenden Sie zur Reinigung nur ein weiches Tuch mit glatter Oberfläche bzw. einen
weichen Pinsel. Verwenden Sie auf keinen Fall Scheuermittel, Alkohol, Waschbenzin, Möbelpolitur
oder Ähnliches zur Reinigung! Möbel sind häufig mit den verschiedensten Lacken und Kunststoffen
beschichtet, die mit chemischen Substanzen behandelt sein können. Manche dieser Substanzen
können Bestandteile enthalten, die die Gummifüße angreifen und aufweichen. Legen Sie daher ggf.
eine rutschfeste Unterlage unter den/die Lautsprecher.
7. Lautstärkepegel
VORSICHT! Dauerhaft hohe Lautstärkepegel können ernsthafte Hörschäden hervorrufen. Achten
Sie daher auf einen angemessenen Umgang mit der Lautstärke.
8. Entsorgung
Die Verpackung besteht aus recyclingfähigen Materialien. Entsorgen Sie diese bitte umweltgerecht.
Werfen Sie den Lautsprecher am Ende seiner Lebensdauer nicht in den normalen Hausmüll. Führen
Sie den Lautsprecher entsprechend den geltenden gesetzlichen Vorschriften einer geordneten
Entsorgung zu. Erkundigen Sie sich hierzu bei Ihrer Stadtverwaltung nach geeigneten Möglichkei-
ten, damit die im Gerät enthaltenen wertvollen Rohmaterialien wiederverwendet werden können.
Machen Sie den Lautsprecher vor der Entsorgung unbrauchbar.
SICHERHEITSHINWEISE

Vielen Dank für den Kauf dieses ELAC-Produkts.
Seit der Zeit unserer Gründung (1926) bemühte sich ELAC immer, das Beste zu erreichen.
Ihre neuen ELAC-Lautsprecher werden nach höchsten Standards mit hochwertigen Komponenten
gebaut, die sorgfältig konstruiert wurden, um bestmögliche Klangqualität zu liefern. Sie werden
von einer leidenschaftlichen Gruppe von Einzelpersonen entwickelt, die danach streben, eine neue
Dimension an Klangqualität in Ihr Zuhause zu bringen. Viel Vergnügen!
PHILOSOPHIE
VOR DER INBETRIEBNAHME
Achten Sie darauf, die Lautsprecher und andere Bauteile nicht zu beschädigen:
Nehmen Sie die Lautsprecher vorsichtig aus der Verpackung heraus,
um die Lautsprecher nicht zubeschädigen.
Verwenden Sie einen geeigneten Leitungsquerschnitt
(mindestens 1.31 mm2bei einem Abstand bis zu 7,5 m).
Achten Sie beim Anschluss unbedingt auf die korrekte Polarität. Zur einfacheren Handhabung sind
die meisten Lautsprecherkabel entsprechend gekennzeichnet. Der Plusanschluss (rot) der Verstärker-
klemme muss mit dem Plusanschluss (rot) des Lautsprechers verbunden werden. Gehen Sie auf der
Minusseite nach demselben Verfahren vor. Entfernen Sie an den Enden des Lautsprecherkabels
ca. 13 mm der Isolierung, verdrillen Sie dann die blanken Einzeldrähte und führen Sie sie in die
Polklemme ein.
Stellen Sie vor dem Anschließen eines Lautsprechers sicher,
dass alle Komponenten ausgeschaltet sind.
Vergewissern Sie sich, dass die Plus- und Minuslitzen nach dem Anschluss an
die Lautsprecherklemmen nicht miteinander in Kontakt kommen.

ANSCHLUSSMÖGLICHKEITEN
Viele unserer Lautsprecher bieten die
Möglichkeit, den Hoch-/Mitteltonteil und
den Bassteil getrennt über zwei Verstärker
(Bi-Amping) oder zumindest über getrennte
Anschlusskabel (Bi-Wiring) zu betreiben.
Hierfür sind diese Lautsprecher mit Doppel-
terminals ausgerüstet. Die zwei Anschluss-
buchsenpaare sind für den Normalbetrieb
(mit einer einzigen Zuleitung) werkseitig mit
Kurzschlussbrücken verbunden.
Für den Bi-Wiring/Bi-Amping-Betrieb sind
diese Kurzschlussbrücken zu entfernen.
Dabei bleiben die zu den jeweiligen Chassis
gehörigen Passiv-Netzwerke in Funktion, so
dass spezielle Filter-Netzwerke (Frequenz-
weichen) nicht notwendig sind.
Eingang Mittel-Hochtonzweig
Kurzschlussbrücke
Eingang Tieftonzweig
Das eine Anschlussbuchsenpaar führt zum Hoch-/Mitteltonnetzwerk, das andere zum Tiefton-
netzwerk. Durch getrennte Leitungsführung (Bi-Wiring) erreicht man eine Entkopplung der beiden
Zweige, d.h., das Übersprechen zwischen dem Tiefton- und Hoch-/Mitteltonzweig wird verringert.
Auch lassen sich für den jeweiligen Zweck optimierte Anschlusskabel verwenden, z.B. besonders
induktivitätsarme Kabel für den Hochtonbereich und besonders große Kabelquerschnitte für den
Bassbereich.
Bi-Wiring/Bi-Amping-Betrieb
Eingang Mittel-Hochtonzweig
Kurzschlussbrücke
Eingang Tieftonzweig
Viele unserer Lautsprecher bieten die Möglich-
keit, den Hoch-/Mitteltonteil und den Bassteil
getrennt über zwei Verstärker (Bi-Amping) oder
zumindest über getrennte Anschlusskabel (Bi-
Wiring) zu betreiben. Hierfür sind diese Laut-
sprecher mit Doppelterminals ausgerüstet. Die
zwei Anschlussbuchsenpaare sind für den Nor-
malbetrieb (mit einer einzigen Zuleitung) werksei-
tig mit Kurzschlussbrücken verbunden.
Für den Bi-Wiring/Bi-Amping-Betrieb sind diese
Kurzschlussbrücken zu entfernen. Dabei bleiben
die zu den jeweiligen Chassis gehörigen Passiv-
Netzwerke in Funktion, so dass spezielle Filter-
Netzwerke (Frequenzweichen) nicht notwendig
sind.
Das eine Anschlussbuchsenpaar führt zum Hoch-/Mitteltonnetzwerk, das andere zum Tieftonnetzwerk. Durch ge-
trennte Leitungsführung (Bi-Wiring) erreicht man eine Entkopplung der beiden Zweige, d.h., das Übersprechen zwi-
schen dem Tiefton- und Hoch-/Mitteltonzweig wird verringert. Auch lassen sich für den jeweiligen Zweck optimierte
Anschlusskabel verwenden, z.B. besonders induktivitätsarme Kabel für den Hochtonbereich und besonders große
Kabelquerschnitte für den Bassbereich.
Anschluss von HiFi-Lautsprechern an den Verstärker
10
Werden die beiden Zweige über getrennte Endverstärker betrieben, so ist es möglich, die Verstärker angepasst an
die Anforderungen für die Übertragung hoher und mittlerer bzw. tiefer Frequenzen auszuwählen. Mit getrennter Laut-
stärkenregelung für die beiden Zweige lässt sich die gesamte Klangbalance besser den örtlichen Gegebenheiten
(Wohnraumakustik) anpassen.
Beachten Sie bitte, dass unterschiedliche Endverstärkermodelle eventuell nicht gleich laut spielen, wenn sie per Y-
Adapter aus der gleichen Quelle gespeist werden. Die Ursache hierfür sind unterschiedliche Verstärkungsfaktoren
zwischen Eingangs- und Ausgangspegel.
Damit die Klangbalance nicht vom Zufall bestimmt wird, sind Endstufenmodelle mit eingebauten Pegelstellern sinn-
voll, so dass ein Ausgleich der Verstärkungsfaktoren oder gezielt die Einstellung der gewünschten Klangbalance
möglich ist.
Noch universeller ist es, für eine der beiden Stereo-Endstufen einen hochwertigen Vollverstärker zu wählen, dessen
Lautstärkensteller dann für die gewünschte Klangbalance benutzt wird. Die andere Endstufe kann dann ein puristi-
sches Modell ohne jede Einstellmöglichkeit sein. Unabhängig hiervon muss natürlich eine gemeinsame Vorstufe zur
Einstellung von Gesamtlautstärke und Programmquelle vorhanden sein. Falls die Vorstufe nur einen Ausgang besitzt,
schafft ein einfaches Y-Adapterkabel Abhilfe. Beim Einsatz unterschiedlicher Verstärkermodelle sollte ähnlich wie auf
Seite 8 beschrieben eine mögliche interne Verpolung eines Verstärkers überprüft werden.
Anschluss von HiFi-Lautsprechern an den Verstärker 11
SO GEHTS RICHTIG
Bi-Wiring/Bi-Amping-Betrieb

Bi-Wiring/Bi-Amping-Betrieb
Eingang Mittel-Hochtonzweig
Kurzschlussbrücke
Eingang Tieftonzweig
Viele unserer Lautsprecher bieten die Möglich-
keit, den Hoch-/Mitteltonteil und den Bassteil
getrennt über zwei Verstärker (Bi-Amping) oder
zumindest über getrennte Anschlusskabel (Bi-
Wiring) zu betreiben. Hierfür sind diese Laut-
sprecher mit Doppelterminals ausgerüstet. Die
zwei Anschlussbuchsenpaare sind für den Nor-
malbetrieb (mit einer einzigen Zuleitung) werksei-
tig mit Kurzschlussbrücken verbunden.
Für den Bi-Wiring/Bi-Amping-Betrieb sind diese
Kurzschlussbrücken zu entfernen. Dabei bleiben
die zu den jeweiligen Chassis gehörigen Passiv-
Netzwerke in Funktion, so dass spezielle Filter-
Netzwerke (Frequenzweichen) nicht notwendig
sind.
Das eine Anschlussbuchsenpaar führt zum Hoch-/Mitteltonnetzwerk, das andere zum Tieftonnetzwerk. Durch ge-
trennte Leitungsführung (Bi-Wiring) erreicht man eine Entkopplung der beiden Zweige, d.h., das Übersprechen zwi-
schen dem Tiefton- und Hoch-/Mitteltonzweig wird verringert. Auch lassen sich für den jeweiligen Zweck optimierte
Anschlusskabel verwenden, z.B. besonders induktivitätsarme Kabel für den Hochtonbereich und besonders große
Kabelquerschnitte für den Bassbereich.
Anschluss von HiFi-Lautsprechern an den Verstärker 10
Werden die beiden Zweige über getrennte Endverstärker betrieben, so ist es möglich, die Verstärker angepasst an
die Anforderungen für die Übertragung hoher und mittlerer bzw. tiefer Frequenzen auszuwählen. Mit getrennter Laut-
stärkenregelung für die beiden Zweige lässt sich die gesamte Klangbalance besser den örtlichen Gegebenheiten
(Wohnraumakustik) anpassen.
Beachten Sie bitte, dass unterschiedliche Endverstärkermodelle eventuell nicht gleich laut spielen, wenn sie per Y-
Adapter aus der gleichen Quelle gespeist werden. Die Ursache hierfür sind unterschiedliche Verstärkungsfaktoren
zwischen Eingangs- und Ausgangspegel.
Damit die Klangbalance nicht vom Zufall bestimmt wird, sind Endstufenmodelle mit eingebauten Pegelstellern sinn-
voll, so dass ein Ausgleich der Verstärkungsfaktoren oder gezielt die Einstellung der gewünschten Klangbalance
möglich ist.
Noch universeller ist es, für eine der beiden Stereo-Endstufen einen hochwertigen Vollverstärker zu wählen, dessen
Lautstärkensteller dann für die gewünschte Klangbalance benutzt wird. Die andere Endstufe kann dann ein puristi-
sches Modell ohne jede Einstellmöglichkeit sein. Unabhängig hiervon muss natürlich eine gemeinsame Vorstufe zur
Einstellung von Gesamtlautstärke und Programmquelle vorhanden sein. Falls die Vorstufe nur einen Ausgang besitzt,
schafft ein einfaches Y-Adapterkabel Abhilfe. Beim Einsatz unterschiedlicher Verstärkermodelle sollte ähnlich wie auf
Seite 8 beschrieben eine mögliche interne Verpolung eines Verstärkers überprüft werden.
Anschluss von HiFi-Lautsprechern an den Verstärker
11
ANSCHLUSS AN DEN VERSTÄRKER
Werden die beiden Zweige über getrennte Endverstärker betrieben, so ist es möglich, die
Verstärker angepasst an die Anforderungen für die Übertragung hoher und mittlerer bzw. tiefer
Frequenzen auszuwählen. Mit getrennter Lautstärkenregelung für die beiden Zweige lässt sich
die gesamte Klangbalance besser den örtlichen Gegebenheiten (Wohnraumakustik) anpassen.
Beachten Sie bitte, dass unterschiedliche Endverstärkermodelle eventuell nicht gleich laut spielen,
wenn sie per Y-Adapter aus der gleichen Quelle gespeist werden. Die Ursache hierfür sind
unterschiedliche Verstärkungsfaktoren zwischen Eingangs- und Ausgangspegel.
Damit die Klangbalance nicht vom Zufall bestimmt wird, sind Endstufenmodelle mit eingebauten
Pegelstellern sinnvoll, so dass ein Ausgleich der Verstärkungsfaktoren oder gezielt die Einstellung
der gewünschten Klangbalance möglich ist.
Noch universeller ist es, für eine der beiden Stereo-Endstufen einen hochwertigen Vollverstärker
zu wählen, dessen Lautstärkensteller dann für die gewünschte Klangbalance benutzt wird. Die an-
dere Endstufe kann dann ein puristisches Modell ohne jede Einstellmöglichkeit sein. Unabhängig
hiervon muss natürlich eine gemeinsame Vorstufe zur Einstellung von Gesamtlautstärke und Pro-
grammquelle vorhanden sein. Falls die Vorstufe nur einen Ausgang besitzt, schafft ein einfaches
Y-Adapterkabel Abhilfe. Beim Einsatz unterschiedlicher Verstärkermodelle sollte eine mögliche
interne Verpolung eines Verstärkers überprüft werden.

EINSTELLHILFE ELAC VX-JET
Ihr Lautsprecher ist mit ELACs innovativer VX-JET Technologie ausgestattet. Diese ermöglicht es
Ihnen erstmalig, Ihren Lautsprecher auf Ihre Hörgewohnheiten und an Ihre räumlichen Gegebenhei-
ten anzupassen. Mit Hilfe des Einstellknopfes auf der Rückseite der Box können Sie das Verhältnis
zwischen Direktschall (Schallwellen, die direkt vom Lautsprecher zu Ihren Ohren gelangen) und
Diffusschall (Schallwellen, die durch Reflexionen an Decken und Wänden zu Ihren Ohren gelangen)
einstellen. Sie verändern also nicht die Tonalität des Lautsprechers, sondern seine Abstrahlcharak-
teristik (Richtwirkung) im Mittel/Hochton-Bereich. Im Folgenden finden Sie eine Hilfestellung, wie Sie
Ihren Lautsprecher optimal einstellen.
Für den Fall, dass sich Ihr Hörplatz weiter als
4 m von den Lautsprechern entfernt befindet
und Sie einen zu räumlichen oder halligen
Klangeindruck an Ihrem Hörplatz empfinden,
sollten Sie den VX-JET nach innen verfahren
(Einstellknopf herausdrehen).
Die Mittelstellung des Einstellknopfes stellt
die Neutralstellung dar. Diese ist für Hörentfer-
nungen von 3 – 4 m gut geeignet. Der VX-JET
befindet sich in einer Ebene mit der Lautspre-
cher-Front.
Für den Fall, dass die Hörentfernung geringer
als 3 m ist und Ihnen der Klangeindruck auf
Ihrem Hörplatz nicht räumlich genug ist, sollten
Sie den VX-JET nach vorn verfahren
(Einstellknopf hineindrehen).
Ihr Lautsprecher ist mit ELAC’s innovativer VX-JET Technologie ausgestattet. Diese ermöglicht es Ihnen erstmalig, Ihren
Lautsprecher auf Ihre Hörgewohnheiten und an Ihre räumlichen Gegebenheiten anzupassen. Mit Hilfe des Einstellknopfes auf der
Rückseite der Box können Sie das Verhältnis zwischen Direktschall (Schallwellen, die direkt vom Lautsprecher zu Ihren Ohren
gelangen) und Diffusschall (Schallwellen, die durch Reflexionen an Decken und Wänden zu Ihren Ohren gelangen) einstellen. Sie
verändern also nicht die Tonalität des Lautsprechers, sondern seine Abstrahlcharakteristik (Richtwirkung) im Mittel/Hochton-
Bereich. Im Folgenden finden Sie eine Hilfestellung, wie Sie Ihren Lautsprecher optimal einstellen.
Your loudspeaker is equipped with ELAC’s innovative VX-JET technology. This technology for the first time allows, to adjust the
loudspeaker to your personal gusto and to special room conditions. By means of the adjusting knob on the rear baffle of the
speaker, you are able to adjust the relation between direct sound (the sound which is directly distributed from the speaker to your
ear) and reverberant sound (the sound which is distributed by reflections on walls and ceilings to your ear). So, you are not
changing the sound of the speaker but its directivity pattern in the middle/high range. This paper should help you to adjust your
speaker optimally.
Für den Fall, dass sich Ihr Hörplatz
weiter als 4 m von den Lautsprechern
entfernt befindet und Sie einen zu
räumlichen oder halligen Klangeindruck
an Ihrem Hörplatz empfinden, sollten
Sie den VX-JET nach innen verfahren
(Einstellknopf herausdrehen).
In case your listening place is more
than 4 m away from the speakers and
you have a very spatial or reverberant
sound impression, you should move the
VX-JET to the inside (turning the
adjusting knob out).
Die Mittelstellung des Einstellknopfes
stellt die Neutralstellung dar. Diese ist
für Hörentfernungen von 3 – 4 m gut
geeignet. Der VX-JET befindet sich in
einer Ebene mit der Lautsprecher-
Front.
The mid position of the adjusting knob
marks the neutral and basic position.
This is suitable for listening distances of
3 – 4 m. The VX-JET is located in the
same plane as the front of the
loudspeaker.
Für den Fall, dass die Hörentfernung
geringer als 3 m ist und Ihnen der
Klangeindruck auf Ihrem Hörplatz nicht
räumlich genug ist, sollten Sie den VX-
JET nach vorn verfahren (Einstellknopf
hineindrehen).
In case the listening distance is less
than 3 m and you have the impression
that the sound is not spatial enough,
you should move the VX-JET to the
front (turning the adjusting knob in).
GUT ZU WISSEN

Erzielen Sie maximale Leistung und optimale Klangqualität, indem Sie Ihre ELAC Lautsprecher richtig
positionieren und anordnen. Obwohl sich Räume in ihrem Aufbau unterscheiden, bieten Ihnen die
folgenden Richtlinien eine Orientierungshilfe, wenn Sie die Lautsprecher für Ihren individuellen Raum
konfigurieren. Für das Aufstellen von Lautsprechern gibt es keine „exakten“ Regeln oder Angaben
für Begrenzungen, jedoch können die folgenden Anregungen dabei helfen, das für Sie klangliche
Optimum zu erreichen. Dabei gilt, die beste Anordnung ist immer diejenige, die für Sie persönlich am
besten klingt. Daher empfehlen wir Ihnen zu experimentieren, indem Sie die Position bzw. Ausrichtung
der Lautsprecher verändern.
Platzieren Sie die Lautsprecher circa 30 bis 60 cm von Begrenzungen (z.B. Wänden sowie Raum-
ecken) entfernt (Abb. 1). Eine Aufstellung nahe einer Seiten- oder Rückwand verstärkt die Basswieder-
gabe. Wird der Aufstellort jedoch zu nah an einer Wand (bzw. insbesondere zu nah an einer Zimmer-
ecke) gewählt, kann dies zu einem unnatürlichen Klang führen. Ist eine Eckposition unvermeidlich,
versuchen Sie, den Lautsprecher so zu positionieren, dass Rückwand- und Seitenwandabstand des
Lautsprechers unterschiedlich sind.
AUFSTELLUNG DER LAUTSPRECHER
RICHTIG IN SZENE GESETZT

STEREO ANORDNUNG
Wenn sich der rechte und linke Lautsprecher Ihres Systems zu weit voneinander entfernt befinden,
winkeln Sie diese zur Hörposition hin ein, um ein fokussierteres, zentrales Klangbild zu erhalten.
In der Regel erhalten Sie das beste Ergebnis mit der realistischsten Stereoabbildung und dem leben-
digsten Klang, wenn Sie die Lautsprecher so anordnen, dass Ihre bevorzugte Hörposition mit den
Lautsprechern ein gleichseitiges Dreieck bildet (Abb. 2). Diese Anordnung gewährleistet das
optimale Klangbild.
VARIATION

ELAC Americas LLC.
North America Limited Liability Warranty Passive Concentro Speakers
(No Built-in Amplifier)
ELAC Americas LLC. warrants to the original purchaser that this product be free from
defects and or workmanship for a period of 3 (Three) years from the original date of
purchase (Carrying out the official ELAC registration it expands to 10 years factory
guarantee in total.). During this time period, repair or replacement of parts will be free
of charge to the original owner (See below limitations). Shipping to and return from the
repair center will be the responsibility of the original purchaser.
Limitations
Warranty begins on the date of original purchase from an authorized ELAC Americas
LLC dealer. Product is warranted only if used in home applications within the max power
rating specified in this manual. Commercial use of this product is not warranted.
Product that has been modified or altered in anyway will not be warranted.
Product that has been abused or subjected to faulty equipment will not be warranted.
Products with defaced or removed serial numbers will not be warranted.
lf service is required
In the event that service is required, please contact ELAC America at 714-252-8843 or at
proof of purchase (Copy or original sales receipt). Shipping to and from our repair center
will be the responsibility of the original purchaser.
Warranty Outside of North America
This warranty applies to products purchased in the United States and Canada. For
warranty claims outside of North America please contact the local dealer/distributor in
the country of purchase.
WARRANTY

Congratulations!
You are the proud owner of
Enjoy your superlative sound
experience
experience
experience
experience
experience
experience

SAFETY INSTRUCTIONS
1 General information
Please read and follow these safety instructions.
Keep them safe for future reference.
Observe all warnings on the speaker and in the manual. Please check the speaker for damage
before use. The speaker must be in perfect working condition.
Damaged parts may lead to personal injury.
2 Use only as directed
Connect the speaker(s) according to the instructions in the manual.
Many ELAC speakers are equipped with spikes and/or anti-slip feet. They are explicitly provided for
levelling the speaker. For levelling on an uneven floor, unscrew. the spikes or anti-slip feet by 2-3
turns of thread. The speaker should always be in perfect vertical alignment: the stability of the spea-
ker must not be compromised by using spikes or anti-slip feet as the speaker may tip-over.
3. Location
Install the speakers on a level surface only
When choosing the location of these speakers do not place them in locations that are:
In direct sunlight
Very humid
Prone to vibrations
Exceptionally hot or cold
Near CRT Televisions (the speakers are not magnetically shielded and may cause color issues with
a CRT based TV)
Close to magnetic cards (Since the speakers are not magnetically shielded placing magnetic cards
such as credit cards or commuter cards may cause
WARNING! Please ensure the product is perfectly stable to avoid injury from tip-over. Please note,
that stability can be increased by using spikes on carpeted surfaces. However, the mounting of
spikes must be carried out carefully due to their very sharp ends which may cause injuries. The sta-
bility on slippery floors can be increased by using Velcro fastening tape or double-sided adhesive
tape. Do not install the speaker near any heat sources such as radiators, heating valves, stoves,
or other apparatus (including amplifiers) that produce heat, or in areas where there is a risk of ex-
plosion.
Do not block any ventilation openings. Install in accordance with the manufacturer’s instructions.
Do not install the speaker in a closed rack or in a closed cupboard.
Do not put burning candles on or near the speaker.
Do not install the speaker near transformers because electromagnetic stray fields can cause hum
noise on woofers.
In combination with certain materials / lacquers / material surfaces, anti-slip feet or spike washers
may cause colored imprints on the surfaces.
levelling the speaker. For levelling on an uneven floor, unscrew. the spikes or anti-slip feet by 2-3
turns of thread. The speaker should always be in perfect vertical alignment: the stability of the spea-
levelling the speaker. For levelling on an uneven floor, unscrew. the spikes or anti-slip feet by 2-3
turns of thread. The speaker should always be in perfect vertical alignment: the stability of the spea-
turns of thread. The speaker should always be in perfect vertical alignment: the stability of the spea-
ker must not be compromised by using spikes or anti-slip feet as the speaker may tip-over.
ker must not be compromised by using spikes or anti-slip feet as the speaker may tip-over.
Install the speakers on a level surface only
Install the speakers on a level surface only
When choosing the location of these speakers do not place them in locations that are:
Install the speakers on a level surface only
When choosing the location of these speakers do not place them in locations that are:
levelling the speaker. For levelling on an uneven floor, unscrew. the spikes or anti-slip feet by 2-3
turns of thread. The speaker should always be in perfect vertical alignment: the stability of the spea-
levelling the speaker. For levelling on an uneven floor, unscrew. the spikes or anti-slip feet by 2-3
turns of thread. The speaker should always be in perfect vertical alignment: the stability of the spea-
turns of thread. The speaker should always be in perfect vertical alignment: the stability of the spea-
ker must not be compromised by using spikes or anti-slip feet as the speaker may tip-over.
turns of thread. The speaker should always be in perfect vertical alignment: the stability of the spea-
ker must not be compromised by using spikes or anti-slip feet as the speaker may tip-over.
Install the speakers on a level surface only
Install the speakers on a level surface only
levelling the speaker. For levelling on an uneven floor, unscrew. the spikes or anti-slip feet by 2-3
turns of thread. The speaker should always be in perfect vertical alignment: the stability of the spea-
turns of thread. The speaker should always be in perfect vertical alignment: the stability of the spea-
turns of thread. The speaker should always be in perfect vertical alignment: the stability of the spea-
turns of thread. The speaker should always be in perfect vertical alignment: the stability of the spea-
ker must not be compromised by using spikes or anti-slip feet as the speaker may tip-over.
turns of thread. The speaker should always be in perfect vertical alignment: the stability of the spea-
ker must not be compromised by using spikes or anti-slip feet as the speaker may tip-over.
3. Location
levelling the speaker. For levelling on an uneven floor, unscrew. the spikes or anti-slip feet by 2-3
turns of thread. The speaker should always be in perfect vertical alignment: the stability of the spea-
turns of thread. The speaker should always be in perfect vertical alignment: the stability of the spea-
turns of thread. The speaker should always be in perfect vertical alignment: the stability of the spea-
turns of thread. The speaker should always be in perfect vertical alignment: the stability of the spea-
ker must not be compromised by using spikes or anti-slip feet as the speaker may tip-over.
ker must not be compromised by using spikes or anti-slip feet as the speaker may tip-over.
turns of thread. The speaker should always be in perfect vertical alignment: the stability of the spea-
turns of thread. The speaker should always be in perfect vertical alignment: the stability of the spea-
levelling the speaker. For levelling on an uneven floor, unscrew. the spikes or anti-slip feet by 2-3
ker must not be compromised by using spikes or anti-slip feet as the speaker may tip-over.
turns of thread. The speaker should always be in perfect vertical alignment: the stability of the spea-
ker must not be compromised by using spikes or anti-slip feet as the speaker may tip-over.
ker must not be compromised by using spikes or anti-slip feet as the speaker may tip-over.
ker must not be compromised by using spikes or anti-slip feet as the speaker may tip-over.
levelling the speaker. For levelling on an uneven floor, unscrew. the spikes or anti-slip feet by 2-3
turns of thread. The speaker should always be in perfect vertical alignment: the stability of the spea-
ker must not be compromised by using spikes or anti-slip feet as the speaker may tip-over.
levelling the speaker. For levelling on an uneven floor, unscrew. the spikes or anti-slip feet by 2-3
levelling the speaker. For levelling on an uneven floor, unscrew. the spikes or anti-slip feet by 2-3
turns of thread. The speaker should always be in perfect vertical alignment: the stability of the spea-
turns of thread. The speaker should always be in perfect vertical alignment: the stability of the spea-
turns of thread. The speaker should always be in perfect vertical alignment: the stability of the spea-
levelling the speaker. For levelling on an uneven floor, unscrew. the spikes or anti-slip feet by 2-3
turns of thread. The speaker should always be in perfect vertical alignment: the stability of the spea-
ker must not be compromised by using spikes or anti-slip feet as the speaker may tip-over.
levelling the speaker. For levelling on an uneven floor, unscrew. the spikes or anti-slip feet by 2-3
levelling the speaker. For levelling on an uneven floor, unscrew. the spikes or anti-slip feet by 2-3
levelling the speaker. For levelling on an uneven floor, unscrew. the spikes or anti-slip feet by 2-3
turns of thread. The speaker should always be in perfect vertical alignment: the stability of the spea-
levelling the speaker. For levelling on an uneven floor, unscrew. the spikes or anti-slip feet by 2-3
turns of thread. The speaker should always be in perfect vertical alignment: the stability of the spea-
turns of thread. The speaker should always be in perfect vertical alignment: the stability of the spea-
ker must not be compromised by using spikes or anti-slip feet as the speaker may tip-over.
levelling the speaker. For levelling on an uneven floor, unscrew. the spikes or anti-slip feet by 2-3
levelling the speaker. For levelling on an uneven floor, unscrew. the spikes or anti-slip feet by 2-3
levelling the speaker. For levelling on an uneven floor, unscrew. the spikes or anti-slip feet by 2-3
levelling the speaker. For levelling on an uneven floor, unscrew. the spikes or anti-slip feet by 2-3
levelling the speaker. For levelling on an uneven floor, unscrew. the spikes or anti-slip feet by 2-3
turns of thread. The speaker should always be in perfect vertical alignment: the stability of the spea-
ker must not be compromised by using spikes or anti-slip feet as the speaker may tip-over.
levelling the speaker. For levelling on an uneven floor, unscrew. the spikes or anti-slip feet by 2-3
Many ELAC speakers are equipped with spikes and/or anti-slip feet. They are explicitly provided for
Many ELAC speakers are equipped with spikes and/or anti-slip feet. They are explicitly provided for
Many ELAC speakers are equipped with spikes and/or anti-slip feet. They are explicitly provided for
levelling the speaker. For levelling on an uneven floor, unscrew. the spikes or anti-slip feet by 2-3
levelling the speaker. For levelling on an uneven floor, unscrew. the spikes or anti-slip feet by 2-3
turns of thread. The speaker should always be in perfect vertical alignment: the stability of the spea-
turns of thread. The speaker should always be in perfect vertical alignment: the stability of the spea-
ker must not be compromised by using spikes or anti-slip feet as the speaker may tip-over.
Many ELAC speakers are equipped with spikes and/or anti-slip feet. They are explicitly provided for
levelling the speaker. For levelling on an uneven floor, unscrew. the spikes or anti-slip feet by 2-3
Connect the speaker(s) according to the instructions in the manual.
Connect the speaker(s) according to the instructions in the manual.
Many ELAC speakers are equipped with spikes and/or anti-slip feet. They are explicitly provided for
Connect the speaker(s) according to the instructions in the manual.
Many ELAC speakers are equipped with spikes and/or anti-slip feet. They are explicitly provided for
levelling the speaker. For levelling on an uneven floor, unscrew. the spikes or anti-slip feet by 2-3
turns of thread. The speaker should always be in perfect vertical alignment: the stability of the spea-
turns of thread. The speaker should always be in perfect vertical alignment: the stability of the spea-
ker must not be compromised by using spikes or anti-slip feet as the speaker may tip-over.
Connect the speaker(s) according to the instructions in the manual.
Many ELAC speakers are equipped with spikes and/or anti-slip feet. They are explicitly provided for
2 Use only as directed
Connect the speaker(s) according to the instructions in the manual.
Many ELAC speakers are equipped with spikes and/or anti-slip feet. They are explicitly provided for
levelling the speaker. For levelling on an uneven floor, unscrew. the spikes or anti-slip feet by 2-3
turns of thread. The speaker should always be in perfect vertical alignment: the stability of the spea-
turns of thread. The speaker should always be in perfect vertical alignment: the stability of the spea-
ker must not be compromised by using spikes or anti-slip feet as the speaker may tip-over.
Damaged parts may lead to personal injury.
Connect the speaker(s) according to the instructions in the manual.
before use. The speaker must be in perfect working condition.
Damaged parts may lead to personal injury.
Damaged parts may lead to personal injury.
Connect the speaker(s) according to the instructions in the manual.
Many ELAC speakers are equipped with spikes and/or anti-slip feet. They are explicitly provided for
levelling the speaker. For levelling on an uneven floor, unscrew. the spikes or anti-slip feet by 2-3
turns of thread. The speaker should always be in perfect vertical alignment: the stability of the spea-
turns of thread. The speaker should always be in perfect vertical alignment: the stability of the spea-
ker must not be compromised by using spikes or anti-slip feet as the speaker may tip-over.
before use. The speaker must be in perfect working condition.
Damaged parts may lead to personal injury.
Observe all warnings on the speaker and in the manual. Please check the speaker for damage
before use. The speaker must be in perfect working condition.
Damaged parts may lead to personal injury.
Connect the speaker(s) according to the instructions in the manual.
Many ELAC speakers are equipped with spikes and/or anti-slip feet. They are explicitly provided for
levelling the speaker. For levelling on an uneven floor, unscrew. the spikes or anti-slip feet by 2-3
turns of thread. The speaker should always be in perfect vertical alignment: the stability of the spea-
turns of thread. The speaker should always be in perfect vertical alignment: the stability of the spea-
ker must not be compromised by using spikes or anti-slip feet as the speaker may tip-over.
Keep them safe for future reference.
Observe all warnings on the speaker and in the manual. Please check the speaker for damage
before use. The speaker must be in perfect working condition.
Connect the speaker(s) according to the instructions in the manual.
Many ELAC speakers are equipped with spikes and/or anti-slip feet. They are explicitly provided for
levelling the speaker. For levelling on an uneven floor, unscrew. the spikes or anti-slip feet by 2-3
turns of thread. The speaker should always be in perfect vertical alignment: the stability of the spea-
ker must not be compromised by using spikes or anti-slip feet as the speaker may tip-over.
Please read and follow these safety instructions.
Keep them safe for future reference.
Observe all warnings on the speaker and in the manual. Please check the speaker for damage
before use. The speaker must be in perfect working condition.
Connect the speaker(s) according to the instructions in the manual.
Many ELAC speakers are equipped with spikes and/or anti-slip feet. They are explicitly provided for
levelling the speaker. For levelling on an uneven floor, unscrew. the spikes or anti-slip feet by 2-3
turns of thread. The speaker should always be in perfect vertical alignment: the stability of the spea-
ker must not be compromised by using spikes or anti-slip feet as the speaker may tip-over.
1 General information
Please read and follow these safety instructions.
Keep them safe for future reference.
Observe all warnings on the speaker and in the manual. Please check the speaker for damage
before use. The speaker must be in perfect working condition.
Connect the speaker(s) according to the instructions in the manual.
Many ELAC speakers are equipped with spikes and/or anti-slip feet. They are explicitly provided for
levelling the speaker. For levelling on an uneven floor, unscrew. the spikes or anti-slip feet by 2-3
turns of thread. The speaker should always be in perfect vertical alignment: the stability of the spea-
ker must not be compromised by using spikes or anti-slip feet as the speaker may tip-over.
ker must not be compromised by using spikes or anti-slip feet as the speaker may tip-over.
1 General information
Please read and follow these safety instructions.
Observe all warnings on the speaker and in the manual. Please check the speaker for damage
before use. The speaker must be in perfect working condition.
Connect the speaker(s) according to the instructions in the manual.
Many ELAC speakers are equipped with spikes and/or anti-slip feet. They are explicitly provided for
levelling the speaker. For levelling on an uneven floor, unscrew. the spikes or anti-slip feet by 2-3
turns of thread. The speaker should always be in perfect vertical alignment: the stability of the spea-
ker must not be compromised by using spikes or anti-slip feet as the speaker may tip-over.
Please ensure the product is perfectly stable to avoid injury from tip-over. Please note,
that stability can be increased by using spikes on carpeted surfaces. However, the mounting of
spikes must be carried out carefully due to their very sharp ends which may cause injuries. The sta-
bility on slippery floors can be increased by using Velcro fastening tape or double-sided adhesive
tape. Do not install the speaker near any heat sources such as radiators, heating valves, stoves,
WARNING!
Please ensure the product is perfectly stable to avoid injury from tip-over. Please note,
that stability can be increased by using spikes on carpeted surfaces. However, the mounting of
spikes must be carried out carefully due to their very sharp ends which may cause injuries. The sta-
Please ensure the product is perfectly stable to avoid injury from tip-over. Please note,
such as credit cards or commuter cards may cause
a CRT based TV)
Close to magnetic cards (Since the speakers are not magnetically shielded placing magnetic cards
such as credit cards or commuter cards may cause
Exceptionally hot or cold
Near CRT Televisions (the speakers are not magnetically shielded and may cause color issues with
Close to magnetic cards (Since the speakers are not magnetically shielded placing magnetic cards
Near CRT Televisions (the speakers are not magnetically shielded and may cause color issues with
Close to magnetic cards (Since the speakers are not magnetically shielded placing magnetic cards
Prone to vibrations
Near CRT Televisions (the speakers are not magnetically shielded and may cause color issues with
Near CRT Televisions (the speakers are not magnetically shielded and may cause color issues with
In direct sunlight
In direct sunlight
Near CRT Televisions (the speakers are not magnetically shielded and may cause color issues with
Install the speakers on a level surface only
When choosing the location of these speakers do not place them in locations that are:
Near CRT Televisions (the speakers are not magnetically shielded and may cause color issues with
Install the speakers on a level surface only
When choosing the location of these speakers do not place them in locations that are:
turns of thread. The speaker should always be in perfect vertical alignment: the stability of the spea-
ker must not be compromised by using spikes or anti-slip feet as the speaker may tip-over.
When choosing the location of these speakers do not place them in locations that are:
When choosing the location of these speakers do not place them in locations that are:
levelling the speaker. For levelling on an uneven floor, unscrew. the spikes or anti-slip feet by 2-3
levelling the speaker. For levelling on an uneven floor, unscrew. the spikes or anti-slip feet by 2-3
turns of thread. The speaker should always be in perfect vertical alignment: the stability of the spea-
ker must not be compromised by using spikes or anti-slip feet as the speaker may tip-over.
ker must not be compromised by using spikes or anti-slip feet as the speaker may tip-over.
When choosing the location of these speakers do not place them in locations that are:
When choosing the location of these speakers do not place them in locations that are:
Connect the speaker(s) according to the instructions in the manual.
Connect the speaker(s) according to the instructions in the manual.
Many ELAC speakers are equipped with spikes and/or anti-slip feet. They are explicitly provided for
levelling the speaker. For levelling on an uneven floor, unscrew. the spikes or anti-slip feet by 2-3
turns of thread. The speaker should always be in perfect vertical alignment: the stability of the spea-
Many ELAC speakers are equipped with spikes and/or anti-slip feet. They are explicitly provided for
turns of thread. The speaker should always be in perfect vertical alignment: the stability of the spea-
ker must not be compromised by using spikes or anti-slip feet as the speaker may tip-over.
When choosing the location of these speakers do not place them in locations that are:
When choosing the location of these speakers do not place them in locations that are:
2 Use only as directed
Connect the speaker(s) according to the instructions in the manual.
Connect the speaker(s) according to the instructions in the manual.
Many ELAC speakers are equipped with spikes and/or anti-slip feet. They are explicitly provided for
levelling the speaker. For levelling on an uneven floor, unscrew. the spikes or anti-slip feet by 2-3
turns of thread. The speaker should always be in perfect vertical alignment: the stability of the spea-
ker must not be compromised by using spikes or anti-slip feet as the speaker may tip-over.
before use. The speaker must be in perfect working condition.
Damaged parts may lead to personal injury.
Connect the speaker(s) according to the instructions in the manual.
Many ELAC speakers are equipped with spikes and/or anti-slip feet. They are explicitly provided for
levelling the speaker. For levelling on an uneven floor, unscrew. the spikes or anti-slip feet by 2-3
turns of thread. The speaker should always be in perfect vertical alignment: the stability of the spea-
ker must not be compromised by using spikes or anti-slip feet as the speaker may tip-over.
Prone to vibrations
Exceptionally hot or cold
Near CRT Televisions (the speakers are not magnetically shielded and may cause color issues with
Very humid
Prone to vibrations
Exceptionally hot or cold
In direct sunlight
Very humid
When choosing the location of these speakers do not place them in locations that are:
In direct sunlight
Install the speakers on a level surface only
When choosing the location of these speakers do not place them in locations that are:
3. Location
Install the speakers on a level surface only
When choosing the location of these speakers do not place them in locations that are:
When choosing the location of these speakers do not place them in locations that are:
ker must not be compromised by using spikes or anti-slip feet as the speaker may tip-over.
turns of thread. The speaker should always be in perfect vertical alignment: the stability of the spea-
ker must not be compromised by using spikes or anti-slip feet as the speaker may tip-over.
levelling the speaker. For levelling on an uneven floor, unscrew. the spikes or anti-slip feet by 2-3
turns of thread. The speaker should always be in perfect vertical alignment: the stability of the spea-
ker must not be compromised by using spikes or anti-slip feet as the speaker may tip-over.
Connect the speaker(s) according to the instructions in the manual.
Many ELAC speakers are equipped with spikes and/or anti-slip feet. They are explicitly provided for
levelling the speaker. For levelling on an uneven floor, unscrew. the spikes or anti-slip feet by 2-3
turns of thread. The speaker should always be in perfect vertical alignment: the stability of the spea-
ker must not be compromised by using spikes or anti-slip feet as the speaker may tip-over.

4. Overload
Extreme overload of the device du e to very high volume may cause damage to individual com-
ponents. Because of the possible danger, you should never leave loudspeakers under extreme
overload conditions unattended.
5. Service
DANGER! Do not open the cabinet because the components and conductors may carry current!
Servicing to be carried out by qualified service personnel only.
Servicing is required when the loudspeaker has been damaged in any way, such as damage to
the power supply cord or the plug, or when liquid has been spilled or objects have fallen onto the
loudspeaker, the speaker has been exposed to rain or moisture, does not operate normally, or has
been dropped. To reduce the risk of electric shock, do not open the loudspeaker. Servicing should
be carried out by qualified service personnel only.
6. Cleaning
Clean only with soft, smooth cloth or with dust brush. Do not use scouring agents, alcohol, benzene,
furniture polish or other agents for cleaning! Modern furniture is often coated with multiple varnishes
and plastics which can be treated with chemical agents. Some of these agents contain substances
which degrade or soften the rubber feet. Therefore we advise that you place an anti-slip mat under-
neath the loudspeaker(s).
7. Volume
CAUTION! Continuous high volume may cause severe damage to your hearing. Please listen
responsibly.
8. Disposal
The packaging is made from recyclable materials. Dispose of this in an environmentally friendly
manner. At end of life do not dispose of the speaker(s) with standard household waste. The speaker
must be recycled in accordance with local legislation. Ask your local government for further infor-
mation on recycling as the device contains valuable raw materials. Disable the speaker(s) before
disposal.
SAFETY INSTRUCTIONS
and plastics which can be treated with chemical agents. Some of these agents contain substances
and plastics which can be treated with chemical agents. Some of these agents contain substances
which degrade or soften the rubber feet. Therefore we advise that you place an anti-slip mat under-
neath the loudspeaker(s).
Continuous high volume may cause severe damage to your hearing. Please listen
The packaging is made from recyclable materials. Dispose of this in an environmentally friendly
and plastics which can be treated with chemical agents. Some of these agents contain substances
be carried out by qualified service personnel only.
6. Cleaning
furniture polish or other agents for cleaning! Modern furniture is often coated with multiple varnishes
Clean only with soft, smooth cloth or with dust brush. Do not use scouring agents, alcohol, benzene,
furniture polish or other agents for cleaning! Modern furniture is often coated with multiple varnishes
and plastics which can be treated with chemical agents. Some of these agents contain substances
and plastics which can be treated with chemical agents. Some of these agents contain substances
which degrade or soften the rubber feet. Therefore we advise that you place an anti-slip mat under-
neath the loudspeaker(s).
Continuous high volume may cause severe damage to your hearing. Please listen
and plastics which can be treated with chemical agents. Some of these agents contain substances
6. Cleaning
6. Cleaning
furniture polish or other agents for cleaning! Modern furniture is often coated with multiple varnishes
Clean only with soft, smooth cloth or with dust brush. Do not use scouring agents, alcohol, benzene,
furniture polish or other agents for cleaning! Modern furniture is often coated with multiple varnishes
furniture polish or other agents for cleaning! Modern furniture is often coated with multiple varnishes
and plastics which can be treated with chemical agents. Some of these agents contain substances
which degrade or soften the rubber feet. Therefore we advise that you place an anti-slip mat under-
neath the loudspeaker(s).
Continuous high volume may cause severe damage to your hearing. Please listen
and plastics which can be treated with chemical agents. Some of these agents contain substances
6. Cleaning
6. Cleaning
Clean only with soft, smooth cloth or with dust brush. Do not use scouring agents, alcohol, benzene,
furniture polish or other agents for cleaning! Modern furniture is often coated with multiple varnishes
Clean only with soft, smooth cloth or with dust brush. Do not use scouring agents, alcohol, benzene,
furniture polish or other agents for cleaning! Modern furniture is often coated with multiple varnishes
and plastics which can be treated with chemical agents. Some of these agents contain substances
and plastics which can be treated with chemical agents. Some of these agents contain substances
which degrade or soften the rubber feet. Therefore we advise that you place an anti-slip mat under-
Continuous high volume may cause severe damage to your hearing. Please listen
be carried out by qualified service personnel only.
6. Cleaning
6. Cleaning
Clean only with soft, smooth cloth or with dust brush. Do not use scouring agents, alcohol, benzene,
furniture polish or other agents for cleaning! Modern furniture is often coated with multiple varnishes
furniture polish or other agents for cleaning! Modern furniture is often coated with multiple varnishes
furniture polish or other agents for cleaning! Modern furniture is often coated with multiple varnishes
furniture polish or other agents for cleaning! Modern furniture is often coated with multiple varnishes
furniture polish or other agents for cleaning! Modern furniture is often coated with multiple varnishes
and plastics which can be treated with chemical agents. Some of these agents contain substances
which degrade or soften the rubber feet. Therefore we advise that you place an anti-slip mat under-
be carried out by qualified service personnel only.
6. Cleaning
6. Cleaning
Clean only with soft, smooth cloth or with dust brush. Do not use scouring agents, alcohol, benzene,
Clean only with soft, smooth cloth or with dust brush. Do not use scouring agents, alcohol, benzene,
furniture polish or other agents for cleaning! Modern furniture is often coated with multiple varnishes
furniture polish or other agents for cleaning! Modern furniture is often coated with multiple varnishes
Clean only with soft, smooth cloth or with dust brush. Do not use scouring agents, alcohol, benzene,
Clean only with soft, smooth cloth or with dust brush. Do not use scouring agents, alcohol, benzene,
furniture polish or other agents for cleaning! Modern furniture is often coated with multiple varnishes
furniture polish or other agents for cleaning! Modern furniture is often coated with multiple varnishes
and plastics which can be treated with chemical agents. Some of these agents contain substances
which degrade or soften the rubber feet. Therefore we advise that you place an anti-slip mat under-
be carried out by qualified service personnel only.
6. Cleaning
Clean only with soft, smooth cloth or with dust brush. Do not use scouring agents, alcohol, benzene,
furniture polish or other agents for cleaning! Modern furniture is often coated with multiple varnishes
furniture polish or other agents for cleaning! Modern furniture is often coated with multiple varnishes
Clean only with soft, smooth cloth or with dust brush. Do not use scouring agents, alcohol, benzene,
Clean only with soft, smooth cloth or with dust brush. Do not use scouring agents, alcohol, benzene,
furniture polish or other agents for cleaning! Modern furniture is often coated with multiple varnishes
furniture polish or other agents for cleaning! Modern furniture is often coated with multiple varnishes
and plastics which can be treated with chemical agents. Some of these agents contain substances
which degrade or soften the rubber feet. Therefore we advise that you place an anti-slip mat under-
be carried out by qualified service personnel only.
be carried out by qualified service personnel only.
Clean only with soft, smooth cloth or with dust brush. Do not use scouring agents, alcohol, benzene,
Clean only with soft, smooth cloth or with dust brush. Do not use scouring agents, alcohol, benzene,
furniture polish or other agents for cleaning! Modern furniture is often coated with multiple varnishes
and plastics which can be treated with chemical agents. Some of these agents contain substances
Clean only with soft, smooth cloth or with dust brush. Do not use scouring agents, alcohol, benzene,
be carried out by qualified service personnel only.
be carried out by qualified service personnel only.
Clean only with soft, smooth cloth or with dust brush. Do not use scouring agents, alcohol, benzene,
Clean only with soft, smooth cloth or with dust brush. Do not use scouring agents, alcohol, benzene,
furniture polish or other agents for cleaning! Modern furniture is often coated with multiple varnishes
furniture polish or other agents for cleaning! Modern furniture is often coated with multiple varnishes
furniture polish or other agents for cleaning! Modern furniture is often coated with multiple varnishes
be carried out by qualified service personnel only.
be carried out by qualified service personnel only.
Clean only with soft, smooth cloth or with dust brush. Do not use scouring agents, alcohol, benzene,
Clean only with soft, smooth cloth or with dust brush. Do not use scouring agents, alcohol, benzene,
Clean only with soft, smooth cloth or with dust brush. Do not use scouring agents, alcohol, benzene,
loudspeaker, the speaker has been exposed to rain or moisture, does not operate normally, or has
been dropped. To reduce the risk of electric shock, do not open the loudspeaker. Servicing should
be carried out by qualified service personnel only.
the power supply cord or the plug, or when liquid has been spilled or objects have fallen onto the
loudspeaker, the speaker has been exposed to rain or moisture, does not operate normally, or has
been dropped. To reduce the risk of electric shock, do not open the loudspeaker. Servicing should
be carried out by qualified service personnel only.
Servicing is required when the loudspeaker has been damaged in any way, such as damage to
the power supply cord or the plug, or when liquid has been spilled or objects have fallen onto the
loudspeaker, the speaker has been exposed to rain or moisture, does not operate normally, or has
been dropped. To reduce the risk of electric shock, do not open the loudspeaker. Servicing should
been dropped. To reduce the risk of electric shock, do not open the loudspeaker. Servicing should
be carried out by qualified service personnel only.
be carried out by qualified service personnel only.
be carried out by qualified service personnel only.
Servicing is required when the loudspeaker has been damaged in any way, such as damage to
the power supply cord or the plug, or when liquid has been spilled or objects have fallen onto the
loudspeaker, the speaker has been exposed to rain or moisture, does not operate normally, or has
loudspeaker, the speaker has been exposed to rain or moisture, does not operate normally, or has
been dropped. To reduce the risk of electric shock, do not open the loudspeaker. Servicing should
be carried out by qualified service personnel only.
be carried out by qualified service personnel only.
Do not open the cabinet because the components and conductors may carry current!
Servicing is required when the loudspeaker has been damaged in any way, such as damage to
the power supply cord or the plug, or when liquid has been spilled or objects have fallen onto the
loudspeaker, the speaker has been exposed to rain or moisture, does not operate normally, or has
loudspeaker, the speaker has been exposed to rain or moisture, does not operate normally, or has
been dropped. To reduce the risk of electric shock, do not open the loudspeaker. Servicing should
been dropped. To reduce the risk of electric shock, do not open the loudspeaker. Servicing should
be carried out by qualified service personnel only.
be carried out by qualified service personnel only.
Do not open the cabinet because the components and conductors may carry current!
Servicing to be carried out by qualified service personnel only.
Servicing is required when the loudspeaker has been damaged in any way, such as damage to
the power supply cord or the plug, or when liquid has been spilled or objects have fallen onto the
loudspeaker, the speaker has been exposed to rain or moisture, does not operate normally, or has
been dropped. To reduce the risk of electric shock, do not open the loudspeaker. Servicing should
been dropped. To reduce the risk of electric shock, do not open the loudspeaker. Servicing should
be carried out by qualified service personnel only.
be carried out by qualified service personnel only.
Do not open the cabinet because the components and conductors may carry current!
Servicing to be carried out by qualified service personnel only.
Servicing is required when the loudspeaker has been damaged in any way, such as damage to
the power supply cord or the plug, or when liquid has been spilled or objects have fallen onto the
the power supply cord or the plug, or when liquid has been spilled or objects have fallen onto the
loudspeaker, the speaker has been exposed to rain or moisture, does not operate normally, or has
been dropped. To reduce the risk of electric shock, do not open the loudspeaker. Servicing should
been dropped. To reduce the risk of electric shock, do not open the loudspeaker. Servicing should
be carried out by qualified service personnel only.
be carried out by qualified service personnel only.
6. Cleaning
6. Cleaning
6. Cleaning
Do not open the cabinet because the components and conductors may carry current!
Servicing to be carried out by qualified service personnel only.
Servicing is required when the loudspeaker has been damaged in any way, such as damage to
the power supply cord or the plug, or when liquid has been spilled or objects have fallen onto the
the power supply cord or the plug, or when liquid has been spilled or objects have fallen onto the
loudspeaker, the speaker has been exposed to rain or moisture, does not operate normally, or has
been dropped. To reduce the risk of electric shock, do not open the loudspeaker. Servicing should
been dropped. To reduce the risk of electric shock, do not open the loudspeaker. Servicing should
be carried out by qualified service personnel only.
be carried out by qualified service personnel only.
6. Cleaning
6. Cleaning
and plastics which can be treated with chemical agents. Some of these agents contain substances
and plastics which can be treated with chemical agents. Some of these agents contain substances
neath the loudspeaker(s).
Clean only with soft, smooth cloth or with dust brush. Do not use scouring agents, alcohol, benzene,
Clean only with soft, smooth cloth or with dust brush. Do not use scouring agents, alcohol, benzene,
furniture polish or other agents for cleaning! Modern furniture is often coated with multiple varnishes
furniture polish or other agents for cleaning! Modern furniture is often coated with multiple varnishes
furniture polish or other agents for cleaning! Modern furniture is often coated with multiple varnishes
and plastics which can be treated with chemical agents. Some of these agents contain substances
and plastics which can be treated with chemical agents. Some of these agents contain substances
and plastics which can be treated with chemical agents. Some of these agents contain substances
which degrade or soften the rubber feet. Therefore we advise that you place an anti-slip mat under-
neath the loudspeaker(s).
Clean only with soft, smooth cloth or with dust brush. Do not use scouring agents, alcohol, benzene,
Clean only with soft, smooth cloth or with dust brush. Do not use scouring agents, alcohol, benzene,
furniture polish or other agents for cleaning! Modern furniture is often coated with multiple varnishes
furniture polish or other agents for cleaning! Modern furniture is often coated with multiple varnishes
furniture polish or other agents for cleaning! Modern furniture is often coated with multiple varnishes
and plastics which can be treated with chemical agents. Some of these agents contain substances
which degrade or soften the rubber feet. Therefore we advise that you place an anti-slip mat under-
neath the loudspeaker(s).
and plastics which can be treated with chemical agents. Some of these agents contain substances
Clean only with soft, smooth cloth or with dust brush. Do not use scouring agents, alcohol, benzene,
Clean only with soft, smooth cloth or with dust brush. Do not use scouring agents, alcohol, benzene,
furniture polish or other agents for cleaning! Modern furniture is often coated with multiple varnishes
furniture polish or other agents for cleaning! Modern furniture is often coated with multiple varnishes
furniture polish or other agents for cleaning! Modern furniture is often coated with multiple varnishes
and plastics which can be treated with chemical agents. Some of these agents contain substances
which degrade or soften the rubber feet. Therefore we advise that you place an anti-slip mat under-
neath the loudspeaker(s).
and plastics which can be treated with chemical agents. Some of these agents contain substances
Clean only with soft, smooth cloth or with dust brush. Do not use scouring agents, alcohol, benzene,
Clean only with soft, smooth cloth or with dust brush. Do not use scouring agents, alcohol, benzene,
furniture polish or other agents for cleaning! Modern furniture is often coated with multiple varnishes
furniture polish or other agents for cleaning! Modern furniture is often coated with multiple varnishes
and plastics which can be treated with chemical agents. Some of these agents contain substances
which degrade or soften the rubber feet. Therefore we advise that you place an anti-slip mat under-
neath the loudspeaker(s).
Clean only with soft, smooth cloth or with dust brush. Do not use scouring agents, alcohol, benzene,
Clean only with soft, smooth cloth or with dust brush. Do not use scouring agents, alcohol, benzene,
furniture polish or other agents for cleaning! Modern furniture is often coated with multiple varnishes
furniture polish or other agents for cleaning! Modern furniture is often coated with multiple varnishes
furniture polish or other agents for cleaning! Modern furniture is often coated with multiple varnishes
and plastics which can be treated with chemical agents. Some of these agents contain substances
and plastics which can be treated with chemical agents. Some of these agents contain substances
which degrade or soften the rubber feet. Therefore we advise that you place an anti-slip mat under-
Clean only with soft, smooth cloth or with dust brush. Do not use scouring agents, alcohol, benzene,
Clean only with soft, smooth cloth or with dust brush. Do not use scouring agents, alcohol, benzene,
furniture polish or other agents for cleaning! Modern furniture is often coated with multiple varnishes
furniture polish or other agents for cleaning! Modern furniture is often coated with multiple varnishes
and plastics which can be treated with chemical agents. Some of these agents contain substances
and plastics which can be treated with chemical agents. Some of these agents contain substances
which degrade or soften the rubber feet. Therefore we advise that you place an anti-slip mat under-
Clean only with soft, smooth cloth or with dust brush. Do not use scouring agents, alcohol, benzene,
Clean only with soft, smooth cloth or with dust brush. Do not use scouring agents, alcohol, benzene,
furniture polish or other agents for cleaning! Modern furniture is often coated with multiple varnishes
furniture polish or other agents for cleaning! Modern furniture is often coated with multiple varnishes
and plastics which can be treated with chemical agents. Some of these agents contain substances
which degrade or soften the rubber feet. Therefore we advise that you place an anti-slip mat under-
Clean only with soft, smooth cloth or with dust brush. Do not use scouring agents, alcohol, benzene,
Clean only with soft, smooth cloth or with dust brush. Do not use scouring agents, alcohol, benzene,
furniture polish or other agents for cleaning! Modern furniture is often coated with multiple varnishes
and plastics which can be treated with chemical agents. Some of these agents contain substances
and plastics which can be treated with chemical agents. Some of these agents contain substances
Clean only with soft, smooth cloth or with dust brush. Do not use scouring agents, alcohol, benzene,
Clean only with soft, smooth cloth or with dust brush. Do not use scouring agents, alcohol, benzene,
furniture polish or other agents for cleaning! Modern furniture is often coated with multiple varnishes
furniture polish or other agents for cleaning! Modern furniture is often coated with multiple varnishes
and plastics which can be treated with chemical agents. Some of these agents contain substances
furniture polish or other agents for cleaning! Modern furniture is often coated with multiple varnishes
and plastics which can be treated with chemical agents. Some of these agents contain substances
Clean only with soft, smooth cloth or with dust brush. Do not use scouring agents, alcohol, benzene,
Clean only with soft, smooth cloth or with dust brush. Do not use scouring agents, alcohol, benzene,
furniture polish or other agents for cleaning! Modern furniture is often coated with multiple varnishes
furniture polish or other agents for cleaning! Modern furniture is often coated with multiple varnishes
and plastics which can be treated with chemical agents. Some of these agents contain substances
furniture polish or other agents for cleaning! Modern furniture is often coated with multiple varnishes
and plastics which can be treated with chemical agents. Some of these agents contain substances
Clean only with soft, smooth cloth or with dust brush. Do not use scouring agents, alcohol, benzene,
Clean only with soft, smooth cloth or with dust brush. Do not use scouring agents, alcohol, benzene,
furniture polish or other agents for cleaning! Modern furniture is often coated with multiple varnishes
and plastics which can be treated with chemical agents. Some of these agents contain substances
Clean only with soft, smooth cloth or with dust brush. Do not use scouring agents, alcohol, benzene,
Clean only with soft, smooth cloth or with dust brush. Do not use scouring agents, alcohol, benzene,
furniture polish or other agents for cleaning! Modern furniture is often coated with multiple varnishes
and plastics which can be treated with chemical agents. Some of these agents contain substances
Clean only with soft, smooth cloth or with dust brush. Do not use scouring agents, alcohol, benzene,
furniture polish or other agents for cleaning! Modern furniture is often coated with multiple varnishes
Clean only with soft, smooth cloth or with dust brush. Do not use scouring agents, alcohol, benzene,
furniture polish or other agents for cleaning! Modern furniture is often coated with multiple varnishes
furniture polish or other agents for cleaning! Modern furniture is often coated with multiple varnishes
and plastics which can be treated with chemical agents. Some of these agents contain substances
and plastics which can be treated with chemical agents. Some of these agents contain substances
6. Cleaning
Clean only with soft, smooth cloth or with dust brush. Do not use scouring agents, alcohol, benzene,
furniture polish or other agents for cleaning! Modern furniture is often coated with multiple varnishes
6. Cleaning
Clean only with soft, smooth cloth or with dust brush. Do not use scouring agents, alcohol, benzene,
furniture polish or other agents for cleaning! Modern furniture is often coated with multiple varnishes
furniture polish or other agents for cleaning! Modern furniture is often coated with multiple varnishes
6. Cleaning
Clean only with soft, smooth cloth or with dust brush. Do not use scouring agents, alcohol, benzene,
Clean only with soft, smooth cloth or with dust brush. Do not use scouring agents, alcohol, benzene,
be carried out by qualified service personnel only.
Clean only with soft, smooth cloth or with dust brush. Do not use scouring agents, alcohol, benzene,
be carried out by qualified service personnel only.
be carried out by qualified service personnel only.
been dropped. To reduce the risk of electric shock, do not open the loudspeaker. Servicing should
be carried out by qualified service personnel only.
been dropped. To reduce the risk of electric shock, do not open the loudspeaker. Servicing should
the power supply cord or the plug, or when liquid has been spilled or objects have fallen onto the
loudspeaker, the speaker has been exposed to rain or moisture, does not operate normally, or has
been dropped. To reduce the risk of electric shock, do not open the loudspeaker. Servicing should

Thank you for purchasing this ELAC product.
Since the time we started (1926), ELAC has always striven to achieve the very best.
Your new ELAC speakers are built to the highest standards using high-quality components that are
carefully constructed to deliver the best-in-class sound quality. They are developed by a passiona-
te group of individuals whose soul purpose is to bring a new dimension of sound quality into your
home. Enjoy!
Avoid damage to the speakers and other components:
Carefully unbox the speakers carefully to avoid physically damaging your speakers.
Use appropriate gauge wires (minimum of 12 gauge wire for runs up to 25 feet).
Make sure wire polarity is connected correctly. Most speaker cables are coded for ease of use.
Make sure positive (red) connection on the amplifier terminal is connected to the positive (red) on
your speakers. Follow the same instructions for the negative side. Strip off approximately 1/2”of the
insulation from the ends of the speaker cable, twist the bare strands and insert into the binding post.
Ensure your equipment is turned off before connecting speakers.
Check to ensure positive and negative wires are not touching each other once they’re connected to
the speaker terminals.
PHILOSOPHY
BEFORE USE
AMPLIFIER

CONNECTING
Bi-Wiring/Bi-Amping operation
Some of our speakers allow separate ope-
ration of the treble/midrange and the woofer
by means of two amplifiers (Bi Amping) or
by means of separate connecting cables
(Bi Wiring). For this purpose, the speakers
are provided with double terminals. The two
pairs of connecting jacks that are provided
with jumpers were designed for standard
oper-ation (with one amplifier). For Bi Wiring/
Bi Amping, the jumpers must be removed.
The passive crossover networks of the indi-
vidual drivers remain in operation. This way,
the use of special filter crossover networks
is not required.
input midrange/treble
jumper
input woofer
One pair of connecting jacks is used for the connection to the network of the midrange/tweeter. The
other pair is used for the connection to the network of the woofer. Due to separate wiring (Bi Wiring),
a decoupling of the two legs is obtained. This reduces cross-talking between the midrange/tweeter
leg and the woofer leg.
There are different types of connecting cables that can be used. For example, low-inductance ca-
bles are suitable for the treble area and particularly large cables are suitable for the woofer area.
Bi-Wiring
One pair of connecting jacks is used for the connection to the network of the midrange/tweeter. The other pair is
used for the connection to the network of the woofer. Due to separate wiring (Bi Wiring), a decoupling of the two legs
is obtained. This reduces cross-talking between the midrange/tweeter leg and the woofer leg.
There are different types of connecting cables that can be used. For example, low-inductance cables are suitable for
the treble area and particularly large cables are suitable for the woofer area.
Bi-Amping
If both legs are operated through separate output stages, it is possible to choose amplifiers that allow the transmis-
sion of high, midrange or low frequencies. With separate volume controls for both legs, it will be easier to provide a
sound balance that offers perfect adaption to the living room environment (room acoustics).
Please note, that different models of output stages may not provide the same volume when fed by one source
through a y adapter.
The reason for this lies in different amplification factors that occur between the input and the output levels.
To ensure, that the sound balance will not be defined at random, the amplifiers provide level controls that enable
perfect adjustment of the desired sound balance.
It would be advantageous to choose a high-quality amplifier for one of the two stereo output stages. Its volume con-
trol can be used to adjust the desired sound balance. The other output stage would be a puristic element that does
not offer any adjustment options.
It is important to mention, that there must be prestages for adjusting the volume and programmes. If the prestage
provides only one output, a standard cable for the Y adapter can be used.
Connecting the speakers to a stereo system Page 21
Connecting the speakers to a stereo system Page 25
Connecting the speakers to a stereo system 25
THE RIGHT WAY

CONNECTING THE SPEAKERS TO A STEREO SYSTEM
If both legs are operated through separate output stages, it is possible to choose amplifiers that
allow the transmis-sion of high, midrange or low frequencies. With separate volume controls for
both legs, it will be easier to provide a sound balance that offers perfect adaption to the living room
environment (room acoustics).
Please note, that different models of output stages may not provide the same volume when fed by
one source through a y adapter.
The reason for this lies in different amplification factors that occur between the input and the output
levels. To ensure, that the sound balance will not be defined at random, the amplifiers provide level
controls that enable perfect adjustment of the desired sound balance.
It would be advantageous to choose a high-quality amplifier for one of the two stereo output
stages.
Its volume control can be used to adjust the desired sound balance. The other output stage would
be a puristic element that does not offer any adjustment options.
It is important to mention, that there must be prestages for adjusting the volume and programmes.
If the prestage provides only one output, a standard cable for the Y adapter can be used.
Bi-Wiring
One pair of connecting jacks is used for the connection to the network of the midrange/tweeter. The other pair is
used for the connection to the network of the woofer. Due to separate wiring (Bi Wiring), a decoupling of the two legs
is obtained. This reduces cross-talking between the midrange/tweeter leg and the woofer leg.
There are different types of connecting cables that can be used. For example, low-inductance cables are suitable for
the treble area and particularly large cables are suitable for the woofer area.
Connecting the speakers to a stereo system 24
Bi-Amping
If both legs are operated through separate output stages, it is possible to choose amplifiers that allow the transmis-
sion of high, midrange or low frequencies. With separate volume controls for both legs, it will be easier to provide a
sound balance that offers perfect adaption to the living room environment (room acoustics).
Please note, that different models of output stages may not provide the same volume when fed by one source
through a y adapter.
The reason for this lies in different amplification factors that occur between the input and the output levels.
To ensure, that the sound balance will not be defined at random, the amplifiers provide level controls that enable
perfect adjustment of the desired sound balance.
It would be advantageous to choose a high-quality amplifier for one of the two stereo output stages. Its volume con-
trol can be used to adjust the desired sound balance. The other output stage would be a puristic element that does
not offer any adjustment options.
It is important to mention, that there must be prestages for adjusting the volume and programmes. If the prestage
provides only one output, a standard cable for the Y adapter can be used.
Connecting the speakers to a stereo system Page 21
Connecting the speakers to a stereo system Page 25
Connecting the speakers to a stereo system
25

ADJUSTING AID ELAC VX-JET
GOOD TO KNOW
Your loudspeaker is equipped with ELAC’s innovative VX-JET technology. This technology for the
first time allows, to adjust the loudspeaker to your personal gusto and to special room conditions.
By means of the adjusting knob on the rear baffle of the speaker, you are able to adjust the relation
between direct sound (the sound which is directly distributed from the speaker to your ear) and re-
verberant sound (the sound which is distributed by reflections on walls and ceilings to your ear). So,
you are not changing the sound of the speaker but its directivity pattern in the middle/high range.
This paper should help you to adjust your speaker optimally.
In case your listening place is more than 4 m
away from the speakers and you have a very
spatial or reverberant sound impression, you
should move the VX-JET to the inside (turning
the adjusting knob out).
The mid position of the adjusting knob marks
the neutral and basic position. This is suitable
for listening distances of 3 – 4 m. The VX-JET
is located in the same plane as the front of the
loudspeaker.
n case the listening distance is less than 3 m
and you have the impression that the sound
is not spatial enough, you should move the VX-
JET to the front (turning the adjusting knob in).
Ihr Lautsprecher ist mit ELAC’s innovativer VX-JET Technologie ausgestattet. Diese ermöglicht es Ihnen erstmalig, Ihren
Lautsprecher auf Ihre Hörgewohnheiten und an Ihre räumlichen Gegebenheiten anzupassen. Mit Hilfe des Einstellknopfes auf der
Rückseite der Box können Sie das Verhältnis zwischen Direktschall (Schallwellen, die direkt vom Lautsprecher zu Ihren Ohren
gelangen) und Diffusschall (Schallwellen, die durch Reflexionen an Decken und Wänden zu Ihren Ohren gelangen) einstellen. Sie
verändern also nicht die Tonalität des Lautsprechers, sondern seine Abstrahlcharakteristik (Richtwirkung) im Mittel/Hochton-
Bereich. Im Folgenden finden Sie eine Hilfestellung, wie Sie Ihren Lautsprecher optimal einstellen.
Your loudspeaker is equipped with ELAC’s innovative VX-JET technology. This technology for the first time allows, to adjust the
loudspeaker to your personal gusto and to special room conditions. By means of the adjusting knob on the rear baffle of the
speaker, you are able to adjust the relation between direct sound (the sound which is directly distributed from the speaker to your
ear) and reverberant sound (the sound which is distributed by reflections on walls and ceilings to your ear). So, you are not
changing the sound of the speaker but its directivity pattern in the middle/high range. This paper should help you to adjust your
speaker optimally.
Für den Fall, dass sich Ihr Hörplatz
weiter als 4 m von den Lautsprechern
entfernt befindet und Sie einen zu
räumlichen oder halligen Klangeindruck
an Ihrem Hörplatz empfinden, sollten
Sie den VX-JET nach innen verfahren
(Einstellknopf herausdrehen).
In case your listening place is more
than 4 m away from the speakers and
you have a very spatial or reverberant
sound impression, you should move the
VX-JET to the inside (turning the
adjusting knob out).
Die Mittelstellung des Einstellknopfes
stellt die Neutralstellung dar. Diese ist
für Hörentfernungen von 3 – 4 m gut
geeignet. Der VX-JET befindet sich in
einer Ebene mit der Lautsprecher-
Front.
The mid position of the adjusting knob
marks the neutral and basic position.
This is suitable for listening distances of
3 – 4 m. The VX-JET is located in the
same plane as the front of the
loudspeaker.
Für den Fall, dass die Hörentfernung
geringer als 3 m ist und Ihnen der
Klangeindruck auf Ihrem Hörplatz nicht
räumlich genug ist, sollten Sie den VX-
JET nach vorn verfahren (Einstellknopf
hineindrehen).
In case the listening distance is less
than 3 m and you have the impression
that the sound is not spatial enough,
you should move the VX-JET to the
front (turning the adjusting knob in).

Achieve maximum performance and optimal sound quality from your ELAC speakers with proper
speaker placement and set-up. While not all rooms are the same, use the following guidelines to con-
figure the speakers for your particular room.
There are no “exact” rules or boundaries in setting up your speakers but the following suggestions will
help optimize your desired results. Remember the best sound set-up is what sounds best for you so
don’t be afraid to experiment and make adjustments to the placement and directivity of the speakers.
SPEAKER PLACEMENT
SET IN SCENE
Place the speakers approximately one to two feet away (fig. 1) from boundaries such as wall(s) and
especially corners. Close proximity to a side or rear wall will enhance bass performance (output), but
being too close (particularly to a corner) may result in bass that is unnatural. lf a corner location is
unavoidable, try to position the loudspeaker so that the distance to the rear wall is not equal to the
distance to the side wall.
This manual suits for next models
1
Table of contents
Languages:
Other ELAC Speakers manuals
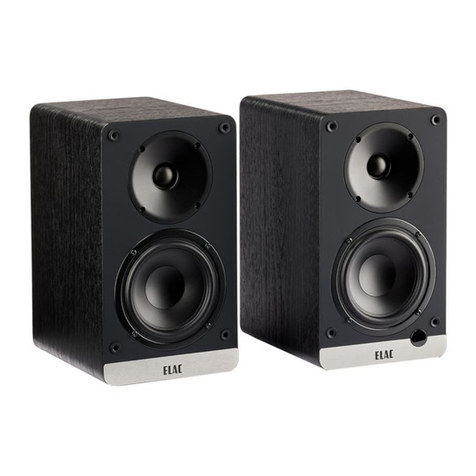
ELAC
ELAC DEBUT ConneX User manual

ELAC
ELAC UB5 User manual

ELAC
ELAC IW 1030 User manual
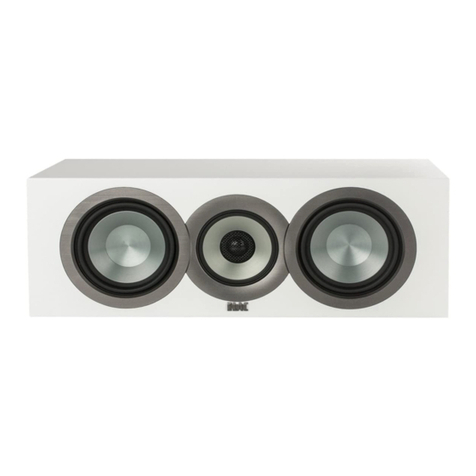
ELAC
ELAC Uni-Fi UF5IFS U5 User manual
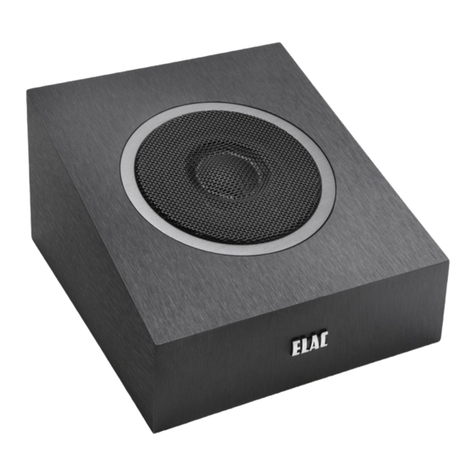
ELAC
ELAC A4 User manual
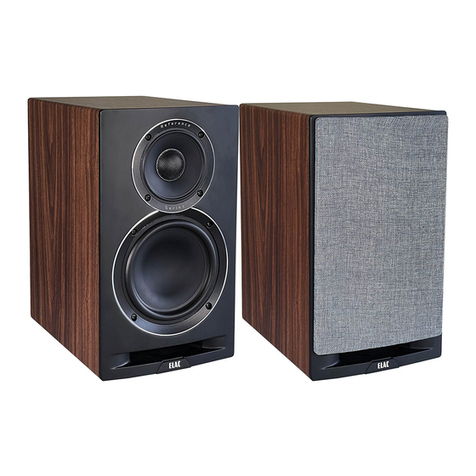
ELAC
ELAC Uni-Fi Reference UBR62 User manual

ELAC
ELAC WS 1425 User manual
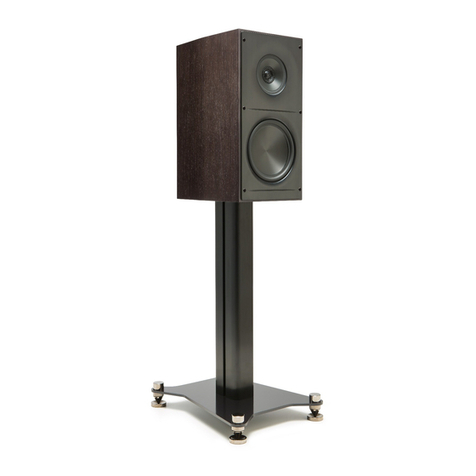
ELAC
ELAC Adante AS-61 User manual
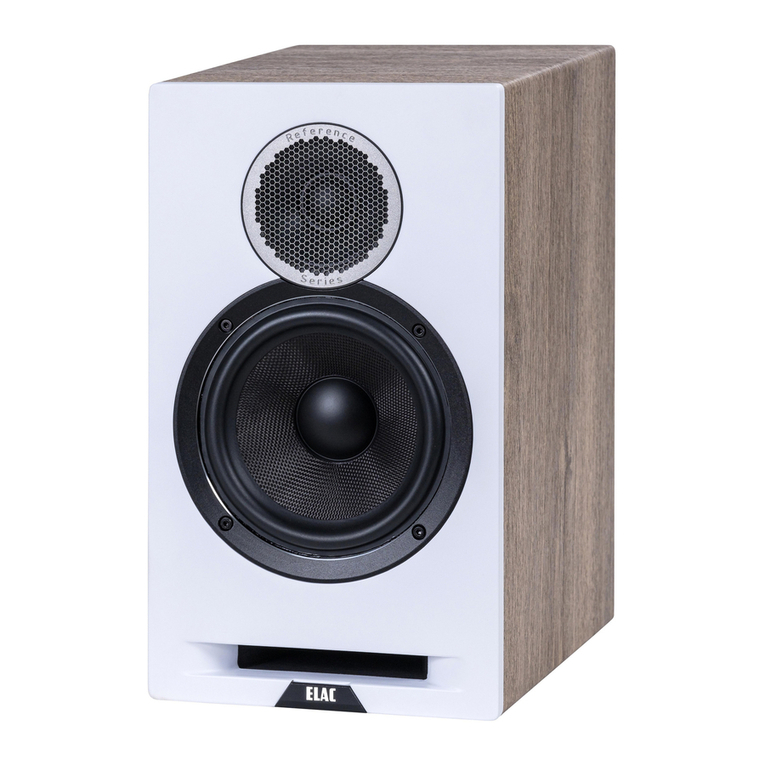
ELAC
ELAC Debut Reference DBR62 User manual

ELAC
ELAC LA JET 10 User manual
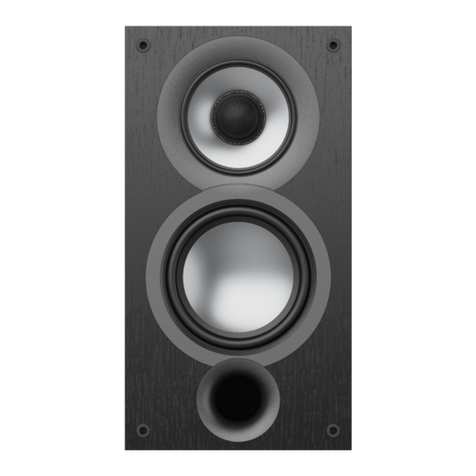
ELAC
ELAC Uni-Fi 2.0 User manual

ELAC
ELAC SB-VJ41L User manual
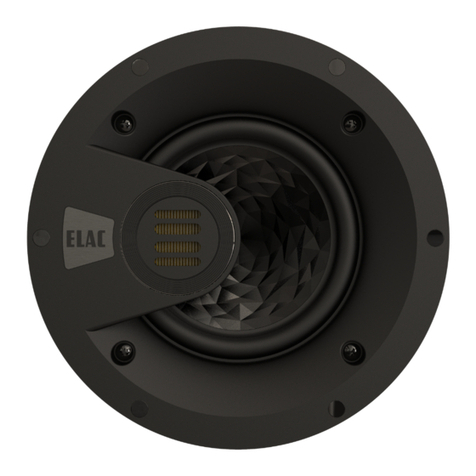
ELAC
ELAC Vertex III Series User manual

ELAC
ELAC DCB41 User manual

ELAC
ELAC Navis AB-51 User manual

ELAC
ELAC Debut Reference DBR62 User manual
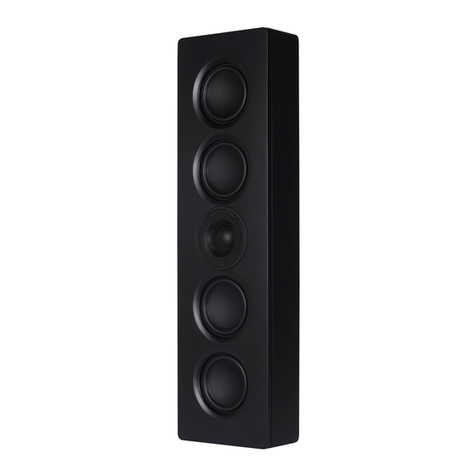
ELAC
ELAC Muro Series User manual

ELAC
ELAC DCB41 User manual

ELAC
ELAC Discovery Z3 User manual

ELAC
ELAC Adante AS-61 User manual
