ElectroFlip DVlite User manual

DVlite User Guide
1
DVlite
User Guide
All information and instructions included in this manual are current as of July, 2011. However,
due to the fluid nature of advancing technology, some characteristics may change or need
modifications in the future. Should you encounter any problems or have any further questions
about your purchase, please visit us at www.ElectroFlip.com and visit the contact us page.

DVlite User Guide
2
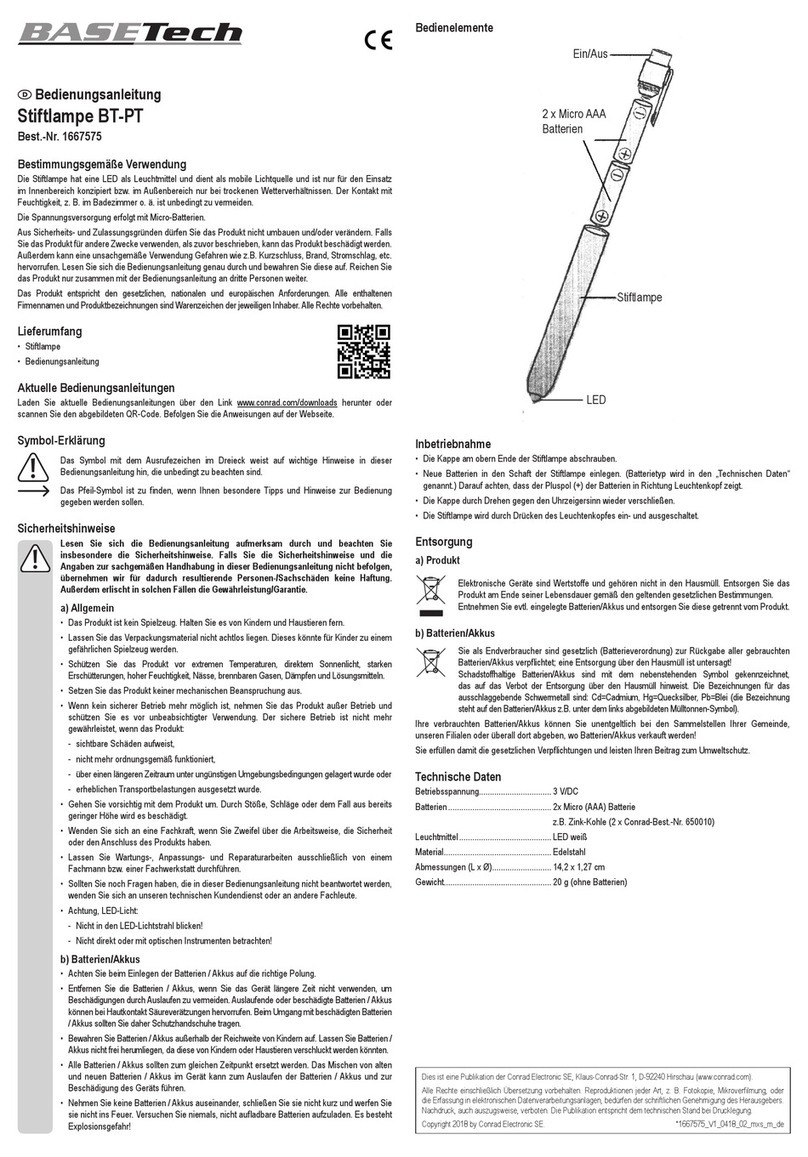
Please carefully read this user guide before attempting to install and operate this product.
Retain user guide for your future reference.
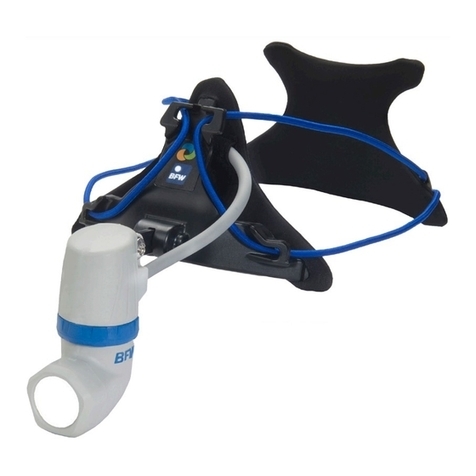
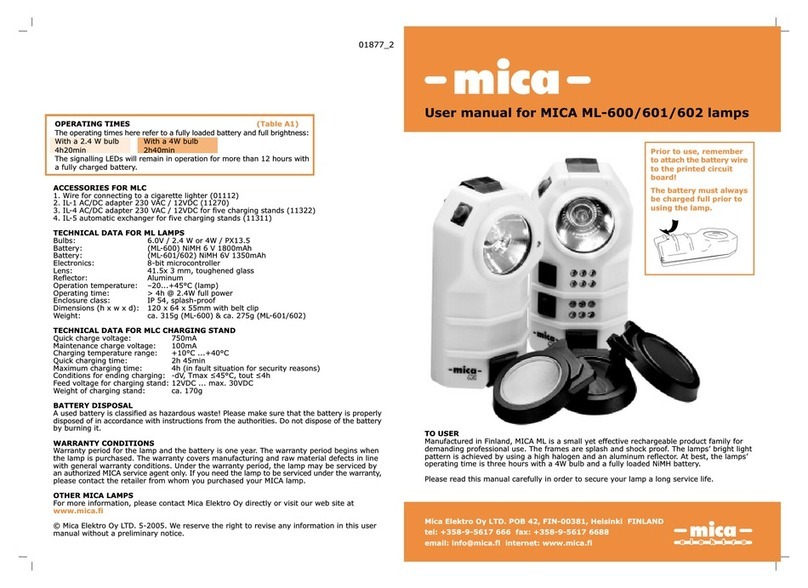
LED Light
Halogen Lamp
Pinhole Camera
Laser DesignatorMicrophone

DVlite User Guide
3
Function
There are four buttons used to control the DVlite:
DV – Digital Video recording and power(specific to video/picture function)
button
DC – Digital Camera Snap Button
LAS – To turn the laser On/Off
PWR – To turn the LED/Halogen light On/Off
Power Camera Function On/Off
•To turn the camera function On, press and hold the DV button for 4 seconds. The
indicator light will flash yellow then remain solid when its in standby mode.

DVlite User Guide
4
•Press and hold the DV button again for 4 seconds to turn the DVlite Off. The
indicator light will disappear.
Digital Video Mode
•After powering the camera function.
•Press the DV button one time to begin recording. The red indicator light will
continue to blink while recording.
•Press the DV button again to stop recording.
•Video file will automatically be saved.
Digital Camera Mode
•After powering the camera function.
•Press the DC button once – the red indicator light will stay illuminated, the DVlite
is now in Camera Standby mode
•Press the DC button to again to take a picture.
•Image file will be automatically saved.
Laser Operation
•Press the LAS button once to turn On the Laser Aiming Light
•Press the LAS button again to turn Off the Laser Aiming Light
Microphone Operation
•The microphone is automatically activated when the camera function is powered
and its recording.
Setting the Time Stamp
•While the DVlite is plugged into your computer, create new file “time.txt” in the
DVlites root directory. The correct date format must be used:
“2012.07.31 12:00:00” (without the quotes)
Save the file when you are done to ensure that the DVlite records with these
settings.

DVlite User Guide
5
•Disconnect DVlite and do a test recording, the second test record should have
the new time stamp.
Camera Low Power
•Low Battery – The Low Battery indicator light will flash red 5 times and the
DVlite camera will automatically turn off after 10 seconds.
LED Low Power Light
•Because the LED uses a lot less power than the video camera, it will continue to
work after the video camera has stopped working due to low power. Do not use
the DVlite LED or Halogen for an extended period of time while the battery is low,
as this could cause damage to the battery.
•Low Battery – The Low Battery indicator light will flash red 5 times and the
DVlite LED light will automatically turn off after 10 seconds.
Recharging the Battery
•Battery indicator light will be red while charging and will turn green when fully
charged – aproximately 4 hours.
Uploading Video Files
•Connect the DVlite to your computer connecting the supplied USB cable to the
DVlite’s USB port shown below.
•The DVlite will appear as an external storage device on your computer.
•You can open video files the same way you would any other file on your
computer.
•You can move video files to your computer’s hard drive by copying files or drag &
drop them into the folder you want them.RECOMMENDED, before playback.

DVlite User Guide
6
Resetting the DVlite
•You can reset the DVlite if it fails to operate by simply pressing the RST button
shown above with a paperclip.
Video Playback
•While the DVlite is connected to your computer can play all video files using
Apple QuickTime or Windows Media Player
Viewing Pictures
•All photographs are recorded using .JPEG format – compatible with almost all
computer systems for quick and easy viewing.
Specifications
Light Power Rated
2W
LED Useful Life
≥ 100,000h
Lumens
190
Battery Recharge time
4hours
Battery Life
≥500 times
Battery Capacity
2400mAh
Battery Type
Rechargeable Li-ion Battery
Video Format
.AVI
Picture Format
.JPEG

DVlite User Guide
7
Frames per Second
>30fps
Playback Software
QuickTime, Windows Media Player, VLC
Player
Video Resolution
640x480 – VGA
Support System
98SE/Windows ME/2000/XP/Vista/Win7
Lighting
White
Audio
Integrated Microphone
Size
138x36x24mm / 5.43x1.4x0.94inches
Weight – (with battery)
100grams / 3.52 ounces
Safety and Care
•Do Not use chemical or solvents to clean the DVlite as they may damage the
finish or operability of the device. Only use a damp cloth to clean the DVlite.
•Not Waterproof – do not submerge in water or use in the rain.
•Only Use the provided charger to recharge the DVlite’s batteries. Using an
incorrect charger may damage the unit or cause a fire.
•Do Not disassemble or attempt to modify any part of the DVlite – no replacement
parts are available.
•Do Not fully discharge the units batteries. Once the batteries have been
completely discharged, they cannot be recharged again. Safety precautions have
been installed to prevent this from happening, but if the DVlite automatically turns
off because of low poer, do not attempt to use it until it has been charge again.
•Do Not shine the light directly into anyone’s eyes.
•Do Not direct the laser at anyone’s eyes – May cause blindness

DVlite User Guide
8
•Transfer Data to your computer as soon as possible to avoid losing or damaging
files.
•Do Not attempt to use the device while it is saving data – this could cause
corruption of the data.
WARNING: Owner accepts all responsibility for the DVlite’s use. ElectroFlip.com
assumes no responsibility for damages or penalties incurred resulting from the
unauthorized use of the product.
Accessories
Flashlight DVR Recorder
Rechargeable Li-Battery
USB Cable
Charger
User Guide
Troubleshooting
1. Device won’t turn on?
Ensure battery power is charged.
2. Can’t connect to a PC
and download images or
video files?
Check USB cable connection with computer, this product uses
standard 5pin USB cable; you can also replace the USB cable
and re-connect.
3. Camera won’t Record?
Open the LED light, if the LED lights works, the DV button
works. If it doesn’t work, test it after recharged.
If there are
questions, please contact the factory or place where you
purchase.

DVlite User Guide
9
4. Video without sound?
Microphone is located inside the rubber ring which is at the
head of the flashlight. Ensure rubber ring holes and the inside
microphone are positively aligned, the camera will have sound.
5. Battery cannot be
properly recharged?
Ensure that the battery compartment and the battery cap are
connected. Then connected the battery charger to the cap and
make sure battery charger red light illuminates.
All information and instructions included in this manual are current as of July, 2011. However,
due to the fluid nature of advancing technology, some characteristics may change or need
modifications in the future. Should you encounter any problems or have any further questions
about your purchase, please visit us at www.ElectroFlip.com and visit the contact us page.
This document is property of ElectroFlip LLC. No unauthorized reproductions allowed.
Table of contents
