NOTICE: Always be sure the grinding burrs are not
touching while the machine is running on the
ESPRESSO/TURKISH setting. Otherwise serious damage
to the motor may result.
Cleaning & Maintenance
Protection
This grinder is equipped with both a circuit breaker and
a shear disc or shear pin to protect motor and burrs.
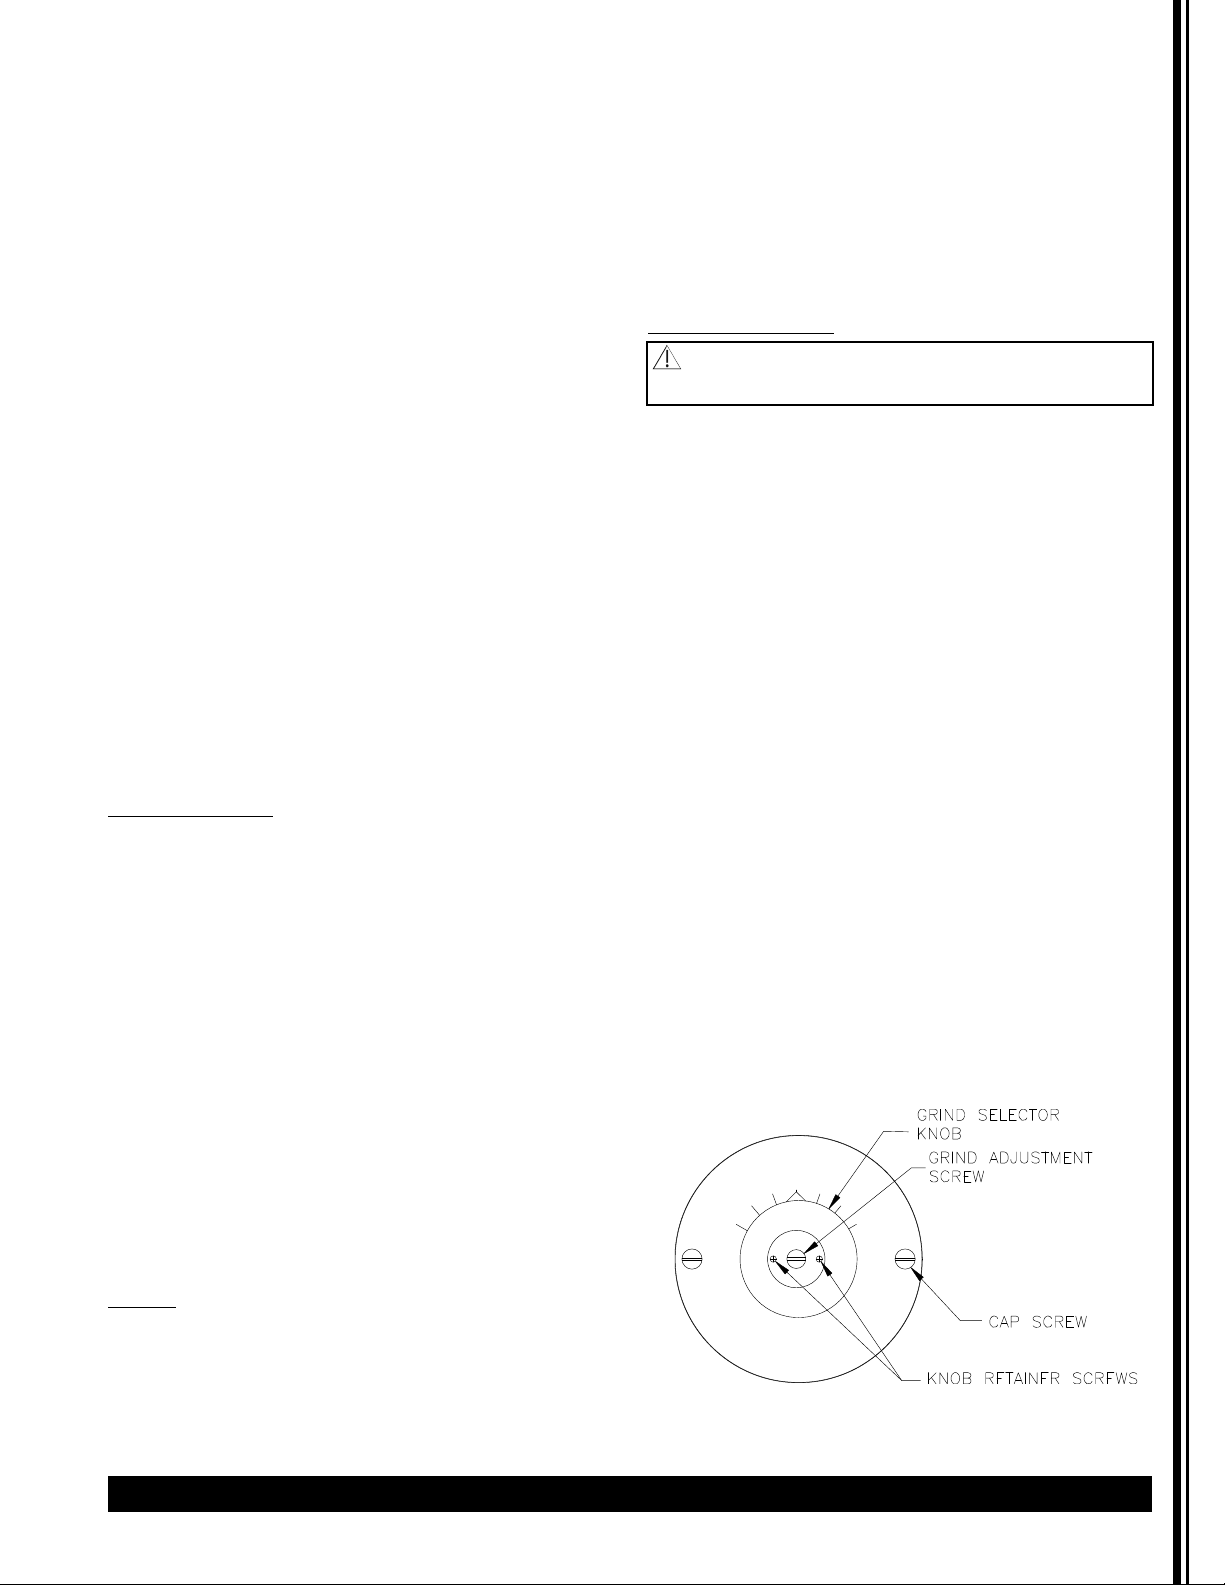
Circuit Breaker
This grinder is equipped with a circuit breaker to
protect the motor from overloading. When the circuit
breaker trips, the reset button will pop out
approximately 1/4” (1 cm) which stops the power to the
grinder. The reset button is located on the front panel
of the Model 810, 835 and 875. To reset the circuit
breaker, wait two minutes then push in the reset
button. You will hear a click as it resets. If the grinder
does not operate after resetting the circuit breaker,
there may be an obstruction in the grinding
mechanism that is stalling the motor. Turn the grind
selector knob all the way to the left. Try restarting the
grinder. If the circuit breaker “trips” again, the
obstruction was not able to pass. In this case, the
Grinder Head should be cleaned out as described in the
Shear Disc Replacement section of this manual.
Cleaning Instructions
NOTICE: The person cleaning the parts should do so
with clean hands.
The outside of the machine can be cleaned with warm
soapy water and a damp cloth.
Grinding parts should be cleaned with a stiff brush or
dry cloth. DO NOT USE WATER. See Shear Disc
Replacement for instructions on assembling and
disassembling grinder parts. Before reassembling, wipe
motor shaft with dry cloth.
All other parts that are in contact with food must be
washed with warm soapy water, rinsed, and air-dried.
Lubrication
None required.
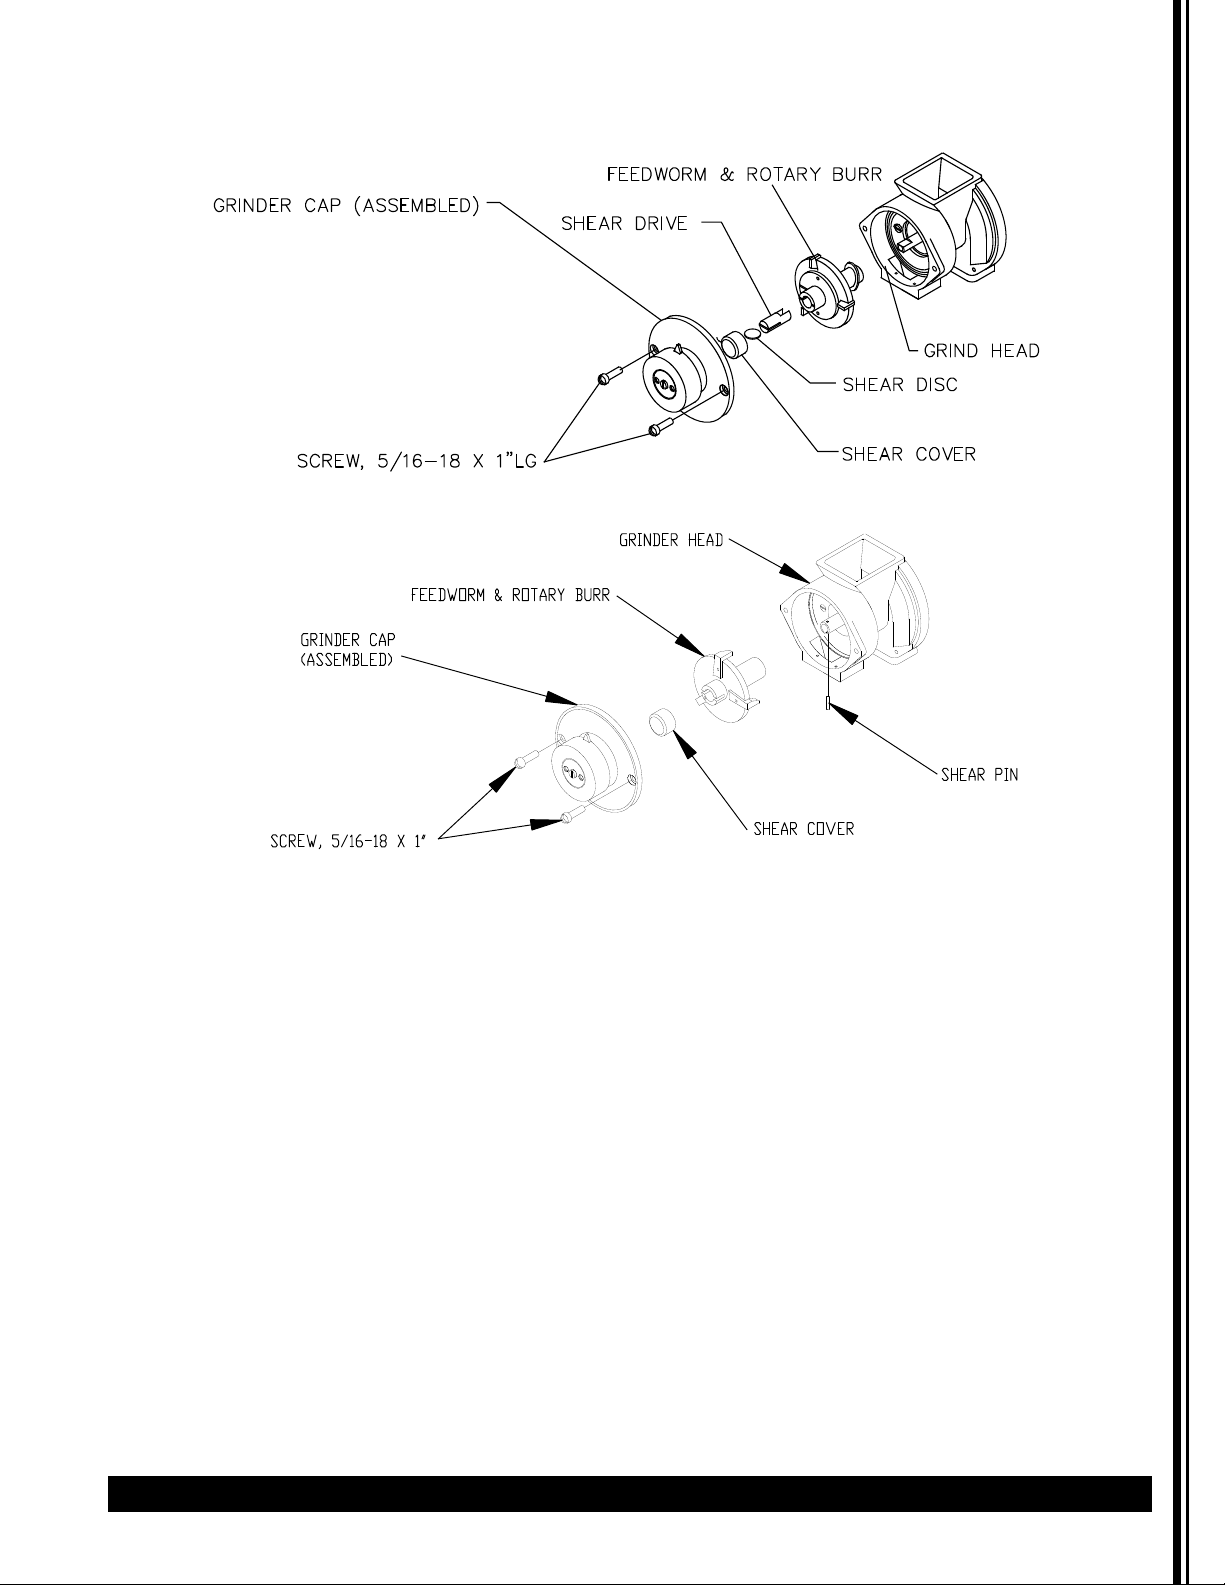
Shear Disc Replacement
If the motor should run and no coffee is dispensed, the
Shear Disc or Shear Pin may have sheared. Should this
occur, perform the following operations in the
sequence given (refer to following drawings).
Tools Required: Slotted Screwdriver
Pliers
1. Remove all of the coffee beans from the
hopper.
2. Remove the Grinder Cap by taking out the
2 Cap Screws.
3. (Model 890) Turn Feedworm Assembly such
that the slot in the assembly is vertical then
push inward to release the Shear Pin.
4. Pull out the Rotary Burr and Feedworm
Assembly. Clean out the Grinder Head,
removing all coffee particles from inside of
the Grinder Head and the Grinder Cap so
that it can be reset properly.
5. Check that no obstruction has been caught
on the surface of the teeth of either burr.
Remove the Shear Cover and broken pieces
of the Shear Disc or Shear Pin. You are now
ready to reassemble the grinder
mechanism.
6. Slide the Rotory Burr and Feedworm
Assembly onto the Drive Shaft.
(Model 810, 835, 875) Insert the shear drive
so that the Motor Shaft tongue engages
into the shear drive notch.
7. (Model 810, 835, 875) Insert a new Shear
Disc by aligning the slot in the Shear Drive
with the slot in the hub of the Feedworm.
(Model 890) Align slot in Feedworm
Assembly with the hole in the motor shaft.
Install new Shear Pin.
8. Reassemble the Shear Cover and Grinder
Cap. Make certain the Grinder Cap is
screwed on tight and is sealed properly
against the head and not tilted or
misaligned. Otherwise, a proper grind
cannot be obtained.
9. Your grinder is now ready to grind.
(See drawings next page)
Operation (continued)
8 Electrolux 800 Series Coffee Grinders