manuals.online logo
Brands
  1. Home
  2. •
  3. Brands
  4. •
  5. Electrolux
  6. •
  7. Cooktop
  8. •
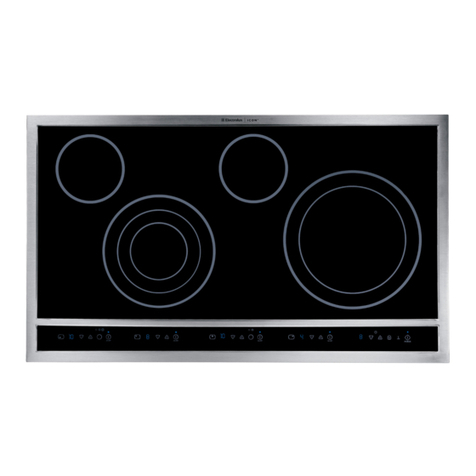
  9. Electrolux E30EC65ESS1 User manual

Electrolux E30EC65ESS1 User manual

This manual suits for next models

4

Other Electrolux Cooktop manuals

Electrolux Libero Line 601610 User manual

Electrolux

Electrolux Libero Line 601610 User manual

Electrolux EW30GC60IS2 User manual

Electrolux

Electrolux EW30GC60IS2 User manual

Electrolux E36GC75GSS - Icon 36 Inch Slide-In Gas... Quick start guide
Electrolux

Electrolux E36GC75GSS - Icon 36 Inch Slide-In Gas... Quick start guide

Electrolux EGT7826CKP User manual

Electrolux

Electrolux EGT7826CKP User manual

Electrolux EI24GC15KS User manual

Electrolux

Electrolux EI24GC15KS User manual

Electrolux EW30EC55GB - 30" - Electric Cooktop User instructions

Electrolux

Electrolux EW30EC55GB - 30" - Electric Cooktop User instructions

Electrolux 36" Ceramic User manual

Electrolux

Electrolux 36" Ceramic User manual

Electrolux EW36IC60I - 36 in. Induction Cooktop User manual

Electrolux

Electrolux EW36IC60I - 36 in. Induction Cooktop User manual

Electrolux GK69TSIO User manual

Electrolux

Electrolux GK69TSIO User manual

Electrolux GC58V User manual

Electrolux

Electrolux GC58V User manual

Electrolux E36EC65ESS2 User manual

Electrolux

Electrolux E36EC65ESS2 User manual

Electrolux EW30EC55GS - 30" Electric Cooktop User manual

Electrolux

Electrolux EW30EC55GS - 30" Electric Cooktop User manual

Electrolux EW30IC60LS User manual

Electrolux

Electrolux EW30IC60LS User manual

Electrolux EW36EC55GS2 User manual

Electrolux

Electrolux EW36EC55GS2 User manual

Electrolux ARG24FLCE User manual

Electrolux

Electrolux ARG24FLCE User manual
Electrolux 318 200 687 User manual

Electrolux

Electrolux 318 200 687 User manual

Electrolux EHH957BE User manual

Electrolux

Electrolux EHH957BE User manual

Electrolux EW36CC55GB - 36 Inch Hybrid Induction... User manual

Electrolux

Electrolux EW36CC55GB - 36 Inch Hybrid Induction... User manual

Electrolux GAS COOKTOP User manual

Electrolux

Electrolux GAS COOKTOP User manual

Electrolux E46GC66ESS User manual

Electrolux

Electrolux E46GC66ESS User manual

Electrolux E36EC75HSS3 User manual

Electrolux

Electrolux E36EC75HSS3 User manual

Electrolux E36GC75E - Icon Cooktops User manual

Electrolux

Electrolux E36GC75E - Icon Cooktops User manual

Electrolux EW30EC55G - 30" Electric Cooktop User manual

Electrolux

Electrolux EW30EC55G - 30" Electric Cooktop User manual

Electrolux E36GC75GSS - Icon 36 Inch Slide-In Gas... User manual

Electrolux

Electrolux E36GC75GSS - Icon 36 Inch Slide-In Gas... User manual

Popular Cooktop manuals by other brands

Fisher & Paykel CE302CBX2 manual

Fisher & Paykel

Fisher & Paykel CE302CBX2 manual

Whirlpool GJC3634RB00 parts list

Whirlpool

Whirlpool GJC3634RB00 parts list

Whirlpool ACH7324/BLV Use, care and installation guide

Whirlpool

Whirlpool ACH7324/BLV Use, care and installation guide

Frigidaire Professional FPDF4085KF Important safety instructions

Frigidaire

Frigidaire Professional FPDF4085KF Important safety instructions

Bonnet OPTIMUM 700 Technical instructions

Bonnet

Bonnet OPTIMUM 700 Technical instructions

Jenn-Air JGCP430 installation instructions

Jenn-Air

Jenn-Air JGCP430 installation instructions

Bompani BO374AA/E User instructions

Bompani

Bompani BO374AA/E User instructions

Kleenmaid cooking GCTK9011 Instructions for use and warranty details

Kleenmaid

Kleenmaid cooking GCTK9011 Instructions for use and warranty details

Waldorf RN8603E-B Technical data sheet

Waldorf

Waldorf RN8603E-B Technical data sheet

Whirlpool SMP658CNEIXL quick guide

Whirlpool

Whirlpool SMP658CNEIXL quick guide

Wolf CI243C/B Use and care guide

Wolf

Wolf CI243C/B Use and care guide

Fulgor Milano F5PGK305S1 installation instructions

Fulgor Milano

Fulgor Milano F5PGK305S1 installation instructions

Wells WV-2HFG owner's manual

Wells

Wells WV-2HFG owner's manual

Samsung NA36N9755 installation manual

Samsung

Samsung NA36N9755 installation manual

Miele KM 404 operating instructions

Miele

Miele KM 404 operating instructions

Lacor 69562 Instructions for use and maintenance

Lacor

Lacor 69562 Instructions for use and maintenance

Keating Of Chicago MG-2 manual

Keating Of Chicago

Keating Of Chicago MG-2 manual

Jenn-Air CCE1400 Use and care guide

Jenn-Air

Jenn-Air CCE1400 Use and care guide

manuals.online logo
manuals.online logoBrands
  • About & Mission
  • Contact us
  • Privacy Policy
  • Terms and Conditions

Copyright 2025 Manuals.Online. All Rights Reserved.

se _ Care Gui e
9/8 200 625 (0505) Rev. B
iii ,oformo,ioo
}{ }} } { {{} Brand
Purchase Date
ModeI Numbe r
Serial Number
2_ o
[]oooooooooooooooooo
........................................................................................................................................................................................................................For tolbfree telephone support in the U.S. and Canada:
1o877-4ELECTROLUX (1-877-435-3287)
For online support and [nternet product information:
www.electrolu×°corn
@2005 Electrolux Home Products, Inc.
Post Office Box 212378, Augusta, Georgia 30917, USA
All rights reserved. Printed in the USA
TABLEO/©ONH
[] [] [] [] [] [] [] [] [] [] [] [] [] [] [] [] [] [] [] [] [] []
Finding Infocmation ..........................................2-3
Makea RecordforFutureuse.................................2
Questions?...............................................................2
Safety ..................................................................4-6
importantSafetyinstructions.....................................4
Setting SucfaeeContcob ................................7-13
AbouttheCeramicGlassCooktop............................7
AbouttheRadiantSurfaceElements.........................7
LocationsoftheRadiantSurfaceEbments...............8
SurfaceCookingSettings..........................................8
TheElectronicSurfaceElement
Control(ESEC)........................................................9
OperatingtheSingleSurfaceRadiantElements...... 10
OperatingtheDua!SurfaceRadiantEbments.........11
OperatingtheTripleSurfaceRadiantElement........12
SurfaceCookingutensils........................................13
CookwareMaterialTypes......................................13
GenecalCace& Cleaning...............................14-16
Care&CleaningTable...........................................14
CooktopCleaningandMaintenance.......................15
CbaningRecommendationsforthe
CeramicGlassCooktop.....................................15=16
Care&Cleanin9dStainlessSteel.........................16
Solutions to Common Pcobbme..................17-19
EntireCooktopDoesNotOperate..........................17
SurfaceElementDoesNotHeat.............................17
SurfaceEbmentTooHotor NotHotEnough..........17
FoodNotHeatingEvenly.......................................18
ScratchesorAbrasionsonCeramic
GlassCooktopSurface...........................................18
MetalMarksonCeramicGlass
CooktopSurface....................................................18
BrownStreaksandSpecksonCeramicGlassCooktop
Surface..................................................................18
AreasofDiscolora%nonCeramic
GlassCooktopSurface...........................................19
WaccantyInfocmation.........................................20
IIIM ANTS£FE IIINS U ONS
[] [] [] [] [] [] [] [] [] [] [] [] [] [] [] [] [] [] [] [] [] []
o Remove aHtape and packaging wrap before using the appliance. Destroy the carton
and plastic bags after unpacking the appliance. Never allow children to play with
packaging material,
o Proper Installation. Be sure your appliance is properJy installed and grounded by a
qualified technician in accordance with the NationaJ ElectrieaJ Code No. 70 -tatest
edition in the United States, or CSA 022.1, Part 1 in Canada, and tocaJ code
requirements. Install only per installation instructions provided in the literature package for
this appliance,
Ask your dealer to recommend a qualified technician and an authorized repair service, Know
how to disconnect the electrical power to the appliance at the circuit breaker or fuse box in
case of an emergency,
User Servicing. Do not repair or reptace any part of the appliance unless specifically
recommended in the manuaJs. All other servicing should be done only by a qualified
technician to reduce the risk of personal injury and damage to the appliance,
Never modify or aJter the construction of an appJia rice such as removaJ of panets, wire
covers or any other permanent part of the appliance.
Storage on Appliance. Flammable materiaJs shouJd not be stored near surface units.
This includes paper, plastic and cloth items, such as cookbooks, plasticware and towels, as
well as flammable liquids, Do not store explosives, such as aerosol cans, on or near the
appliance, Flammable materials may explode and result in fire or property damage,
, Donotteavechildrenalone,Childrenshouldnotbeteftaloneorunattendedin the
areawhereanapplianceis in use.Theyshouldneverbeallowedtositorstandonany
partoftileappliance,
o DONOTTOUCHSURFACEUNITSORAREASNEARTHESEUNITS.Surfaceunitsmay
behoteventhoughtheyaredarkincolor,Areasnearsurfaceunitsmaybecomehotenough
tocauseburns,Duringandafteruse,donottouch,orletclothingorotherflammablematerials
touchtheseareasuntiltheyhavehadsufficienttimetocool,Amongtheseareasarethe
ceoktopandareasfacingthecooktop,
oWear Proper Apparet. Loose-fitting or hanging garments shoutd never be worn while
using the appliance. Do not let clothing or other flammable materials contact hot surfaces,
o Do Not Use Water or Flour on Grease Fires. Smother the fire with a pan tid, or use
baking soda, a dry chemica! or foam-type extinguisher.
o When heating fat or grease, watch it cloeety. Fat or grease may catch fire if allowed to
become too hot,
o Use Onty Dry Pot holders, Moist or damp pot holders on hot surfaces may reeuJt in
burns from steam. Do not let the pot holders touch hot surface units, Do not use a towel or
other bulky cloth instead of a pot holder.
o Do Not Heat Unopened Food Containers. Buitdup of pressure may cause the container
to burst and result in injury.
]MPORTANT. Donotattempttooperatethecooktopdur]ngapowerfai_ute, If the power
falls, always turn off the cooktop. Ifthe coektop is not turned off and the power resumes, the
cooktop will not operate and an error message will be displayed,
IMPORTANT SAFETY INSTRUCTIONS FOR USING YOUR COOKTOP
o Know which knob controls each surface unit.
o Clean the appJiance reguJaHy to keep aH parts free of grease that couJd catch fire.
Exhaust fan ventilation hoods and grease filters should be kept clean, Do not allowgrease to
accumulate on hood or filter, Greasy deposits in the fan could catch fire, When flaming food
under the hood, turn fan on, Refer to hood manufacturer's instructions for cleaning,
o Use Proper Pan Size, This appliance is equipped with one or more surface units of different
sizes, Select utensils having fiat bottoms large enough to cover the surface unit, The use of
undersized utensils will expose a portion of the surface heating unit to direct contact and may
result in ignition of clothing, Proper relationship of utensil to element will also improve
efficiency,
o UtensilHandles Should Be Turned inward and Not Extend Over Adjacent Surface
Units, To reduce the risk of burns, ignition of fiammabHe materiaHs, and spHHagedue to
unintentionaH contact with the utensil,
Never Leave Surface Units Unattended. BoHovers cause smoking and greasy spHHovers
that may ignite, or a pan that has boiled dry may merit,
Protective Liners. Do not use aHuminum foil to Hne any part of the appliance, OnHyuse
aHuminumfoil as recommended for baking ifused as a cover pHacedon the food, Any other use
of protective Hinersor aHuminumfoiHmay resuHtin a risk of eHectricshock or fire or short circuit,
GJazed Cooking Utensils, OnHy certain types of gHass, gHass/ceramic, ceramic,
earthenware, or other gHazedutensiHsare suitabHefor range top service without breaking due
to the sudden change in temperature, Check the manufacturer's recommendations for
cooktop use,
Do Not Use Decorative Surface Element Covers. if an element is accidentally turned on,
the decorative cover will become hot and possibly melt, Bums will occur ifthe hot covers are
touched, Damage may also be done to the appliance,
• Ventilating hood. The ventilating hood above your cooking surface should be cleaned
frequently, so the grease from cooking vapors does not accumulate on the hood or filter,
FOR CERAMIC-GLASS COOKTOP ONLY
Do Not Clean or Operate a Broken Cooktop. Hfcooktop shouHdbreak, cHeaning soHutions
and spiHHoversmay penetrate the broken cooktop and create a risk of eHectricshock, Contact
a quaHifiedtechnician immediateHy,
CJean Cooktop with Caution. if a wet sponge or cloth is used to wipe spills on a hot cooking
area, be careful to avoid a steam burn, Some cleaners can produce harmful fumes ifapplied
to a hot surface,
Do Not Place Hot Cookware on Cold Cooktop Glass. This couHdcause gHassto break,
Do not slide pan across the cooktop surface. They may scratch the cooktop surface,
,Do Not Let Pans Boll Dry. This may cause permanent damage in the form of breakage,
fusion, or marking that can affect the ceramic=gHass cooktop, (This type of damage is not
covered by your warranty).
ABOUTTHEC AMIICASSOOOK P
[] [] [] [] [] [] [] [] [] [] [] [] [] [] [] [] []
The ceramic cooktop has radiant surface elements located below the
surface of the glass, The design of the ceramic cooktop outlines the area
of the surface element underneath, Make sure the diameter of the pan
matches the diameter of the element outline on the cooktop (See Figs, 1
a2),
Heatis transferred up through the surface of the cooktopto the cookware,
Only flat-bottom cookware should be used, The type and size ofcookware,
the number of surface elements inuse and their settings are all factors that
will affect the amount of heat that will spread to areas beyond the surface
elements, The areas surrounding the elements may become hot enough
to cause burns.
[] [] [] [] []
Fig,1-SO"Model-Co0ktopAppearance
ABOUTTHERADIII£NTSU ACE
[] [] [] [] [] [] [] [] [] [] [] [] [] [] [] [] [] [] [] [] [] []
The element temperature rises gradually and evenly, As the temperature rises, the element wiii
9low red, To maintain the selected setting, the element will cycle OX and OFF, The heating
element retains enough heat to provide a uniform and consistent heat during the OFFcycle, For
efficient cooking, turn OFF the element several minutes before cooking is complete, This will ............................
allow residuaH heat to compHete the cooking process,
LOCATIONSOF°FHESURFACERADIANTELEMENTS
[] [] [] [] [] [] [] [] [] [] [] [] [] [] [] [] [] [] [] [] [] []
30" cooktop
36" cooktop
Your cooktop is equipped with radiant surface burners with different wattage
ratings, The ability to heat food quicker and in UargervoUumes increases as
the eUementwattage increases,
The radiant surface eUements are Uocatedon the 30" cooktop as follows:
-2 small 6 inch radiant eUementsUocatedat the right and Ueftrear positions;
-2 duaJ5 to 7 inch radiant eUementsUocatedat the right and Ueftfront positions;
-1 triple 5, 7 or 9 inch radiant elements located at the center rear position;
The radiant surface elements are located on the 36" cooktop as follows:
-2 small 6 inch radiant elements located at the right and left rear positions;
-2 duaJ6 to 9 inch radiant elements located at the right and left front positions;
-1 triple 5, 7 or 9 inch radiant elements located at the center rear position;
SURFACECOOKINGSETF NGS
[] [] [] [] [] [] [] [] [] [] [] [] [] [] [] [] [] [] [] [] [] []
Use the chart to determine the correct setting for the type of food you are preparing.
Recommended Settings for Surface Elements
Setting Type of Cooking
HIGH (HI) Start most foods; bring water to a boil and pan broiling,
MEDIUM HIGH (8-10) Continue a rapid boil; frying, deep fat frying,
MEDIUM (6) Maintain a slow boil; thicken sauces and gravies; steaming
vegetables,
MEDIUM LOW (2 - 4) Keep foods cooking; poaching and stewing,
LOW (LO) Keep warm, melting and simmering,
Note: The size and type of cookware used will influence the setting needed for best cooking
results.
°MEELECTRONICSURFACEELEMENTCON OL(ESEC/
[] [] [] [] [] [] [] [] [] [] [] [] [] [] [] [] [] [] [] [] []
The Electronic Surface Element Control ("ESEC') feature includes 5
digital display windows, The ESEC feature provides a numeric digital
setting for the 5 radiant surface element positions on the cooktop, These
settings work the same way as normal knob setting indicators work
except the settings are displayed in digital windows (Figs, 1 thru 4),
The available ESEC Display Settings
The ESECcontrol provides various heat levels from Hi (Fig, 2) to Lo (Fig,
4) and OFF (Fig, 1), The settings between 9.5 and 3.0 decrease or
increase in increments of,5 (1/2), The settings between 3.0 and ! .2 are
Simmer settings which decrease or increase in increments of ,2(1/5) to
Lo (Figure 4_lowest Simmer setting) for more precise settings at lower
heat levels, Use the Recommended Surface Setting Chart to determine
the correct setting for the kind of food you are preparing,
Note: The size and type of cookware used will influence the setting
needed for best cooking results,
LO OFF HI
Fig, 1
OFF HI
Fig. 3
LO
Fig, 2
Fig, 4
ESEC Power Failure Indicator f_essage (PF}
When the range isfirst plugged in or when the power supply to the range has been interrupted,
the ESEC control will display the message "PF" (Power Failure; See Fig, 5),After a few seconds
the "PF" message will disappear from the display,
ESEC Hot Element Indicator Message (HE}
After using any of the single, dual or triple radiant element positions the cooktop will become
very hot. Even after turning the control knob to OFF, the cooktop will remain hot for some time.
The ESEC control monitors the temperatu re ofthe cooktop and displays the message"H E" (hot
element) warning when the cooktop is still too hot to touch (See Fig.6). if the HE message
appears in the window, the control can still be turned ON again for use.
ESEC Error Indicator Message (Er)
An error message will be displayed (gnowing "E¢') at power up (or after a power failure) if ANY
of the surface control knobs were left in the ON positions (See Fig. 7). if a power failure should
occur, be sure to set all of the surface control knobs to the OFF position. This will reset the
surface controls.
Once the sutrace controls have been set to the OFF positions, the surface controls should return
to normal operation, ifthe surface controls do not function and the"E€' message remains in any
display after following these procedures, contact your authorized servicer for assistance.
Fig. 5
Fig, 6
Fig. 7
Fig.1
Fig.2
iiiiiiiiiiiiiiiiiiiiiiiiiiiiiiiiiiiiiiiiiiiiiiiiiiiiiiiiiiiiiiiiiiiiiiiiiiiiiiiiii iii iii iii iii iii iii iii iii iii iii iii iii iii iii iii iii iii iii iii iii iii iii iii iii iii iii iii iii iii iii iii iii iii iii iii iii iii iii iii iii iii iii iii iii iii iii iii iii iii iii ii! i
O?EB£T NGTHES NGLESUBFAOEBAD ANTELEMENTS
[] [] [] [] [] [] [] [] [] [] [] [] [] [] [] [] [] [] [] [] [] []
The cooktop has single radiant surface elements at 2 Iocationsl the right and left rear
(Figs. 1 & 2) element positions.
To Operate the Single Surface Element
1. Place correctly sized cookware on the radiant surface
element.
2. Push in and turn the surface control knob in either
direction to the desired setting using the ESEC digital
display window to verify (Fig.3). Turn the knob to adjust
the setting as needed.
3. Start most cooking operations on a higher setting and
then turn to a lower setting to finish cooking. Each
surface element provides a constant amount of heat at
each setting. A glowing red surface heating area extending
beyond the bottom edge of the cookware indicates the
cookware is too ernaH for the surface heating area.
4. When cooking has completed, turn the surface control
knob to OFF before removing the cookware. Note: The
surface" Element On" indicator lights wiii glow when one
or more elements are turned on. A quick glance at these
indicator lights when cooking is finished is an easy
check to be sure all surface elementsare turned off. Also,
the HE message will appear inthe displayafter turning the
control knob to 0 FF ifthe cooktop isstill hot and remain on
until the heating surface area has cooled sufficiently.
Fig. 3