Electrolux AEG PWE3810-M User manual

PWE3810-M
User Manual Refreshment Centre

2 Contents
Contents
Safety information 2
Applian e des ription 4
Main omponents 4
Rating plate 5
Te hni al spe ifi ations 6
Pa kage ontent 6
Installation 7
Unit positioning 7
Unit onne tion 12
Usage 16
Maintenan e and leaning 17
Signals for users 23
What to do if... 24
Environment on erns 25
Safety information
Fundamental safety warnings
Warning The applian e must be earthed in omplian e with legislation. Ele tri al and Water
onne tion must be arried out by qualified te hni ians following the instru tions
Warning Keep all pa kaging (plasti bags, polystyrene foam) away from hildren
Warning The applian e is not to be used by people (in luding hildren) with redu ed physi al,
sensory or mental apabilities, or la k of experien e and knowledge, unless they have been given
supervision or instru tion on erning use of the applian e by a person responsible for their safety
Warning In order for hildren not to play with the applian e, a lose supervision is required
Warning Do not grasp the applian e when it is out of the abinet. Do not rest re ipients
ontaining liquids or inflammable or orrosive materials on top of the applian e
Warning Do not use the applian e when extra ted, ex ept for installation, maintenan e and “What
to to do if...” se tions. For any other operation make sure the applian e is ina tive
Warning Water leakage will o ur when the dis harge tap is open
Instru tions
Read these instru tions arefully before using the applian e.
•Keep the instru tions
•Failure to respe t these instru tions may result in injuries or in damages to the applian e
The manufa turer is not liable for damage deriving from failure to respe t these instru tions
Use original or manufa turer re ommended a essories and spare parts only.

Safety information
3
Designated use
Warning This is a household applian e only
It is not intended to be used in:
•Staff kit hen areas in shops
•Offi es and other working environments
•Farm houses
•By lients in hotels, motels, and other residential type of environments
•Bed and breakfast type of environments
The applian e is designed and made to supply water and i e. Other uses are onsidered improper. This
applian e is not suitable for ommer ial use. The manufa turer is not liable for damage deriving from
improper use of the applian e.
Ele tri al safety
Warning The applian e must be earthed in omplian e with legislation. Ele tri al onne tion
must be arried out by qualified te hni ians following the instru tions
Warning This is an ele tri al applian e, it is therefore important to respe t the following safety
warnings:
•Never tou h the plug with wet hands.
•Make sure the so ket is freely a essible at all times, enabling the applian e to be unplugged when
ne essary.
•If the applian e is faulty, do not attempt to repair it. Turn it off using the power swit h, unplug from
the main so ket and onta t your lo al Servi e For e Centre.
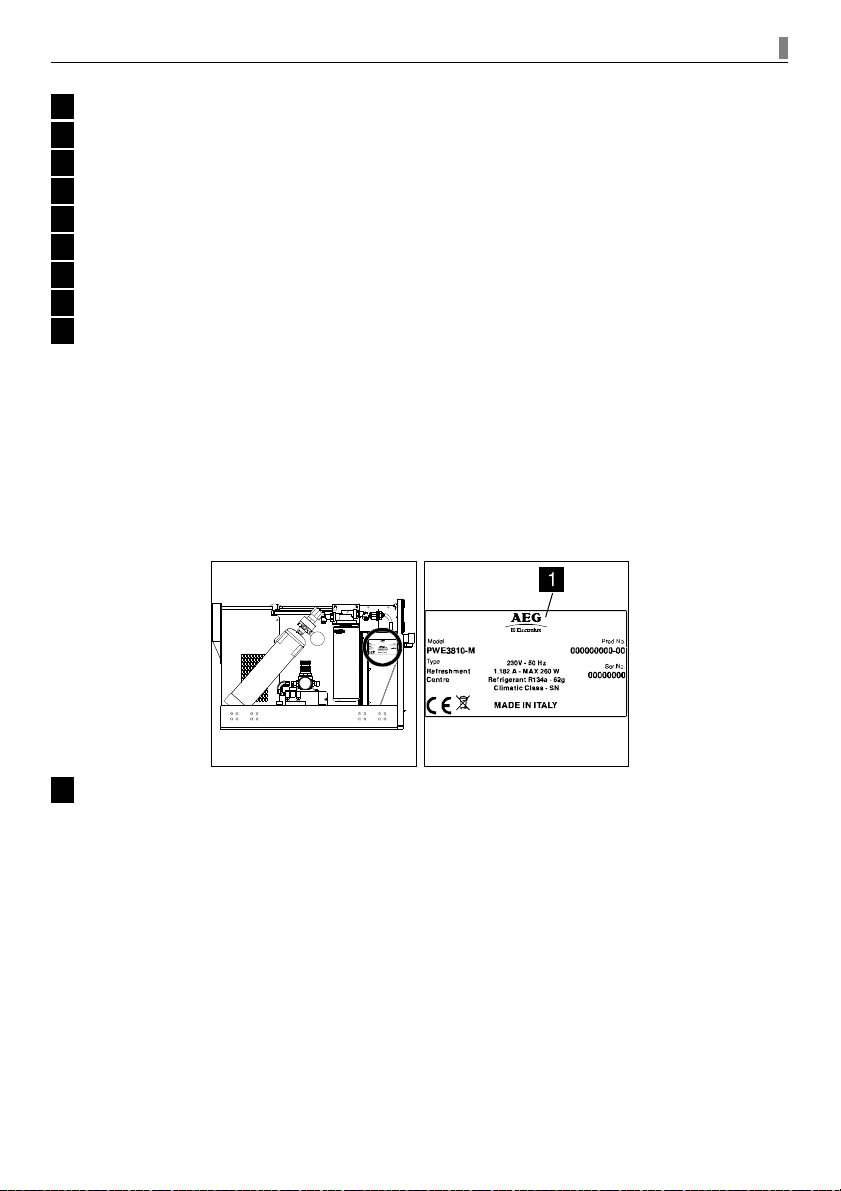
Che k that the main power supply voltage orresponds to the value indi ated on the rating plate on the
left side of the applian e. Conne t the applian e to an effi iently earthed and orre tly installed so ket.
If the power so ket does not mat h the plug on the applian e, have the so ket repla ed with a suitable
type by a qualified professional. Do not use multiple so kets or extensions.
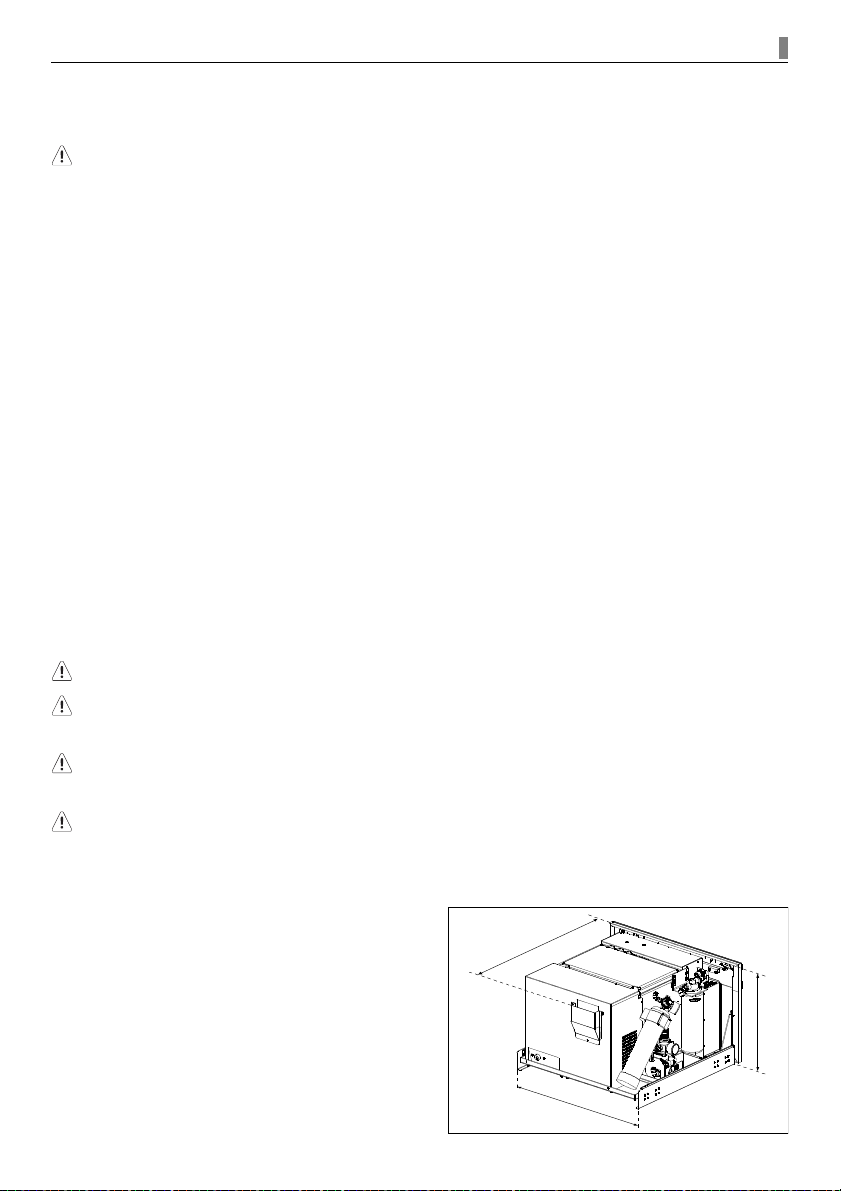
During installation and Use
Warning Move the applian e arefully in order not to damage omponents of the refrigeration
ir uit and to avoid gas leaks
Warning Avoid prolonged exposure of the applian e to dire t sunlight
Warning When installing the applian e do not over bend hoses
After removing the pa kaging, make sure the produ t is omplete and undamaged and that all
omponents are present.
Do not use the applian e if it is visibly damaged. Conta t your lo al Servi e For e Centre.
•Installation must be arried out by qualified professional in omplian e with legislation in for e in
the ountry of installation.
•The pa king elements (plasti bags, polystyrene foam, et .) should be kept out of rea h of hildren.
•Do not install the applian e in rooms where the temperature may raise up to 35°C or above.

4 Safety information
Surfa e treatment
Warning Before performing any washing operation, the applian e must be swit hed off and
unplugged from the power supply
Warning Do not use solvents or abrasive detergents.
A soft damp loth will suffi e
Environmental prote tion
Ele tri al applian es must not be disposed of as household waste. Applian es with this symbol are
overed by European Dire tive 2002/96/EC. All unused ele tri and ele troni applian es must be
disposed of separately from household waste and taken to ountry-authorised spe ial entres.
Appliance description
Refreshment Centre is a household applian e that refrigerates, purifies and arbonates the water from
the mains and makes i e shards.
Its two nozzles dispense:
•Ambient water
•Cold sparkling water
•Cold still water
•I e shards
Main components
Refreshment Centre's main omponents
1Stainless steel front frame
2Water dis harge nozzle
3Water dispense nozzle
4Control panel (i ons and LEDs)
5I e dispensing nozzle
6Drip tray
7CO pressure redu er₂

Main components
5
8Filter head
9CO bottle₂
10Water pressure redu er
11Water dis harge tap
12Water inlet
13Filter artridge
14Rating plate
15Power swit h
16Power supply so ket
Rating plate
Under no ir umstan es should you attempt to repair the ma hine yourself. Repair arried out by
inexperien ed people ould ause injury or serious malfun tioning. Conta t your lo al Servi e For e
Centre. Always insist on genuine spare parts.
When onta ting your lo al Servi e For e Centre, you will be asked to give the data and the feature
information of the Refreshment Centre, to be found in the rating plate on the left side of the applian e.
1Rating plate

6 Technical specifications
Technical specifications
Te hni al spe ifi ations
Power Supply Voltage 230-240 V
Frequen y 50 Hz
Power onsumption MAX 260 W
Cold still water dispense apa ity 2lt @ 1 l/min.
Cold sparkling water dispense apa ity 2lt @ 1 l/min.
I e shards 200g / 2h
Dispense temperature < 13°C
Water mains pressure (water inlet) > 0.2 MPa (> 2 bar), < 0.6 MPa (< 6 bar)
CO pressure₂> 0.25 MPa (> 2.5 bar), < 0.40 MPa (< 4 bar)
Filtration 0.5 mi ron
Filter apa ity 2840 litres
Climati lass SN (> +10°C, < +32°C)
Dimensions W x D x H 594x578x378 mm
Weight 34 Kg
Refrigerant gas R134a – 62gr
Package content
After removing the pa kaging, make sure the produ t is omplete and undamaged and that all
omponents are present.
Move it arefully avoiding sho ks or downfalls that may damage the refrigeration ir uit.
The pa kage ontains the following material:
•Refreshment Centre
•2 sliding rails
•Spa ers 2x1mm, 2x2mm, 2x3mm
•2 support bra kets
•Frontal spa er
•Water inlet hose
•Filter artridge
•Plasti hose for water tank dis harge
•Re hargeable CO bottle with adapting jun tion or disposable CO bottle₂ ₂
•CO pressure redu er₂
•Cleaning artridge
•Neutral detergent
•Safety strip to fix CO bottle₂
•8 4.5x16mm self threading s rews for support bra kets
•4 M6x12 ir ular spa ers
•3 M4x12 s rews for frontal spa er
•2 M4x12 s rews to fix the Refreshment Centre to sliding rails

Installation
7
Installation
Warning It is ne essary to install the applian e properly. The power supply and water onne tion
data in the Te hni al Spe ifi ations hart must be observed
Unit positioning
•Che k for minimum requirements
•Spa ers installation
•Support bra kets installation
•Sliding rails installation
•Positioning in the kit hen abinet
•Frontal spa er installation
Unit onne tion
•Se ure water dis harge tap
•Pressure redu er first installation
•CO bottle first installation₂
•Water mains onne tion
•Filter artridge first installation
•Ele tri al onne tion
Unit positioning
Warning The installation of the produ t should be made above the level of the water mains
Warning To ensure proper ventilation, leave a gap at the bottom of the abinet (see
measurements in the drawing)
Warning The installation of the Refreshment Centre in dire t onjun tion with an oven might
ause performan e redu tion
Warning Safety ut-out devi es must be fixed properly so that they annot be removed without
tools
Che k for minimum requirements
Verify the minimum measurements required for a
orre t installation of the applian e.
560 mm
378 mm max
558 mm max

8 Unit positioning
The Refreshment Centre must be installed in a abinet
and the abinet must be firmly fixed to the wall.
Leave room behind the applian e as des ribed in these
instru tions to avoid overheating.
Spa ers installation
To ensure a smooth installation of the applian e, you need the same internal width as shown in the
pi ture below. Use the provided spa ers to adjust internal width.
For their orre t positioning, pla e the spa ers dire tly in onta t with both the shelf and the side of the
abinet.
Support bra kets installation
After positioning the spa ers, pla e the two provided support bra kets.
520 mm
560 + 8mm
560 mm min
225 cmq min
380 + 2 mm
40 mm
40 mm
40 mm
520 mm
40 mm
560 mm
520 mm min
40 mm min

Unit positioning
9
For a orre t installation, take the single support
bra ket and pla e it dire tly in onta t with both the
shelf of the abinet and the spa er if previously used.
Otherwise the bra ket will be in dire t onta t with both
shelf and side of the abinet.
After this first phase, align the support bra kets to be flush with the front of the abinet.
Use the upper holes to orre tly mount the applian e at
the right height.
Warning Mount the s rews perpendi ularly to the abinet in order to guarantee the orre t
extra tion of the sliding rails
A pilot hole is re ommended for an easier assembly.
Extra t the s rews to ontinue the mounting.
Sliding rails installation
Position ea h rail on the side of the abinet. Please note that there is a spe ifi sliding rail for ea h side
of the abinet.
Ea h sliding rail should be flush with the support bra kets, with spa ers when present and with the front
of the abinet.
1Spa er
2Sliding rail
3Support bra ket

0 Unit positioning
Pull out the sliding rail until the abinet underneath
be omes visible.
Fix the sliding rail, the support bra ket and the spa er
with the provided self-threading s rews 4.5x16.
When extra ting the sliding rails, only one of the frontal holes will be ome visible. After mounting
the orresponding s rew, move the rail again to see the se ond hole and mount the orresponding
s rew.
Positioning in the kit hen abinet
Pull the sliding rails ompletely out, and pla e the Refreshment Centre on them making sure that the
oni al pivots mat h the holes on the base.
Fix the Refreshment Centre on the bottom side of the
sliding rails with the 2 provided M4x12 s rews.
Push ba k the Refreshment Centre, until it is lo ked into position.
Che k aestheti alignment with the abinet and use the provided ir ular spa ers M6x12 for final
adjustment.
Frontal spa er installation
When in luded in the pa kage, and if ne essary, fix the frontal spa er with the 3 supplied M4x12
s rews.

Unit positioning
1Frontal spa er
2M4x12 s rews
Unit connection
All the operations below require the applian e to be extra ted from abinet.
Remove the grid of the drip tray to easily pull out the Refreshment Centre. After extra ting the
applian e, pla e the grid ba k in its original position.
Ele tri al onne tion
Warning Before starting the plug-in, make sure voltage and frequen y mat h the related
information on the rating plate and on the te hni al spe ifi ations table.
Warning Make sure the main swit h is in off position
Conne t the applian e to the so ket using the supplied ord.
When ne essary, extra t momentarily the power ord from the safety lip to make the onne tion to the
power so ket easier.
Fix the supplied ord to the lip on the right side of applian e.

2 Unit connection
1230V AC So ket
2Clip to fix ord
Se ure water dis harge tap
Warning Water leakage will o ur when the dis harge tap is open
Warning Close the water dis harge tap if open.
A red safety s rew prevents the a idental opening of the tap.
During regular applian e operation, when not otherwise indi ated, the tap shall be losed and the s rew
inserted.
1Water dis harge tap
2Safety s rew
Water mains onne tion
Warning Provided inlet hose an rea h a maximum distan e of 4 meters from the water mains. In
alternative, extra long tubes need to be used
Warning It is ne essary to pla e a tap between the water mains and the water inlet hose
Warning Conne t only to potable old water mains
Warning All water mains onne tions must be arried out by a ertified plumber
Warning Use only the new hose-sets in luded in the pa kage
Warning Do not reuse old hose-sets
S rew the hose to water inlet rotating it lo kwise, then onne t the hose to the water mains.

Unit connection
3
1Water inlet 3/4”
Filter artridge first installation
Warning Make sure there are no water leaks
Warning Dry well the base of the applian e before installing it into the abinet
The head of the filter artridge is on the left side of the applian e.
Remove the ap from the filter artridge, hold the filter head tight and insert the new filter artridge in
the head by pushing it up and rotating it ounter- lo kwise.
1Filter head
2Filter artridge
Pressure redu er first installation
Warning Do not open the pressure redu er during unit onne tion
1CO tube₂
2CO fitting₂
Pull out the CO -labeled tube and its fitting pla ed on the left side of the applian e and then insert the₂
fitting in the CO pressure redu er. ₂

4 Unit connection
CO bottle first installation₂
Warning While s rewing on the new CO bottle, CO leaks might o ur₂ ₂
The CO bottle is pla ed on the left side of the applian e.₂
The applian e an operate with both disposable and re hargeable CO bottles.₂
With disposable CO bottles₂
1. Remove the plasti ap
2. S rew the bottle rotating it lo kwise on the pressure redu er
With re hargeable CO bottles, an adapting jun tion is provided with the pressure redu er.₂
1. S rew the adapting jun tion rotating it lo kwise on the pressure redu er
2. S rew the bottle rotating it lo kwise on the adapting jun tion
Make sure the CO bottle is tightly fixed.₂
1. Lo k the bottle in the bottle holder on the left side of the applian e
2. Fix the holder with the provided safety strip

Usage
5
Usage
Front tou h ontrol panel
Warning To prevent damages to the tou h ontrol panel, do not tou h it with wet or oily hands
1Empty CO bottle LED₂
2Power LED (to be used also during water tank draining)
3Ambient water LED
4Cold sparkling water LED
5Cold still water LED
6I e shards LED
7Light LED
8Filter LED
First Start-up
Warning Dispense 3 litres of old still water and 1 litre of old sparkling water to rinse out well
the water oils
Turn on the applian e using the power swit h pla ed on the right side of the applian e.
The power LED will start flashing.
When the power LED stops flashing, the tou h ontrol panel be omes a tive.
When using the Refreshment Centre for the first time you need to wait 5 hours before the applian e
provides full operating results.
During this period of time the applian e is working but with limited performan e.
The above pro edure needs to be followed also after extended ina tive period of time.
Regulate water inlet pressure
Warning The pressure redu er must be opened only when the installation pro ess is omplete
and the applian e is swit hed on

6 Usage
1Water plasti knob
2Water pressure gauge
Make sure that the tap between the water mains and the flexible hose is open.
After any pressure regulation, verify the new adjusted level by dispensing a little water.
Pressure has to be regulated between 2 and 3 bar operating on the plasti knob.
To regulate the pressure, pull up the water plasti knob.
While dispensing ambient water: for pressure in rease rotate the knob lo kwise, for pressure de rease
rotate it ounter- lo kwise.
On e the regulation has been made, push the knob ba k to its se urity position.
Regulate CO pressure₂
Warning The pressure redu er must be opened only when the onne tion pro ess is omplete
and the applian e is powered up
Warning When hanging CO pressure, the adjusted sparkling level will be rea hed after₂
dispensing 0.5 litres of old sparkling water
Warning CO p₂ressure an be adjusted to a maximum of 4 bar
1CO p₂lasti knob
2CO pressure ₂gauge
CO pressure an be adjusted using the pressure redu er pla ed on the CO bottle.₂ ₂
Pressure has to be regulated 0.5 bar above inlet water value operating on the CO plasti knob.₂
For pressure in rease rotate the knob lo kwise, for pressure de rease rotate it ounter- lo kwise.
Dispensing during first start-up
During first start-up ambient water is immediately ready.
The first i e shards will be ready after 90 minutes.
The ideal temperature for old water will be rea hed after 2.5 hours.
The i e tank will be fully loaded after 5 hours.

Usage
7
Dispensing during normal usage
Warning Do not insert any obje t in the i e shards nozzle. This may damage the se tion with
onsequent i e melting
In order to fill a big bottle or jug, arefully pull out the water dispense nozzle.
Pla e a glass on the drip tray, then sele t the desired beverage or the i e shards. Press the i on until
the desired amount has been dispensed.
Dispensing is indi ated by the LED orresponding to the
pressed i on.
Dispensing from water nozzle is delayed to prevent a idental leakage.
The applian e an dispense 2 litres of old still or old sparkling water in 2 hours.
The water oolness level may vary if the dispensing time re ommendations are not followed.
If the i e has been entirely dispensed, fresh i e shards will be available after approximately 40 minutes.
The i e tank will be fully loaded after 2.5 hours.
Illumination of the Refreshment Centre
For a more omfortable dispensing pro ess, press the light LED of the ontrol panel and swit h on the
entral ambient light.
Maintenance and cleaning
Warning If the applian e remains swit hed off for over 8 hours it is ne essary to drain the water
tank
Warning A monthly drainage of the water tank is needed to guarantee the orre t quality level
Warning Carry out a leaning of the applian e every six months to ensure the orre t quality level
Warning Use food grade CO bottle₂
Drainage of the drip tray
To prevent water leakage, keep the drip tray lean and dry.

8 Maintenance and cleaning
Drainage of the water tank
Warning If you had to stop pressing the power i on, please press it again and keep it pressed in
order to omplete the step
Warning After the pro edure always remember to lose the water dis harge tap to avoid water
leakage
1. Dispense all the available i e shards
2. Remove the grid of the drip tray to easily pull out the Refreshment Centre. After extra ting the
applian e, pla e the grid ba k in its original position
3. Conne t the plasti hose to the dis harge water nozzle
4. Pla e a big ontainer underneath the plasti hose or put the hose in a sink
5. Press the power i on until power LED starts flashing
6. Remove the safety s rew and open the water dis harge tap
7. Press the power i on again and keep it pressed until the power LED stops flashing
8. Close the water dis harge tap and reinsert the safety s rew
9. Restart the applian e using the power swit h
10. Push ba k the applian e until it is lo ked into position
Food grade CO bottle repla ement₂
Warning While s rewing on the new CO bottle, CO leaks might o ur₂ ₂

Maintenance and cleaning
9
1. Remove the grid of the drip tray to easily pull out the Refreshment Centre. After extra ting the
applian e, pla e the grid ba k in its original position
2. Remove the safety strip of the CO holder to extra t the used bottle₂
3. Hold the pressure redu er and turn the CO bottle lo kwise₂
4. S rew the new bottle, ounter- lo kwise, into the pressure redu er
5. Se ure the new CO bottle to its holder and fix it with the provided safety strip₂
6. Push ba k the applian e until it is lo ked into position
Filter artridge repla ement
Warning In ase of water leakage dry the base arefully
Warning Lay a loth under the filter artridge to prevent the base from getting wet
1. Remove the grid of the drip tray to easily pull out the Refreshment Centre. After extra ting the
applian e, pla e the grid ba k in its original position
2. Turn off the applian e using the power swit h
Water may ome out from the filter artridge, therefore pla e a loth on the filter head and
artridge to prevent the abinet from getting wet.
If there is water on the base, dry it arefully.

20 Maintenance and cleaning
3. Rotate the used filter artridge lo kwise and pull it down to extra t it
4. Insert the new filter artridge in the filter head by pushing it up and rotating it ounter- lo kwise
5. Turn on the power swit h
6. Immediately press the ambient water i on and keep it pressed until LEDs start s anning.
Wait for all LEDs to turn off before pro eeding with the next step
If the power LED be omes steady, please repeat the last two steps until LEDs start s anning.
7. Restart the applian e using the power swit h
8. Push ba k the applian e until it is lo ked into position
9. Dispense 3 litres of old still water
10. Dispense 1 litre of old sparkling water
Cleaning of the inlet filter
1Water inlet and inlet filter housing
Carry out this pro edure on a yearly basis.
1. Close the water mains
2. Dispense ambient water until it stops oming out
3. Remove the grid of the drip tray to easily pull out the Refreshment Centre. After extra ting the
applian e, pla e the grid ba k in its original position
4. Rotate the filter artridge lo kwise and pull it down to extra t it
5. Take out the water inlet hose
Table of contents
Other Electrolux Dispenser manuals
Popular Dispenser manuals by other brands

Schroeder America
Schroeder America 950R Installation instruction, parts list and configuration guide

Branded Safety
Branded Safety FlexiStore 160-1001 quick start guide

Graco
Graco Buckshot Instructions-parts list

Gehl's
Gehl's gehl's 2.0 Operator's manual

Dolphin
Dolphin BC 5262 Mounting instructions

Baby Brezza
Baby Brezza Formula Pro Advanced user manual