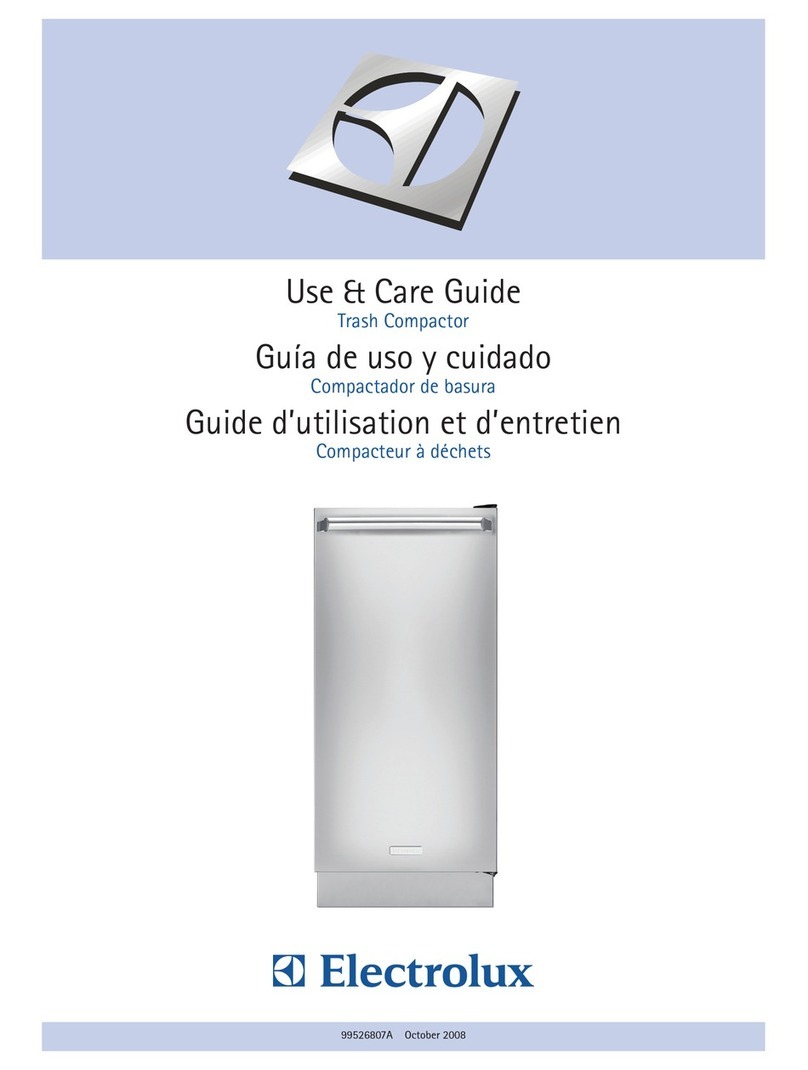
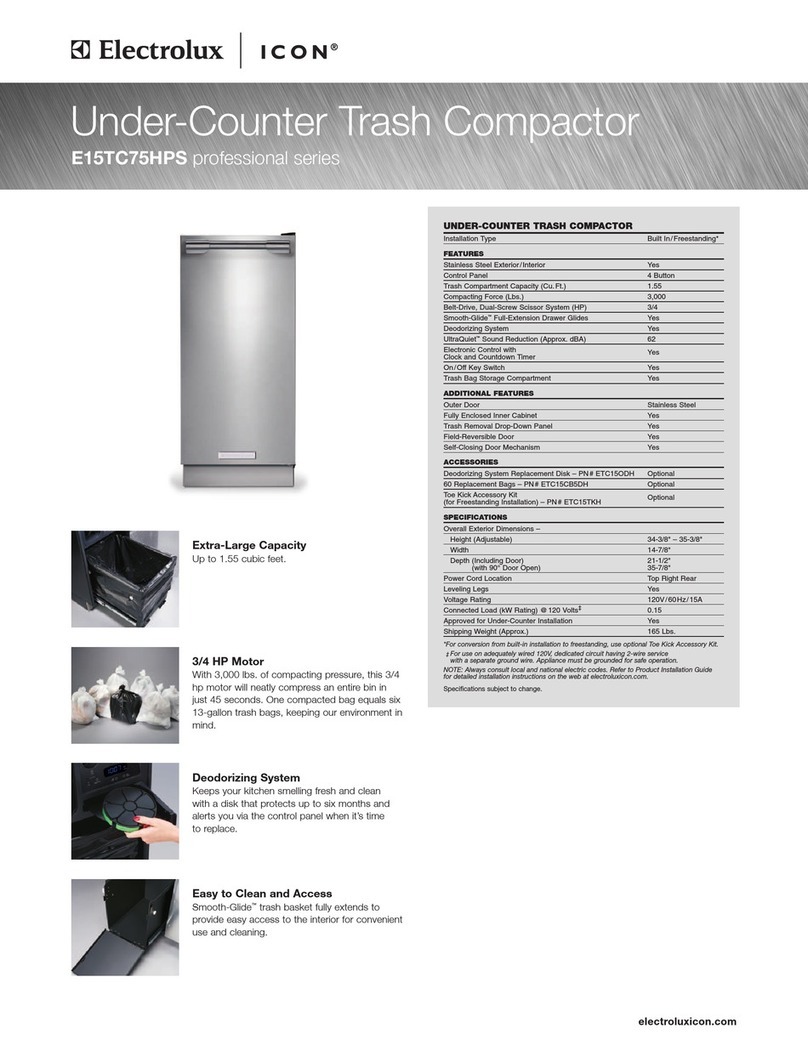
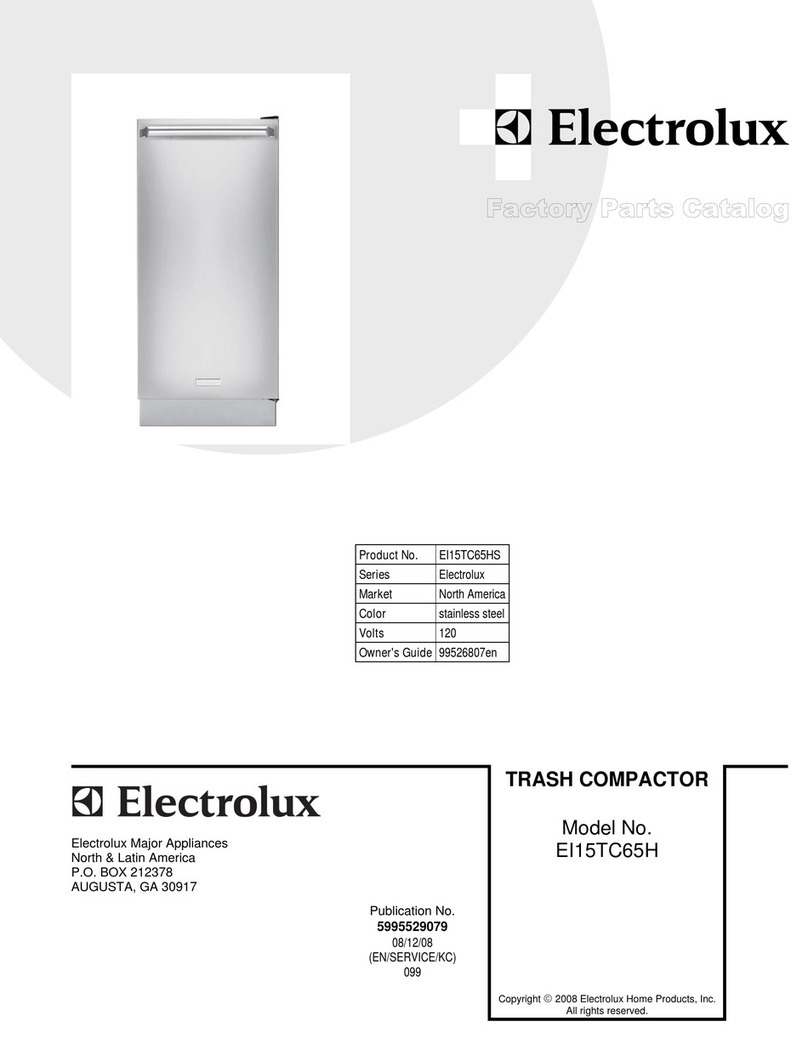
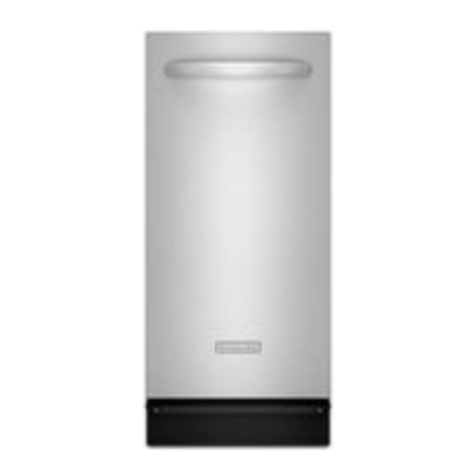
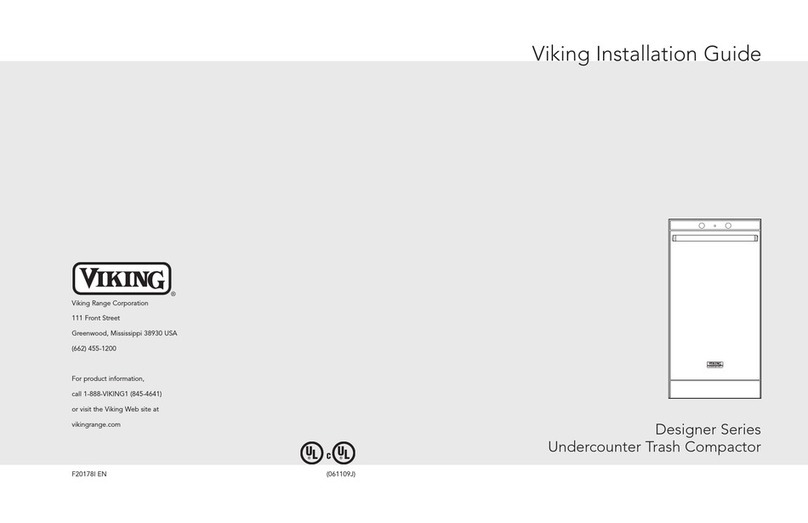
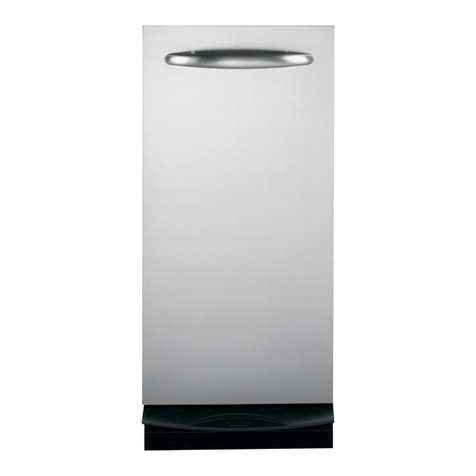
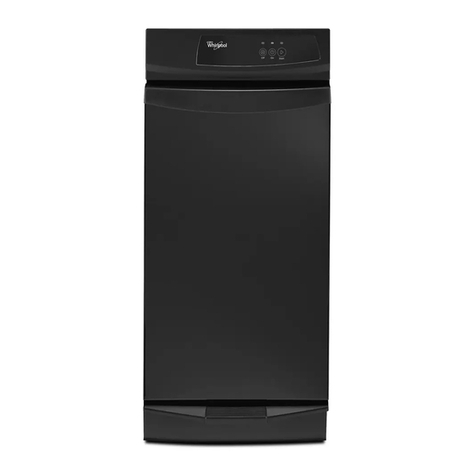
Electrolux 99526808A User manual

99526808A October 2008
Use & Care Guide
Trash Compactor
Guía de uso y cuidado
Compactador de basura
Guide d’utilisation et d’entretien
Compacteur à déchets

2Finding Information
Purchase date
Electrolux model number
Electrolux serial number
Please read and save this guide
Thank you for choosing Electrolux, the new premium brand in home appliances. This Use & Care Guide
is part of our commitment to customer satisfaction and product quality throughout the service life of your
new appliance.
We view your purchase as the beginning of a relationship. To ensure our ability to continue serving you,
please use this page to record important product information.
Keep a record for quick reference
NOTE
Registering your product with Electrolux enhances
our ability to serve you. You can register online
at www.electroluxusa.com or by dropping your
Product Registration Card in the mail.
Questions?
For toll-free telephone support in the U.S. and Canada:
1-877-4ELECTROLUX (1-877-435-3287)
For online support and Internet production information visit http://www.electroluxusa.com
Table of contents
Finding information ........................................................................ 2
Safety ............................................................................................... 3
• Important Safety Instructions ....................................................... 3
Features ........................................................................................... 4
• How the Compactor Works .......................................................... 4
Installation ....................................................................................... 6
• Free Standing .............................................................................. 6
• Built-in Installations ...................................................................... 6
• Leveling the Compactor ............................................................... 6
Preparation ...................................................................................... 7
• Use of Key Lock Switch ............................................................... 7
• Install Odor Control Disk .............................................................. 7
• Install Bag .................................................................................... 7
Operation ....................................................................................... 8-9
• Compacting ................................................................................... 8
• Clock / Auto Delay ........................................................................ 8
• Battery Backup ............................................................................. 8
• Compacting Tips .......................................................................... 9
• Bag Removal ............................................................................... 9
Maintenance ............................................................................... 9-11
• Cleaning ................................................................................. 9, 10
• Troubleshooting .......................................................................... 11
Warranty ........................................................................................ 12
©2008 Electrolux Home Products, Inc. All rights reserved. Printed in China

3
Safety
Important Safety Instructions
Read all instructions before using this appliance.
Save these instructions for future reference.
Do not attempt to install or operate your appliance until you have read the safety precautions in this
manual. Safety items throughout this manual are labeled with a WARNING or CAUTION based on the
risk type.
GROUNDING INSTRUCTIONS
IMPORTANT: TO REDUCE THE RISK OF ELECTRIC
SHOCK - PLEASE READ CAREFULLY.
FOR PERSONAL SAFETY, THIS APPLIANCE MUST
BE PROPERLY GROUNDED. The power cord on this
appliance is equipped with a three-prong (grounding)
plug which mates with a standard three-prong (grounded)
receptacle as illustrated above.
If there is a two-prong outlet located where you will install
the compactor, it is your responsibility to have it replaced
with a properly grounded three-prong wall receptacle. No
adapter shall be used with this product.
DO NOT, UNDER ANY CIRCUMSTANCES, CUT OR
REMOVE THE THIRD (GROUND) PRONG FROM THE
POWER CORD PLUG.
The GREEN (or GREEN & YELLOW) conductor in the
cord is the grounding wire. Never connect the GREEN (or
GREEN & YELLOW) wire to a live terminal.
A 120 volt, 60 Hz., A.C., 15 amp fused and grounded
electrical supply is required (time-delay fuse or circuit
breaker is recommended). It is recommended that a
SEPARATE CIRCUIT serving only this appliance be
provided.
DO NOT USE AN EXTENSION CORD WITH THIS
APPLIANCE.
READ ALL INSTRUCTIONS CAREFULLY BEFORE
OPERATING COMPACTOR.
Basic precautions should always be taken when using
an electrical appliance – including the following:
1. Close supervision is necessary when any appliance
is operated near children. Do not allow the appliance
to be used as a toy, or to run unattended at any
time. Turn key to “OFF” and remove it to lock the
compactor. Store the key out of reach to prevent
children or others from operating or tampering with
the compactor.
2.
Do not push trash into compactor drawer with hands
or feet. Trash might contain broken glass, sharp pieces
of metal, etc.,
which would cause injury.
3. Do not compact volatile material. Paint, oily rags,
lighter fluid cans, and paint thinner cans could
combust spontaneously and cause an explosion
and/or fire.
4. Do not compact aerosol cans or any other
containers still holding toxic chemicals, insecticides,
or combustible contents. Fumes may be released
which are hazardous to health.
5. Do not compact lighted cigarettes, cigars, or other
hot or burning items.
6. Do not overload the compactor.
7. Be careful when removing and carrying bag. Broken
glass or other sharp objects may pierce bag. Do
not overload trash bag with heavy material such as
glass.
8. Do not operate this unit with an extension cord.
9. Use only Electrolux approved accessories.
10. Do not touch moving parts.
11. Donottakethisapplianceapart.Incorrectreassembly
can cause electrical shock when operated.
12. Do not operate with a damaged power cord, plug,
motor, or after damage of any kind. Have the
compactor examined, and all repairs made, by an
authorized serviceman.
13. This compactor is FOR HOUSEHOLD USE ONLY.
Use it only as described in this manual.
14. Unplug the appliance from outlet before servicing.

4Features
Bag Storage Area
Key Lock
Electronic Control Panel
Odor Disk Tray
Ram
Sliding Trash Bucket
Leveling Rollers
Leveling Legs
Door Interlock
Trash Bucket Latches (2)
Compaction Plate Release Tab
Compaction Plate
Interlock Actuator
Battery Back-up
How the compactor works
The compactor compresses household trash up to 1/6 of its original volume. It will compact normal household trash
including milk cartons, glass and plastic bottles, containers and jars, tin cans, wrappings, boxes, food wastes, etc.
When you start the compactor, an electrically powered ram moves down into the trash bucket, compresses the trash
and then returns to the “UP” position and shuts off automatically.
NOTE: The ram travels about 2/3 of the way down into the trash bucket. Because of this, the trash bucket must be
at least 1/3 full before you will notice any compression.

5
Installation
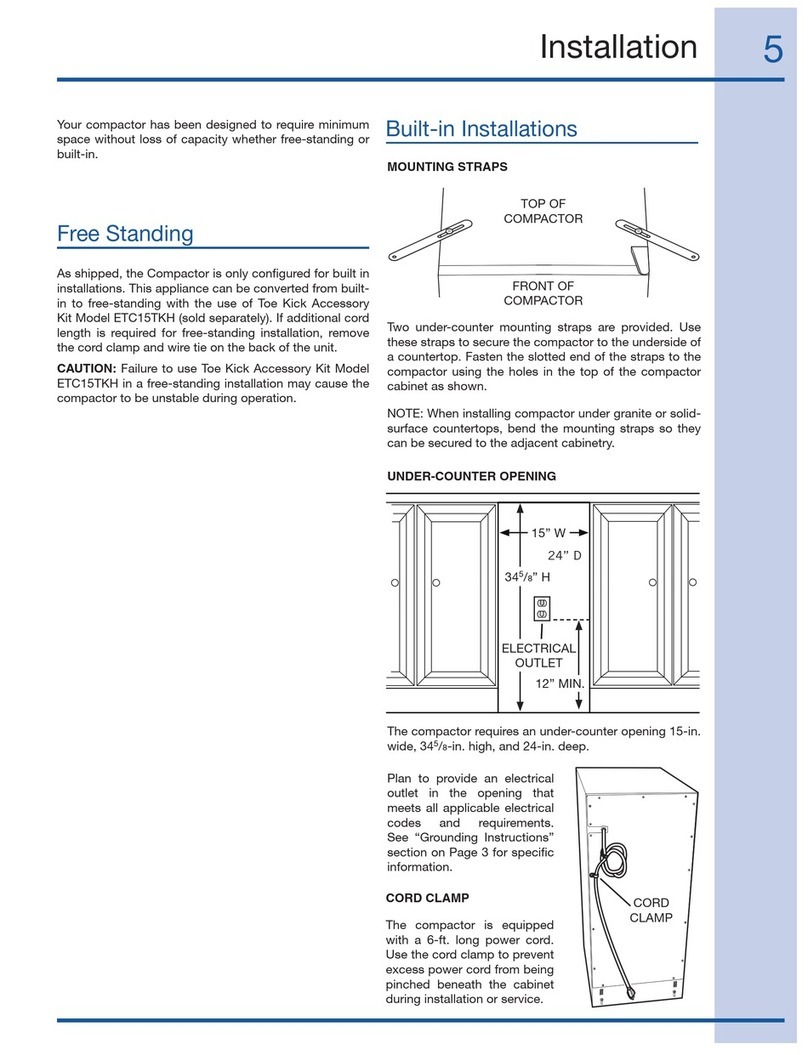
Your compactor has been designed to require minimum
space without loss of capacity whether free-standing or
built-in.
As shipped, the Compactor is only configured for built in
installations. This appliance can be converted from built-
in to free-standing with the use of Toe Kick Accessory
Kit Model ETC15TKH (sold separately). If additional cord
length is required for free-standing installation, remove
the cord clamp and wire tie on the back of the unit.
CAUTION: Failure to use Toe Kick Accessory Kit Model
ETC15TKH in a free-standing installation may cause the
compactor to be unstable during operation.
MOUNTING STRAPS
Two under-counter mounting straps are provided. Use
these straps to secure the compactor to the underside of
a countertop. Fasten the slotted end of the straps to the
compactor using the holes in the top of the compactor
cabinet as shown.
NOTE: When installing compactor under granite or solid-
surface countertops, bend the mounting straps so they
can be secured to the adjacent cabinetry.
UNDER-COUNTER OPENING
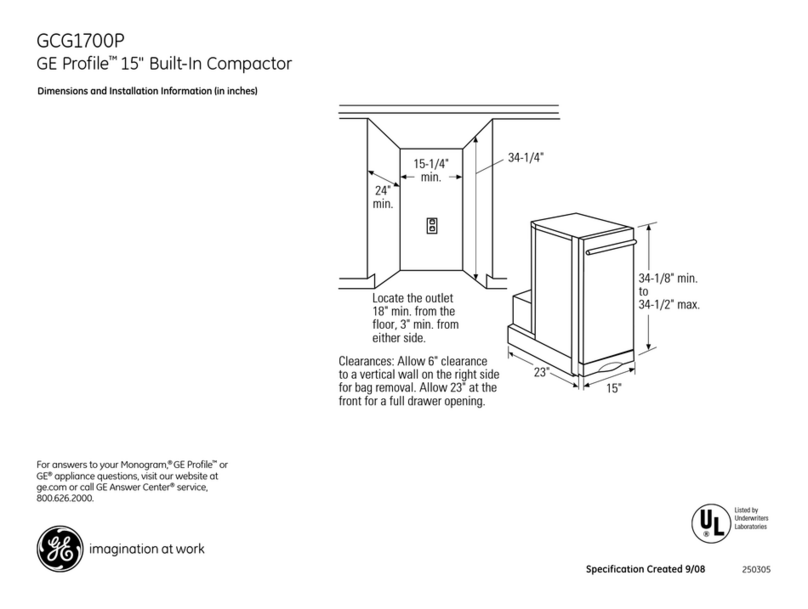
The compactor requires an under-counter opening 15-in.
wide, 345/8-in. high, and 24-in. deep.
Plan to provide an electrical
outlet in the opening that
meets all applicable electrical
codes and requirements.
See “Grounding Instructions”
section on Page 3 for specific
information.
TOP OF
COMPACTOR
FRONT OF
COMPACTOR
CORD CLAMP
The compactor is equipped
with a 6-ft. long power cord.
Use the cord clamp to prevent
excess power cord from being
pinched beneath the cabinet
during installation or service.
CORD
CLAMP
Free Standing
Built-in Installations
Opening
15" Wide
34-1/2" High
22" Deep
15” W
345/8” H
ELECTRICAL
OUTLET
24” D
12” MIN.

6
Your compactor has four adjustable levelers; (2) rollers in
the rear and (2) legs in the front. They allow you to adjust
for uneven floors and also trim the unit up to fit an under-
counter installation.
To level the back of the compactor:
Tip the back of compactor up and onto a wood block.
Loosen the adjusting screws only far enough to move the
rollers to a higher or lower slot. Retighten the adjusting
screws and remove the wood block.
To level the front of the compactor:
Tip the front of compactor up and onto a wood block.
Turn the leveling legs in or out to the desired position.
Remove the wood block.
Installation
BACK OF
COMPACTOR
WOOD
BLOCK
ADJUSTING
SCREWS
SLOTS
ROLLERS
FRONT OF
COMPACTOR
WOOD
BLOCK
LEVELING
LEGS
Leveling the Compactor

7
The key lock switch on your compactor is provided for
your protection as a safety measure.
When the key lock switch is in the “OFF”
and “LOCK” positions, the compactor
will not operate. Remove the key to
keep children from operating the unit or
to prevent anyone from tampering with
it.
When the key lock switch is in the “ON”
position, the compactor is ready for
operation. The key cannot be removed
when in the “ON” position.
NOTE: Opening the door during operation will stop the
unit. If the compactor is stopped during its cycle, it will
always move back UP when the door is closed.
Preparation
Your Compactor is equipped with an odor control disk
that will last up to six months when installed in the trash
compactor. The odor disk comes packaged in a foil
pouch and is activated once the pouch is opened. The
compactor has an electronic control that automatically
advances the odor disk every 30 days until 6 months
have expired.
Optional – You may write dates on the odor disk labels in
this manner:
• When pouch is opened, write the “Activation Date” on top of disk
in space provided.
• Write dates on the GREEN month indicator labels in this manner:
Month 1 Label “Advance Date” = 1 month from “Activation Date”
Month 2 Label “Advance Date” = 2 months from “Activation Date”
Month 3 Label “Advance Date” = 3 months from “Activation Date”
Month 4 Label “Advance Date” = 4 months from “Activation Date”
Month 5 Label “Advance Date” = 5 months from “Activation Date”
• Write date on the RED month indicator label in this manner:
Month 6 Label “Replacement Date” = 6 months from “Activation
Date”
Caution: The odor control disk contains material that
may cause moderate eye irritation. Avoid contact with
eyes. Harmful if swallowed. Wash skin or clothing
thoroughly with soap and water after handling. Do not
reuse empty foil pouch.
With the door open
and the trash bucket
extended to the furthest
position, place a bag into
the bucket. Fold the bag
over the top rim of the
bucket, on all sides.
Press the bag into all
corners of the bucket
and smooth the bottom.
Smooth and shape the
bag carefully - this will
prevent the bag from
being torn by the ram
during compaction.
Secure the bag in place
over the 2 buttons
on each side of the
bucket. The bag has
prepunched slots for
this purpose.
Use of Key Lock Switch
Install Odor Control Disk
Odor Status LED
1. Remove the
disk from the
foil envelope,
swing open the
odor disk door,
and place disk
face down on
tray. Make sure
green label that
says “Month 1”
faces odor disk
door.
2. Press “Reset” to
start the timer.
The odor status LED
will be GREEN.
3. The disk will advance
to the next month
after 30 days have
passed or by pressing
“Advance”. Once the disk advances, the next 30 day
period begins.
4. At the conclusion of the 5th month the odor status
LED will FLASH GREEN to signal the disk is on its
last month.
5. At the conclusion of the 6th month the odor status
LED will turn RED to signal the disk must be
replaced.
6. Discard the used disk in the trash, insert a new disk
and press “Reset”.
Odor disk, Model ETC15ODH, is available from your
Electrolux Distributor.
Install Bag

8
The compactor is now ready to use.
FOR BEST RESULTS, ALWAYS FILL EACH NEW
BAG COMPLETELY BEFORE OPERATING THE
COMPACTOR. DOING SO WILL MINIMIZE BAG PULL-
UP AND TEARING.
1. Slide trash bucket closed completely.
2. Turn Key Lock Switch to “ON” position.
Key Lock Switch
3. Select 1 of 2 compact modes:
Normal Compact Mode
Press “Start” button and close
door - ram will travel downward
into trash bucket and compact
trash. At bottom of ram stroke, ram
automatically reverses and moves upward out of
trash bucket. Total cycle time will be 45 seconds or
less. At top of stroke, compactor automatically shuts
itself off and is ready to receive more trash.
Hold Compact Mode
Press “Start” button and close door
- ram will travel downward into
trash bucket and compact trash.
At bottom of ram stroke, ram will
shut off. Press “Start” button again
to reverse ram upward out of trash bucket. At top of
stroke, compactor automatically shuts itself off and
is ready to receive more trash.
4. Press “Start” button.
Start Button
5. Close door to begin compacting. Compactor will
automatically shut itself off when compaction cycle
is completed.
6. Compacting cycle may be stopped at any time by
opening door. Once stopped, ram will always move
upward when door is closed.
The compactor is equipped with a delay start /clock
feature that allows you to compact your trash at a time of
your choice (such as every evening).
1. To set clock time:
Press and hold “Set Clock” button until display
flashes. Use the “+” and “-” buttons to set current
time.
2. To set delay start time:
Press and hold “Set Delay” button until clock display
flashes. Use “+” and “-” buttons to set delay time.
Press “Set Delay” button again, until clock display
shows current time.
3. To activate delay start:
Press “Delay Start” button. LED above button
will light and clock display will show delay start
time. Once clock reaches delay start time, ram will
compact and hold trash for 2 hours, then return to
previous position.
4. To interrupt delay start during 2-hour hold period:
Open door and press “Start” button. Close door and
ram will return to UP position and stop. Open door to
add additional trash to bucket. Close door and ram
will return to hold position for remainder of 2-hour
hold period.
5. To cancel delay start:
Press “Delay Start” button. Close door and ram will
return to previous position.
The compactor is equipped with a battery backup, to
maintain clock settings in the event of a loss of power to
the unit.
Remove the battery cover and install a 9-Volt battery
(not included).
NOTE: The battery backup will not provide power to
operate ram.
Operation
Compacting Delay Start / Clock
Battery Backup
pm
auto

9
EXCEPT FOR CLEANING DESCRIBED IN THE FOLLOWING
SECTION, ALL SERVICE SHALL BE PERFORMED BY AN
AUTHORIZED SERVICE REPRESENTATIVE.
Your compactor has been designed with easy access for
cleaning when required.
The interior and exterior of the cabinet are finished with a
durable baked-on enamel finish.
Do not use harsh or gritty cleanser or scouring pads
which may mar the finish of the compactor. Use a mild
detergent solution on these surfaces.
Glass fragments and other sharp trash pieces may
be on or around the surfaces to be cleaned. Carefully
remove these objects before wiping down any
surfaces.
REMOVE TRASH BUCKET AND CLEAN INTERIOR
2.
3.
1. BUCKET SLIDE
RELEASE TAB
SCREW
• Although it is not necessary to compact until the drawer is full or
nearly so, it is suggested that for maximum compaction, you start
the compactor each time a significant amount of trash is added.
• At full stroke, the ram does not travel all the way to the bottom
of the trash bucket. Trash in the bottom 1/3 of the bucket will be
crushed during subsequent compacting.
• Glass bottles can make a loud noise when they break during
compaction. This is normal. Bottles do not always break during
the first cycle. Breaking glass and associated noise may occur
several cycles later depending on type and volume of trash.
• Bottles and large cans compact best when laid flat near the
center of the trash bucket.
• Place a couple of folded sheets of newspaper, or a large paper
grocery bag on top of the load to be compacted when :
compacting large or several glass bottles or jars
(or any items that might shatter). This will help
prevent glass fragments and particles from flying
out of bucket into mechanism.
compacting unwrapped messy food waste.
This will help keep the power ram clean.
• Compacting extreme uneven loads may cause the trash bucket to
shift forward which may cause the door to open and interrupt the
compaction cycle. Gently push and hold door closed to activate
the ram until it returns to the up position. Open the trash bucket
and reposition any objects that may be causing the uneven load.
Close the door and re-activate the compaction cycle by pressing
the start button.
• There are certain types of trash that create exceptionally strong
odors such as raw meat, fish, grapefruit rinds, personal hygiene
items, and disposable diapers. You may not wish to put such
items into your compactor.
• If the compactor will not be used for an extended period of time,
such as during vacation, remove the bag to prevent a build-up of
undesirable odor.
DO NOT COMPACT AEROSOL CANS OR ANY OTHER
CONTAINERS STILL HOLDING ORWHICH HELDTOXIC
CHEMICALS, INSECTICIDES, OR COMBUSTIBLE CONTENTS.
FUMES MAY BE RELEASED THAT ARE HAZARDOUSTO
HEALTH OR MAY RESULT IN FIRE OR EXPLOSION.
Do not put paint, oily rags, lighter fluid cans, paint thinner
cans, etc., in your compactor. Doing so could result in
spontaneous combustion causing a fire and/or explosion.
NEVER PUSHTRASH INTOTHE BUCKETWITH HANDS OR
FEET.Trash might contain broken glass, sharp pieces of
metal, etc., which could cause injury.
•
•
1. Slide out trash bucket.
2. Release bucket latches and
lower front of bucket.
3. Unbutton bag from bucket
and close by twisting bag
top. Fasten with twist-tie
provided.
4. Lift and slide bag from bucket.
Compacting Tips Cleaning
Maintenance
Bag Removal
10 Maintenance
1. Pull out trash bucket until it stops.
2. Remove (1) screw from each of the bucket slides.
3. Press down on left and right bucket slide release
tabs while pulling the bucket out of the unit.
4. Vacuum and clean cabinet base, track channels, and
bucket, particularly in corners.
5. Wash the cabinet interior with a mild detergent
solution.
6. When finished cleaning the cabinet, install the trash
bucket by reversing steps 2 and 3.
CLEAN COMPACTION PLATE
1. The ram is equipped with a compaction plate that
can be removed for easy cleaning.
2. Make sure the trash bucket is empty and without a
bag.
3. Push the trash bucket into the cabinet. Unlatch and
lower the bucket front.
4. Press the compaction plate release tab on the front
of the ram to disengage the plate. The plate can be
removed by pulling down and away from the ram.
5. Once removed the compactor plate can be
washed in a mild detergent solution or placed in a
dishwasher.
6. Re-install the compactor plate by inserting the tab
(on the rear of the plate) into the slot (at in the rear
of the ram). Press up on the front of the plate until it
securely latches in place.
RELEASE
TAB
COMPACTION
PLATE
RAM
CLEAN RAM
1. Make sure the trash bucket is empty and pushed into the
cabinet.
2. Turn the Key Lock Switch to “ON” position.
Key Lock Switch
3. Select the “Hold” compact mode.
Hold Compact Mode
4. Press the “Start” button.
Start Button
5. Close the door.
The ram will travel downward into the trash bucket and stop at
the bottom of its stroke.
Glass fragments and other sharp trash pieces may be on or
around the surfaces to be cleaned. Carefully remove these
objects before wiping down any surfaces.
6. Open the door. Unlatch and lower the bucket front. Vacuum
top of ram and clean with a mild detergent solution.
7. When finished cleaning: Raise and re-latch bucket front,
press “Start” button, and close door. The ram will return to
the top of its stroke and automatically shut itself off. Open
door, slide bucket out, install bag, and select compact
mode. Compactor is now ready to receive trash.
RAM
TRASH
BUCKET
Cleaning (continued) Cleaning (continued)

11
Maintenance
Before you call for service, check these handy hints which
may save you the cost of a service call:
1. Is electric cord plugged in securely?
2. Has a house fuse blown or a circuit breaker tripped?
3. Is the door pushed firmly shut?
4. Is the key switch in the “ON” position?
5. If trash bucket is difficult to close, check to see if any
trash has fallen behind the bucket - preventing it from
closing completely.
6. The motor has an automatic thermal cutout. If you
have compacted repeatedly, this protector may have
opened the circuit. Wait a few minutes and the cutout
will reset automatically.
7. The trash bucket must be at least 1/2 full of trash
before any appreciable amount of compacting will be
apparent - as the ram does not travel all the way to
the bottom of the bucket. Trash in the bottom 1/3
of the bucket will be crushed during subsequent
compacting.
8. On rare occasions, a large can placed near the outer
edge of the trash bucket may become wrapped around
the edge of the ram. This could interfere with proper
ram operation. To correct, simply open the door,
unlatch and open the front of the bucket, and remove
the can. BE CAREFUL WHEN HANDLING SHARP
OBJECTS!
9. In the unlikely event that the interlock actuator (on the
inside of the door) breaks off, the compactor will not
operate. DO NOT ATTEMPT TO OPERATE COMPACTOR
IN ANY OTHER MANNER. A replacement actuator
can be ordered from your Electrolux Distributor.
Troubleshooting

12 Warranty
Major Appliance Warranty Information
Your appliance is covered by a one year limited warranty. For one year from your original date of purchase, Electrolux will repair or
replace any parts of this appliance that prove to be defective in materials or workmanship when such appliance is installed, used,
and maintained in accordance with the provided instructions
Exclusions
This warranty does not cover the following:
1. Products with original serial numbers that have been removed, altered or cannot be readily determined.
2. Product that has been transferred from its original owner to another party or removed outside the USA or Canada.
3. Rust on the interior or exterior of the unit.
4. Products purchased “as-is” are not covered by this warranty.
5. Products used in a commercial setting.
6. Service calls which do not involve malfunction or defects in materials or workmanship, or for appliances not in ordinary
household use or used other than in accordance with the provided instructions.
7. Service calls to correct the installation of your appliance or to instruct you how to use your appliance.
8. Expenses for making the appliance accessible for servicing, such as removal of trim, cupboards, shelves, etc., which are
not a part of the appliance when it is shipped from the factory.
9. Service calls to repair or replace appliance light bulbs, air filters, water filters, other consumables, or knobs, handles, or
other cosmetic parts.
10. Labor or in-home service costs during the additional limited warranty periods beyond the first year from your original date of
purchase.
11. Pickup and delivery costs; your appliance is designed to be repaired in the home.
12. Surcharges including, but not limited to, any after hour, weekend, or holiday service calls, tolls, ferry trip charges, or
mileage expense for service calls to remote areas, including the state of Alaska.
13. Damages to the finish of appliance or home incurred during transportation or installation, including but not limited to floors,
cabinets, walls, etc.
14. Damages caused by: services performed by unauthorized service companies; use of parts other than genuine Electrolux
parts or parts obtained from persons other than authorized service companies; or external causes such as abuse, misuse,
inadequate power supply, accidents, fires, or acts of God.
DISCLAIMER OF IMPLIED WARRANTIES; LIMITATION OF REMEDIES
CUSTOMER’S SOLE AND EXCLUSIVE REMEDY UNDER THIS LIMITED WARRANTY SHALL BE REPAIR OR REPLACEMENT AS
PROVIDED HEREIN. CLAIMS BASED ON IMPLIED WARRANTIES, INCLUDING WARRANTIES OF MERCHANTABILITY OR
FITNESS FOR A PARTICULAR PURPOSE, ARE LIMITED TO ONE YEAR OR THE SHORTEST PERIOD ALLOWED BY LAW, BUT
NOT LESS THAN ONE YEAR. ELECTROLUX SHALL NOT BE LIABLE FOR CONSEQUENTIAL OR INCIDENTAL DAMAGES SUCH
AS PROPERTY DAMAGE AND INCIDENTAL EXPENSES RESULTING FROM ANY BREACH OF THIS WRITTEN LIMITED
WARRANTY OR ANY IMPLIED WARRANTY. SOME STATES AND PROVINCES DO NOT ALLOW THE EXCLUSION OR
LIMITATION OF INCIDENTAL OR CONSEQUENTIAL DAMAGES, OR LIMITATIONS ON THE DURATION OF IMPLIED
WARRANTIES, SO THESE LIMITATIONS OR EXCLUSIONS MAY NOT APPLY TO YOU. THIS WRITTEN WARRANTY GIVES YOU
SPECIFIC LEGAL RIGHTS. YOU MAY ALSO HAVE OTHER RIGHTS THAT VARY FROM STATE TO STATE.
If You Need Service
Keep your receipt, delivery slip, or some other appropriate payment record to establish the warranty period should service be
required. If service is performed, it is in your best interest to obtain and keep all receipts. Service under this warranty must be
obtained by contacting Electrolux at the addresses or phone numbers below.
This warranty only applies in the USA, Puerto Rico and Canada. In the USA and Puerto Rico, your appliance is warranted by
Electrolux Major Appliances North America, a division of Electrolux Home Products, Inc. In Canada, your appliance is warranted by
Electrolux Canada Corp. Electrolux authorizes no person to change or add to any obligations under this warranty. Obligations for
service and parts under this warranty must be performed by Electrolux or an authorized service company. Product features or
specifications as described or illustrated are subject to change without notice.
USA
1-877-435-3287
Electrolux Major Appliances North America
P.O. Box 212378
Augusta, GA 30907
Canada
1-800-265-8352
Electrolux Canada Corp.
5855 Terry Fox Way
Mississauga, Ontario, Canada L5V 3E4

13
Cómo encontrar la información
Fecha de compra
Número de modelo Electrolux
Número de serie Electrolux
Lea y guarde esta guía
Gracias por elegir Electrolux, la nueva marca de primer nivel en electrodomésticos para el hogar.
Esta Guía de uso y cuidado es parte de nuestro compromiso con la satisfacción al cliente y la calidad
del producto a lo largo de la vida de servicio de su nuevo electrodoméstico.
Para nosotros, su compra es el inicio de una relación. Para garantizar nuestra capacidad de continuar
atendiéndole, utilice esta página para registrar información importante del producto.
Guarde un registro para una rápida referencia
NOTA
Al registrar su producto con Electrolux se mejora
nuestra capacidad de atenderle. Puede registrarse
en línea en www.electroluxusa.com, o depositando
su Tarjeta de registro de producto en el correo.
¿Preguntas?
Para recibir apoyo telefónico sin costo en EE.UU. y Canadá:
1-877-4ELECTROLUX (1-877-435-3287)
Para recibir apoyo en línea e información de producción por Internet visite http://www.electroluxusa.
com.
Índice
Cómo encontrar la información .................................................. 13
Seguridad ...................................................................................... 14
• Instrucciones importantes de seguridad .................................... 14
Características .............................................................................. 15
• Cómo funciona el compactador ................................................. 15
Instalación ..................................................................................... 17
• Instalación independiente .......................................................... 17
• Instalación empotrada ................................................................ 17
• Nivelación del compactador ....................................................... 17
Preparación ................................................................................... 18
• Uso del interruptor del seguro de llave ...................................... 18
• Instalación del disco de control de olores .................................. 18
• Instalación de la bolsa ............................................................... 18
Funcionamiento ........................................................................ 19-20
• Compactación ............................................................................. 19
• Retraso automático / Reloj ......................................................... 19
• Respaldo de batería ................................................................... 19
• Sugerencias para la compactación ............................................ 20
• Retiro de la bolsa ....................................................................... 20
Mantenimiento ......................................................................... 20-22
• Limpieza ............................................................................... 20, 21
• Resolución de problemas .......................................................... 22
Garantía ......................................................................................... 23
©2008 Electrolux Home Products, Inc. Todos los derechos reservados. Impreso en China

14 Seguridad
Instrucciones importantes de seguridad
Lea todas las instrucciones antes de usar este aparato.
Guarde estas instrucciones para referencias futuras.
No trate de instalar ni de operar el aparato hasta que haya leído las precauciones de seguridad en este
manual. Los puntos de seguridad de este manual están identificados con ADVERTENCIA o
PRECAUCIÓN, de acuerdo con el tipo de riesgo.
INSTRUCCIONES PARA LA PUESTA
A TIERRA
IMPORTANTE: PARA REDUCIR EL RIESGO DE DESCARGAS
ELÉCTRICAS, LEA LO SIGUIENTE DETENIDAMENTE.
PARA FINES DE SEGURIDAD PERSONAL, ESTE APARATO
DEBE ESTAR ADECUADAMENTE CONECTADO A TIERRA.
El cable de alimentación de este aparato tiene un enchufe de
tres patas (tierra) que encaja en un receptáculo estándar de tres
patas (conectado a tierra), como se ilustra arriba.
Si hay un tomacorriente de dos patas en el lugar donde se
va a instalar el compactador, usted debe encargarse de que
se lo cambien por un receptáculo de pared de tres patas que
esté adecuadamente conectado a tierra. No debe usarse un
adaptador con este producto.
BAJO NINGUNA CIRCUNSTANCIA, NO CORTE NI QUITE
LA TERCERA PATA (TIERRA) DEL ENCHUFE DEL CABLE DE
ALIMENTACIÓN.
El conductor VERDE (o VERDE y AMARILLO) del cable es el
cable a tierra. No conecte nunca el cable VERDE (o VERDE y
AMARILLO) a una terminal viva.
Se requiere un circuito de alimentación de CA conectado a
tierra de 120 V y 60 Hz con un fusible de 15 A (se recomienda
un fusible de retardo o un interruptor automático de circuitos).
Se recomienda tener un CIRCUITO SEPARADO que alimente
únicamente a este aparato.
NO HAGA FUNCIONAR ESTE APARATO CON UNA EXTENSIÓN
ELÉCTRICA.
LEA TODAS LAS INSTRUCCIONES DETENIDAMENTE
ANTES DE PONER A FUNCIONAR EL COMPACTADOR
Al usar un aparato electrodoméstico, siempre deben
tomarse precauciones básicas, entre ellas:
1. Es necesario mantener una supervisión constante cuando
haya niños cerca de un aparato que esté en funcionamiento.
No permita que el aparato se use como juguete, ni lo
deje desatendido mientras esté funcionando. Apague el
compactadorysáquelela llavepara impedirsu funcionamiento.
Guarde la llave del compactador en un lugar que no sea de
fácil acceso, para que no lo usen los niños ni otras personas.
2. No empuje la basura del cajón del compactador con las manos
o los pies. La basura podría contener vidrios rotos, piezas
metálicas cortantes, etc., que podrían causarle lesiones.
3. No compacte materiales volátiles. Las pinturas, trapos
aceitosos, latas de líquido para encendedores y latas
de diluyentes de pintura podrían encenderse de manera
espontánea y causar una explosión o un incendio.
4. No compacte latas de aerosoles ni de ningún otro recipiente
que tenga restos de productos químicos tóxicos, insecticidas
o combustibles, porque se podrían emitir vapores peligrosos
para la salud.
5. No compacte cigarrillos o puros prendidos ni otros artículos
calientes o quemándose.
6. No ponga un exceso de carga en el compactador.
7. Tenga cuidado al sacar y transportar la bolsa. Los vidrios
rotos u otros objetos cortantes podrían perforar la bolsa.
No sobrecargue la bolsa de basura con materiales pesados,
como el vidrio.
8. No utilice esta unidad con una extensión eléctrica.
9. Utilice únicamente los accesorios aprobados por Electrolux.
10. No toque las piezas móviles.
11. No desarme este aparato. Si el aparato se llegara a armar
de forma incorrecta, podría provocar descargas eléctricas al
ponerse en funcionamiento.
12. No haga funcionar este aparato con un cable de alimentación,
enchufe o motor dañados, o después de que se hayan dañado
de cualquier manera. Toda inspección o reparación del
compactador deben estar a cargo de un técnico de servicio
autorizado.
13. Este compactador es SÓLO PARA USO DOMÉSTICO.
Use este aparato únicamente de la manera descrita en
este manual.
14. Desenchufe el aparato del tomacorriente antes de realizar
el servicio.
ADVERTENCIA ADVERTENCIA

15
Características
Área de almacenamiento de bolsas
Seguro de llave
Panel de control electrónico
Bandeja del disco de control de olores
Pistón
Bote de basura deslizante
Rodillos niveladores
Patas niveladoras
Entrecierre de la puerta
Trabas del bote de basura (2)
Lengüeta de liberación de la placa de compactación
Placa de compactación
Accionador del entrecierre
Respaldo de la batería
Cómo funciona el compactador
El compactador comprime la basura doméstica hasta 1/6 de su volumen original. Compacta basura doméstica
normal, como cartones de leche, botellas de vidrio y de plástico, recipientes y frascos, latas de estaño, envolturas,
cajas, residuos de alimentos, etc.
Al encender el compactador, un pistón eléctrico desciende en el bote de basura, comprime la basura, regresa a la
posición de “ARRIBA” y se apaga automáticamente.
NOTA: El pistón baja hasta 2/3 de la profundidad del bote de basura. Debido a esto, el bote de basura tiene que
estar al menos 1/3 lleno antes de que se note cualquier compresión.

16 Instalación
El compactador está diseñado para ocupar un mínimo espacio
sin pérdida de capacidad, ya sea como instalación independiente
o empotrada.
Elcompactador se envía configurado únicamentepara instalación
empotrada. La configuración de este aparato puede convertirse
de empotrada a independiente mediante el juego accesorio de
zócalo modelo ETC15TKH (que se vende por separado). Si se
requiere un cable más largo para una instalación independiente,
quite la pinza para el cable y la atadura de cables de la parte
posterior de la unidad.
PRECAUCIÓN: De no usar el juego accesorio de zócalo modelo
ETC15TKH en una instalación independiente puede ocasionar
que el compactador esté inestable durante su funcionamiento.
FLEJES DE MONTAJE
Se incluyen dos flejes para montaje debajo de una cubierta. Utilícelos
para afianzar el compactador a la cara inferior de una cubierta.
Sujete el extremo ranurado de los flejes al compactador mediante
los orificios de la parte superior del gabinete del compactador, tal
como se muestra.
NOTA: Cuando instale el compactador debajo de superficies de
gabinete de granito o sólidas, doble las correas de montaje de tal
manera que se puedan fijar a los gabinetes adyacentes.
ABERTURA DEBAJO DE LA CUBIERTA
El compactador requiere una abertura debajo de la cubierta de
las siguientes dimensiones: 38.1 cm (15 pulg.) de ancho, 87.9 cm
(34
⅝
pulg.) de alto y 60.9 cm (24 pulg.) de profundidad.
En la abertura debe haber un
tomacorriente que cumpla con
todos los requisitos y códigos
eléctricos aplicables. Si desea
información específica, vea la
sección “Instrucciones para la
puesta a tierra”, en la página 15.
PARTE SUPERIOR DEL
COMPACTADOR
PARTE FRONTAL DEL
COMPACTADOR
PINZA PARA EL CABLE
El compactador está equipado
con un cable de alimentación de
1.83 metros (6 pies) de largo. Utilice
la pinza para el cable para evitar que
el exceso de cable quede atrapado
debajo del gabinete durante la
instalación o el servicio.
PINZA PARA
EL CABLE
Instalación independiente
Instalación empotrada
Opening
15" Wide
34-1/2" High
22" Deep
38.1 CM
(15 PULG.)
ANCHO
TOMACORRIENTE
60.9 CM (24 PULG.)
PROFUNDIDAD
87.9 CM
(34 ⅝PULG.) ALTO
30.5 CM
(12 PULG.) MÍN.

17
El compactador tiene cuatro niveladores ajustables:
(2) rodillos en la parte de atrás y (2) patas en la parte de
adelante; esto permite ajustarlo para pisos disparejos y
también para “recortar” la unidad con el fin de que quepa
en una instalación debajo de la cubierta.
Para nivelar la parte posterior del compactador:
Incline la parte posterior del compactador hacia arriba y
sobre un bloque de madera. Afloje los tornillos de ajuste
sólo lo suficiente para mover los rodillos a una ranura
superior o inferior. Vuelva a apretar los tornillos de ajuste
y saque el bloque de madera.
Para nivelar la parte frontal del compactador:
Incline la parte frontal del compactador hacia arriba y
sobre un bloque de madera. Gire las patas niveladoras
hacia adentro o hacia afuera a la posición deseada.
Saque el bloque de madera.
Instalación
PARTE POSTERIOR DEL
COMPACTADOR
BLOQUE DE
MADERA
TORNILLOS DE
AJUSTE
RANURAS
RODILLOS
PARTE FRONTAL DEL
COMPACTADOR
BLOQUE DE
MADERA
PATAS
NIVELADORAS
Nivelación del compactador

18
El compactador tiene un interruptor de seguro de llave que sirve
como medida de seguridad para su protección.
El compactador no funciona cuando
el interruptor del seguro de llave está
en la posición de “APAGADO” (OFF) o
“BLOQUEADO” (LOCK). Saque la llave
para impedir que la unidad sea operada por
niños o prevenir que otros la manipulen de
manera indebida.
Cuando el interruptor del seguro de llave
está en la posición de “ENCENDIDO” (ON),
el compactador está listo para funcionar.
No se puede sacar la llave en la posición
de “ENCENDIDO” (ON).
NOTA: La unidad dejará de funcionar si se abre la puerta durante
su funcionamiento. Si el compactador se para durante su ciclo,
siempre se moverá hacia “ARRIBA” al cerrarse la puerta.
Preparación
El compactador está equipado con un disco de control de olores
que dura hasta 6 meses, cuando se instala en el compactador
de basura. El disco de control de olores viene empacado en
una bolsa de lámina metálica y se activa una vez que se abre
la bolsa.
Opcional: Puede escribir las fechas en las etiquetas del disco de
control de olores de esta manera:
• Cuando se abra la bolsa, escriba la “Fecha de activación” en el espacio incluido
en la parte superior del disco.
• Escriba las fechas en las etiquetas VERDES indicadoras de meses de esta manera:
Etiqueta de “Fecha de avance” del mes 1 = A 1 mes de la “Fecha de activación”
Etiqueta de “Fecha de avance” del mes 2 = A 2 meses de la “Fecha de activación”
Etiqueta de “Fecha de avance” del mes 3 = A 3 meses de la “Fecha de activación”
Etiqueta de “Fecha de avance” del mes 4 = A 4 meses de la “Fecha de activación”
Etiqueta de “Fecha de avance” del mes 5 = A 5 meses de la “Fecha de activación”
Escriba las fechas en la etiqueta ROJA indicadora de meses de esta manera:
• Etiqueta de “Fecha de reemplazo” del mes 6 = A 6 meses de la “Fecha de
activación”
Precaución: El disco de control de olores contiene un material
que puede provocar una irritación moderada en los ojos. Evite el
contacto con los ojos. Es nocivo si se ingiere. Lave la piel o la ropa
meticulosamente con agua y con jabón después de manipular el
producto. No reutilice la bolsa vacía de lámina metálica.
Uso del interruptor del seguro de llave
Instalación del disco de control de olores
Indicador LED
de estado de olor
1. Saque el disco del
sobre de lámina
metálica, abra la
puerta del disco
de control de
olores y ponga
el disco de cara
hacia abajo
en la bandeja.
Asegúrese de que
la etiqueta verde
que dice “Mes 1”
quede de frente a
la puerta del disco
de olores.
2. Presione “Restablecer”
(Reset) para iniciar el
temporizador. El indicador
LED de estado de olor
estará de color VERDE.
3. El disco avanzará al mes siguiente después de que
transcurran 30 días o al presionar “Avanzar” (Advance).
Una vez que el disco avance, comenzará el siguiente
periodo de 30 días.
4. Al finalizar el 5o. mes, el indicador LED de estado de olor
DESTELLARÁ EN COLOR VERDE para indicar que el disco
está en su último mes.
5. Al finalizar el 6o. mes, el indicador LED de estado de olor
cambiará a color ROJO para indicar que se debe cambiar
el disco.
6. Tire el disco usado a la basura, coloque un nuevo disco y
presione “Restablecer” (Reset).
El disco de control de olores, modelo ETC15ODH, puede
conseguirse a través de su distribuidor Electrolux.
Instalación de la bolsa
Con la puerta abierta y
el bote de basura en la
posición más hacia afuera,
coloque una bolsa en el
bote. Doble la bolsa sobre el
borde superior del bote, en
todos los lados.
Presione la bolsa dentro de
las esquinas del bote y alise
el fondo.
Alise y dele forma a la
bolsa con cuidado; eso
evitará que el pistón
rompa la bolsa durante la
compactación.
Asegure la bolsa en su
sitio con los 2 botones
que están a cada lado del
bote. La bolsa viene con
ranuras ya hechas para
este propósito.

19
El compactador está ahora listo para usar.
PARA OBTENER MEJORES RESULTADOS, SIEMPRE
LLENE TOTALMENTE CADA BOLSA NUEVA ANTES DE
HACER FUNCIONAR EL COMPACTADOR. SI LO HACE ASÍ,
REDUCIRÁ AL MÍNIMO LA PROBABILIDAD DE QUE LA
BOLSA SE LEVANTE Y SE ROMPA.
1. Deslice y cierre completamente el bote de basura.
2. Gire el interruptor del seguro de llave a la posición de
“ENCENDIDO” (ON).
Interruptor del seguro de llave
3. Seleccione 1 de 2 modos de compactación:
Modo de compactación “normal”
Presione el botón “Inicio” (Start) y cierre
la puerta. El pistón se moverá hacia
abajo al bote y compactará la basura.
Al terminar la carrera del pistón, se
invierte automáticamente y se mueve hacia arriba, saliendo
del bote de basura. El ciclo total dura 45 segundos
o menos. Al llegar arriba, el compactador se apaga
automáticamente y está listo para recibir más basura.
Modo de compactación de “espera” (hold)
Presione el botón “Inicio” (Start) y cierre
la puerta. El pistón se moverá hacia
abajo al bote y compactará la basura.
Al terminar la carrera del pistón, se
apagará. Presione nuevamente el botón
de “Inicio” para invertir la marcha del pistón de modo
que suba y salga del bote de basura. Al llegar arriba, el
compactador se apaga automáticamente y está listo para
recibir más basura.
4.
Presione el botón “Inicio” (Start)
Botón de “inicio” (Start)
5. Cierre la puerta para que comience a compactar.
El compactador se apagará automáticamente al finalizar
el ciclo de compactación.
6. El ciclo de compactación puede interrumpirse en cualquier
momento abriendo la puerta. Una vez que se detenga, el
pistón se moverá siempre hacia arriba al cerrar la puerta.
El compactador está equipado con un mecanismo de retraso
automático/reloj que permite compactar la basura en el momento
deseado (por ejemplo, todas las noches).
1. Para ajustar la hora del reloj:
Presione y sostenga el botón “Ajustar reloj” (Set Clock)
hasta que destelle la pantalla. Presione los botones “+” y
“-” para fijar la hora actual.
2. Para ajustar el tiempo de inicio con retraso:
Presione y sostenga el botón “Ajustar retraso” (Set Delay)
hasta que destelle la pantalla del reloj. Presione los botones
“+” y “-” para fijar la hora de retraso. Presione y sostenga
el botón “Ajustar retraso” (Set Delay) otra vez, hasta que la
pantalla del reloj muestre la hora actual.
3. Para activar el inicio con retraso:
Presione el botón “Inicio con retraso” (Delay Start). El botón
arriba del LED se encenderá y la pantalla del reloj mostrará
la hora de inicio con retraso. Al llegar el reloj a la hora de
retraso automático, el pistón compactará y mantendrá la
basura por 2 horas, y luego regresará a la posición anterior.
4. Para interrumpir el modo de inicio con retraso durante el
periodo de contención de 2 horas:
Abra la puerta y presione el botón “Inicio” (Start). Cierre
la puerta y el pistón regresará a la posición de “ARRIBA”
y se detiene. Abra la puerta para agregar más basura al
bote. Cierre la puerta y el pistón regresará a la posición de
contención por el resto del periodo de 2 horas.
5. Para cancelar el inicio con retraso:
Presione el botón “Inicio con retraso” (Delay Start). Cierre la
puerta y el pistón regresará a la posición anterior.
El compactador está equipado con un respaldo de batería,
para conservar los ajustes del reloj en el caso de que se
interrumpa la alimentación eléctrica de la unidad.
Quite la tapa de la batería e instale una batería de 9 voltios
(no incluida).
NOTA: El respaldo de la batería no suministrará electricidad
para hacer funcionar el pistón.
Respaldo de batería
Funcionamiento
Compactación Retraso automático / Reloj
Respaldo de batería
pm
auto

20
EXCEPTO PARA LA LIMPIEZA DESCRITA EN LA SIGUIENTE SECCIÓN,
TODO SERVICIO DEBERÁ REALIZARLO UN REPRESENTANTE DE
SERVICIO AUTORIZADO.
El compactador está diseñado con acceso fácil para limpiarlo
cuando sea necesario.
El interior y el exterior del gabinete tienen un acabado de
esmalte duradero.
No use esponjas ni limpiadores abrasivos que podrían dañar el
acabado del compactador. Utilice una solución de detergente suave
para estas superficies.
Es posible que haya fragmentos de vidrio u otros objetos
cortantes en las superficies que se vayan a limpiar o alrededor
de ellas. Retire cuidadosamente estos objetos antes de limpiar
cualquier superficie.
QUITE EL BOTE DE BASURA Y LIMPIE EL INTERIOR
2.
3.
1.
TORNILLO
• Aunque no es necesario hacer funcionar el compactador antes de que el
cajón esté lleno o casi lleno, para lograr una máxima compactación se sugiere
arrancar el compactador cada vez que se agregue una cantidad considerable
de basura.
• En la carrera completa, el pistón no baja hasta el fondo del bote de basura.
La basura que esté en el último tercio del bote se aplastará durante las
compactaciones subsiguientes.
• Las botellas de vidrio hacen bastante ruido al romperse durante la
compactación; esto es normal. Las botellas no siempre se rompen durante el
primer ciclo. La ruptura del vidrio y el ruido correspondiente podrían ocurrir
unos cuantos ciclos después, según el tipo y el volumen de la basura.
• Las botellas y las latas grandes se compactan mejor cuando se colocan
acostadas cerca del centro del bote de basura.
• Ponga un par de hojas dobladas de papel periódico o una bolsa de papel
(de supermercado) encima de la carga en los siguientes casos:
Cuando vaya a compactar botellas o frascos de gran
tamaño o varios frascos o botellas (o cualquier artículo que
podría hacerse añicos). Esto evitará que los fragmentos y
partículas de vidrio salgan despedidos desde el bote hacia el
mecanismo del compactador.
Cuando vaya a compactar residuos de alimentos que no
estén envueltos. Esto ayudará a mantener limpio al pistón
eléctrico.
• La compactación de cargas sumamente diferentes podría causar que el bote
de basura se mueva hacia delante, y eso podría ocasionar que la puerta
se abra, interrumpiendo el ciclo de compactación. Con cuidado, presione
y mantenga cerrada la puerta para activar el pistón hasta que regrese a la
posición de arriba. Abra el bote de basura y cambie la posición de cualquier
objeto que pudiera estar ocasionando las diferencias de la carga. Cierre
la puerta y presione el botón de “Inicio” para volver a activar el ciclo de
compactación.
• Ciertos tipos de basura crean olores sumamente fuertes, como carne y
pescado crudos, cáscara de toronja, artículos de higiene personal y pañales
desechables. Se aconseja no poner estos artículos en el compactador.
• Si el compactador no va a utilizarse durante un periodo largo de tiempo,
como por ejemplo, durante unas vacaciones, saque la bolsa para evitar olores
indeseables.
NO SE DEBEN COMPACTAR LATAS DE AEROSOLES NI DE NINGÚN
OTRO RECIPIENTE QUE CONTENGA O QUE HAYA CONTENIDO
PRODUCTOS QUÍMICOSTÓXICOS, INSECTICIDAS O COMBUSTIBLES.
LA COMPACTACIÓN DE DICHOS ARTÍCULOS PODRÍA PROVOCAR LA
EMANACIÓN DE VAPORES PELIGROSOS PARA LA SALUD O PODRÍA
PROVOCAR UN INCENDIO O UNA EXPLOSIÓN.
No ponga pinturas, trapos aceitosos, latas de líquido para encendedores,
latas de diluyentes de pintura, etc. en el compactador. Dichos artículos
podrían encenderse de manera espontánea y causar un incendio o
una explosión.
NUNCA EMPUJE LA BASURA DEL BOTE CON LAS MANOS O LOS PIES.
En la basura podría haber vidrios rotos, piezas metálicas cortantes, etc.,
que podrían causarle lesiones.
•
•
1. Saque el bote de basura
deslizándolo hacia afuera.
2. Afloje las trabas del bote y baje
el frente del bote.
3. Desabotone la bolsa del bote
y ciérrela torciendo la parte de
arriba. Amárrela con el alambre
de amarre incluido.
4. Levante la bolsa y deslícela hacia afuera del bote.
Sugerencias para la compactación Limpieza
Mantenimiento
Retiro de la bolsa
PRECAUCIÓN
PRECAUCIÓN
LENGÜETA DE LIBERACIÓN
DEL MECANISMO
DESLIZANTE DEL BOTE
This manual suits for next models
2
Table of contents
Languages:
Other Electrolux Trash Compactor manuals

Electrolux
Electrolux E15TC75HSS - ICON Designer User manual

Electrolux
Electrolux EI15TC65HS - Undercounter Trash Compactor User manual

Electrolux
Electrolux E15TC75HPS - Fully Integrated Trash... User manual

Electrolux
Electrolux EI15TC65HS - Undercounter Trash Compactor User manual

Electrolux
Electrolux EI15TC65HS - Undercounter Trash Compactor Operating manual

Electrolux
Electrolux EI15TC65HS - Undercounter Trash Compactor User manual

Electrolux
Electrolux E15TC75HSS - ICON Designer User manual

Electrolux
Electrolux ETC15TKH User manual