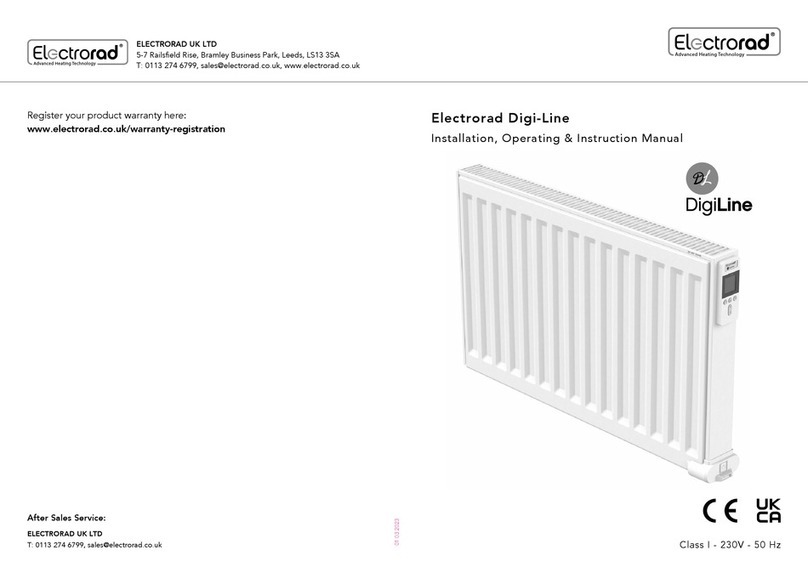
Electrorad DigiLine Series User manual

1

An Introduction to Digi-Line
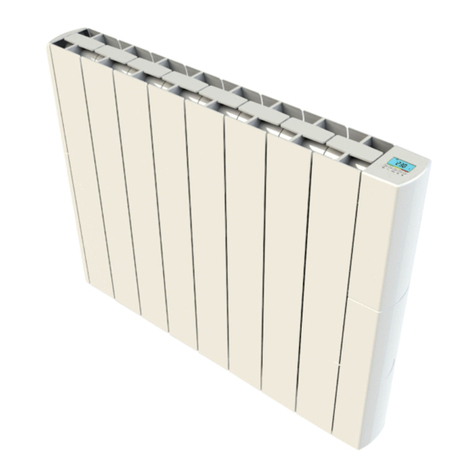
The Digi-Line electric radiator range has been designed and is manufactured in Britain, to give electricians the same
choice of radiator type and selection of sizes as plumbers have always been used to. The radiators are filled with a
thermal fluid to transfer heat to the whole of the surface area without the need for any pump or moving parts. The
fluid is heated by 100% efficiency electric elements which are controlled by the most advanced thermostat
electronics available. The radiator body is constructed in steel and powder coated to ensure a high quality, extremely
long lasting and robust finish. The range is available in 500mm & 300mm heights and power ratings from 500 watts
to 2000 watts. Single panel and double panel radiators are available and both have convection fins to ensure the
perfect balance of radiant and convected heat. Only the very best components and materials have been used in the
new Digi-Line range. There are some more very special, unique and energy saving features built in to the new
electronics. All features do not have to be used but can be activated if required. 1. Energy saving open window
feature –this senses when a window has been opened and stops the radiator heating until the window is closed. 2.
Surface temperature control –The surface temperature can be operated at the full 90 deg C or reduced to a
maximum of 75 deg C or a maximum of 60 deg C. ( Surface temperature reduction will reduce the heating power ) 3.
Double panel radiator smart control –If the room temperature is within 1 deg C of the set point, the front panel only
will operate. If the room temperature is more than 1 deg C from the set point, the back panel will also operate to act
as a boost and re-heat the room faster.
With the Touch E3 it is no longer necessary to go to a radiator to make control changes, any radiator in any room of
the property can be controlled individually from this central control. Because it is communicating with each radiator
it can utilise the thermostat sensors on each of the radiators to produce exactly the temperature you want in each
room separately. This means you also have absolute control of the energy use. All features can also be controlled
from the Clevertouch app from anywhere in the world
2

Controlling your Digi-Line Radiators
There are 3 ways to control your Radiators:
Independently –Each radiator has its own built in
thermostat and set of controls. You can either use these
manually, or set a timer and in theory, never have to touch
them ever again!
With our central controller –You can pair up your radiators
to our Touche3 to give you one point of central control, once
paired up these are nice and easy to use.
With our Clevertouch app- If you have the Touche3, you can
connect this to the internet wirelessly and download the
Clevertouch app so that you can control your radiators from
anywhere in the world.
3

Independent control - manual
Setting the date and time on the Digi-Line Radiator.
•Press and hold the OK button for 3 second and a 24 hour clock will appear as 00:00
•The hour value will blink and you can use the arrow up and down button to select the hour of the day. Press OK.
•The minute value will now blink for you to select the minute of the hour in the same way. Use the arrow up and
down keys to select the correct minute and press OK.
•You will now notice that numbers 1 –7 down the left hand side of the screen are flashing, these represent the
days of the week. It is a good idea to call day 1 Monday, day 2 Tuesday and so on. Use the arrow up and down keys
to select the current day. Press OK to confirm.
Setting the temperatures on the radiator.
You can set 2 different temperature settings on each radiator:
Comfort Setting –when you want to be nice and warm, symbolised by a sunshine icon
Economy setting –Set back temperature, symbolised by a moon icon
•Press the arrow right button once to illuminate the screen and then use the arrow right button to scroll across the
icons at the top of the screen. Each time you press the arrow right, the little square box will move across each
icon. Press ok once you have selected the sunshine icon.
•The sunshine icon represents your comfort temperature. You can now use the arrows up and down to increase or
decrease the temperature that you want the room to be so that you are comfortable. Once you have selected
your desired temperature, press ok. The radiator will now heat the room until it gets to your set point. Once it has
achieved your set point temperature, it will hover around at a luke warm temperature, clicking on and off to
compensate for any heat loss.
•Now repeat this process, this time selecting the moon icon to set your desired set back temperature.
•All you need to do now is scroll across the icons between the sunshine and moon icons, using the left and right
arrow keys and pressing ok when you want to change between your comfort and set back temperatures.
4

Independent control –Timed settings
First of all, set your date, time, comfort and set back temperatures following the steps for manual control on the previous page. It helps if you have an
idea before you start of when you want your radiator to be on comfort and when you want it to be on set back for a full weekly cycle.
1.) Using the arrow right button, move along the icons to the clock symbol and press OK.
2.) Using the arrow down key, scroll until you reach U1 then press and hold the OK button for 3 seconds. You will now see the following screen:
You will notice that number one is highlighted. As mentioned earlier we treat
day 1 as Monday, so you are about to set Monday in your weekly cycle.
You will also notice that the moon is present, this means that you are setting
the setback temperature first as most people require this at midnight and we
start setting the timings from 12am.
3.) Now if you press the arrow up button, you will notice that the time changes in 30 minute intervals each time you press it. Keep pressing the arrow
up button until you get to the time you want the temperature to change to comfort. e.g. 7am
4.) Now you are at the time you want the radiator to come on to comfort setting, press OK and you will see the moon icon disappear and the sunshine
icon will now be show instead. Press the arrow up key again until you reach the time that you want the radiator to drop back to the set back
temperature.
5.) Now press OK again and you will notice the sunshine disappear and the moon will come back. Repeat steps 4 and 5 until you reach 23:30
6.) You have now completed the temperature settings for Monday. You will notice that bars along the timeline at the bottom of the screen indicate
when comfort mode has been selected. When you press the arrow up button again, the words ‘copy will appear on the screen, this is asking you if you
want to copy the exact same timings for the next day which would be Tuesday. If you want to do this then press OK.
7.) If you want a different set of timings for the next day, press the arrow up key for no, then you can start again for this day starting from step 4.
8.) Once you reach 23:30 on day 7, the next time you press OK you will be asked if you want to save the full week’s cycle. Press OK and then this full
week will be saved to the U1 pre-set.
The radiator will now automatically put you into U1 setting and in theory, you should never have to touch the radiator again.
5

Temporary Override of the current set
point temperature
If you come home early, or you are too warm for any reason and you want to
temporarily change the temperature, you can select a new temperature and a
duration to override your current timings. Here’s how:
1.) Push the arrow up button and you will be shown a temperature, you can
then use the arrows up and down keys to adjust what you would like it to be,
then Press OK
2.) You will now see the word ‘no in the screen. From here, push the arrow up
key for how many hours you want the override to stand for, so for 1 hour,
push up once and you will see 1h, if you want to override for 3 hours, push up
3 times and you will see 3h in the screen, then press OK.
3.) The radiator will return to the normal temperature after the override time
has expired.
6

Using Digi-Lines with the Touche3
Understanding the buttons on the touche3:
Setting up your Touche3
1. Press “main menu” button A (See Image above)
2. Press “user settings” button F which is the silhouette of a person’s head
and shoulders
3. Click on the ‘hour’ setting and then use the + and – buttons to select the
current hour of the day
4. Now press the arrow right button and do the same for the minutes,
then press the green tick
5. Now press the date button and set the correct date in the same way that
you set the time then press the green tick again.
7

Now let’s create your house on the
touche3
1. From the home screen, press menu, then a 5 second press on the parameter
settings key ( House with a sunshine in the middle)
2. Press the “ house creation” button
3. You will now see the screen below, we have labelled the buttons with letters
to help show you which buttons to press.
4. Press button b, the button at the bottom right (looks like a keyboard) to
change the room name to whatever you like, for example, lounge, kitchen,
Melanie’s Bedroom. You will need to press the button at the bottom right with
all the back arrows on to delete the current text, label your room, then press
the green tick.
5. Press C, the + key, to add a room, repeat step 4.
6. Repeat step 5 until you have added all of your rooms in the house where you
will have a Digi-Line radiator.
8

Pairing Radiators with the touch e3
1. On the Touche3, Press the menu button
2. Press and hold the Parameters button (House with a sunshine in)
3. Select radio paring
4. Press “heating”
5. Select room –You may get a warning message to tell you must first be in the zone, this is just
telling you to make sure that you are next to the radiator with the touch e3. A battery is in the
Touche3 so you can walk around freely with it for a period of time. Just press the green tick.
6. Press on radio pairing. It will say pairing on-going
7. Now go to radiator press and hold OK for 10 seconds
8. RFI will show, press OK
9. Rfun will show, press + button (If Rf.bi shows, just press ok and go to step 11)
10. Rf.bi will show, press OK
11. Now on the touch e3 you should see ‘wait pairing on-going’ and on the radiator screen you will
see a running line along the middle of the screen.
12. Once the touche3 has found the radiator, it will ask you to select either a 1 radiant panel are 2
radiant panels, select the appropriate choice. If you are unsure, take a look behind the radiator as
best you can, if the fins look open to the wall, you have a single panel radiator, if there appears to
be a back panel and the fins are in the middle, you have a double panel.
13. Now you will be asked to enter the power of the radiator, make sure you enter the wattage
correctly., then press the green tick
14. You will then be asked to give the device a name, it makes sense to call this the same name as the
room, this is more so for if you have more than one radiator in the same room, so you might call it
Lounge 1 and lounge 2 if you had 2 radiators in your lounge.
15. Now repeat this process to pair up all of your radiators.
9

To Set Temperatures on your Touche3
(If you are using the app, skip straight to using the Touche3 with the app page 12)
1. Press the home button at the bottom left on the home page (button b on the start screen.)
2. Choose which room you are working on by pressing the black arrow buttons (Button E). you will then be
presented with this screen, the control menu:
3. Now press button 3, which will take you to the ‘current mode menu’ shown above.
4. To set comfort mode, press button g, symbolised by the sunshine, then press the green tick in the bottom right.
5. You will now be back on the control menu and you can use the + and _ keys on the right hand side (buttons 6)
to adjust your comfort temperature to how you like it.
6. Now to set your set back temperature, press button 3 again on the control menu, then press button I on the
current mode menu, (the moon icon) then press the tick, as before use the + and –keys to select your desired
reduced temperature.
7. To set anti-freeze, repeat the above process choosing the snowflake, button k on the current mode menu.
10

To Set Timings on your Touche3
(If you are using the app, skip straight to using the Touche3 with the app page)
1. Press home button
2. Navigate to the room that you want to set the timings for using the arrow left and right keys.
3. Press button d on the room menu
4. Press auto (button h)0, then press the button underneath the auto icon, button M on the current mode menu.
5. Press create
6. Press days of the week you want to be the same i.e. Monday-Friday (this will highlight them in grey, the days you do not want setting should be red)
7. Using the arrow keys, scroll the time to 00.00-00.15, the lime green light indicates where you are at on the blue bar in the centre of the screen, so this
should be all the way over to the left hand side.
8. You can set the timings in 15 minute intervals. You can just press either the sunshine or the moon icon for every 15 minute interval throughout the
day, each time you press either the sun or moon, you will be automatically moved on to the next 15 minute interval. For every time period you have
selected your set back temperature, you will have a blue block and for every time period you have selected the comfort temperature, you will have a
taller orange block.
9. So for example, if you want your heating to be on set back through the night, then come on for a couple of hours at 7am in the morning, then set back
during the day while you are out at work, then back on from 5pm –11pm in comfort mode, Monday to Friday, your screen should look like this:
10. Press tick once you are happy. The days of the week turn green to show timings have been saved
11. If you want the weekend different, press Saturday and Sunday, use steps 7 –9 then press the tick
12. You will then get a warning to say your old program will be modified, if you had one, just press the tick to accept
13. Now click the arrow back button at the bottom left twice, click on button d on the room menu (this will either be a sun or moon), now click auto to put
the radiator into auto mode, and then click the green tick. You will now see button d has turned to a clock icon
14. Now to set all the timings on your other radiators by repeating steps 2-12.
11

Using the Touche3 with the
Clevertouch App
Connecting your Touche3 to your internet router
PLEASE FOLLOW ALL OF THE STEPS ON PAGES 12 –13 IN ORDER
1. On your Touche3, Press “ menu” button at the bottom right. This is button A on the start screen
menu as shown above.
2. Press and hold the “parameter setting” button which is the icon on the far right on the bottom
line. (It looks like a house with a sunshine in the middle) You will have to press and hold this
button for about 5 seconds
3. Using the arrow up and down buttons on the right hand side of the screen, scroll down to the
“Wi-Fi settings” button and click on the ‘Wi-Fi settings’ box.
4. Press the “Research networks” button. A list of available Wi-Fi networks will be displayed,
hopefully your router name will now appear, select this and then enter your Wi-Fi password.
5. Sometimes red numbers start counting down from 120, just let that happen. If it gets to 0 and
you still have state 0/2, it hasn’t worked, check you have entered the correct wifi password and
try again.
6. When your Wi-Fi connection succeeds, state 1 of 2 will be green with a tick.
12

Installing the Clevertouch App
1. Download the free App “Clever Touch gen 2” from Apple store or Google play
2. Open the app and click on ‘Create an account’
3. Enter your email address in the top box and then pick a pass word of your choice to type
4. in the middle box, then repeat the password in the bottom box.
5. You will also need to put a tick in a box to accept the t’s and c’s, Now press validate.
6. You will now be presented with a notification box to say that a confirmation e-mail has
7. been sent to you. Click ok.
8. Now check your emails to find an email from clever touch, titled validate your account.
9. Open up the e-mail and click on the blue link. You will then be presented with this message, to say that your
account has now been validated.
10. Now open up the app again on your mobile device and enter your previously chosen pas word and press ok.
11. You will now be presented with this screen (List of my touche3, Your first steps)
12. Click on the + button at the top right, you will now see this screen (Pairing code)
13. Press the black ‘send code’ button
14. You will now be presented with a message to notify you that the code has been sent to your email address and
will only be valid for 24 hours.
15. Now open up your emails again and you should have received a second code from clever touch with the title ‘get
the pairing code.
16. Now go back on the touche3, press the menu button.
17. Press the black and white Wi-Fi button
18. Now press internet access password
19. Now enter the code that you received via email –this is case sensitive, and then press the green tick.
20. You should now see state 2/2 in the green tick on the right hand side.
21. Now press the back button on the bottom left of the Touche3 which shows a curvy arrow pointing backwards to
take you back to your home screen
13

Using the Clevertouch App
When you first open up the app, you will be presented with a list of Touche3’s that are set up to your
account. Most people just have the one, but some people have 2 or more if they have families on their
or rental properties.
Click on the home you wish to control. From here you will see all the rooms names that you have set
up. If you want all of the radiators in the home to be the same, you can just select ‘all installation’ at the
top left of the screen to control all of them at once.
Click on the room you wish to control. This screen will show you the current
temperature in the room and the setpoint. From here you can change the
temperatures by clicking on the black circle under the ‘C’ showing the temperature.
You will then be presented with this screen:
From here you can slide the black circle up and down the temperature bar to
change the setpoints. Simply click on the sunshine moon or snowflake, and slide the black
circle to your chosen new setpoint then press apply.
You can also click the ‘off’ key to turn the radiator off completely
14

If you would like to amend the timings on one of your radiators using
the app, click into the home and then into the room you wish to amend.
Again click the black circle button under the ‘C’ for the temperature, then
click ‘program’ in the bottom left. From here You can click on add a
comfort or eco period, depending on how you wish to amend.
From here enter the start and end time of the new period you
wish to set then press save, you will see then the green periods
which represent the set back periods and the yellow periods
which represent your comfort times.
Holiday Mode.
If you are going on holiday, you can click on holiday mode from your home screen,
Enter the dates that you are going away and the the time of your return, then press
Set. Your radiators will now go into anti-frost mode until the time of your return,
When your usual settings will then return.
15

FAQ’s
How do you know when the radiator is heating?
On the touche3, the flame in the middle of the house will be red and flickering. If the flame is black and constant, the radiator is not heating.
On the app, you will see 3 red wiggly lines pulsing at the side of each radiator that is on.
On the radiator, 3 wiggly lines will be present to the left of the temperature.
How do I override the temperature temporally, for example, coming home sooner than expected?
Press the menu button, scroll to the room you want to change the temperature in and then use the arrow up and down keys to select the new temperature that you
want and leave it, this will then temporarily override the current set point temperature to the one you just entered for 2 hours, if you want it for a different length of
time, press button ‘D’ on room menu, then press the egg timer on the bottom row and use the arrow keys to select the length of time you wish to override for, this
can be up to 44 days, then press the green tick. Once the time is up, the radiator will go back to your set times.
How do I use the radiator in manual mode?
On the radiator, just use the arrow keys to select either the sunshine for constant comfort, or the moon for constant set back temperature.
On the touche3, press button ‘D’ on the room menu, select the comfort key, and then press the green tick. You can now use the + and – keys on the right hand side to
increase and decrease the temperature as you wish.
How do I turn off the open window feature?
This must be done on the radiator. Press and hold the OK key for 6 seconds, at 3 seconds the time will appear, keep a hold of the button untill you see ‘rFi’. Now press
the arrow right key 5 times and then press ‘OK’. Use the + and – button to select ‘no’ then press ‘OK’ again. /now press arrow right button 4 more times to see ‘End’
and press OK. You will now be back on the original screen and the open window feature has been disabled.
How do I lock and unlock the screen?
Press the ‘OK’ button to illuminate the screen, then simultaniously press the arrow left and arrow right buttons.
How do I calibrate the radiator?
Place a thermometer in the room at 1.5m distance from the floor so that it is similar to the thermostat and check the real temperature in the room after 1 hour. On
the radiator, press and hold the OK button for 6 seconds, then press the arrow right button twice then press ‘OK’. Now using the –and + buttons, enter the real value
shown on your thermometer. At this point the hand symbol will appear and blink, press the ‘OK’ key to confirm and save the new reading. Now press the arrow right
button 7 times to see ‘End’ then press OK.
16

What does state 1/2 and 2/2 mean?
State 1/2 means that you are connected to the Wi-Fi. State 2/2 means that the server.
How do I do a factory re-set?
•Carry out a soft factory re-set on TouchE3.
Press menu, 7th icon house with red dot for 5 secs, scroll down, select general factory default, you will then be presented with a screen that has an X on the left
and a tick on the right, press and hold the tick for 5 seconds.
•Carry out a hard factory re-set on TouchE3.
1). Turn off for 10 seconds.
2). Switch on until the screen's backlight flicks on (the screen may blink white, or show the normal Touch E3 screen, but it is only the screen lighting up for a
split second that we are interested in).
3). Switch off for 1 second.
4). Repeat steps 2 & 3 a total of 5 times.
5). Switch on and leave for approximately 3 minutes, or until the usual home screen, displaying the time appears.
For the first 2 minutes of this 3 minute period, the screen will turn white, but blink off and back on several times, while the reset process completes. For the last
1 minute, a black screen will appear with first a green progress bar, and then a red progress bar.
After the reset, the software version will have reverted back to 02.01 on the "Menu" screen. So now the software update can be made. Just make sure that all 4
files are on the micro SD card before the update is carried out.
•Carry out a factory re-set on radiator.
Press and hold OK button until “RFI” shows on the screen then press the right arrow until you see CLR, press and hold OK for 10 seconds. The screen will turn
off and on again and you will be at a screen that reads 00:00
•Can I reduce the surface temperature?
Yes you can. On the radiator, scroll along to the P icon on the far right. Press Ok to choose your power selection. P1 means a maximum surface temperature of
60 degrees C. P2 means a maximum surface temperature of 75 degrees and P3 means a maximum surface temperature of 90 degrees C.
17

Troubleshooting
COMPLAINT
Possible Resolution
There
is no power in the radiator
Check the power button switch is on
on the power box where the flex enters the radiator. Check the fuse and supply
going to the radiator, check the terminal in fuse spur/plug.
If you have a second radiator, try exchanging the control
unit with another control unit that works to see if the problem stays in the radiator, or leaves with the control unit. If
this is not possible, please try asking a qualified electrician to attach a plug and try the radiator in a socket that you
know works. If this doesn’t solve the problem,
please get in touch with the company that you purchased the radiator
from.
The
radiator is not Heating
Put radiator into sunshine mode and turn the temperature up to 30 degrees, check current room temp by pressing
OK, the radiator will only heat when set point is higher than room temp, calibration may be necessary if room temp
reading seems to be incorrect. Try a factory re
-set to see if this re-sets any setting you may have accidently set
previously.
If this doesn’t solve the problem, please get in touch with the company that you purchased the radiator
from. A draft may be activating the open window feature. Please de
-activate this feature.
App / Wireless
Signal Issue /
Touche3
Wireless signals can be affected by property structure, particularly metallic objects, try
placing the Touche3 in a
different location.
There is no indicator on the touche3 but you could use a phone or mobile tablet to stand next to
the touche3 to see what signal strength you get on that. If the signal becomes weaker, it is likely to be weaker still on
the touche3 as the receiver is weaker. Factors that effect the signal are walls, doors, and other appliances, the signal
travels in straight lines as the crow flies so the clearer the space between the 2, the greater this will improve. Either
move the router and touche3 closer together, or look at purchasing a
wifi booster to enhance the strength.
Also check the states on the Touch e3, 0/2 means the
wifi is not set up to the touche3. state ½ means that tha the
wifi
is connected but the touche3 is not connecting to the server. State 2/2 means wifi
is connected and the server is
too.
Check you
have all the relevant update information, the current version is V.03.05. Press the menu button on your
touch e3 to see your version displayed along the bottom. If you need any updates, please call
Electrorad on 01132
746 799. You could
try a repeater for the touche3, repeaters will only enhance the signal from the radiator to the
touche3.
The radiator keeps shutting
off
and is not achieving set point.
There may be a draft near your radiator which is causing the open window feature to kick in. Please de
-activate this
feature on
the radiator.
Press and hold the OK key for 6 seconds, at 3 seconds the time will appear, keep a hold of the
button
untill you see ‘rFi’. Now press the arrow right key 5 times and then press ‘OK’. Use the + and – button to
select ‘no’ then press ‘OK’ again. /now press arrow right button 4 more times to see ‘End’ and press OK. You will now
be back on the original screen and the open window feature has been disabled.
Make sure you are on full power setting 3
–on your radiator, scroll along the icons to the P icon and make sure you
are on P3.
18

COMPLAINT
Possible Resolution
I cannot get to state
1/2
Please be aware there are 2 places that say
wifi.
The 1
st is the black and white wifi button in the 1st menu, this is for your internet access password which is sent via e-
mail when you register with the app.
The 2
nd is in the installer menu and is labelled wifi settings, this is where you enter your wifi password from your
router.
I cannot get to state 2 / 2
This may mean that there is a problem with your internet connection or the server.
Check your internet connection.
Try a power cycle on your router (turning it off an on again)
Can I get any further help or
support?
Yes of course, please get in touch with the
Electrorad customer service team by calling 01132 746 799 or e-mail
My app only works when I am at
home?
Check
that you have state 2/2 on your Touche3. Check your internet connection. Try a power cycle on your router
(turning it off an on again)
19
Table of contents
Other Electrorad Heater manuals
