Please inspect the product immediately upon receipt for transit damage, missing
packs/parts or manufacturing fault. Damage reported later cannot be accepted.
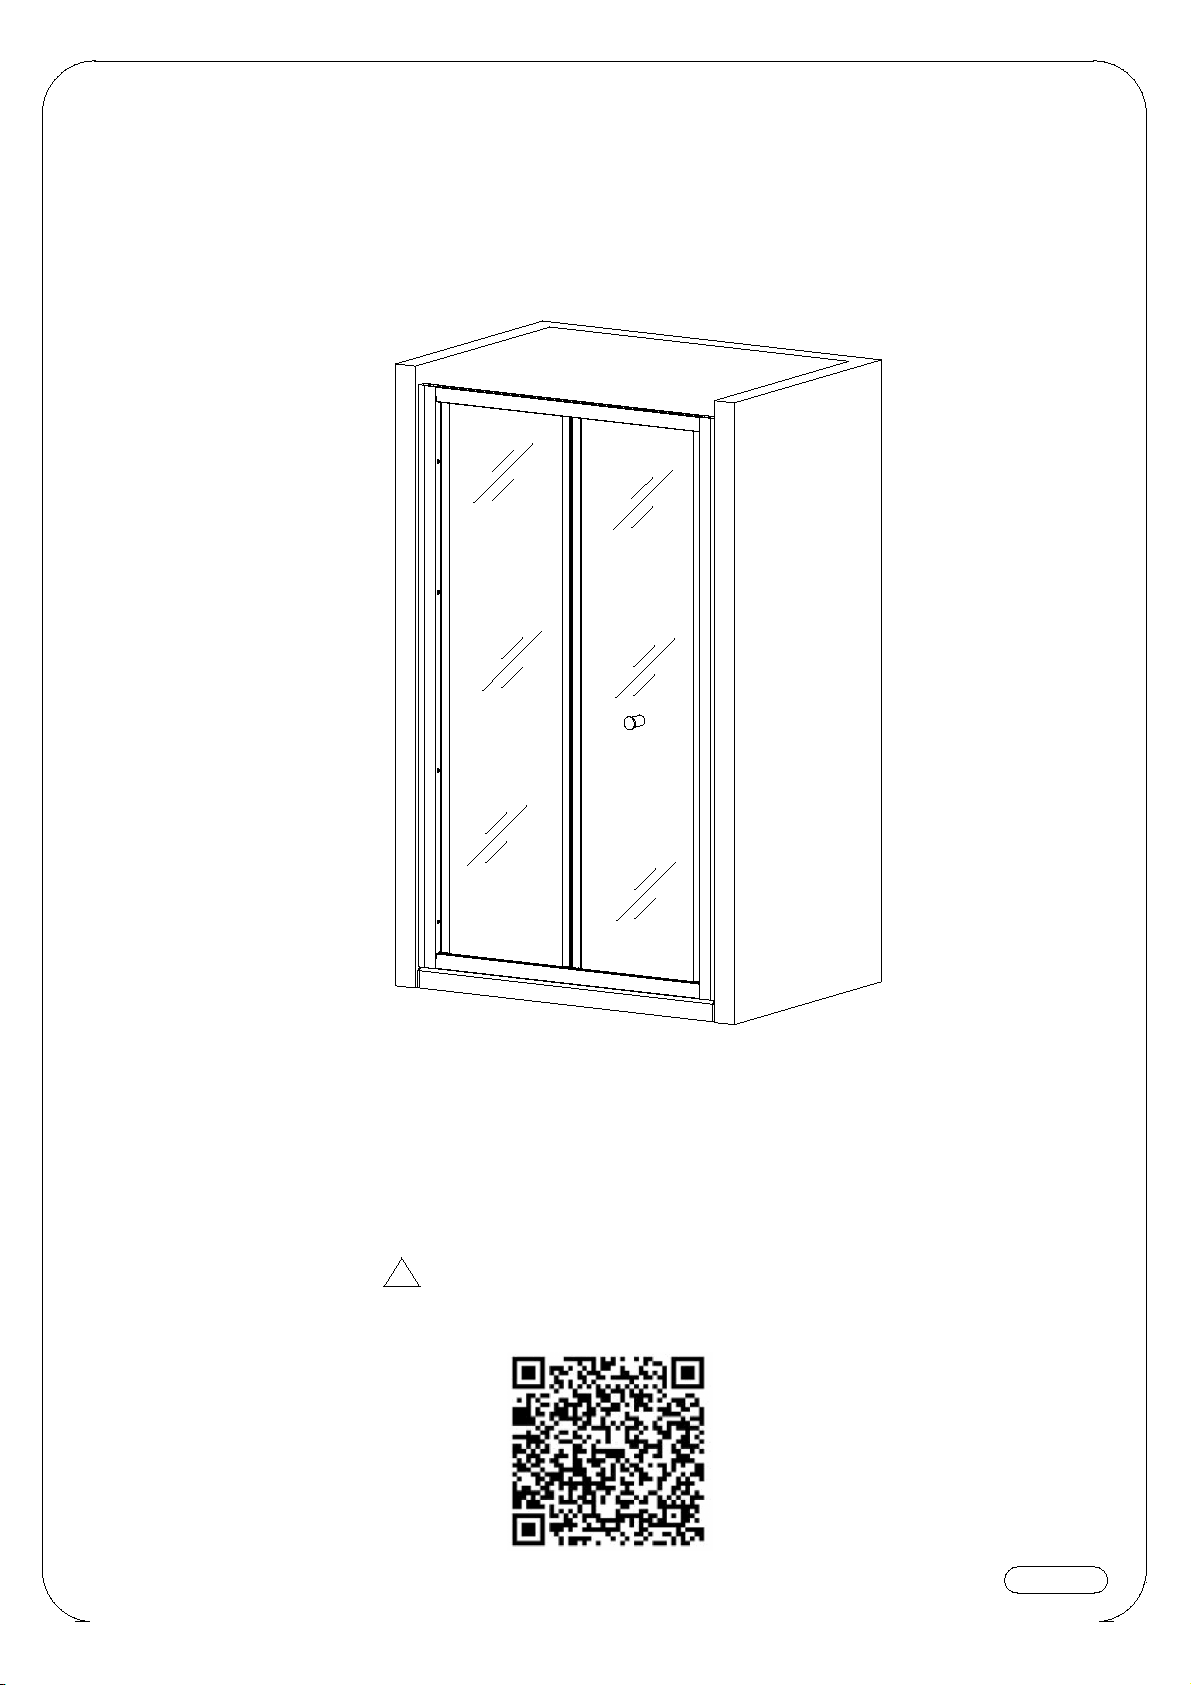
Please handle the product with care avoiding knocks and shock loading to all
sides and edges of the glass.
General information
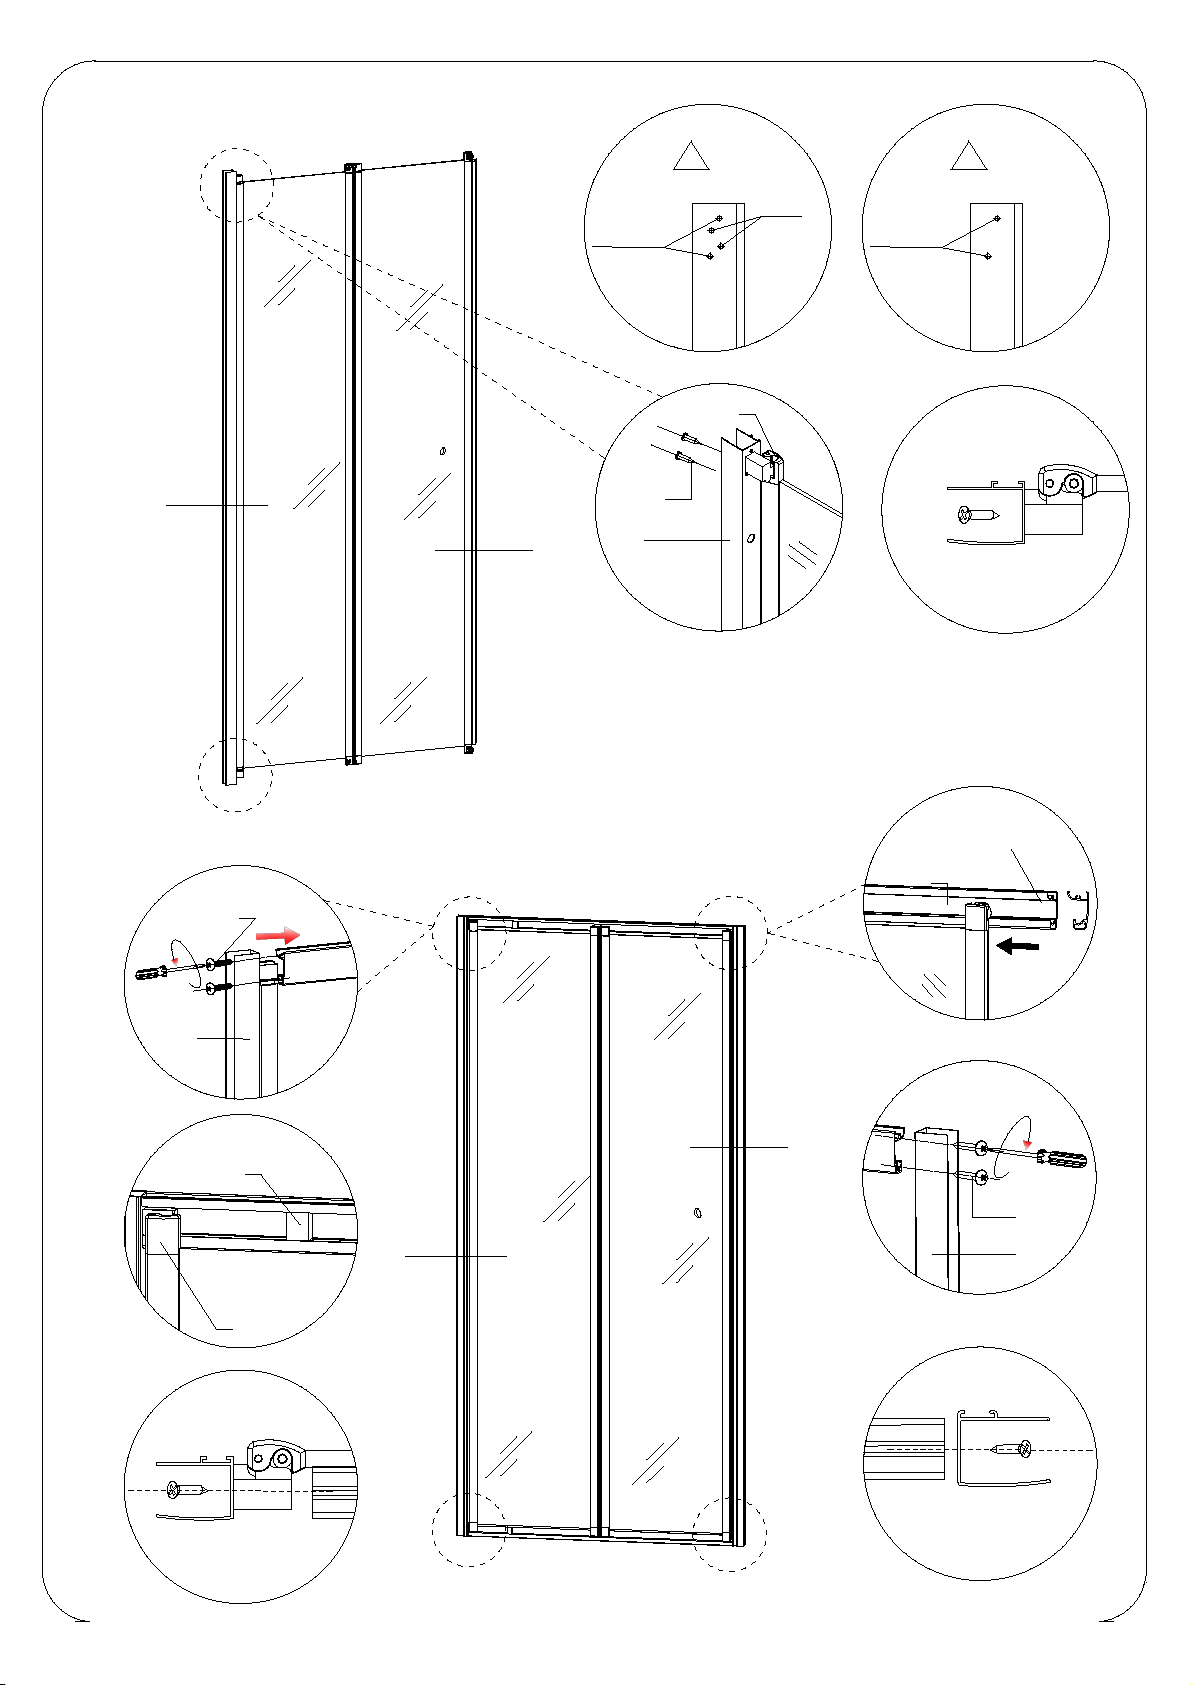
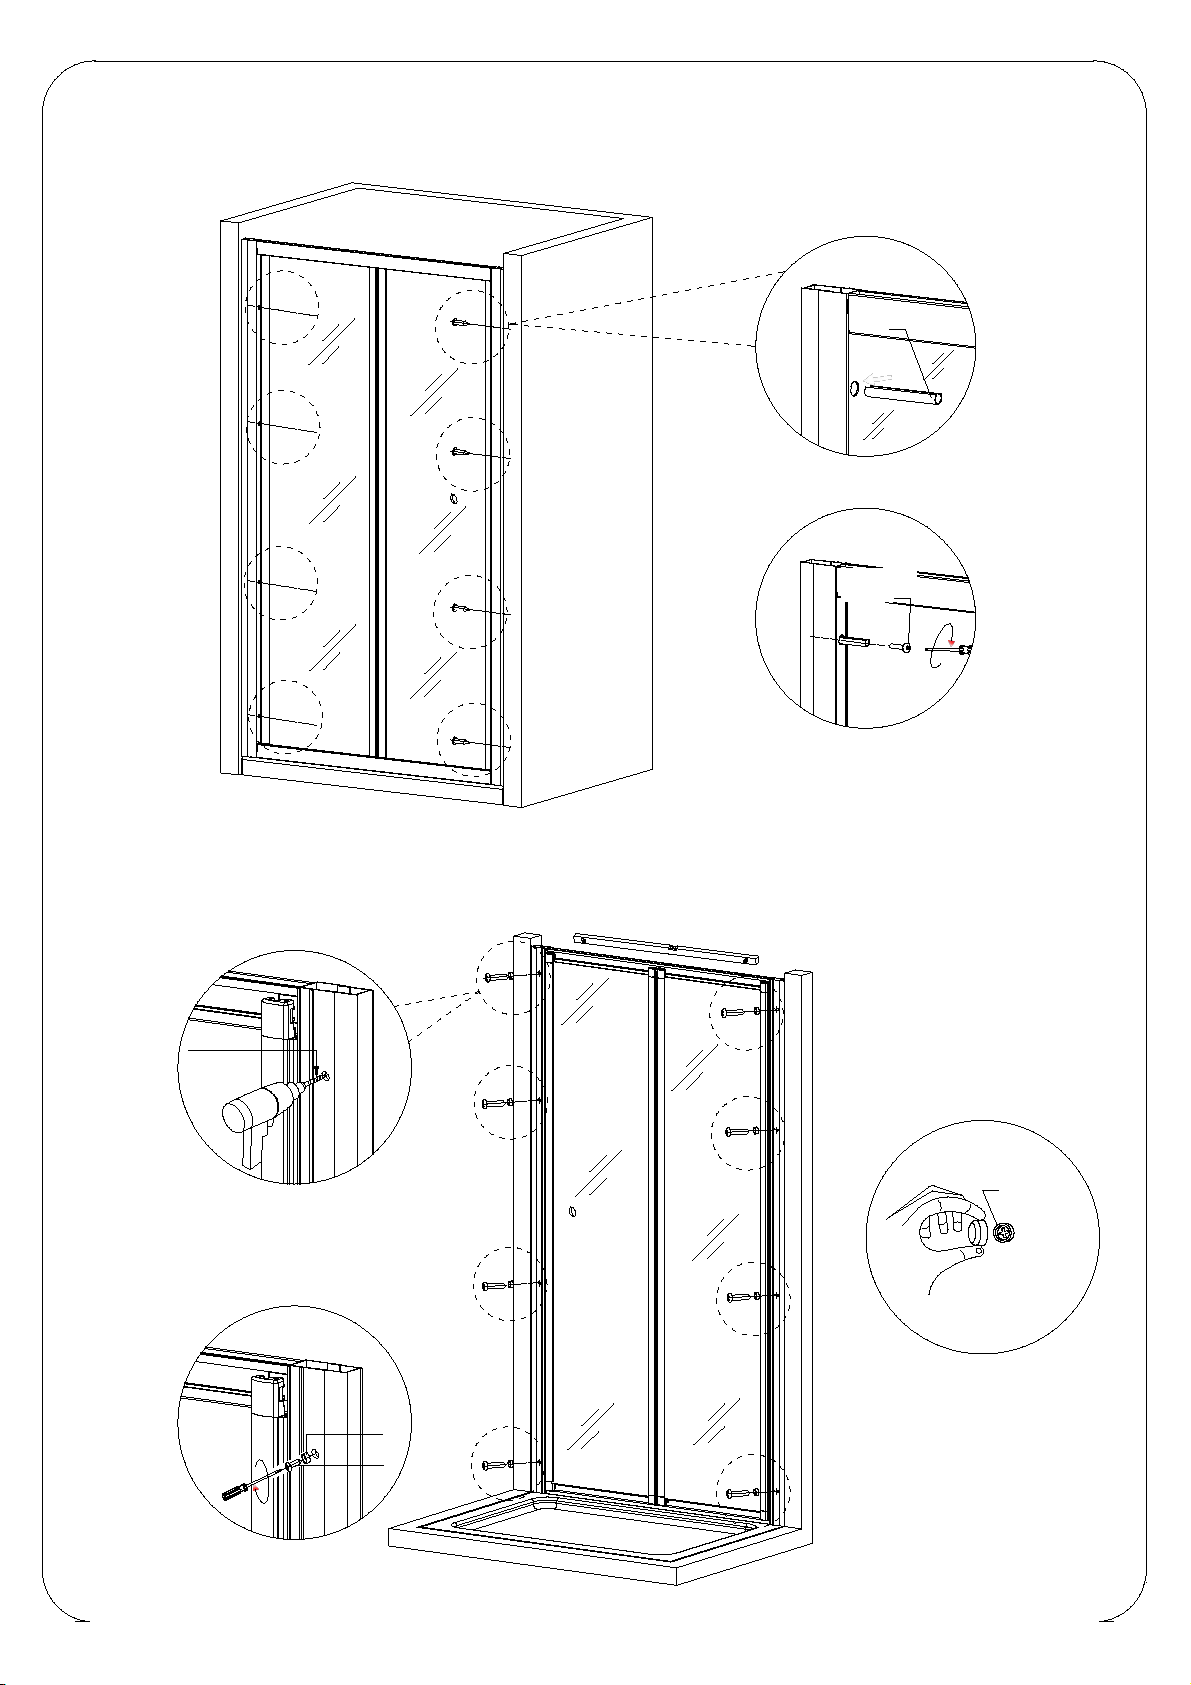
-Please read these instructions carefully before start of installation.
-Special care should be taken when drilling walls to avoid hidden pipes or
electrical cables.
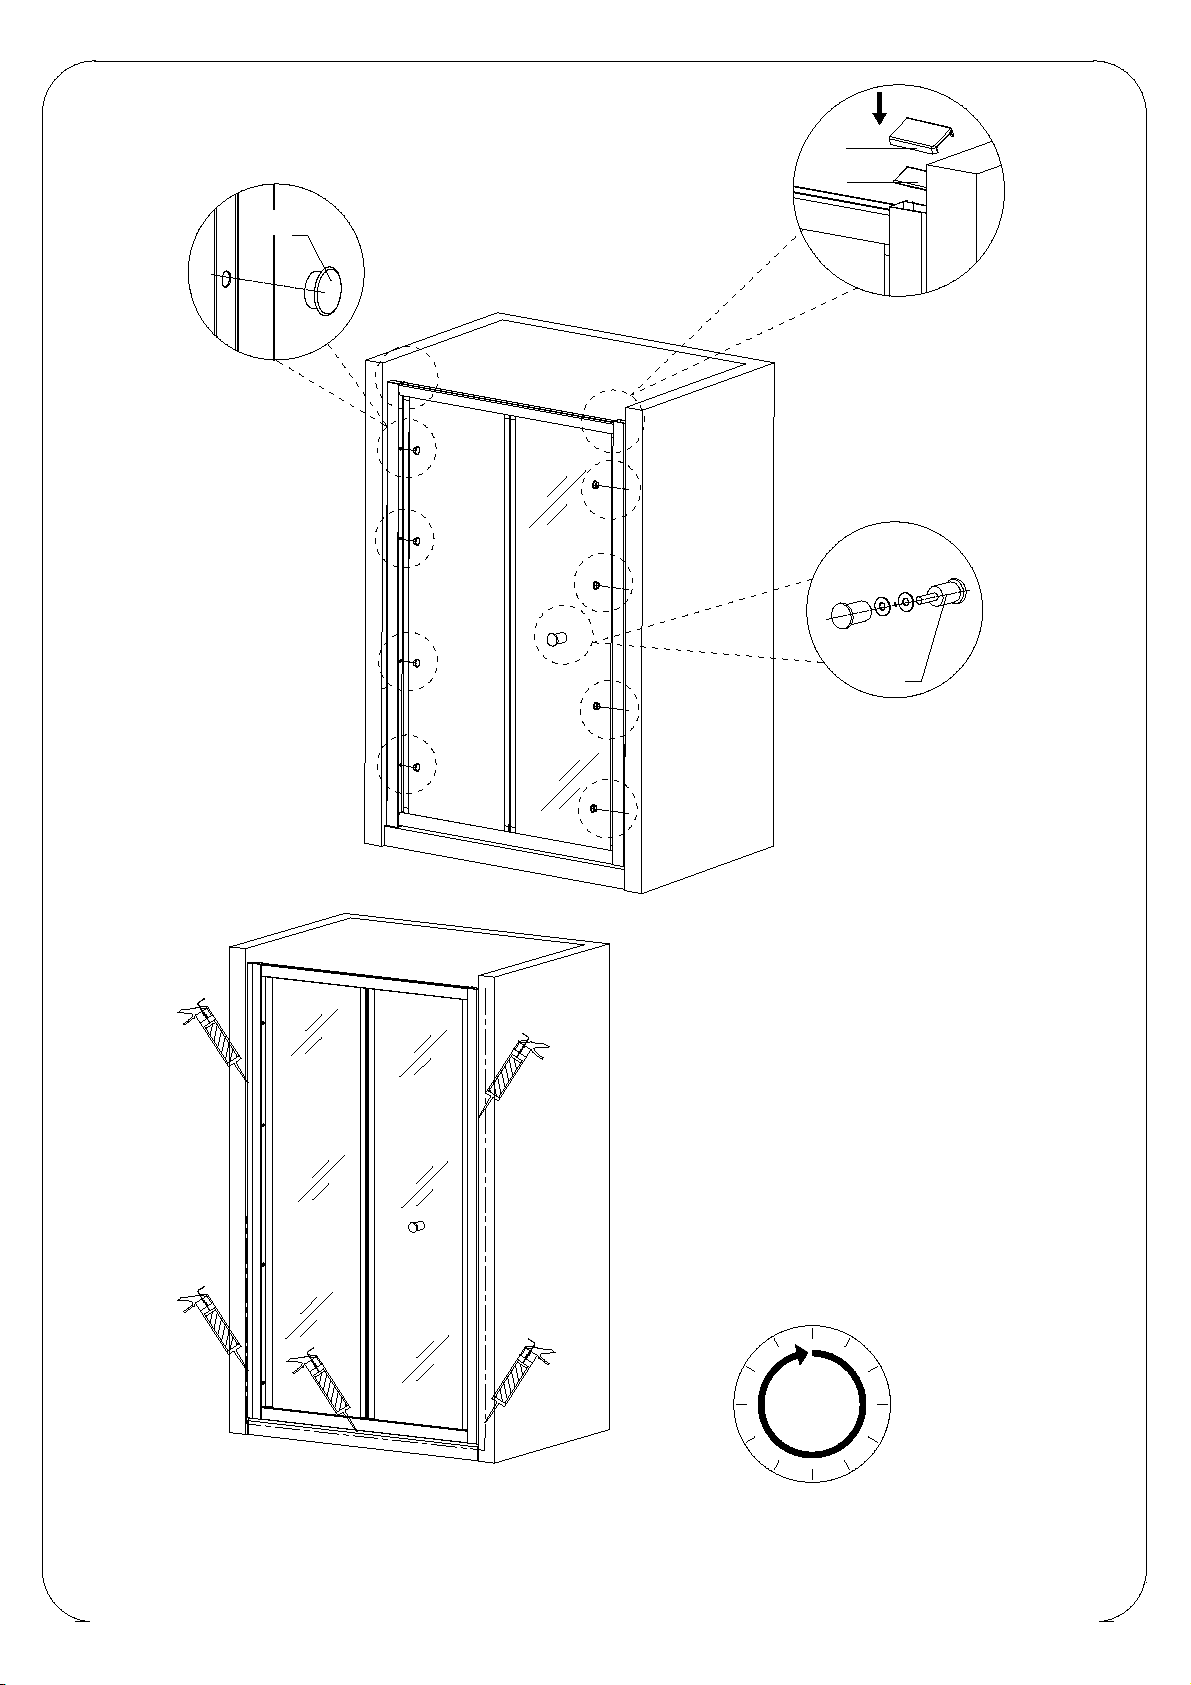
-Note: this product is heavy and required two persons install.
Note: Safety glass can not be re-worked.
-After use, your shower should be cleaned with soap and water. This is
particularly important in hard water districts where insoluble lime salts may be
deposited and allowed to build up.
-Cleaners of gritty or abrasive nature should not be used. Care should be taken
to avoid contact with strong chemicals such as organic solvents and strippers.
-Glass cleaners can be used but with caution, if in doubt contact the
manufacturer of the cleaner in question.
-Please keep these instructions for aftercare and customer service details.
Aftercare instructions
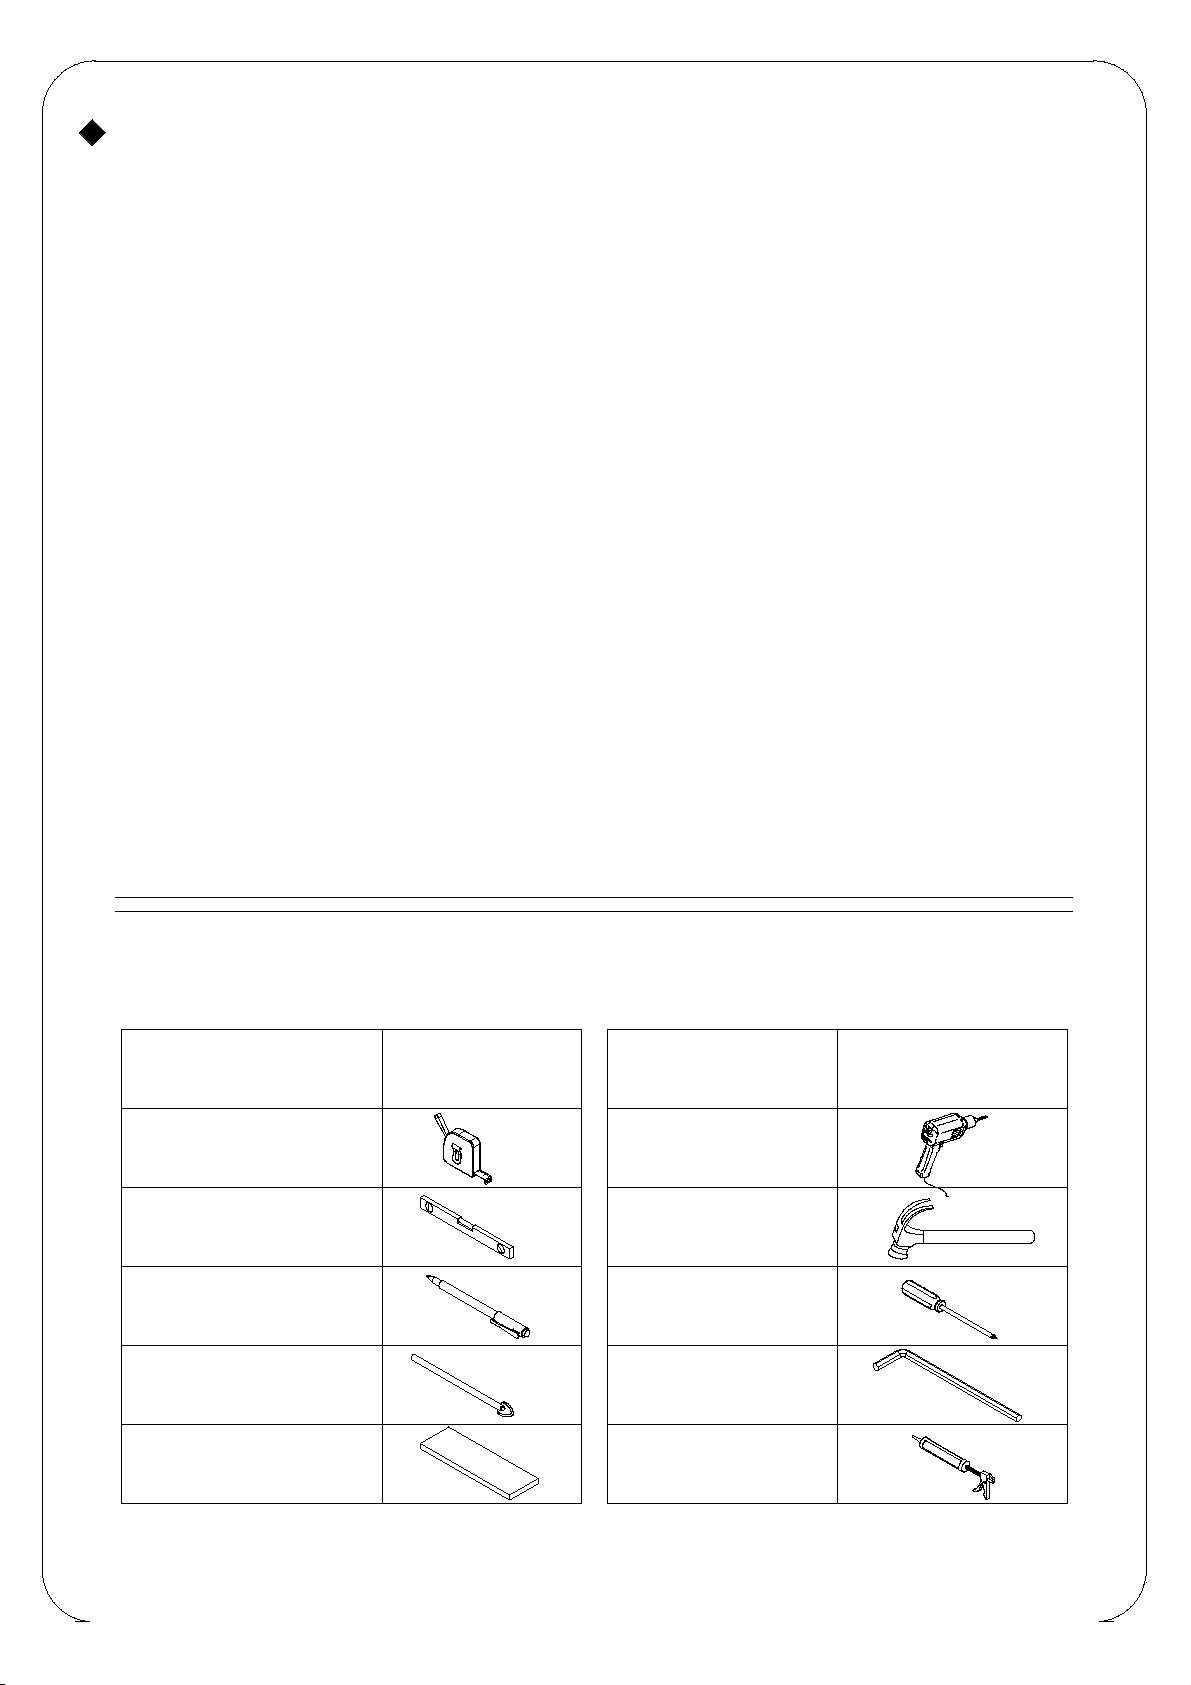
TOOLS REQUIRED
DESCRIPTION PART IMAGE DESCRIPTION PART IMAGE
Tape measure
Spirit level
Pencil
Ø6/3.2mm Drill bit
20mm Thick board
Drill
Hammer
Cross head
Screwdriver
Inner hexagon
Spanner
Silicone Sealant