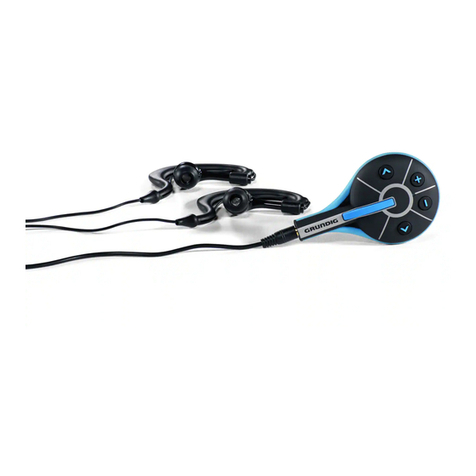
Grundig MP 420 User manual

ǵ
ENGLISH
DIGITAL
MUSIC PLAYER
MPaxx
MP 420/256MB

2
CONTENTS________________________________________________________________________
3 MP 420/256
Supplied accessories
Special features
Safety
4 Overview
Controls
Displays
Power supply
6 General functions
Switching on and off
Playback
Selecting a track
Fast forward and rewind
Adjusting the volume
Disabling and enabling the buttons
Battery status
Connecting earphones
7 Menu navigation
Opening the main menu
Opening the sub-menus
Quitting the menus
8 Menu structures
Main menu
Sub-menus
12 Menu functions
Select »Music« mode
In »Music« mode: Menu options during playback pause
In »Music« mode: Menu options during playback
Select »Record« mode
Select »Voice« mode
Select »Setting« mode
18 Voice recording
Recording
Playing back voice recordings
19 Operation with a computer
System requirements
Installing the player
Connecting to the computer
Disconnecting from the computer
Data transfer
Synchronising music and text files
Firmware upgrade
23 Information
Technical data
Environmental note

ENGLISH
3
MP 420/256__________________________________________________________________
Supplied accessories
1Installation CD 4USB cable
2Stereo earphones 5Battery 1 x 1.5 V, LR 04/AM4/AAA
3Overview
Note:
The accessory components supplied can change.
Safety
This device is intended for the reproduction of music and voice files and serves
as a removable disc. Any other use is expressly prohibited.
Do not drop the device. Avoid pressing on the display. Do not place the device
near magnetic objects.
Make sure the device is protected against moisture (dripping and splashing
water), direct sunlight and heat.
Do not remove the battery while the device is activated. This can cause serious
damage to the device.
Never open the device casing. No warranty claims are accepted for damage
caused by improper handling.

4
OVERVIEW________________________________________________________________________
Controls
ıII 5Switch on. Start playback, pause playback. Switch off.
VOL + Raise volume.
Together with »VOL –«: Disable and enable the buttons.
VOL – Lower volume.
Together with »VOL +«: Disable and enable the buttons.
5MENU 6Previous or next track. Fast search backwards or forwards.
Open the menu. Move cursor up or down, left or right.
Select playback mode.
Display LCD display.
USB PORT Eject USB plug.
PUSH Ņ
USB PORT USB plug, insert in the USB interface on the computer.
Microphone Microphone for voice recordings.
OEyelet for carrying strap.
0Connecting socket for the stereo earphones.
Battery Battery 1 x 1.5 V, LR 04/AM4/AAA.
compartment
MPaxx MP 420/256
G.DR xx
A pleine puissance, l´écoute prolongée peut
endommager l´oreille de l´utilisateur
Continuous use at high volume can damage
the user´s hearing
MENU

ENGLISH
5
OVERVIEW________________________________________________________________________
Displays
AData format (after switching on).
BPlayback mode (Normal, Repeat One, Folder, Repeat Folder, Repeat All,
Random, Intro).
CSound settings (Natural, Rock, Pop, Classic, Soft, Jazz, DBB).
DElapsed playing time of the track, total playing time of track.
ECurrent track number, total number of tracks.
FID3 tag display (name of track, text).
GBit rate (during operation).
HBattery status display (» «: the battery is running low).
Power supply
The player operates with a 1 x 1.5 V, LR 04/AM4/AAA battery.
1To open the battery compartment cover on the back of the device, press
where indicated and push the cover downward.
2Insert the battery, observing the polarity marked in the battery compartment.
3Put the battery compartment cover back on and close it.
Notes:
The display of the player tells you about the state of the batteries. If you see
» « in the display, the battery is running low.
The playing time of the device with batteries is more than 8 hours.
Take out the batteries when you know that the player will not be used for
a long period of time. The manufacturer accepts no liability for damage
resulting from leaking batteries.
Environmental note:
The battery – even if it contains contain no heavy metal – may not be dis-
posed of with household waste. Please dispose of used batteries in an envi-
ronmentally responsible manner. Find out about the legal regulations which
apply in your area.
Ä
Ä
A
E F E F
B C B CD HH G

6
GENERAL FUNCTIONS_________________________________________
Switching on and off
1To switch on the player, press »ıII« for one second.
– The display appears after approx. one second. The player then switches to
most recently selected operating mode.
2To switch off the player, press »5« for one second.
– Display: »Power Off«.
Playback
1Press »ıII« to start playback.
2Press »ıII« to pause playback.
Selecting a track
1To select the next or previous track, briefly press »5MENU 6« to the left
or the right.
Fast forward and rewind
1To search for a particular passage of a track, press »5MENU 6« to the
left or the right during playback and hold down.
– Fast forward or reverse search begins. Release »5MENU 6« at the
required position.
Adjusting the volume
1To change the volume, press »VOL +« or »VOL –« (scale from 0 to 31).
Disabling and enabling the buttons
1To disable or enable the buttons, press »VOL +« and »VOL –«
simultaneously.
– If a button is pressed while the buttons are disabled »Hold« appears in the
display.
Battery status
When the battery is low, » « appears in the display. If this happens replace
the battery.
Connecting earphones
1Insert earphones plug in the »0« socket on the player.
Ä

ENGLISH
7
MENU NAVIGATION______________________________________________
Opening the main menu
The main menu can be called up during playback or playback pause.
1To call up the main menu, press »5MENU 6« for one second.
– Display: »Music«, »Record«, »Voice«, »Settings« or »Exit«.
2To select the required option, press »5MENU 6« to the left or to the right.
3To confirm the option selection, briefly press »5MENU 6«.
Opening the sub-menus
The sub-menu can be called up during playback or playback pause.
1To call up the menu, briefly press »5MENU 6«.
2To select the required option, press »5MENU 6« to the left or to the right.
3To confirm the option selection, briefly press »5MENU 6«.
Quitting the menus
1To select option »Exit«, press »5MENU 6« to the left or to the right.
2To confirm the option selection, briefly press »5MENU 6«;
or
press »ıII«.

8
MENU STRUCTURES________________________________________________
Main menu
Sub-menu in »Music« mode during playback
DBB
JazzSoftClassic
PopRockNatural
Equalizer
Normal
IntroRandomRepeat all
Repeat folderFolderRepeat one
Repeat
ExitReplay gapReplay timesReplay
Tempo rateEqualizerRepeat
Music
ExitSettingVoiceRecordMusic
8

ENGLISH
9
MENU STRUCTURES________________________________________________
Sub-menu in »Music« mode during playback pause
Sub-menu in »Record« mode during playback pause
Long VORFine VOR
Long recFine rec
ExitRec typeLocal folder
Record
ExitDelete all
Delete fileLocal folderLicence infComposers
GenreAlbumArtistsPlaylist
Music

10
MENU STRUCTURES________________________________________________
Sub-menu in »Voice« mode during playback
Sub-menu in »Voice« mode during playback pause
ExitDelete allDelete fileLocal folder
Voice
ExitReplayTempo rateRepeat
Voice
10

ENGLISH
1111
MENU STRUCTURES________________________________________________
Sub-menu in »Settings« mode during playback
pause
USB discMedia device
Online device
Exit
Firmware upgradeFirmware versionMemory info
ContrastReplay modePower off
BacklightSystem timeOnline device
Music

12
MENU FUNCTIONS__________________________________________________
Select »Music« mode
1In the main menu, select »Music« by pressing »5MENU 6« to the left or
right.
2To confirm the selection, briefly press »5MENU 6«.
– The player switches to music playback mode.
In »Music« mode: Menu options during playback
pause
Structure of the sub-menu
»Music« (Playback pause) ɮ»5MENU 6« ɮ
»Playlist« ɲɮ »Artist« ɲɮ »Album« ɲɮ »Genre« ɲɮ
»Composer« ɲɮ »Licence info« ɲɮ »Local folder« ɲɮ
»Delete file« ɲɮ »Delete all« ɲɮ »Exit«.
»Playlist«
Select and play music files.
»Artists«
The music files are listed by artist.
»Album«
The music files are listed by album.
»Genre«
The music files are listed by music type.
»Composers«
The music files are listed by composer.
»Licence info«
The licensing information for the DRM-protected WMA files is displayed.
1To call up the information sequentially, press »5MENU 6« to the left or to
the right.
2Return to playback in music mode by pressing »ıII«.

ENGLISH
13
MENU FUNCTIONS__________________________________________________
»Local folder«
Folders are displayed and can be selected.
1Select root folder or sub-folder by pressing »5MENU 6« to the left or to
the right and press »5MENU 6« to confirm.
2To start playback of the files in the selected order, press »ıII«.
»Delete file«
Individual files can be deleted.
1To select »Delete file«, press »5MENU 6« to the left or to the right and
confirm with »5MENU 6«.
2To select »Yes« or »No«, press »5MENU 6« to the left or right and
confirm by pressing »5MENU 6«.
– »Yes«: The current file is deleted.
– »No«: The player returns to music mode.
»Delete all«
All the files in an album can be deleted.
1To select »Delete all«, press »5MENU 6« to the left or to the right and
confirm with »5MENU 6«.
2To select »Yes« or »No«, press »5MENU 6« to the left or right and
confirm by pressing »5MENU 6«.
– »Yes«: All the files on the current album are deleted.
– »No«: The player returns to music mode.
In »Music« mode: Menu options during playback
Structure of the sub-menu
»Music« (Playback) ɮ»5MENU 6« ɮ
»Repeat« ɲɮ »Equalizer« ɲɮ »Tempo rate« ɲɮ »Replay« ɲɮ
»Replay times« ɲɮ »Replay gap« ɲɮ »Exit«.

14
MENU FUNCTIONS__________________________________________________
Selecting playback modes
1To select »Repeat«, press »5MENU 6« to the left or to the right and
confirm with »5MENU 6«.
2To select the required playback mode, press »5MENU 6« to the left or to
the right and confirm with »5MENU 6«.
– »Normal«: The player plays back all tracks in the normal order and stops
after the last track. First, all the tracks in the main folder are played,
followed by the tracks in the sub-folder.
– »Repeat one«: The current track is repeated constantly.
– »Folder«: All tracks in the current folder are played in sequence.
– »Repeat folder«: All tracks in the current folder are repeated constantly.
– »Repeat all«: All tracks stored in the player are repeated constantly.
– »Random«: All tracks stored in the player are played back in random
order.
– »Intro«: All tracks stored in the player are played for approx. seconds.
Selecting sound effects
1To select »Equalizer«, press »5MENU 6« to the left or to the right and
confirm with »5MENU 6«.
2To select the desired sound setting (Natural, Rock, Pop, Classic, Soft, Jazz,
DBB – Bass Boost), press »5MENU 6« to the left or right and confirm
with »5MENU 6«.
Selecting the tempo
1To select »Tempo rate«, press »5MENU 6« to the left or to the right and
confirm with »5MENU 6«.
2To select the desired tempo (– 8 = low to + 8 = high), press »5MENU 6«
to the left or to the right and confirm with »5MENU 6«.
Note:
This function is not available for WMA formats.
Repeating a selected passage (A-B)
1To select »Replay«, press »5MENU 6« to the left or to the right and
confirm with »5MENU 6«.
– Display: »A« flashes.
2To select starting point A, at the desired position press »5MENU 6« to
the left or right.
– Display: »B« flashes.
3To select starting point B, at the desired position press »5MENU 6« to the
left or right.
– Display: » «.
– The selected section is repeated continuously.
4To quit the function, briefly press »5MENU 6«.
A-B

ENGLISH
15
MENU FUNCTIONS__________________________________________________
Selecting the number of A-B repetitions
1To select »Replay time«, press »5MENU 6« to the left or to the right and
confirm with »5MENU 6«.
2To select the quantity of repeats (1 = repeat once to 10 = repeat ten times),
press »5MENU 6« to the left or right and confirm with »5MENU 6«.
Selecting the time interval between A-B repetitions
1To select »Replay gap«, press »5MENU 6« to the left or right and
confirm with »5MENU 6«.
2To select the time interval (1 = 1 second to 10 = 10 seconds), press
»5MENU 6« to the left or to the right and confirm with »5MENU 6«.
Select »Record« mode
1In the main menu, select »Record« mode by pressing »5MENU 6« to the
left or the right and confirm with »5MENU 6«.
– The player switches to voice recording mode.
Note:
For information about the recording mode functions, see “Voice recording”
(page 18).
Select »Voice« mode
1In the main menu, select »Voice« mode by pressing »5MENU 6« to the
left or the right and confirm with »5MENU 6«.
– The player switches to voice playback mode.
Note:
For information on the functions in voice playback mode, see “Voice
recording” (page 18).

16
MENU FUNCTIONS__________________________________________________
Select »Setting« mode
1In the main menu, select »Setting« mode by pressing »5MENU 6« to the
left or the right and confirm with »5MENU 6«.
– The player switches to the corresponding sub-menu.
Structure of the sub-menu
»Setting« ɮ»5MENU 6« ɮ
»Online device« ɲɮ »System time« ɲɮ »Backlight« ɲɮ
»Power off« ɲɮ »Replay mode« ɲɮ »Contrast« ɲɮ
»Memory info« ɲɮ »Firmware version« ɲɮ
»Firmware upgrade« ɲɮ »Exit«.
Setting the USB mode
1Select »Online device« by pressing »5MENU 6« to the left or to the
right and confirm with »5MENU 6«.
2To select »Media device« or »USB disc«, press »5MENU 6« to the left or
to the rightand confirm with »5MENU 6«.
– »Media device«: Windows XP recognises the player as an MTP drive and
the Windows Media Player is automatically started.
– »USB disc«: Windows recognises the player as a mass storage device.
Setting the system time
1Select »System time« by pressing »5MENU 6« to the left or to the right
and confirm with »5MENU 6«.
2Use »VOL +« or »VOL –« to call up the year, month day, hours, minutes
and seconds sequentially (the current input position flashes).
3To set the digits, press »5MENU 6« to the left or right and confirm with
»5MENU 6«.
Notes:
The player can only play DRM-protected music files when the system is set
correctly.
After the battery is replaced, the system time must be reset. This is not
required if the battery replacement took less than three minutes.
Setting the switch-off time of the display back-lighting
1Select »Backlight« by pressing »5MENU 6« to the left or right and
confirm with »5MENU 6«.
2To select the switch-off time (0 = 0 seconds to 30 = 30 seconds), press
»5MENU 6« to the left or to the right and confirm with »5MENU 6«.
– If no button was previously pressed, the background illumination goes out
after the set time has elapsed.

ENGLISH
17
MENU FUNCTIONS__________________________________________________
Setting the player switch-off times
1Select »Power off« by pressing »5MENU 6« to the left or right and
confirm with »5MENU 6«.
2To select the switch-off time (0 = 0 seconds to 60 = 60 seconds), press
»5MENU 6« to the left or right and confirm with »5MENU 6«.
– In playback pause mode, the player switches off after the set time has
elapsed, provided no button was previously pressed;
or
2Select »Sleep timer« by pressing »5MENU 6« to the left or to the right
and confirm with »5MENU 6«.
3To select the switch-off time (0 = 0 minutes to 120 = 120 minutes), press
»5MENU 6« to the left or to the right and confirm with »5MENU 6«.
– After the selected time has elapsed, the player automatically switches off.
Setting the display contrast.
1Select »Contrast« by pressing »5MENU 6« to the left or to the right and
confirm with »5MENU 6«.
2To select the desired value (1 to 10), press »5MENU 6« to the left or to
the right and confirm with »5MENU 6«.
Calling up information on the free memory space
1Select »Memory info« by pressing »5MENU 6« to the left or right and
confirm with »5MENU 6«.
– You will receive information on the memory space available and the free
memory space.
Calling up information about the firmware version
1Select »Firmware version« by pressing »5MENU 6« to the left or right
and confirm with »5MENU 6«.
– The current firmware version is displayed.
Calling up firmware upgrade
1Select »Firmware upgrade« by pressing »5MENU 6« to the left or right
and confirm with »5MENU 6«.
– You can now start a firmware upgrade with the connected PC.

18
VOICE RECORDING_________________________________________________
Recording
To record, the option »Record« must first be selected in the main menu
(see page 16).
1Press »ıII« to start recording.
2Press »ıII« to pause playback..
– Display: The current recording time flashes.
3To stop recording, press and hold down »ıII«.
– Display: »Storing ...«.
– The voice recording is stored as a file.
Storing recordings
1In stop mode, call up the menu by briefly pressing »5MENU 6«.
2Select »Local folder« by pressing »5MENU 6« to the left or to the right
and confirm with »5MENU 6«.
3To select the main folder or sub-folder, press »5MENU 6« to the left or
right and confirm with »5MENU 6«.
– The recording file is stored in the selected folder.
Adjusting the recording quality
1Select »Rec type« by pressing »5MENU 6« to the left or to the right and
confirm with »5MENU 6«.
2To select »Fine rec« or »Long rec«, press »5MENU 6« to the left or right
and confirm by pressing »5MENU 6«.
– »Fine rec«: less recording time.
– »Long rec«: more recording time.
Playing back voice recordings
Before playback, the option »Voice« must first be selected in the main menu
(see page 16).
1To select the desired recording, press »5MENU 6« to the left or to the
right.
2Press »ıII« to start playback.
3To end playback, briefly press »ıII«.
Notes:
If you press »5MENU 6« in »Voice« mode, during playback pause or
during playback of a recording, menus appear with functions similar to
those for music files (see pages 13-16):
»Voice« (Playback pause) ɮ»5MENU 6« ɮ
»Local folder« ɲɮ »Delete« ɲɮ »Delete all« ɲɮ »Exit«.
»Voice« (Playback) ɮ»5MENU 6« ɮ
»Repeat« ɲɮ »Tempo rate« ɲɮ »Replay« ɲɮ »Exit«.

ENGLISH
19
OPERATION WITH A COMPUTER_____________
System requirements
When connecting to the computer the player appears as a removable disk drive.
This corresponds to the player’s flash memory. Your computer should meet the
following requirements:
– Windows 98 SE; Windows ME/2000/XP; Mac OS X 10.2.6 or higher
– CD-ROM drive 4x or higher
– Pentium MMX 200 or higher
– Minimum 30 MB available memory on the hard disk
– USB interface
Installing the player
With Windows ME/2000/XP or Mac OS X 10.2.6 installing the player driver is
only necessary if you want to upgrade the firmware or lock the drive.
Installing the driver is necessary with Windows 98 SE and Windows 2000,
if the Windows Service Pack 3 is not installed.
1Insert the installation CD provided in the CD-ROM drive.
2To start installation, select e.g. drive D (D:\Setup.exe) and click on the setup
symbol.
3To carry out the installation follow the instructions on the screen.
Connecting to the computer ...
... using Windows ME or 2000
1Turn on the computer.
2Switch off the player.
3Insert the player in the USB interface of the computer.
– As soon as the connection is established, a corresponding display appears.

20
OPERATION WITH A COMPUTER_____________
... using Windows XP
1Select »Settings« »Online device« in the menu by pressing »5MENU 6«
to the left or to the right and confirm with »5MENU 6«.
2Confirm »Media device« or »USB disc« with »5MENU 6«.
– »Media device«: Windows XP recognises the player as an MTP drive and
the Windows Media Player is automatically started.
– »USB disc«: Windows XP, like Windows ME/2000, recognises the player
as a mass storage device.
3Turn on the computer.
4Switch off the player.
5Insert the player in the USB interface of the computer.
– As soon as the connection is established, a corresponding display
appears. If »Media device« was selected, the Windows Media Player starts
automatically.
Disconnecting from the computer
If no data transfer is running, you can disconnect the player from the computer.
Before you disconnect the player’s cable connection to the computer, you must
remove the player from the Windows desktop by following the Windows instruc-
tions for “Removing hardware”.
Note:
Do not disconnect the player from the computer while the data transfer is
running. This can damage the data irreparably.
1Double click on the symbol for removing hardware.
– The “Remove hardware” window appears.
2To continue follow the instructions on the screen.
Note:
The circuits of the player and the computer can be seriously damaged if you
do not follow the instructions with Windows ME/2000/XP.
Table of contents
Other Grundig MP3 Player manuals

Grundig
Grundig MPaxx 928 Hydrox User manual

Grundig
Grundig GDR8700 User manual

Grundig
Grundig MPaxx SP 9100 PLL User manual

Grundig
Grundig MPaxx M-P 100 User manual

Grundig
Grundig MPAXXMP-100 User manual

Grundig
Grundig MPaxx 910 User manual

Grundig
Grundig MP 530 User manual

Grundig
Grundig VP 6200/30GB User manual

Grundig
Grundig 30GB User manual

Grundig
Grundig MPaxx 928 Hydrox User manual