elero Lumo-868 User manual

181005106_EN_0515
Operating instructions (translation)
Keep the operating instructions in a safe place!
Lumo-868
Lumo-915

2 | EN Ⓒelero GmbH
The German operating instructions are the
original version.
All other documents represent the language translations of
the original text.
All rights in the case of a patent, utility model or ornamental
design registration are reserved.

Ⓒelero GmbH EN | 3
Contents
1 Product description 5
1.1 Description of the device 5
1.2 Product features 6
1.3 Product versions 6
1.4 Scope of supply 7
1.5 Specifications 7
2 Explanation of functions 7
2.1 Functions of the Lumo-868 7
2.2 Bidirectional radio system 8
2.3 Unidirectional radio system 8
2.4 Group control unit 9
2.5 Commissioning 9
2.5.1 Meanings of the status display 9
2.5.2 Opening and closing the Lumo-868 10
2.6 Programming Lumo-868 11
2.7 Settings of the encoding switches 12
2.8 Function light sensor 13
2.8.1 Selection and display of the operating mode 13
2.8.2 Settings within an operating mode 14
2.8.3 Setting sun threshold
(encoding switch 1) 15
2.8.4 Setting twilight threshold
(encoding switch 2) 16
2.8.5 Encoding switch setting for regular operation 17
2.8.6 Glass breakage mode (encoding switch 3) 18
2.8.7 No function (encoding switch 4) 19
2.9 Deleting the programmed sensor 19
2.10 Replacing the battery 19
2.11 Cleaning and maintaining the Lumo-868 20

4 | EN Ⓒelero GmbH
3 Notes on the EC declaration of conformity 21
4 Troubleshooting 21
5 Repair 22
6 Manufacturer's address 23
7 Disposal /
notes on environmental protection 23
Ⓒelero GmbH EN | 5
1 Product description
1.1 Description of the device
The Lumo-868 is a sensor for light, twilight and glass break-
age as well as a radio sensor and serves to control roller
shutters.
it offers you the option of automatically protecting your
plants and inventory from too-strong solar radiation.
The Lumo-868 is attached indoors at a window that can be
covered by a roller shutter. It can be used either for a unidi-
rectional radio connection (downwards compatible with the
elero ProLine-868 product range) or for a bidirectional radio
connection (compatible with the elero ProLine 2 product
range.
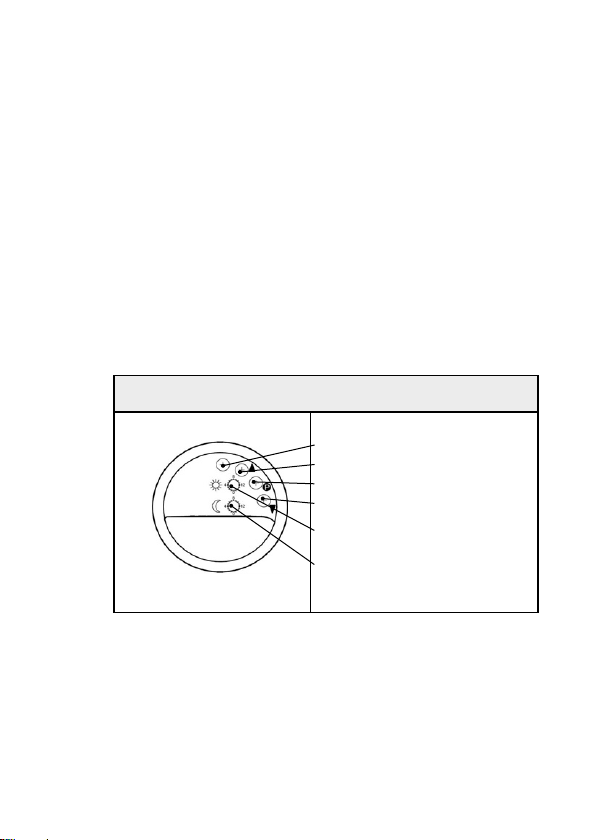
Product views housing lid and PCB
1. Status indicator
2. UP button
3. STOP-/P-Taste
4. DOWN button
5. Sun
threshold value controller
6. Twilight
threshold value controller
Other manuals for Lumo-868
1
This manual suits for next models
1
Table of contents
Other elero Accessories manuals

elero
elero Unio-868 Specification sheet

elero
elero Ventero-868 User manual

elero
elero Protero-868 User manual

elero
elero Lumo-868 User manual

elero
elero Sensero-868 AC User manual

elero
elero SilentGliss Lumero-868 User manual

elero
elero Ventero-868 User manual

elero
elero Lumero-868 User manual

elero
elero Unio-868 User manual

elero
elero Lumo User manual


