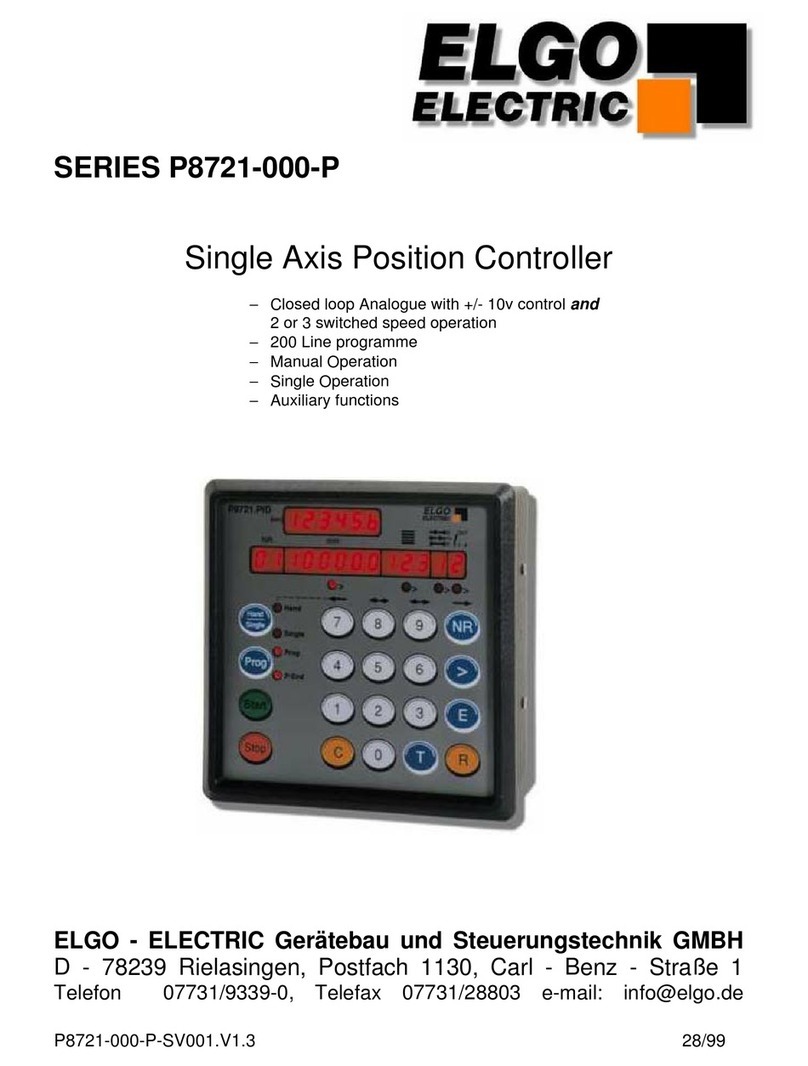
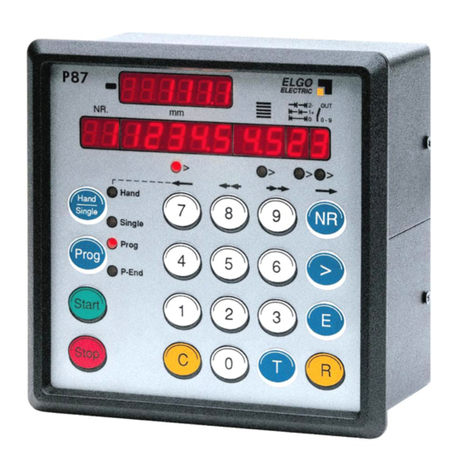
ELGO Electric P8822-000-R Series User manual

P8822-000-R SERIES
P8822-000-P-D_25-04
Dual axes position controller
• 2 or 3 switched speed operation
• manual inching mode
• single set operation
• 200 line program memory

2
Contents:
1. SHORT DESCRIPTION 4
2. FUNCTIONS 4
2.1 Two speed operation (switched) 4
2.2 Three speed operation (switched) 4
2.3 Setting Datum/Reference 5
2.4 Encoder pulse monitoring 5
2.5 Error messages 5
3. FRONT VIEW/CONTROL ELEMENTS 6
3.1 Function of the displays 6
3.2 Function of the keypad 6
4. CONTROLLER IN OPERATION 8
4.1 Single operation 8
4.2 Program line operation (R 8/4 = 0) 8
4.3 Table operation (R8/4 = 1) 9
4.4 Manual inching 10
5. REGISTER INPUT 10
5.1 Unlocking Registers by Security Code 10
5.2 Setting and Changing Register Values 11
5.3 Locking of Registers 11
6. REGISTER TABLE (PARAMETER) 12
7. DESCRIPTION OF REGISTERS 13
R8 SYSTEM REGISTER 1 14
R18 SYSTEM REGISTER 2 18

3
R28 SYSTEM REGISTER 3 18
R88 SYSTEM REGISTER 4 20
8. FUNCTION OF INPUTS (ST3 CONNECTIONS) 21
9. FUNCTIONS OF THE OUTPUTS (ST4 / ST6 CONNECTIONS) 23
11. CONNECTIONS 25
12. TECHNICAL SPECIFICATIONS 26
13. INSTALLATION AND WIRING 27
14. ONLY FOR SERVICE 28
15. TYPE DESIGNATION 28
16. LIABILITY EXCLUSION / GUARANTEE 29

4
1. Short description
The dual axes position controller P8822 is the consistent advancement of the proven
88P2.
Substantial characteristics:
• extensive standard functions
• manual inching mode via keypad (with keys 7, 8, 9, NR) for X and Y axis
• switched 2 or 3 speed operation
2. Functions
The P8822 controller can be operated with 2 or 3 different speeds
2.1 Two speed operation (switched)
NB: R1 = R2 > R3 ÆThe value in Register 1 must be the same value as R2
2.2 Three speed operation (switched)
NB: R1 > R2 > R3 ÆThe value in Register 1 must be larger than R2
Notice: The stop offset is only effective when R8 = 1xxxxx.
slow point
Fast (and slow)
creep
tar
g
et position
stop offset R 3
R 1
tar
g
et position
fast
slow
creep
stop offset
slow point
R 3
R 2
R 1
creep point

5
2.3 Setting Datum/Reference
Datum can be set in a variety of ways. The method is selected in Register R8/3
R8 = XX0XXX – Datum to R7
With activating the external input ST3 Pin 8 (X- Axis) or ST3 Pin 7 (Y- Axis), the
value deposited in R7, will be taken over into the actual position window.
R8 = XX1XXX – Datum to preset (target value)
With activating the external input ST3 Pin 8 (X- Axis) or ST3 Pin 7 (Y- Axis), the
actual target value will be taken over into the actual position window (single mode
only).
R8 = XX4XXX – Datum directly to R7 (without external reference input)
2.4 Encoder pulse monitoring
There are a number of faults on a machine that can stop the operation i.e.
Stalled motor, Controller failure, Cable failure, Encoder failure
Should pulses fail to reach the controller after start has been given and before in posi-
tion is reached, then one of the above faults must be present. The controller monitors
the pulses at intervals set in Register R19 X/Y. If the Register R19 X/Y is set to "0",
the monitoring features will be disabled. Should a failure occur, the ERROR01 is dis-
played in target position window.
2.5 Error messages
If any failures are present, the following error numbers flashes in the target value win-
dow.
Error number 01 = Encoder error
02 = End Limit minimum active
03 = End Limit maximum active
04 = Actual position < min software limit (R13) Hand
Target position < min software limit (R13) Single
05 = Actual position > max software limit (R14) Hand
Target position > max software limit (R14) Single
07* = External stop activated or wire break
08 = Maximum number of program lines exceeded
The fault message is cleared by pressing any button.
“07” also flashes if Stop on front panel is activated in middle of any move.
*Notice for 07: The external STOP input must be linked before system can oper-
ate. Therefore, if external n/c pushbutton is not fitted, then insert a permanent
wire link. Thus the stop input can be used as wire break input.

6
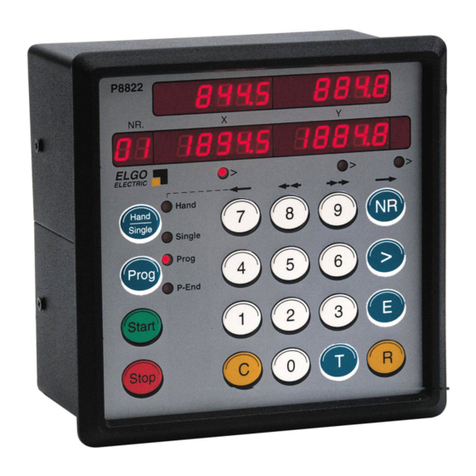
3. Front view/control elements
3.1 Function of the displays
Actual value : shows the actual positions of the axes
Target value : preset window for the target positions
Nr. : shows the number of the selected program line
LED Hand : shines if the button Hand/Single is pressed for 2 times
LED Single : shines if the button Hand/Single is pressed for 1 or 2 times
LED Prog : shines if the button Prog is pressed (program mode active)
LED P-End : shines if the end of the program is reached
LED 1 - 3 : shows which preset window is selected by the > Button
3.2 Function of the keypad
Hand/ Single
1. After pressing the Hand/Single - Key (LED “Single” shines), the X-Axis target
position can be entered. The Y-Axis target position can be entered with pressing >
2. With renewed pressing of Hand/Single (LED Hand shines additionally) and using the
keys 7, 8, 9, NR, the selected axis can be proceeded with 2 speeds in both directions.
Button 7 = slow speed backward
Button 8 = fast speed backward
Button 9 = fast speed forward
Button Nr. = slow speed forward
The desired axes can be selected by pressing the > - Button. The active axis will be in-
dicated by the LED’s, located below the target windows
Prog - Activates the program line mode
Start - Starts the positioning procedure. The START Button is disabled in the
parameter set up mode and during manual inching operation.
Stop - Interrupts the positioning procedure. For a new positioning, press START again.
NR. mm
Hand
Single
Prog
P-End
P8822
>>>
ELECTRIC
ELGO
89NR
56>
23E
7
4
1
C0TR
Hand
Prog
Start
Stop
Single

7
NR – This key is only active in the Prog- Mode (Prog must be pressed before
and the LED Prog must shine) and has the following functions:
1. Begin of the program memory entry (after this, use > - Button to step up)
2. Test of an existing program: Each pressing of NR causes a continuous-switching into
the next program line.
3. Selection of any line in the table operation
> - The cursor button selects the preset windows sequentially.
On completion of a line, the next press of >will select the next address line.
LEDs 1 – 3 indicate the selected Window.
E- This button will :
Set the end of program and reset the controller into operation mode.
This Button should be pressed only, when the last window is selected.
Confirm and save the entered values
End register setting at any point
R - Selector for entry of Register values. Only active when “Prog” selected
(LED Prog shines)
T- Reset button : Resets all preset windows in program mode.
C- Clears selected Target window value
0… 9 - Numerical keys for data entry

8
4. Controller in Operation
Switch on conditions: On switch on, the controller assumes the same conditions as at
the switch off time. The actual position is memorized.
- In Hand- and Prog- Mode, the target windows are set to zero
- In Single- Mode the old target values (before power off) are present
4.1 Single operation
Additional to program operation, a single line for X and Y axes can be operated.
Note: Only an absolute position and quantity can be entered in the single mode.
Please press
1.
T ÆTo set the controller to the basic position (all preset windows are „0“)
2. Single ÆThe LED’s for single and target value are shining
3. 0... 9ÆEnter the target position for X-Axis
4. > ÆThe LED for the target value - Y shines
5. 0... 9ÆEnter the target position for Y-Axis
6.
Start ÆThe target values Xand Ywill be positioned
The next positions can be operated by renewed using of the steps 3 – 6 then.
4.2 Program line operation (R 8/4 = 0)
4.2.1 Selection of a program block
The P8822 is equipped with a program memory of 200 address lines. These can be di-
vided into several blocks of equal quantity of lines (see Register R41). The number of
blocks is calculated by the number of datasets. If the input is larger than the number of
program blocks, the program block 0 is selected automatically, and an error message
Err 08 is shown in the display.
Please press
1.
RÆthe Nr. (No.) window flashes
2.
4 + 0 Æthe Nr. (No.) window flashes with "40"
3. >Æthe previously selected program block is displayed in the target window
4. CÆto clear the window to ZERO
5. 3 Æ3 appears in the target window (program block 3 is selected)
6. EÆthe set up is ready now, all preset values are “0”.
The controller returns to normal operation mode.
Now the block can be used with the existing program, or a new program can be entered.

9
4.2.2 Enter a program
The required program block is selected in accordance with section 4.2.1.
First step - Target value X
Please press NR Æ01 appears in the Nr. window
ÆThe LED under target window Xshines
Now press C ÆClears the target value – X, the display shows „0“
Use the keys 0… 9 Æto enter a new value for the target X…
Second step - Target value Y
… please press >ÆThe LED under target window Yshines
ÆClears the target value – Y, the display shows „0“
Use the keys 0… 9 Æto enter a new value for the target Y
The first line of program is complete now …
Third step - End or continue
Press E Æto end programming
Press > Æto continue resp. programming the next line
4.3 Table operation (R8/4 = 1)
With setting R8/4 = 1 (R8 = XXX1XX), the controller operates in 99 selectable address
tables mode. Programming is exactly the same as described in chapter 4.2.2.
4.3.1 Function of a table operation
The address lines of the stored program can be individually selected and positioned in ar-
bitrary order.
Press Prog ÆActivates the program mode
Press T ÆBasic position, resets the both target windows
Press Nr ÆThe Nr. window flashes “0”
Type in 58 now Æ“58” flashes in Nr. window
Press > ÆThe programmed values of address 58 are displayed.
Press Start ÆThe axes executes the desired target positions

10
4.4 Manual inching
Press T Æto reset all target windows to zero
Use
Hand/Single Æto activate Hand mode Æthe appropriate LED shines
The buttons 7/8/9/NR can be used to move the axis forward and backwards at high and
low speeds (whilst the button is depressed).
Press > Æto select the axis, which want to be moved
Press 7Æto move slow reverse
Press 8Æto move fast reverse
Press 9Æto move fast forwards
Press NR Æto move slow forwards
If a 3 speed drive is used, the fast and creep speeds are used. The physical direction
of movement, can be reversed by setting of Register R64. When operating in switched
speed mode (i.e. without analog output) the outputs fast/slow/creep/reverse are set
according to the button pressed.
When closed loop analog control is used, the respective speeds are set in R60… R63
in rpm. The proportional analog output voltage is given, when the button is pressed.
5. Register Input
5.1 Unlocking Registers by Security Code
The values of Registers R1…R97 can be changed after the security code 250565
has been entered into Register R98 (Exception R6/R7/R40).
The security code can be entered in program mode.
Use the button Eto Æa) save register values b) end editing
Press Prog ÆController is set to program mode. Prog - LED shines.
Press R ÆThe Nr. window flashes
Press C ÆClears display to zero
Type in 98 ÆValue 98 appears in Nr. window flashes “8”
Press > ÆThe Target window shows “000000” without decimal point
Press C ÆClears display to zero
Type in 250565 ÆDisplay shows 250565 (the security code)
Press E ÆThe Controller is now set to data entry mode.
All Windows are set to zero. Decimal point is reinstated.

11
5.2 Setting and Changing Register Values
Example: A slowdown point of 20.0 mm needs to be entered.
Assuming that registers have been unlocked as above :
Press R ÆThe Nr. window flashes.
Press 1 Æ1flashes in Nr. window i.e. Register 01.
Press > ÆThe existing value of R01 is displayed in the
target windows of X- and Y- axes, decimal point is extinguished.
Press C ÆTo reset the old value
Type in 200 ÆThe window shows 200 (i.e. 20.0 mm).
Press EÆThe new value is saved now.
All windows are 0 and the decimal point is reinstated.
Any Register from 1 to 97 can be selected and changed in the above manner.
5.3 Locking of Registers
After editing the registers, it is necessary to relock the registers to avoid accidental
changes. There are 3 methods to do so.
1. Access R98 and - instead of security code 250565
type in a “0” by the C- Button ÆNow press R- 9- 8- >- C– E
2. Activate the reset input
3. Switch OFF the controller and ON after a few seconds.

12
6. Register table (Parameter)
Registers, signed as * can be changed without the security code R98.
Register Function Unit X- Axis Y- Axis
R 1 Slow speed distance 0.1 mm
R 2 Creep speed distance 0.1 mm
R 3 Correction stop (stop offset) 0.1 mm
R 4 Backlash compensation 0.1 mm
R 5 Retract distance 0.1 mm
R 6 Tool width * 0.1 mm
R 7 Datum / Reference value 0.1 mm
R 8 System Register 1 see page 14
R 8/1 Character of positioning 0-1
R 8/2 Option 0
R 8/3 Datum mode „Set reference“ 0-4
R 8/4 Paging of program memory 0-1
R 8/5 Relay output configurations 0-9
R 8/6 Backlash compensation 0-2
R 9 Time „position reached“ 0.1 sec.
R 10 Backlash dwell time 0.1 sec.
R 12 Width of tolerance window 0.1 mm
R 13 min. end limit 0.1 mm
R 14 max. end limit 0.1 mm
R 18 System Register 2 see page 18
R 18/1 Interface activated / deactivated (still in preparation)
R 18/2 Retract function 0-2
R 18/3 Character of single positioning 0-2
R 18/4 Character of program line positioning 0-2
R 18/5 Keyboard interlock 0-3
R 18/6 Option -
R 19 Pulse time of encoder monitoring 0.1 sec.
R 20 Decimal place see page 18
R 28 System Register 3 see page 18
R 29 Time delay for drive inhibit 0,1 sec.
R 30 Program end pulse 0.1 sec.
R 40 Program block selection* see page 8
R 41 Program block size 1-99
R 46 Program counter Limit 0-9999
R 47 Program cycle counter 0-9999
R 56 Multi edge counter IW 1, 2, 4 1, 2 or 4
R 64 UP/DOWN manual inching buttons 0-1
R 73 Automatic stop offset calculation 0-5
R 80 Comparator mode 0-2
R 81 Comparator distance 0.1 mm
R 88 System Register 4 see page 20
R 88/1 Option -
R 88/2 Customer setting 0
R 88/3 Program stepping 0-1
R 88/4 Double start function 0-1
R 88/5 Relay/Transistor version 0-1
R 88/6 Error compensation in
incremental mode
0-1
R 90 Service registers 0-2
R 92 Display brightness 0-15
R 96 Pulse scaling factor 0.1 mm
R 97 Inch/mm measurement unit selection 0-1
R 98 Security code 250565
Please note: Logical sequence values such as these must always be present, regardless whether a 3 speed, 2 speed
or 1 speed drive is used. R1 > R2 > R3 for 3 speed drive R1 = R2 > R3 for 2 speed or 1 speed drive.

13
7. Description of Registers
R01 - Slow speed distance X/Y
Distance to the target position at which the controller switches from high speed to slow
speed. The output high speed will be switched off.
R02 - Creep speed distance X/Y
Distance to the target position at which the controller switches from slow to creep speed
R03 - Stop offset distance X/Y
The over run distance can be programmed to compensate for distance from the switch-
off point of the motor to standstill. For exact positioning, the over run distance should be
very small (0.0… 0.5 mm). Therefore the mechanical friction should be steady and the
creep speed should be very slow.
During commissioning, first set R12 to zero (to eliminate Tolerance window blanking),
then set the value of R03 to 0.0 and execute a number of moves in both directions.
Note
the average overrun distance and then set R03 to that value. Then set R12 to suit.
Note: Stop offset is only functional when R8/1 = 1
R04 - Backlash overrun X/Y
To correct for screw or pinion backlash, the target position should be approached
from one direction only. In positive direction therefore, the target position will be
overrun by the value of R4 and drive back to the target position with creep speed,
after the time delay of R10.
R05 - Retract distance X/Y
There are different modes available in the P8822, selectable by Register R18/2.
If R18/2 = 0 Retract Position to the actual value + R5
Whilst the input St3 Pin 7 (Y- Axis) resp. 8 (X- Axis) is activated, the P8822 will move
to the retract position. With deactivating the input, the controller returns to the basic
position (Value 0).
If R18/2 = 1 Retract Position to the value of R5
When input St3/8 is activated, the axis moves to position as set in R5, but will not re-
turn to original position on release of input. (Value 1)
If R18/2 = 2 Retract with backlash dwell time of R10
R06 - Tool offset compensation X/Y
This Register can be accessed without security code. When moving in incremental mode,
it is often the case that the subsequent function is a cut, that removes part of the mate-
rial. Thus to cut the correct pre-set lengths, it is necessary to move the desired distance
plus the tool offset. This feature is active in incremental mode only.
R07 - Datum/Reference X/Y
This Register can be accessed security code. The Datum value is stored in this Register.
The value is used in different ways, in accordance with setting of P8/3. Input St3 Pin 7
(Y-Axis) resp. Pin 8 (X- Axis) initiates loading.

14
R8 System Register 1
Target value windows Xand Y
Backlash compensation
0 = Without backlash compensation
1 = With negative backlash compensation
2 = With positive backlash compensation
Relay output configuration
0 = 2 speeds, independent outputs for speed and direction
1 = 2 speeds, independent outputs for speed, additional reverse
2 = 2 speeds, separate outputs for each condition
3 = 3 speeds, additional reverse output
4 = 2 speeds, independent outputs for speed and direction
5 = 2 speeds, independent speed and direction, separate reverse
6 = 2 speeds, separate outputs for each condition
7 = 2 speeds, separate outputs for each condition
8 = 2 speeds, separate outputs for speed and direction
9 = 2 speeds, separate outputs for speed, additional reverse
Program / Table operation
0 = Program operation mode
1 = Table operation mode
Datum / Reference
0 = Reference with R7 by external input
1 = Reference with target window by external input
4 = Directly with R7 by keypad
Option
Character of positioning
0 = PID regulated positioning (Option)
1 = Switched positioning

15
Drive control output configuration (Relays)
R8/5 = 0 2 speeds, independent outputs for speed and direction
Output signals ST4=X/ST6=Y 1/5 2/6 3/7 4/8
Creep forwards X X
Slow forwards X X
Fast forwards X X
Creep reverse X X
Slow reverse X X
Fast reverse X X
X= output activated
R8/5 = 1 2 speeds, independent outputs for speed and additional reverse signal
Output signals ST4=X/ST6=Y 1/5 2/6 3/7 4/8
Creep forwards X X
Slow forwards X X
Fast forwards X X
Creep reverse X X X
Slow reverse X X X
Fast reverse X X X
X= output activated
R8/5 = 2 2 speeds, separate outputs for each condition
Output signals ST4=X/ST6=Y 1/5 2/6 3/7 4/8
Creep forwards X
Slow forwards X
Fast forwards X
Creep reverse X
Slow reverse X
Fast reverse X
X= output activated
R8/5 = 3 3 speeds, additional reverse output ( - Standard setting)
Output signals ST4=X/ST6=Y 1/5 2/6 3/7 4/8
Creep forwards X
Slow forwards X X
Fast forwards X X X
Creep reverse X X
Slow reverse X X X
Fast reverse X X X X
X= output activated
R8/5 = 4 2 speeds, independent outputs for speed and direction
Output signals ST4=X/ST6=Y 1/5 2/6 3/7 4/8
Creep forwards X X
Slow forwards X X
Fast forwards X X
Creep reverse X X
Slow reverse X X
Fast reverse X X X
X= output activated

16
R8/5 = 5 2 speeds, independent speed and direction outputs, separate reverse output
Output signals ST4=X/ST6=Y 1/5 2/6 3/7 4/8
Creep forwards X X
Slow forwards X X
Fast forwards X X
Creep reverse X X X
Slow reverse X X X
Fast reverse X X X
X= output activated
R8/5 = 6 2 speeds, additional reverse output, separate outputs for speed
Output signals ST4=X/ST6=Y 1/5 2/6 3/7 4/8
Creep forwards X
Slow forwards X
Fast forwards X
Creep reverse X
Slow reverse X
Fast reverse X
X= output activated
R8/5 = 7 2 speeds, separate outputs for each condition
Output signals ST4=X/ST6=Y 1/5 2/6 3/7 4/8
Creep forwards X
Slow forwards X
Fast forwards X
Creep reverse X
Slow reverse X
Fast reverse X
X= output activated
R8/5 = 8 2 speeds, separate outputs for speed and direction
Output signals ST4=X/ST6=Y 1/5 2/6 3/7 4/8
Creep forwards X X
Slow forwards X X
Fast forwards X X
Creep reverse X X
Slow reverse X X
Fast reverse X X
X= output activated
R8/5 = 9 2 speeds, separate outputs for speed, additional reverse output
Output signals ST4=X/ST6=Y 1/5 2/6 3/7 4/8
Creep forwards X X
Slow forwards X X
Fast forwards X X
Creep reverse X X X
Slow reverse X X X
Fast reverse X X X
X= output activated

17
R9 - Time “in position”
At the end of each move, the controller gives an output, to signal “in position” as long as
the time register R9/X resp. R9/Y is. The length of this pulse is adjustable in R9
(range: 0.1… 9.9 s). Setting 0.0 gives a maintained output.
R10 - Backlash dwell time
When the machine stops at the end of the overrun, it is usually desirable to have a short
delay. The time is set in register R10 (range: 0.1… 9,9 sec.).
R12 - Tolerance window
It is possible to enter a value in Register R12 that represents an acceptable tolerance
e.g. 0.1 mm. When the actual position is within the tolerance window, the actual position
displayed is made equal to the Target position. The actual error is not lost, as the con-
troller knows the true position.
Example: R12 = 0.2 Therefore tolerance window is +/- 0.2mm
Display without tolerance set Display with tolerance set
Note: At first start-up, the tolerance window is to be set first to “0”.
Only after a correct adjustment of R1… R4, other values can be used here.
R13/ R14 - Min/Max software limits
Target < Limit R13 = error message ERR04
Target > Limit R14 = error message ERR05
Single operation
Immediately after a start signal, the controller checks the software limits. If the target
position is greater or smaller than the corresponding limit, the controller will stop and
show the error message on the display. The backlash distance in R4 is considered at the
check of the Max software limit, if the backlash is activated in R8/6 X/Y.
Manual operation
The movement will stop when software limits are reached. If moving at high speed, the
drive will drop to creep speed at a distance set in R1 from this limit. This prevents run-
ning into the ends of the machine. The end limit values are modified by backlash value
as set in R4, if R8/6 X/Y is selected.
R15 - Software Limit Selection
Software limits (R13 & R14) are active in accordance with the setting of R15/6
xxxxx0 ÆBoth software limits active
xxxxx1 ÆMin software limit (R13) inhibited
xxxxx2 ÆMax software limit (R14) inhibited
xxxxx3 ÆBoth software limits (R13 &R14) inhibited
Actual display
Target display

18
R18 System Register 2
Target value windows Xand Y
Option
Keyboard interlock
0 = Programming enabled
1 = Programming disabled
2 = All keyboard functions disabled
3 = Memory and START/STOP disabled
Positioning in Prog
0 = Absolute
1 = Incremental +
2 = Incremental -
Positioning in single
0 = Absolute
1 = Incremental +
2 = Incremental –
Retract mode
0 = retract to Actual + R5 setting value
1 = retract to absolute position in R5
2 = retract whilst input active Return on deactivation
Serial link
0 = none
R19 cycle time of encoder monitoring
If after positioning is initiated, no encoder pulses are sensed after a time set in R19
(0.1… 9.9 s), positioning will be aborted and Fault ERROR01 will be displayed. To deac-
tivate the encoder pulse monitoring, R19 must be is set to 0.0.
R20 decimal place
The decimal point is placed in a fixed position and is optical only. It does not change the
resolution of the system.
R20 = XXXXX0 = without
R20 = XXXXX1 = 1/10
R20 = XXXXX2 = 1/100
R20 = XXXXX3 = 1/1000
R20 = XXXXX4 = 1/10000
R28 System Register 3
Target value window X
Function of the front located START button
0 = Start of both axes
1 = Only start of the axis, selected by the cursor

19
R29 Time delay for drive inhibit (positioning)
On activating start, output positioning is activated. On arriving in position, after a time
delay of R29 this output deactivates.
R30 Time of “program end” signal
If last step of a program is completed, the output signal program-end is activated for
the time programmed in this register.
R40 Program block selection
This register can be accessed without security code (R98). The program block required
for operation can be entered here (0… 99).
R41 Number of Lines in each program block
Enter the number of lines required per program block (1 – 99). The number of Blocks
will be calculated automatically.
Example : Total number of lines = 200, Number of Lines required per Block = 25
(enter 25 into R41). Therefore number of Program blocks = 8
R46 Program cycle- pre selection
To limit the execution of the Program the cycle counter can be set. If the Register R47
(Cycle counter) is equal the pre selection the signal ready will drop off. To Disable the
counter set R46 to zero.
R47 Program cycle counter
When the cycle counter is complete. i.e. R46 equal to R47 the output ready drop of and
cycle count is displayed in actual position window. The external and front panel Start are
disabled. To clear the output to allow positioning again R47 must be set to zero. For
temporary unlock press Stop. The one more Program cycle can be done. After complet-
ing this Program new counter value is displayed and ready drop of again.
R56 Encoder edge multiplication
1 = x 1 2 = x 2 4 = x 4
Entry of any other value will automatically select 1
R73 Automatic stop offset calculation and positioning retry
If the value of R73 X/Y is set to zero, the controller will operate without recalculation
and without retry. If the value of R73 X/Y is set to "1" this means that should the posi-
tion reached be outside the tolerance window, the controller will recalculate the new stop
offset but no retry. If R73 is set to any value bigger than “1” the controller will also re-
try.
R80 Two axis position comparator
Two modes are required. Anti collision control and Balance control
Setting R80: Value 0 : Checking mode inoperative
Value 1 : Anti-collision operation.
Value 2 : Skew Detection
R81 Comparator distance
Controller checks both positions whilst running and if difference is bigger than value set in
R81, stop is activated and ERROR09 / ERROR10 info is activated.

20
R88 System Register 4
Target value window X
Incremental error comp
0 = not active
1 = active
Output / Input Version
0 = D-Sub connector
1 = Relays output / Ria type input
Double start at Prog end
0 = without
1 = with
Address Line switching
0 = at position reached
1 = at start
Default selection
0 = Elgo standard (EL)
1 = Customer 1 (DR)
2 = Customer 2 (LD)
3 = Customer 3 (AD)
Option
R90 Service register
Only active when R98 is unlocked. Select button as shown below:
Button 1 - Pressing this button loads default values into all registers
Button 2 – Clear memory
R92 Display brightness
With the setting of this register, the brightness of the display can be altered digitally:
0.0 = dark, 9.9 = max. brightness
R96 Pulse scaling factor
A factor (0.00001… 9.9999) can be entered in this register. The encoder pulses will be
multiplied by this factor, to manipulate the display to required dimensions. If no multipli-
cation is required, this register must be set to 1.00000.
R97 Inch/ mm - selection
This register sets the metric or inch mode. This setting has priority to the external selec-
tion of the input. Active in Ad default.
Target window X
Option
0 = mm mode
1 = Inch mode 0,001 inch resolution
R98 Security code
Enter 250565 to unlock and change parameters and registers
R99 Service (only for service), see page 28
Table of contents
Other ELGO Electric Controllers manuals
