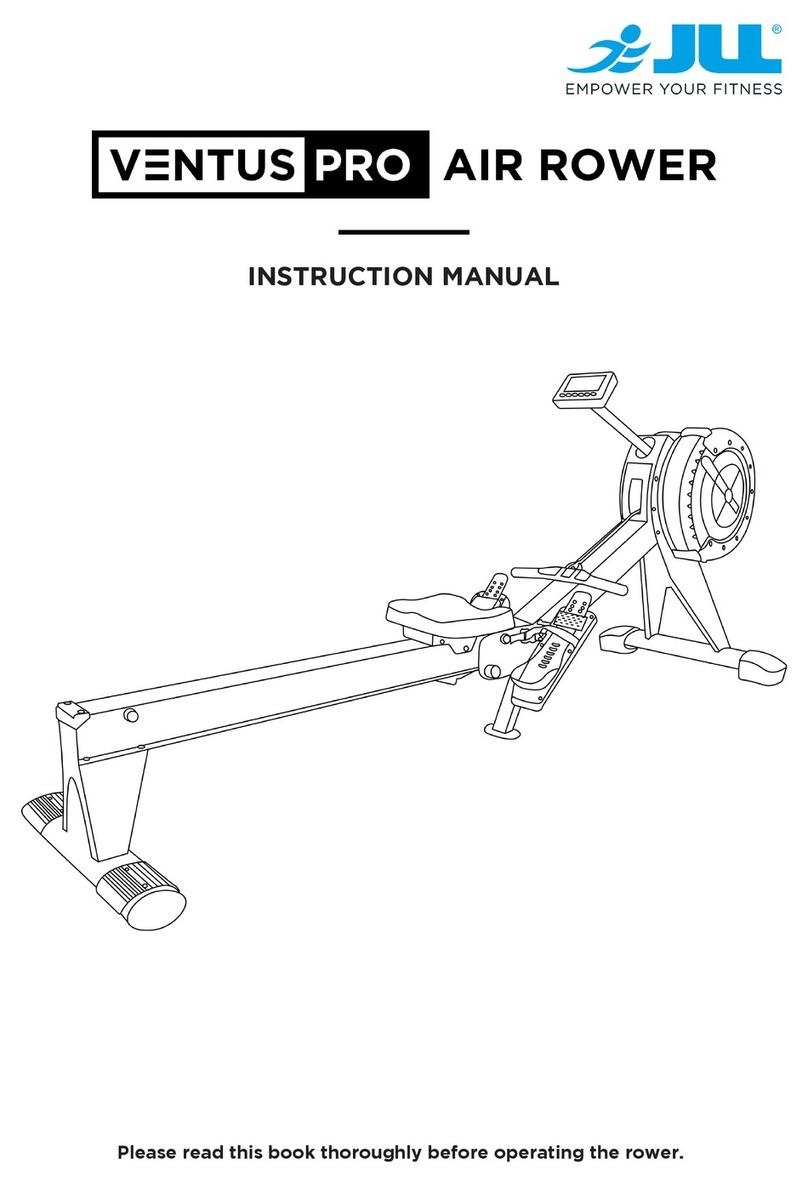
Elite Fitness CONQUEST User manual

ASSEMBLY MANUAL
Record serial number
Elite Conquest Rowing Machine

2
CONTENTS
Important Safety Instrucons 3
Product Specicaons 4
Console 5
Assembly Instrucons 12
Care and Maintenance 21
Maintenance Log 22
Limited Warranty 23
Warm-Up Exercise 24
Rowing Techniques 25
Training Stages 26
Parts List 2
Exploded Drawing 24
Thank you for purchasing the Elite Conquest Rowing Machine.
For over 20 years, Elite Fitness™ has been New Zealand’s largest supplier of tness equipment.
Our aim and vision is to provide you Elite™ branded products, tested to the highest standard for
quality and biomechanics at the best possible price.
Please read through this manual to familiarise yourself with the operaon of your new
Elite Conquest Rowing Machine Doing so will help to insure that you get the most out of your
machine, enjoying a safe and eecve workouts ahead.
Even though we go to great eorts to ensure the quality of each product we produce, occasional
errors and or omissions do occur. In any event should you nd this product to have either a defect
or a missing part, please contact us for a replacement.
SERVICE & WARRANTY
For service and warranty assistance please visit:
www.elitetness.co.nz/service
Online forms are available for Service, Warranty and Parts requests.
(09) 258 9067
Elite Fitness HQ
28 Morrin Road. Saint Johns
Auckland, New Zealand
info@elitetness.co.nz
0800 2 438 348
www.elitetness.co.nz

3CONQUEST ROWING MACHINE ASSEMBLY MANUAL
The following denion applied to the word “WARNING” when used in this manual:
Used to call aenon to POTENTIAL hazards that could
result in personal injury or loss of life.
READ ALL INSTRUCTIONS BEFORE USING THE MACHINE
This product has been designed for home use only. Product liability and warranty condions will
not be applicable to products being subjected to professional use or products being used in a
commercial environment. e.g Gym Centre
This exercise machine is built for opmum safety. However, certain precauons apply whenever
you operate a piece of exercise equipment. Be sure read the enre manual before you assemble
or operate your machine. In parcular, note the following safety precauons.
— Read all instrucons in this manual before using this equipment.
— Use the machine only for its intended use as described in this Manual.
— Keeps hands away from moving parts.
— Keep children and pets away from the machine at all me. DO NOT leave children unaended
in the same room with the machine.
— Before using the machine to exercise, always do stretching exercises to properly warm up.
— Inspect the machine before each use; make sure all of the connecons are ghtly secured.
— Only one person at a me should use the machine.
— If the user experiences dizziness, nausea, chest pain, or any other abnormal symptoms, STOP
the workout at once. CONSULT A PHYSICIAN IMMEDIATELY.
— Posion the machine on a clear, levelled surface. DO NOT use the machine near water or
outdoors.
— Always wear appropriate workout clothing when exercising. DO NOT wear robes or other
clothing that could become caught in the machine. Sporng shoes are recommended when
using the machine.
— Do not place any sharp object around the machine.
— Disabled persons should not use the machine without a qualied person or physician in
aendance.
— Never operate the machine if the machine is not funconing properly.
— Only carry out training work on the equipment when it is in perfect working order. Only use
original spare parts in the event of a repair.
— Do not use strong solvents for cleaning, and only use the tools supplied, or suitable ones of
your own, for any repairs that may be required. Please dispose of the packaging and any parts
that have to be replaced subsequently (all parts for the unit) at suitable collecng points or
containers with a view to saving the environment.
— Not for therapeuc use.
IMPORTANT SAFETY INSTRUCTIONS

4
WARNING: Before beginning any exercise program, consult your physician. This is especially
important for persons with pre-exisng health problems. The seller assumes no responsibility for
personal injury or property damage sustained by or through the use of this product.
SERVICE HINTS: The high quality standard of this product only will be kept if you on a regular
basis check all screw-connecons and moving parts on proper ng. Damaged parts have to be
changed immediately. During the me of repair the product must not be used by anybody.
IMPORTANT HINTS:
A) This product has been tested in accordance with the requirements of EN 957-1/A1, EN 957-5,
standard, Class HA (HOME USE).
B) Parents should be aware of the risk factor of young children playing on tness equipment
unaended. Make sure that the children are instructed properly in the use of the product
and in the controlled execuon of the dierent exercise. Misuse of the product could result in
serious injury
PRODUCT SPECIFICATIONS
User Weight Capacity: 120KG
Dimensions: 2050 X 485 X 855 MM
Shipping Weight: 37.5KG
Net Weight: 33.1KG
Power Requirements: 220-240 V

5CONQUEST ROWING MACHINE ASSEMBLY MANUAL
CONSOLE
DISPLAY INFORMATION
1. In the main display area when in moon:
— Scan mode: Console will display each funcon every 6 seconds, TIME->DISTANCE ->PULSE
SPM(/WATT)->CALORIE->STROKES(/TOTAL STROKES).
— Pressing the “Display-ALT” key lets you to select and lock on to a parcular funcon you want.
2. Press “ENTER” key to changeover display from SPM /WATT to STROKES /TOTAL STROKES when
exercising.
4. Resistance levels: 16
FUNCTION DESCRIPTION SPECS
TIME The me of each workout ,when starng exercise. 0M:00S ~ 99M:59s
TIME/500m The me of each 500 meters at the current pulp velocity. 0M:00S ~ 99M:59s
DISTANCE The distances of each workout ,when starng exercise. 0.0 ~ 9999 KM
PULSE Heart beat. 40-240 BPM
CALORIE The calorie burned of each workout, when starng exercise. 0 ~ 9999KCAL
SPM The strokes per minute, when starng exercise. 0 ~ 999 RPM
STROKES The strokes of each workout, when staring exercise. 0~9999
TOTAL The total strokes of all workout. 0~99999

6
CONSOLE PROGRAMS:
KEY FUNCTIONS:
UP Key: Upward selector of the PROGRAMS; Adjusng upward when in the Seng Mode;
Adjusted / increasing the resistance level.
DOWN Key: Downward selector of the PROGRAM; Adjusng downward when in the Seng
Mode; Adjusted / decreasing the resistance level.
RESET Key: Returns to PROGRAM 1 during any point of exercise; Clears all training values, except
the user-dened of U1-U4, WATT and PULSE.
START/STOP Key: To start or stop the rowing moon.
RECOVERY Key: Monitoring the level of heartbeat recovery.
ENTER Key: To changeover display from SPM /WATT to STROKES /TOTAL STROKES when in a rowing
moon
Display-ALT Key: Allows you to select and begin a parcular funcon you desire.;
PROGRAM 1 MANUAL MODE The resistance changed by manual adjustment.
PROGRAM 2~11 PROGRAM MODE Pre-programmed auto adjustment with presented
feedback.
PROGRAM 12: BODY FAT Body fat percentage and body mass index goal
dependent.
PROGRAM 13: WATT MODE The moon mode by wa target controlled.
PROGRAM 14~17 H.R.C MODE Heartbeat target value controlled by user goal heart rate
target, 65% ,75%,85%, user-dened.
PROGRAM 18~21 USER MODE The moon mode controlled by user - dened resistance
value.
RECOVERY MODE The level of heartbeat recovery.
Bluetooth and APP Oponal Bluetooth & APP.
Wireless pulse Wireless pulse receiver.

7CONQUEST ROWING MACHINE ASSEMBLY MANUAL
1. Press “START/STOP” key to begin rowing, or press “ENTER” key for the seng mode.
2. In seng mode, press the “ENTER” key to choose seng items while the window begins ashing
the various features - TIME,DISTANCE,CALORIE,STROKES,AGE.
3. Press “UP” or “DOWN” key to upward or downward adjusted, and press “ENTER” key to next
funcon.
4. Computer automacally exits the seng status when all operaons are complete, user can press
“START/STOP” key in the seng status to start exercise.
5. Adjust the resistance value level during the exercise, by pressing the “UP” or “DOWN” key.
6. When any of seng feature has counted down to 0, the moon will STOP and produce a
beeping sound.
7. Press “START/STOP” key to complete your exercise.
MANUAL MODE (PROGRAM 1):
PROGRAM MODE (PROGRAM 2-12)

8
1. Press “UP” or “DOWN” key to select a desired funcon.
2. Press “START/STOP” key to begin workout, or press “ENTER” key for seng mode.
3. In seng status, press the “ENTER” key to choose seng items while the window begins
ashing the various features - TIME,DISTANCE,CALORIE,STROKES,AGE;
4. Press “UP” or “DOWN” key to upward or downward adjusted, and press “ENTER” key to next
seng.
5. Computer automacally exits the seng status when all operaons are complete, user can press
“START/STOP” key in the seng status to start exercise.
6. The resistance value level is automacally adjusted during the selected program, or user can
press “UP” “DOWN” for manual adjustment.
7. When any of seng feature has counted down to 0, the moon will STOP and produce a
beeping sound.
8. Press “START/STOP” key to complete your exercise.
BODY FAT (PROGRAM 13)
1. Press “ENTER” key into seng mode.
2. In seng status, press “ENTER” key to choose seng items while the window begins ashing
the various features - GENDER→HEIGHT→WEIGHT→AGE.
- Press “UP” or “DOWN” key to upward or downward adjusted, and press “ENTER” key to next
funcon.
- Press “START/STOP” key to start test and hold the pulse sensor rmly. Then the display will show
your body fat in 8 seconds later - B.M.I. (Body Mass Index).
NOTE: You should keep your body relaxed and your heart rate calm.

9CONQUEST ROWING MACHINE ASSEMBLY MANUAL
WATT MODE (PROGRAM 14)
1. Press “ENTER” key into seng mode;
2. In seng status, press “ENTER” key to choose seng items while the window begins ashing
the various features - TIME→DISTANCE→WATT;
3. Press “UP” or “DOWN” key to upward or downward adjusted, and press “ENTER” key to next
seng.
4. Press “START/STOP” key to begin,
5. The resistance value level is automacally adjusted during moon to meet the desired WATT
target value, or user can press “UP” “DOWN” for manual adjustment.
6. When any of seng feature has counted down to 0, the moon will STOP and produce a
beeping sound.
7. Press “START/STOP” key to complete your exercise.
H.R.C MODE (PROGRAM 15-18)

10
1. Press “UP” or “DOWN” key to select a desired funcon.
2. Press “START/STOP” key to begin exercise, or press “ENTER” key into seng mode.
3. In seng status, press “ENTER” key to choose seng items while the window begins ashing
the various features - TIME→DISTANCE→CALORIE→STROKES→AGE (only PROGRAM 15-17)
→ T.H.R (only PROGRAM 18);
4. Press “UP” or “DOWN” key to upward or downward adjusted, and press “ENTER” key to next
funcon.
5. Press “START/STOP” key to begin.
6. The resistance value level is automacally adjusted during moon to meet the desired T.H.R
target value, or user can press “UP” “DOWN” for manual adjustment.
7. When any of seng feature has counted down to 0, the moon will STOP and produce a
beeping sound.
8. Press “START/STOP” key to complete your exercise.
NOTE: You must be hold the pulse sensor in during the exercise.
USER MODE (PROGRAM 19-22)

11CONQUEST ROWING MACHINE ASSEMBLY MANUAL
1. Press “UP” or “DOWN” key to select U1-U4 mode on the computer.
2. Press “START/STOP” key to begin exercise, or press “ENTER” key into seng mode.
3. In seng status, press “ENTER” key to choose seng items while the window begins ashing
the various features - TIME→DISTANCE→CALORIE→STROKES→AGE →Resistance Value;
4. Press “UP” or “DOWN” key to upward or downward adjusted, and press “ENTER” key to next
funcon.
5. Press “START/STOP” key to begin.
6. The resistance value level is automacally adjusted to match program design, or user can press
“UP” “DOWN” for manual adjustment.
7. When any of seng feature has counted down to 0, the moon will STOP and produce a
beeping sound.
8. Press “START/STOP” key to complete your exercise.
RECOVERY MODE
When exercising, rst test your pulse by holding the handlebars. Then press the “RECOVERY” key
to enter the pulse recovery funcon. The display will then show a 1 minute count-down as well as
your pulse rate. Keep a hold of the pulse sensor unl it counts down to zero. Then, the display will
pop up with your pulse recovery level from F1 to F6, that is, from the fastest recovery to slowest.
The fastest recovery F1 show the best.
BEST STATE : F1=1.0
WELL : 1.0 < F2 <2.0
GOOD : 2.0 < F3 <2.9
ORDINARY : 3.0 < F4 <3.9
Relavely poor : 4.0 < F5 <5.9
BAD : F6=6.0

12
ASSEMBLY INSTRUCTIONS
STEP 1
— Remove the bolts (9), arc washers (10), spring washers (11) and cap nuts (12) from the
main frame (27) using the wrench (B).
— Then aach front boom tube (6) to main frame (27) using the bolts (9), arc washers (10),
spring washers (11) and cap nuts (12) with the wrench (B).
10 1112 1011 12
9
9
6
27
#9M8*73*20*H52PCS
#10d8*Φ20*2*R302PCS
#BS13-14-151PC
#12M8*H16*S132PCS
2PCS
#11d8

13CONQUEST ROWING MACHINE ASSEMBLY MANUAL
STEP 2
— Remove the bolts (31) from rail (33) using the wrench (B).
— Insert the seat (40) into rail (33).
— Secure the rail piece (32) into the rail (33) with the bolt (31) using the wrench (B).
— Secure the limiter (34) to the rail (33) with the bolts (35) using the wrench (B).
40
35
34
33
#BS13-14-151PC
#35M6*16*φ10
31
#34Φ27*Φ23*16*Φ6 2PCS
#31
M5*10*φ8
2PCS

14
STEP 3
— Remove screws (25) from the upper rail and the lower cover (36&37) using the wrench (B).
— Aach the upper rail and the lower cover (36&37) to the rail (33) with the screw (25) using the
wrench(B);
— Secure the rear supporter (38) to the boom of the rail (33) with the washers (3),
spring washers (11) and bolts (24) using the spanner (A).
36
37
25
311
24
3
11
24
24
11
3
#AS51PC
#BS13-14-151PC
#25ST4.2*16*Φ81PCS
33
38
#3d8*Φ16*1.54PCS
4PCS
4PCS
#11d8
#24M8*20*S5

15CONQUEST ROWING MACHINE ASSEMBLY MANUAL
STEP 4
— Remove the arc washers (10), spring washers (11) and bolts (24) from main frame (27) using
the spanner (A), then remove screws (25) from the cover (26L/R) and main frame (27) using the
wrench(B).
— Aach the rail (33) into the main frame (27), then secure them with the arc washers (10),
spring washers (11) and bolts (24) using the spanner (A);
— Secure the cover (26L/R) to the main frame (27) using the screws (25) with the wrench (B).
25
26R
25
24
11
10
27
10
11
24
26L
25
25
24
11
10
33
#AS51PC
#BS13-14-151PC
#25ST4.2*16*Φ84PCS
#10d8*Φ20*2*R30 6PCS
6PCS
6PCS
#11d8
#24M8*20*S5

16
STEP 5
— Remove the spring washers (11), bolts (22) and washers (23) from main frame (27) using the
wrench (B).
— Aach the pedal plate (30) to main frame (27) with the spring washers (11), bolts (22) and
washers (23) using the wrench (B).
— Secure the pedal (29) into the pedal plate (30) with bolts (24) using the spanner (A).
Aenon: The pedal strap (28) should be placed in the long groove, which is at the boom of the
pedal (29), and the pedal (29) must not restrict the pedal strap (28), so that the pedal strap (29)
can be adjusted by pulling up and down.
24
24
29
30
23
11
22
29
28
24
24
22
11
23
23 11
22
#AS51PC
#23d8*Φ20*24PCS
#22M8*20*S134PCS
28
#BS13-14-151PC
27
4PCS
4PCS
#11d8
#24M8*20*S5

17CONQUEST ROWING MACHINE ASSEMBLY MANUAL
STEP 6
— Pull out the trunk wire (16a/16b/16c) from the computer post (67), then connect the wires to
the computer wires (15a/15b/15c), then places these wires into the computer post (67) once
done.
— Secure the computer (15) on the computer post (67) with bolts (15) using the wrench (B).
— Insert the adapter line (38) to the power point posioned on the front of the main frame, then
plug the adapter into an outlet.
Aenon: Cut o the power source when don’t use it long me.
15
13
#BS13-14-151PC
67 15
13
15b
15c
15a
15a 15b 15c
16a 16b 16c
16b
16c
16a
92
4PCS
#13M5*10

18
CONGRATULATIONS
Assembly of your Elite Conquest Rowing Machine is now complete! Be sure to fully inspect your
machine before using it for the rst me.
Failure to visually check and test and tech the assembly before use can cause damage to
the Elite Conquest Rowing Machine and serious injury to users and bystanders and can also
compromise the eecveness of your exercise program.

19CONQUEST ROWING MACHINE ASSEMBLY MANUAL
MOVING THE MACHINE
Li up the Rear supporter (38) unl the transportaon wheels on the Front boom tube (6) touch
the ground. With the wheels on the ground, you can transport the bike to the desired locaon with
ease.
ADJUSTMENT GUIDE & STORAGE INSTRUCTIONS
COMPUTER ANGLE ADJUSTMENT
The rotaon angle of computer post can be adjusted to obtain
the best view of the Computer LCD screen.
PEDAL ADJUSTMENT
The pedal strap is adjustable and can be personalized to t the
user’s foot size.

20
STORAGE
When not in use, you can stand up the machine to save the space .
Aenon: The seat will slip when the rower is placed horizontally.
B
A
Table of contents
Other Elite Fitness Home Gym manuals

Elite Fitness
Elite Fitness WARRIOR User manual

Elite Fitness
Elite Fitness IT 9300-E User manual

Elite Fitness
Elite Fitness ITM 4600-E User manual

Elite Fitness
Elite Fitness Stamina X User manual

Elite Fitness
Elite Fitness RAZOR R11 User manual

Elite Fitness
Elite Fitness Vanquish User manual

Elite Fitness
Elite Fitness RAZOR R7 User manual
