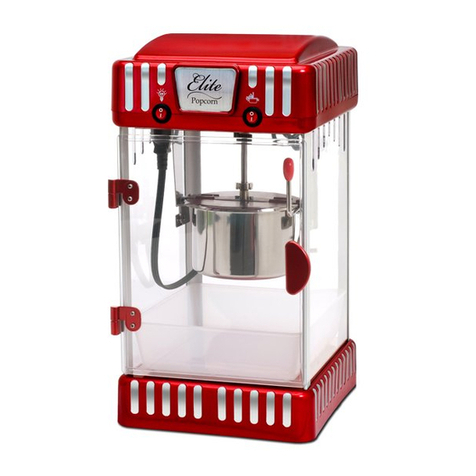
Elite EPM-250 User manual

Classic
Countertop
Popcorn Maker
Model: EPM-250
INSTRUCTION MANUAL
Before operating your new appliance, please read all instructions carefully and keep
for future reference

IMPORTANT SAFEGUARDS
Basic safety precautions should always be followed when using electrical products,
especially when children are present.
WARNING: TO AVOID THE RISK OF ELECTRICAL SHOCK, ALWAYS MAKE SURE THE
PRODUCT IS UNPLUGGED FROM THE ELECTRICAL OUTLET BEFORE ASSEMBLING,
DISASSEMBLING, RELOCATING, SERVICING, OR CLEANING.
1. READ ALL INSTRUCTIONS BEFORE USE.
2. Do not touch hot surfaces. Always use handles or knobs to operate.
3. To protect against risk of electrical shock, do not immerse cord, plug, or any
non-removable parts of this appliance in water or other liquid.
4. Close supervision is necessary when any appliance is used by or near children.
5. Unplug from outlet when not in use and before cleaning. Allow to cool
before installing or removing parts. To disconnect, grasp plug and
remove from outlet. Do not pull by the cord.
6. Do not operate the appliance if the power cord or plug is damaged, it must be
replaced by the manufacturer or its service agent before use. Return appliance
to the nearest service facility for examination, repair or adjustment.
7. The use of any accessories or attachments not supplied by the manufacturer is
not recommended as it may cause injuries.
8. Do not use outdoors.
9. Do not pop kernels in a dry kettle (without oil).
10. Do not use butter/margarine when popping kernels. This will burn the
popcorn and leave a residue.
11. Do not immerse popping kettle into water or any other liquid.
12. Kettle surface is very HOT when in use. Do NOT touch the hot kettle when in
use or just after use.
13. Do not let cord hang over edge of table or counter, or touch hot surfaces.
14. Always attach plug to appliance first, then plug cord in the wall outlet. To
disconnect, turn any control to “off’, then remove plug from wall outlet.
15. A fire may occur if this appliance is covered by or touches flammable
material including curtains, draperies, walls, etc. when in operation. Do not
store any item on top of the appliance.
16. Do not place on or near a hot gas or electrical burner, or in a heated oven.
17. Extreme caution must be used when moving an appliance containing hot oil or
other hot liquid.
18. Turn all controls to "OFF" before inserting or removing plug from wall outlet.
19. Do not use appliance for other than intended use.
20. Never steam food in the popping kettle.
21. A popper that is plugged into an outlet should not be left unattended.
22. Extreme caution must be used when removing and serving popcorn.
23. KEEP OUT OF REACH OF CHILDREN.
24. Do not clean with metal scouring pads. Pieces can break off the pad and touch
electrical parts resulting in a risk of electric shock.
25. NEVER FORCE ANY PARTS OR BRACKETS INTO POSITION.
26. CAUTION: Injury and/or Burns may result from non-compliance with these
operating procedures.
27. No parts are intended for dishwasher (except removable tray & spoons).

SHORT CORD PURPOSE
NOTE: A short power cord is provided to reduce the risk of personal injury resulting
from becoming entangled in or tripping over a longer cord.
Longer power-supply cords or extension cords are available and may be used if
care is exercised in their use.
If an extension cord is used: (1) the marked electrical rating of the extension cord
should be at least as great as the electrical rating of the product; (2) the extension
cord should be arranged so that it will not drape over the countertop or tabletop
where it can unintentionally be pulled on or tripped over by
Ã
children or pets.
POLARIZED PLUG
If this appliance is equipped with a
polarizedÃplug
(one blade is wider than the
other), please follow the below instructions:
To reduce the risk of electrical shock, this plug is intended to fit into a polarized
outlet only one way. If you are unable to fit the plug into the electrical outlet, try
reversing the plug. If the plug still does not fit, contact a qualified electrician. Never
use the plug with an extension cord unless the plug can be fully inserted into the
extension cord. Do not alter the plug of the product or any extension cord being
used with this product. Do not attempt to defeat the safety purpose of the
polarized plug.
INTRODUCTION
Prepare to enjoy warm and freshly popped popcorn whenever you want it!
Your new Classic Popcorn Maker is perfect for movie nights with the whole
family. Now you can take pleasure in the movie theater experience without
ever leaving the house! It can pop up to 1 gallon in just 5 minutes, and it’s up to
you how you want to flavor your popcorn, sweet or savory! Your new Classic
Popcorn Maker is so easy to use: just turn the switch on, add oil and kernels,
and watch the popcorn pop out from the kettle!
SAVE THESE INSTRUCTIONS
THIS PRODUCT IS FOR
HOUSEHOLD USE ONLY

PARTS & IDENTIFICATION
1. Clear plexi door for convenient viewing
2. 1/3 Measuring Cup (80mL) & 1 Tablespoon (15mL or ½ Fluid Oz.) pre-measured
3. Removable popcorn tray easily slides out for serving popcorn. (DO NOT wash
in dishwasher)
4. Stainless steel 2.5oz popping kettle prepares freshly popped popcorn in
minutes
5. Main Popcorn Unit
6. Steel Hangers hold the popcorn kettle securely and allow kettle to swing freely.
BEFORE FIRST USE
Before using your appliance for the first time, be sure to:
1. Remove all packaging and labels or stickers from your popcorn maker. Be
sure that all parts (listed above) of your new popcorn maker have been
included before discarding any packaging materials. (You may want to
keep the box and packing materials for use at a later date.)
2. Make sure that the appliance is unplugged and the switches are in the
“OFF” position.
3. Wipe housing and internal chamber of main unit with a damp cloth to
remove any dust. Wash the accessories (measuring cup, tablespoon &
tray) in hot, soapy water. Clean the internal surface of the kettle with
warm soapy water, rinse well and dry with clean cloth. (NEVER IMMERSE
THE KETTLE IN ANY LIQUIDS).
4. Thoroughly dry all accessories and follow instructions for assembly.
TIP: NEVER USE BUTTER OR MARGARINE IN THE POPPING KETTLE. This
will cause popcorn to burn and create an unpleasant residue.
6

ASSEMBLING YOUR POPCORN MAKER
Step 1:
Hook the kettle onto the hanger inside the
main popcorn unit.
Step 4:
Place the door onto the hinges by aligning
the pins on the main popcorn unit with the
hinges on the door.
Step 3:
Set the removable tray in the Main Popcorn
unit below the kettle.
Step 2:
Insert the kettleƋs power plug into the
electrical socket on the inner ceiling of the
main popcorn unit.

USING YOUR POPCORN MAKER
POPPING INSTRUCTIONS
1. Make sure the popcorn maker is unplugged before you begin.
2. Before using the unit, please check to be sure voltage (120V ~60Hz) is suitable
to your home.
3. Main popcorn unit has 2 function switches as follows:
- LIGHT: to turn the internal light bulb on.
- POP: to turn the stirring stick motor & heater on.
4. Install popping kettle by hooking the kettle onto the kettle hooks inside the
main popcorn unit (see step 1 on page 4).
5. Insert the internal kettle plug into the socket on the ceiling inside the main
popcorn unit. (see step 2 on page 4)
6. Plug the external power cord into an electric wall outlet.
7. Before pouring oil or kernels into the kettle, lift lid using the lid tab. Add oil (1
tablespoon of vegetable, corn, peanut, or coconut oil).
CAUTION: NEVER use butter or margarine in the kettle when popping
kernels. This will cause the popcorn to burn and create an unpleasant
residue.
8. Turn both LIGHT & POP switches to ON position. The light, heater and motor
will be on. Allow the kettle to preheat oil for approximately 2 to 3 minutes. Turn
the POP switch to off position, add 1/3 cup of corn kernels close lid to the
kettle. Close the plexi-door. Turn POP switch back on, stirrer will begin to
rotate and heater will heat up the oil and corn.
CAUTION: Lid is very hot – it is recommended to use an oven mitt.
Do not use more than the recommended amounts of oil or popcorn for
popping.
9. Popcorn starts popping out through the lid after approximately 2 minutes.
10. When unit is finished popping – you will no longer hear the corn popping –
immediately turn the POP switch to the OFF position and pull down the handle
bar of the kettle to release any remaining popcorn in the kettle. This will also
stop the remaining popcorn from cooking any further and prevent burning.
11. Keep POP switch off if the unit is not in use. Always allow the kettle to cool-
down approximately 5-10 minutes between continuous batches to avoid over-
heating the kettle.
12. WARMING LIGHT: If popcorn is kept inside the machine, the LIGHT switch can
remain on to keep the popcorn warm and fresh.
13. Remove plug from power supply when the unit is not being used.
14. Repeat steps 8 through 10 for continuous popping.

CLEANING AND MAINTENANCE
•It is strongly recommended to clean the kettle after EVERY use.
•NEVER IMMERSE THE KETTLE IN WATER OR ANY LIQUIDS.
•Do not use benzene, scrubbing brushes or chemical cleaners, as these will
damage the kettle.
•After using the popcorn machine, allow it to cool, and use a warm damp
cloth to clean the interior chamber windows of the main unit after each
use to prevent build-up.
•It is strongly recommended to wash and dry the popcorn tray, measuring
cup and spoon after each use. (Do NOT wash in dishwasher.)
•The plexi door is removable by simply lifting it off its hinges. The door can
be hand washed in warm soapy water. Do not use any abrasive cleaners,
scouring pads, or steel wool.
•Do not clean plastic tray with any abrasive cleansers, scouring pad or steel
wool.
•Light bulb is replaceable with an AC120V 10W bulb.
KETTLE QUICK CLEANING PROCEDURE
Turn the POP switch to off. Pour 4 to 6 ounces of water (NO detergent is necessary)
into inner kettle popper. Switch POP to on to boil the water and let the stirrer turn
in order to remove excess oil or kernels stuck inside the kettle. Leave on for
approximately 1-2 minutes. Shut off and let cool. After cooling, pour out the water
and discard.
CAUTION: THE KETTLE MAY BE HOT.
You may also remove the kettle and clean it with a non-abrasive scouring pad (Not
included). NEVER immerse kettle or electrical plug in water or other liquids. You
may also consider using a cleaning product designed for removing carbon deposits
and is specially formulated to clean popcorn kettles.

LIMITED WARRANTY* ONE (1) YEAR
WARRANTY IS ONLY VALID WITH A DATED PROOF OF PURCHASE
PLEASE DO NOT RETURN TO STORE OF PURCHASE.
If you have any problems with this unit, contact Customer Service for support.
1. Your small kitchen appliance is warranted to the original purchaser to be free from
any manufacturing defects under normal use and conditions for one (1) year, cord
excluded. This Warranty applies only to the original purchaser of this product.
2. Retail stores/merchants selling this product do not have the right to alter, modify, or
in any way revise the terms and conditions of the warranty.
3. If you use your appliance for household use and according to instructions, it should
give you years of satisfactory service.
4. At its sole discretion, Maxi-Matic USA will either repair or replace the product found
to be defective during the warranty period.
5. The repaired or replacement product will be in warranty for the remaining balance
of the one-year warranty period and an additional one-month period.
6. Consumer’s remorse is not an acceptable reason to return a product to our Service
Center.
7. This limited warranty covers appliances purchased and used within the 50 U.S.
states plus the District of Columbia and does NOT cover normal wear of parts or:
-Damages caused by unreasonable use, neglect, normal wear and tear, commercial
use, improper assembly or installation of product.
-Damages caused in shipping.
-Damages caused by replacement or resetting of house fuses or circuit breakers.
-Defects other than manufacturing defects.
-Breakage caused by misuse, abuse, accident, alteration, lack of proper care and
maintenance, or incorrect current or voltage.
-Lost or missing parts of the product. Parts will need to be purchased separately.
-Damages of parts that are not electrical; i.e. cracked or broken plastic/glass,
scratched/dented inner pots.
-Damage from service or repair by unauthorized personnel.
-Extended warranties purchased via a separate company or reseller.
-Acts of God such as fire, floods, hurricanes, tornadoes, etc.
8. This warranty does not apply to re-manufactured merchandise.
Maxi-Matic, USA shall not be liable for any incidental or consequential damages caused
by the breach of any express or implied warranty. Apart from the extent prohibited by
applicable law, any implied warranty of merchantability or fitness for a particular
purpose is limited in time to the duration of the warranty.
*One Year Limited Warranty valid only in the 50 U.S. states plus the District of Columbia,
excluding Puerto Rico and the Virgin Islands.
This warranty is effective only if the product is purchased and operated in the USA;
product usage which is in violation of the written instructions provided with the unit will
void this warranty.
For international warranty, please contact the local distributor.
This warranty gives you special legal rights and you may also have other rights to which
you are entitled which may vary by state, province, and/or jurisdiction.
**Any instruction or policy included in this manual may be subject to change at any
time.
MAXI-MATIC,ÃUSA
18401 E. Arenth Ave. City of Industry, CA 91748
Customer Support Hours of Operation MON-FRI 8:30 AM - 5:00 PM PST
(800) 365-6133 Ext: 120/107/105; (626) 912-9877 Ext: 120/107/105
Visit: www.maxi-matic.com for Live Chat Support and Contact Us Form
RETURN INSTRUCTIONS
RETURNS:
A. Any return of defective merchandise to the manufacturer must be
processed accordingly by first contacting customer service (info@maxi-
matic.com) to obtain an RA # (Return Authorization Number). We will not
accept any returns of merchandise without an applicable RA #.
B. IMPORTANT RETURN INSTRUCTIONS. Your Warranty depends on your
following these instructions if you are returning the unit to Maxi-Matic,
USA:
1. Carefully pack the item in its original carton or other suitable box
with sufficient cushioning to avoid damage in shipping.
2. Before packing your unit for return, be sure to enclose:
a) Your name, full address with zip code, daytime
telephone number, and RA#,
b) A dated sales receipt or PROOF OF PURCHASE,
c) The model number of the unit and the problem you are
having (Enclose in an envelope and tape directly to the
unit before the box is sealed,) and
d) Any parts or accessories related to the problem.
3. Maxi-Matic, USA recommends that you ship the package via UPS
ground service for tracking purposes. We cannot assume
responsibility for lost or damaged products returned to us
during incoming shipment. For your protection, always
carefully package the product for shipment and insure it with the
carrier. C.O.D shipments cannot be accepted.
4. All return shipping charges must be prepaid by you.
5. Once your return has been received by our warehouse, Maxi-
Matic, USA will repair or replace the product if it is defective in
material or workmanship, subject to the conditions in paragraph
B.
6. Maxi-Matic will pay the shipping charges to ship the repaired
or replacement product back to you.

IMPORTANTES MEDIDAS DE SEGURIDAD
Cuando utilize aparatos eléctricos, precauciones básicas de seguridad deveran de
seguirse, incluyendo las siguientes:
1. LEA TODAS LAS INSTRUCCIONES ANTES DE USAR SU MÁQUINA DE
PALOMITAS
2. No toque las superficies calientes. Siempre utilize las agarraderas o botones para
operarlo.
3. Para evitar cualquier riezgo de una descarga eléctrica, no sumerja el cordon o
ploga eléctrica en agua o ninngún otro líquido.
4. Este aparato no deve ser utilizado, estar serca de niños, o personas con
incapacidades.
5. Desconecte el aparato del toma corriente cuando no este en uso o para limpiar.
6. Permita que todas las partes calientes enfríen completamente antes de limpiar o
moverlo
7. Para evitar riezgos no opere este aparato o ningún otro con el cordon o ploga
eléctrica dañada. Si el cordon eléctrico o aparato no funciona correctamente o se
an dañado en alguna forma, retorne el aparato al fabricante, centro de cervicio
autorizado o personal capacitado unicamente, para ser examinado, reparado o
ajustado
8. El uso de accesorios o partes no recomendados por el fabricante pueden causar
daños personales o a su aparato
9. No utilice la olla térmica vacia y sin aceite comestible.
10. No sumerja la olla térmica en agua o ningún otro líquido.
11. La olla térmica esta caliente no se devera de tocar durante o despues de su uso.
12. Desconecte la unidad y permita que enfríe . Limpie, cubra la unidad y guarde en
un lugar seco y seguro si no va a utilizarlo por algun tiempo.
13. No permita que el cordon cuelgue de la orilla de la mesa o toque cualquier
superficie caliente.
14. No coloque la unidad sobre o serca de estúfas de gas, eléctricas u hornos
15. No mueva este aparato cuando contenga aceite, agua u otros líquidos que estén
calientes.
16. Coloque los interruptores en apagado antes de desconectarlo del toma
corriente.
17. Este aparato no es recomendado para uso al aire libre.
18. No utilize este aparato para ninguna otra cosa, sino para lo que fue diceñado.
19. Para prevenir el sobrecalentamiento de la olla térmica, siempre ponga aceite y
despues los granos de maíz antes de operarlo.
20. Extrema precaución devera de tener cuando remueva o sirva las palomitas de
maíz, siempre ponga la olla térmica sobre la mesa para que residuos de aceite
caliente o agua corriente no le cause quemaduras.
21. MANTENGA EL APARATO FUERA DEL ALCANCE DE LOS NIÑOS.
22. NO LIMPIE EL APARATO CON LIMPIADORES ABRASIVOS.
23. NUNCA TRATE DE FORZAR NINGUNA PARTE EN POSICIÓN.
24. Ninguna de las partes de este aparato podrán ser lavados en el lavaplatos, con
escepción de la bandeja o cucharón.
25. Ninguna máquina , que este conectada al toma corriente devera de estar
desatendida.
Guarde este manual para futuras
referencias.

EL USO DE UN CORDON CORTO
1) Para reducir el riesgo de daños personales, como un tropezón o enredarse con
el cordón eléctrico. un cordón eléctrico corto es suministrado con la unidad.
2) Una extensión eléctrica mas larga podrá ser utilizada, siempre y cuando tome
extremas precauciones durante su uso.
3) Si una extensión eléctrica mas larga va a ser utilizada, tenga muy en cuenta las
siguientes recomendaciones:
Las especificaciones eléctricas especialmente el (amperaje) del cordón eléctrico a
utilizar deberá de ser de igual o más amperaje que el especificado en el aparato a
utilizar.
El cordón eléctrico, deberá de ser colocado de una manera que no cuelgue de la
mesa, donde los niños no puedan jalar o tropezar con él, accidentalmente.
ENCHUFE POLARIZADO
Si este aparato es suministrado con un cordón eléctrico de enchufe polarizado(un
lado del enchufe es mas ancho que el otro) favor de seguir las siguientes
recomendaciones.
Para reducir el riesgo de una descarga eléctrica este enchufe esta diseñado para
entrar en el receptáculo eléctrico de una sola manera. Si el enchufe eléctrico no
entra completamente, de un giro al mismo y trate de nuevo, si no entra de ninguna
manera, póngase en contacto con un electricista para solucionar el problema.
NO TRATE DE MODIFICAR EL ENCHÚFE DE NINGUNA MANERA.
ESTE APARATO ES PARA USO DOMÉSTICO UNICAMENTE.
Máquina para hacer palomitas de maíz de mesa
Especificaciones:
Modelo no.: EPM-250
Voltaje: AC120V ~60Hz
COMPONENTES

1. Puerta 4. Olla Térmica
2. Tasa y cucharón 5. Vitrina
3. Bandeja recolectora 6. Ganchos
PROCEDIMIENTO PARA ENSAMBLE
Paso 1:
Coloque la olla térmica en los ganchos.
Paso 2:
Conecte la ploga de la olla térmica en el
enchufe localizado en la parte interior
superior del aparato.
Paso 3:
Coloque la bandeja recolectora dentro
de la unidad.
Paso 4:
Instale la puerta aliniando los ollos de
las bisagras de la unidad con los ollos de
la puerta e introduzca los alfileres de
metal.

INSTRUCCIONES
1. Asegurese de que la máquina esté desconectada del toma corriente antes de
hacer qualquiera de las siguientes cosas.
2. Antes de conectar la unidad asegurese de que el voltaje sea de 120 V ~
3. Limpie el interior de la olla térmica con agua y jabón enjuague y seque
perfectamente. Limpie el interior y exterior de la máquina con un trapo húmedo.
4. La máquina cuenta con un interruptor de 2 funciones:
- LUZ: Para encender la luz interior del aparato.
- FUNCIONAMIENTO: Para encender el motor y elemento térmico.
5. Coloque la olla térmica colgandola en los ganchos vea paso(1)
6. Conecte la ploga de la olla térmica en el enchufe localizado en la parte interior
superior del aparato, vea paso(2).
7. Conecte la unidad al toma corriente.
8. Levante la tapa de la olla térmica y ponga una cucharada de aceite vegetal, de
maíz, cacahuate o aceite de coco. PRECAUCIÓN: No use mantequilla ni
margarina en la olla térmica; esto causara que las palomitas se quemen
y deja a tras un residuodesagradable.
9. Coloque el interruptor en LIGHT & POP. La luz, el motor y la olla térmica
encenderán. Deje que el aceite precaliente por unos 2 o 3 minutos. Coloque el
interruptor en apagado y ponga 1/3 de taza de granos de maíz (Nota: Se incluye
taza medidora con graduaciones) Tape la olla térmica y coloque el interruptor de
regreso a encendido. PRECAUCIÓN: La tapa podría estar caliente, es muy
recomendado que utilize guantes de cocina.
10. Las palomitas de maíz enpezarán a salir de la olla térmica despues de 2 minutos.
11. Cuando la máquina termine de hacer las palomitas de maíz, usted no oira mas el
ruido de las palomitas que se estan haciendo. Immediatamente, apague la unidad y
jale la barrita de la olla térmica para soltar cualquier residuo de granos de maíz,
tambien al hacer esto la olla dejara de hacer mas palomitas evitando que se
quemen.
12. Mantenga la unidad apagada, si la unidad no esta en uso. Siempre permita que
la olla térmica enfríe aproximadamente de 5 a 10 minutos entre cada 3 periodo de
uso continuo. Esto va a prevenir el sobrecalentamiento de de la olla térmica.
13. Desconecte la unidad del toma corriente, cuando la unidad deje de usarse.
14. Repita los pasos del 8 al 10 para continuar hacienda palomitas de maíz.

MANTENIMIENTO Y LIMPIEZA
Se recomienda limpiar la olla térmica frecuentemente para evitar que exsesos de
aceite se quemen en el fondo de la olla y sean dificiles de remover..
Despues de usar su máquina de palomitas, deje que enfríe y use un trapo húmedo
para limpiarlo. Es muy recomendado lavar y secar la bandeja despues de cada uso
para evitar el crecimiento de bacteria. La lampara incandecente es reemplazable es
de 120V ~ ac. 10W.
PROCEDIMIENTOS PARA LIMPIAR LA OLLA TÉRMICA.
Apague la unidad. Ponga de 1 a 2 tazas de agua en la olla térmica, vuelva a
encender la unidad, deje ervir el agua de 1 a 2 minutos aproximadamente para
remover el ecxeso de aceite en la olla térmica. Apague y deje que enfríe la unidad.
Despues de que alla enfriado la unidad Saque y tire el agua de la olla térmica.
PRECAUCIÓN: La olla térmica podría estar caliente.
Podra usted tambien remover la olla térmica y limpiarla con limpiadores que no
sean abrasivos (No se incluyen). Nunca sumerja la olla térmica o la ploga eléctrica
en agua o ningún otro líquido.
Tambien puede usted considerer usar productos de limpieza designados para
remover reciduos de carbón que son especialmente formulados para limpiar ollas
para palomitas de maíz.

GARANTÍA LIMITADA * UN (1) AÑO
GARANTIA ES VALIDA CON UNA PRUEBA DE COMPRA FECHADA
1. Se garantiza, al comprador original, de estar libres de defectos de fabricación
en condiciones de uso normales y las condiciones para un (1) año, cordones
excluidos. Esta garantía se aplica sólo al comprador original de este producto.
2. Si necesita cambiar la unidad, devuélvala en su caja original, con el recibo de
compra, a la tienda donde lo compró. Si usted está más allá del plazo
concedido para el retorno por la política de la tienda, por favor consulte la
garantía incluida.
3. Si utiliza el aparato para uso doméstico y de acuerdo con las instrucciones,
debería ofrecerle años de servicio satisfactorio.
4. Durante el período de garantía de un año, un producto con un defecto será
reparado o reemplazado por un modelo nuevo o reacondicionado (a nuestro
criterio) cuando el producto sea devuelto a nuestro Centro de Servicio.
(Consulte la sección "Devoluciones" a continuación).
5. El producto reparado o reemplazado estará garantizado por el saldo restante
del período de garantía de un año y un plazo adicional de un mes.
6. Esta garantía limitada cubre los aparatos comprados y usados en los 50
estados contiguos y el Distrito de Columbia, y no cubre:
-Los daños causados por el uso excesivo, negligencia, uso y desgaste normal,
uso comercial, montaje o instalación incorrecta del producto.
-Los daños causados durante el envío.
-Los daños causados por la sustitución o reposición de fusibles o disyuntores.
-Defectos que no sean defectos de fabricación.
-Rotura causada por mal uso, abuso, accidente, alteración, falta de cuidado y
mantenimiento, o incorrecta de corriente o voltaje.
-Pérdida o falta alguna pieza del producto. Las piezas se deben comprar por
separado.
-Daños de piezas que no sean eléctricos; por ejemplo: agrietado o roto de
plástico o de vidrio.
-Daños por servicio o reparación por personal no autorizado.
-Las garantías extendidas compradas a través de una empresa independiente o
revendedor.
-Remordimiento del consumidor no es una razón aceptable para devolver un
producto a nuestro Centro de Servicio.
* Un año de garantía limitada válida solamente en los 50 estados contiguos y el
Distrito de Columbia, excluyendo Puerto Rico y las Islas Vírgenes.
Esta garantía es válida sólo si el producto es comprado y operado en los EE.UU., el
uso del producto que se encuentra en violación de las instrucciones escritas
proporcionadas con la unidad anulará esta garantía.
Para la garantía internacional, por favor póngase en contacto con el distribuidor
local.
** Cualquier instrucción o política incluida en este manual puede estar sujeta a
cambios en cualquier momento.
MAXI-MATIC, EE.UU.
18401 E. Ave Arenth. City of Industry, CA 91748
Departamento de Atención al Cliente: (626) 912-9877 Ext: 120/107/105
Lunes a viernes 8:30am-5pm PST
Sitio web: www.maxi-matic.com

INSTRUCCIONES DE DEVOLUCIÓN
DEVOLUCIONES:
A. Cualquier devolución de mercancía defectuosa al fabricante deben ser
procesados apropiadamente contactando primero al servicio al cliente
(información de contacto se muestra a continuación) para obtener un # RA
(Número de autorización de devolución). No se aceptará ninguna devolución
de mercancía sin un # RA aplicable.
B. INSTRUCCIONES IMPORTANTES DE RETORNO. Su garantía depende que usted
siga estas instrucciones si va a devolver la unidad a Maxi-Matic EE.UU.:
1. Empaque cuidadosamente el producto en su caja original o en otra
caja adecuada para evitar daños durante el envío.
2. Antes del envío de la devolución unidad, asegúrese de adjuntar:
a) Su nombre, dirección completa con código postal, número
de teléfono durante el día, y #RA
b) Un recibo de compra fechado o COMPROBANTE DE
COMPRA,
c) El número de modelo de la unidad y el problema que tiene
(Encierre en un sobre y pegue directamente a la unidad
antes de sellar la caja) y
d) Todas las piezas o accesorios relacionados con el problema.
3. Maxi-Matic EE.UU. recomienda enviar el paquete de servicio terrestre
de UPS para fines de seguimiento. No podemos asumir la
responsabilidad por productos perdidos o dañados devueltos a
nosotros durante el transporte entrante. Para su protección, siempre
cuidadosamente empaquetar el producto para su envío y asegurarlo
con la compañía. Envíos C.O.D no puede ser aceptado.
4. Todos los gastos de envío de devolución debe ser pagado por
usted.
5. Una vez que su devolución ha sido recibida por nuestro almacén,
Maxi-Matic EE.UU. se compromete a reparar o sustituir el producto si
presenta defectos de materiales o mano de obra, sujeto a las
condiciones del apartado B.
6. Maxi-Matic pagará los gastos de envío para enviar el producto
reparado o reemplazado de nuevo a usted.
Other manuals for EPM-250
1
Table of contents
Languages:
Other Elite Kitchen Appliance manuals

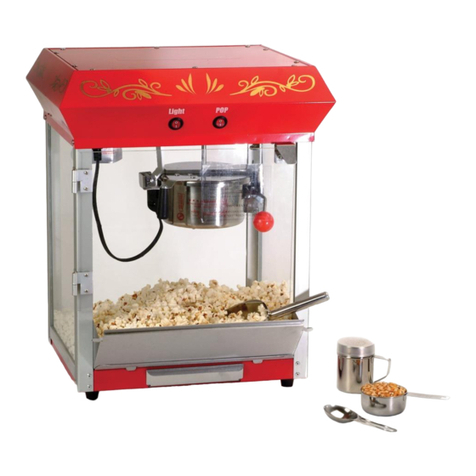
Elite
Elite FIESTA EQD-118 User manual

Elite
Elite EMT-503B User manual

Elite
Elite Gourmet TS-738 User manual

Elite
Elite EPM-450 User manual

Elite
Elite EAF-1506D Technical specifications

Elite
Elite PLATINUM EG-6203 User manual

Elite
Elite ESM-9002KB User manual

Elite
Elite EPM-250 User manual

Elite
Elite EJX-9700 User manual

Elite
Elite EWM-5933 User manual