Page 4
VRCTL8_2C
1000002483 (Rev. E - 01/19)
7. Actuation of Quick Connect Water Fittings: Cooler is provided with lead-free
connectors which utilize o-ring water seal. To remove tubing from the tting,
relieve water pressure, push in on the gray collar before pulling on the tubing.
To insert tubing, push tube straight into tting until it reaches a positive stop,
approximately 3/4” (19mm). See Figure 2.
Service: Inspection/Replacement
• Inspect Cooler twice each year for proper operation and performance.
• Inspection of the unit will require disconnecting electrical supply, removal of panels, etc. and reassembly and return to service practices.
1. Lower Front Panel and Front Dispenser Panel: To access the refrigeration system and plumbing connections, loosen two (2) screws holding the
lower front panel at the bottom of cooler base and two (2) screws at the top using the provided T-25 Torx bit. To gain access to the regulator,
bubbler, and push button assembly remove (2) screws on the underside of the front dispenser panel (Item 34) using the provided T-20 Torx Bit.
Tilt the bottom of the panel toward you, and slide the panel down to remove it.
2. Bubbler: To remove the bubbler, rst disconnect the electrical and water supply. The underside of the bubbler can be reached through the front
dispenser panel (Item 34). Follow the above instructions to remove the Front Dispenser Panel. To remove the bubbler, loosen bubbler nipple from
the underside of the bubbler (Item 4) and remove the tubing from the quick connect tting. See Figure 2. When installing replacement bubbler,
tighten nipple only to hold parts snug in position. Do Not Overtighten. After servicing, replace the Front Dispenser panel and two (2) screws.
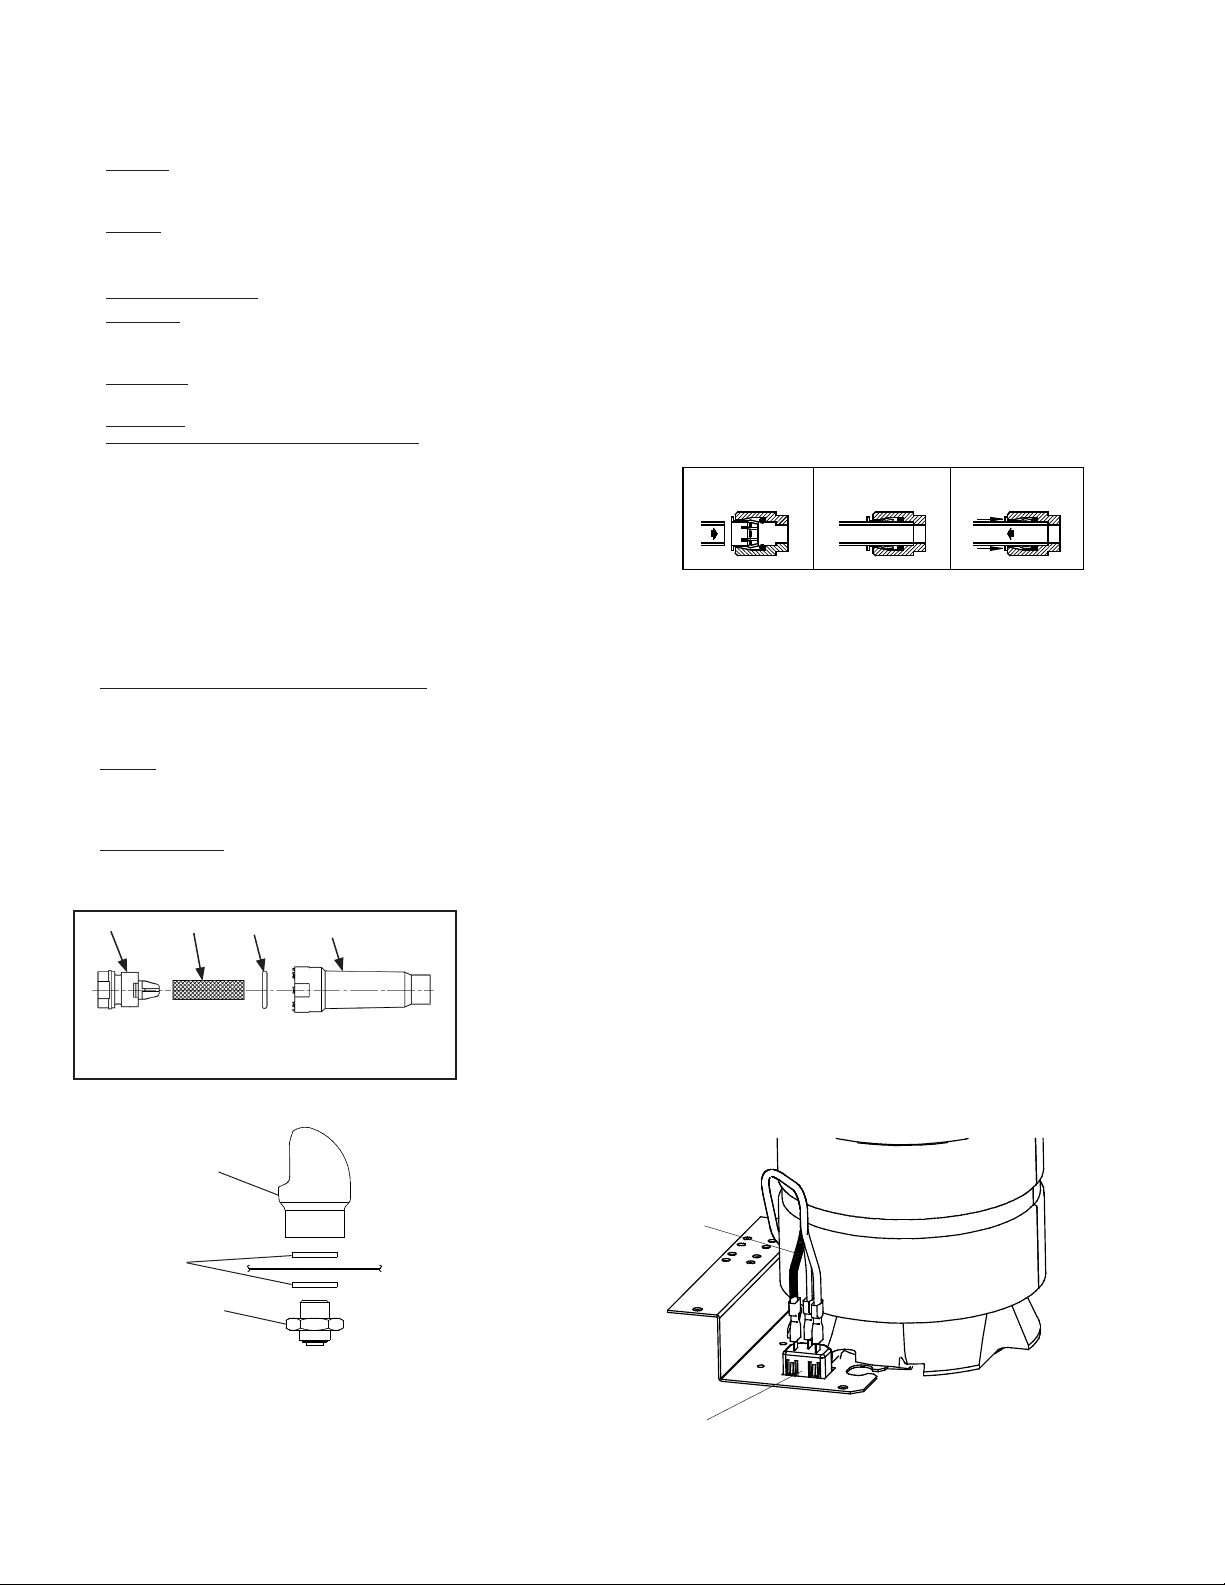
3. Cleaning Strainer: To clean the strainer (Item 47), rst shut o water supply and remove strainer from waterline. Remove plug and screen. Clean
screen and rinse thoroughly with water. Insert screen back into strainer and reassemble. Lubricate O-Ring with food grade pharmaceutical mineral
oil. Do not overtighten plug or ttings. See gure 3.
B CA
SIMPLY PUSH IN
TUBE TO ATTACH
TUBE IS SECURED
IN POSITION
PUSH IN COLLET
TO RELEASE TUBE
OPERATION OF QUICK CONNECT FITTINGS
PUSHING TUBE IN BEFORE
PULLING IT OUT HELPS TO
RELEASE TUBE
OPERATION OF QUICK CONNECT FITTINGS
SIMPLY PUSH IN
TUBE TO ATTACH
TUBE IS SECURED
IN POSITION
PUSH IN COLLET
TO RELEASE TUBE
PUSHING TUBE IN BEFORE
PULLING IT OUT HELPS TO
RELEASE TUBE
A B C
Service: Inspection/Cleaning
• Inspect Cooler twice each year for proper operation and performance.
• Inspection of the unit will require disconnecting electrical supply, removal of panels, etc. and reassembly and return to service practices.
1. Cleaning: Warm, soapy water or mild household cleaning products can be used to clean the exterior panels. Extra caution should be used to
clean the mirror nished stainless steel panels. They can be easily scratched and should only be cleaned with mild soap and water or Windex
glass cleaner and a clean, soft cloth. Use of harsh chemicals or petroleum based or abrasive cleaners will void the warranty.
2. Bubbler: Mineral deposits on the orice can cause water ow to spurt or not regulate. Mineral deposits may be removed from the orice with a
small round le not over 1/8” (3 mm) diameter or small diameter wire.
• CAUTION : DO NOT le or cut orice material. Care must be taken not to damage the orice(s)
3. Condenser Fan Motor: Conrm condenser fan turns freely. If the condenser fan does not spin freely, have an authorized service personnel replace.
4. Ventilation: Cabinet louvers and condenser ns should be periodically cleaned with a brush, air hose or vacuum cleaner. Cleaning should be
done twice each year or more frequently if needed due to environment. Excess dirt or poor ventilation can cause no cold water and compressor
cycling on the compressor overload protector.
5. Water Flow: Conrm proper water ow. If water ow is slow, inspect lter or inline strainer for restriction. Replace lter cartridge if required.
Disassemble inline strainer and clean if required.
6. Lubrication: Motors are lifetime lubricated.
ACBD
A = Plug with 7/8" (22.2mm) Hex
B = O-ring
C = Screen
D = Strainer Body with 1" (25.4mm) Hex Figure 3
Figure 2
VANDAL RESISTANT BUBBLER DETAIL
Basin
Estanque
Bassin
220V Power Inlet Detail
63
50
15
4
1
Figure 4
Figure 5