ELMASLAR LIFETIME SA-PB 1 User manual
LIFETIME SA-PB
Suction Device
Product Descriptions and Operating Manual
ELMASLAR A.Ş.
MODELS:
LIFETIME SA-PB 1
LIFETIME SA-PB 2
LIFETIME SA-PB 3
LIFETIME SA-PB 4
Page 1/ 14

Table of Contents
1.
Overview ..................................................................................................................................................................................
3
1.1
Signs on device plate
.....................................................................................................................................................
5
1.2
Special signs on device .................................................................................................................................................
5
2.
Product Descriptions ................................................................................................................................................................
5
2.1
Intended Use
....................................................................................................................................................................
5
2.2
Functional Descriptions
...............................................................................................................................................
5
3.
Safety Information and Warnings..............................................................................................................................................
6
4.
Assambling................................................................................................................................................................................
7
4.1
Assambling with Wall Stabilizer
......................................................................................................................................
7
4.2
Assambling an Accessory Bag
……...............................................................................................................................
8
5.
Usage .......................................................................................................................................................................................
8
5.1
First Operating
.................................................................................................................................................................
8
5.2
Aspiration
.........................................................................................................................................................................
8
5.3
Ending Aspiration
............................................................................................................................................................
9
5.4
Charging LIFETIME SA-PB
..............................................................................................................................................
9
6.
Hygienic Preparation ................................................................................................................................................................
9
6.1
Preparation
.......................................................................................................................................................................
9
6.2
Cleansing, Disinfection and Sterilization
.......................................................................................................................
9
6.3
Connecting Pieces .........................................................................................................................................................
10
7.
Controlling Functions .............................................................................................................................................................
10
7.1
Periods ............................................................................................................................................................................
10
7.2
Function Controlling......................................................................................................................................................
10
8.
Faults and Troubleshooting ....................................................................................................................................................
11
8.1
Battery ............................................................................................................................................................................
12
8.1.1 Changing battery group .........................................................................................................................................
12
8.1.2 Calibrating capacity indicator ...............................................................................................................................
12
9.
Maintenance ...........................................................................................................................................................................
12
9.1
Periods ............................................................................................................................................................................
12
9.2
Disposal ..........................................................................................................................................................................
12
10. Delivery ................................................................................................................................................................................
13
10.1 Standard Delivery ........................................................................................................................................................
13
11. Technical Values ..................................................................................................................................................................
13
12. Warranty ...............................................................................................................................................................................
14
13. Declaration of Conformity .....................................................................................................................................................
14
Page 2/ 14

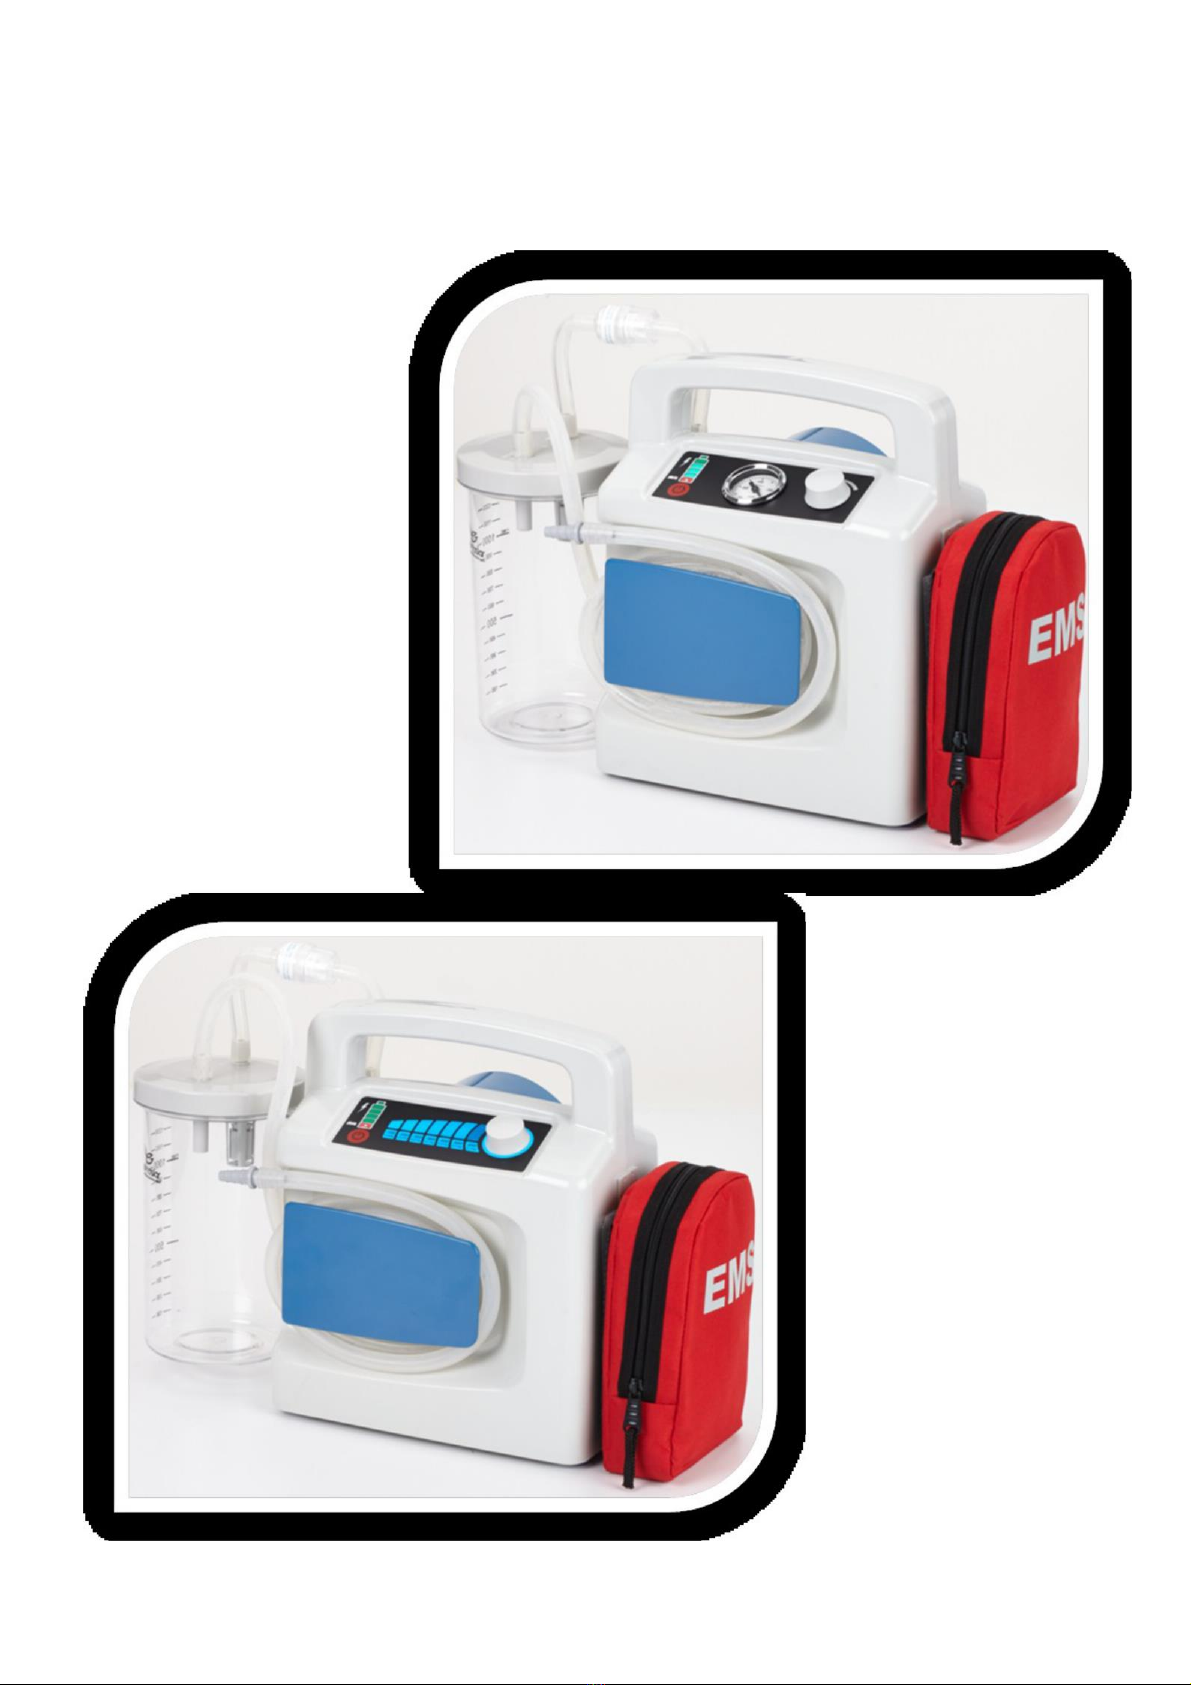
1. Overview
Front view of LIFETIME SA-PB device with reusable collecting container
Back view of LIFETIME SA-PB device
Page 3/ 14

Reusable Collection Container
Accessories and spare parts
Page 4/ 14
1.1 Signs on device plate
Symbol
Description
Serial Number
Date of Manufacturing
DC current
1984
CE mark (certifies that the device meets the requirements of
European Union directives)
Attention, please see the instructions for use.
Protection class against electric shock: BF type device
IP X1 Protection against water penetration
Disposing this device with domestic wastes is prohibited.
Store in temperatures between -40 °C and +70 °C
1.2 Special signs on device
The inscriptions on the reusable collecting container lid show the direction of the hose connections. Use the tip with the text “VACUUM” on
the connection between the collecting vessel and the device, and the tip with the text “PATIENT” on the hose connection to the patient. In case
of reverse connection, since the anti-overfill device will not work, secretions may enter the suction pump and damage it. To prevent the risk of
infection, the bacteria filter between the device and the sump connection must be renewed or sterilized after each use.
Capacity Indicator
Warning symbol on the capacity indicator warns against the risk of over-discharging the battery pack can be damaged. You must charge
the LIFETIME SA-PB before the red warning LED lights up or when this LED lights up at the latest. In case of not charging and continuing to
use, the device will stop automatically when the battery level becomes insufficient and will give audible and visual warning for 6 seconds.
2. Product Descriptions
2.1 Intended Use
LIFETIME SA-PB is a mobile, portable, electrically operated medical suction pump used temporarily in adults, children and infants:
To aspirate blood, secretion and food particles from the oral cavity, nasal-pharyngeal region and bronchial system
If LIFETIME SA-PB is used in accordance with the rules to evacuate vacuum stretchers and vacuum splints, the danger of
respiratory arrest can be prevented by removing obstruction in the airways. This device can be used inside buildings,
outdoors and during transport.
LIFETIME SA-PB vacuum aspirator will not be used in the following areas:
In medical condition requiring a potential balancing (for instance: cardiac surgery)
In places where explosion danger is available
For drainages in low vacuum intervals (for instance: wound drainages or thoracic drainages)
2.2 Functional Descriptions
An electrical pump with piston gives the vacuum pressure required for aspiration. The device can be optionally functioned with mounted
rechargeable batteries or connected to an external direct current source of 12.0 - 13.8 V. With a vacuum setting unit, it is possible to select a
vacuum power between –100 mmHg and -650 mmHg. Keypad is illumminated to be used in dark environment.
Information
When the vacuum pressure you have chosen is reached, the device switches to a constant speed. When the vacuum
pressure changes, the pump adjusts the speed again to create the vacuum pressure selected.
LIFETIME SA-PB reduces energy consumption by reducing performance when it reaches the required vacuum power.
Page 5/ 14

All the contents aspired reach the container via aspiration hose.
Reusable Collection Container
The reusable collection container is fixed on the side of the motor unit. The bacteria filter between the device and the collection
container prevents bacteria and liquid droplets from escaping into the motor unit and scattering the environment through the vibration
damping element. When the bacteria filter gets wet, any contamination or discoloration should be urgently replaced. If the device is used in a
patient at risk of contamination, the bacteria filter should also be replaced.
Never wash, sterilize or autoclave the bacteria filter.
Important!
An overfill prevention apparatus prevents the escape into the motor unit. A closing plug floating on the surface closes the outlet
when the secretion reaches a certain level.
Voltage Supply
Voltage Supply can be provided as follows:
With an internal battery pack,
By using a charging connection cable, over an existing 12 V vehicle electrical installation
With adapter/charger.
The capacity indicator shows the charge status of the battery pack. When you connect the device to an external voltage supply,
the battery pack starts charging automatically.
3. Safety Information and Warnings
For both your own and your patients safety and in accordance with the demands and requirements of the 93/42 / EEC directive, please
consider the following:
Please use LIFETIME SA-PB device only for its intended purpose.
Please read these instructions for use carefully. The instructions for use are part of this device and should always be available
Before working with the LIFETIME SA-PB device, you should know the necessary information about the use of the device.
Use the LIFETIME SA-PB device only if you have sufficient knowledge of medical education and suction technique. Improper
use and practices can lead to serious bodily harm
During suction, be careful not to cause any injury to the patient's mouth and sink area, especially mucous membranes.
During bronchial suction procedure, operate the device by obeying the sterility rules and use only sterile suction catheter.
When operating with the multi-use collection container, the device must always stand upright, because the ball of the overfill
assembly cannot safely close the connection to the suction pump and secretions may enter the suction pump. This can cause
damage to the pump.
The device must be in an upright position once the collection container is used. This prevents liquids or secretions from
spreading into the overflow valve filter, which is integrated into the once used suction bag. If you cannot prevent this, the
bleed feature of the overflow valve filter will be lost and you will need to replace the once used suction bag
We recommend that you have an alternate suction possibility in reserve, due to the possibility of device failure.
To prevent an infection or bacteriological contamination, Pay attention to the part 6 "Hygienic Preparation Procedures"
section.
If foreign materials are used, there may be dysfunctions and limited availability. In addition, the requirements for
biocompatibility may not be met. In such cases, be aware that if neither the accessories recommended in the leaflet nor the
original spare parts are used, any warranty and liability provisions will be completely void.
Please let the all audits and repairs be performed by manufacturer, ELMASLAR or its specialized staffs.
The battery pack should never be over-discharged in order to increase the lifetime of the battery pack. Please charge the
battery pack at the latest when the red 10% LED of the capacity indicator lights up.
To avoid the risk of over-discharging, never store LIFETIME SA PB in an uncharged state. First charge the battery pack
properly
Battery packs are also discharged when not in use. The rate of self-discharge increases in direct proportion to the temperature,
and this is about 50% when it is not used at 20 ° C for 1.5 months. Therefore, pay attention to the function control ranges.
Never insert the bacteria filter into the disinfection liquid, otherwise the properties of the filter will be lost.
Motor unit should not be sterilized in autoclave.
Do not immerse the motor unit in a disinfection solution.
Do not use wireless phone (mobile phone) nearby LIFETIME SA-PB. Even if a mobile phone is used in the driver's cabin,
using the LIFETIME SA-PB device in the patient compartment of the ambulance does not cause any problems.
Page 6/ 14

4. Assambling
Important!
The LIFETIME SA-PB device is delivered to you ready-to-use. Fully charge the LIFETIME SA-PB before using it
4.1 Assembling with Wall Stabilizer
Information
If the the wall stabilizer is not included in the package, you can give the order for
this tool as an accessory. Please use the metallic nuts included in the wall stabilizer
only to fix in the lower plates. For example: in vehicles. In the event that you request to
fix the wall stabilizer in another lower plate, then please use the appropriate and
suitable nuts for such procedure. These nuts are not within the scope of delivery.
1. Find an appropriate and smooth place which is vertical for assembly. The
corner lines on LIFETIME SA-PB assembly template shows how much space is
required for assembly.
2. Hold the assembly template on the wall and align it with a water gage.
3. Mark the holes for the assembly points.
4. Make the holes by using a 3 mm sized drill bit.
5. Screw the wall stabilizer by using the screws in the package.
6. Place the socket of the connecting cable or charger on the guide rail of the wall holder and push it up until it engages with the lock
tongue.
Important: The surface on which stabilization will be done should have the carriage capacity to ensure the safe assembly of LIFETIME
SA-PB for the ambulance in line with the standard EN 1789.
7. Insert the vehicle plug of the charging cable connection line into a 12 V DC source or adapter/ connect the charging device into a 230
V/50 Hz electrical socket.
8. Insert LIFETIME SA-PB device to the wall stabilizer. LIFETIME SA-PB device is automatically charged from DC source either on or
off status.
9. When you need LIFETIME SA-PB device to remove it from the holder, press the unlock button and push LIFETIME SA-PB device
upwards and take it.
Page 7/ 14
4.2 Assembling a Bag
If the accessory bag is not included in the scope of delivery of your device, you can order the accessory bag as an accessory. This bag is
used to protect aspiration catheters and other small parts.
1- Mount the accessory bag on the side of the motor unit using velcro straps.
5. Usage
5.1 First Operating
Recommendation: When you use the reusable collecting container, it will
be very convenient for you to fill the container with approximately 50-
100 ml of disinfection liquid or water before starting the aspiration
application.
The vacuumed particles will not easily stick to the bottom of the container
thanks to this method.
1. Remove the aspiration tube from the hose wrap plate.
2. If necessary, adapt an aspirating catheter of the size suitable for
tracheal or nasopharyngeal aspiration to the end piece..
Important!
To effectively aspirate viscous and solid food particles from the oral cavity, remove the
piece attached to the ends of the aspiration tube and use only the aspiration tube
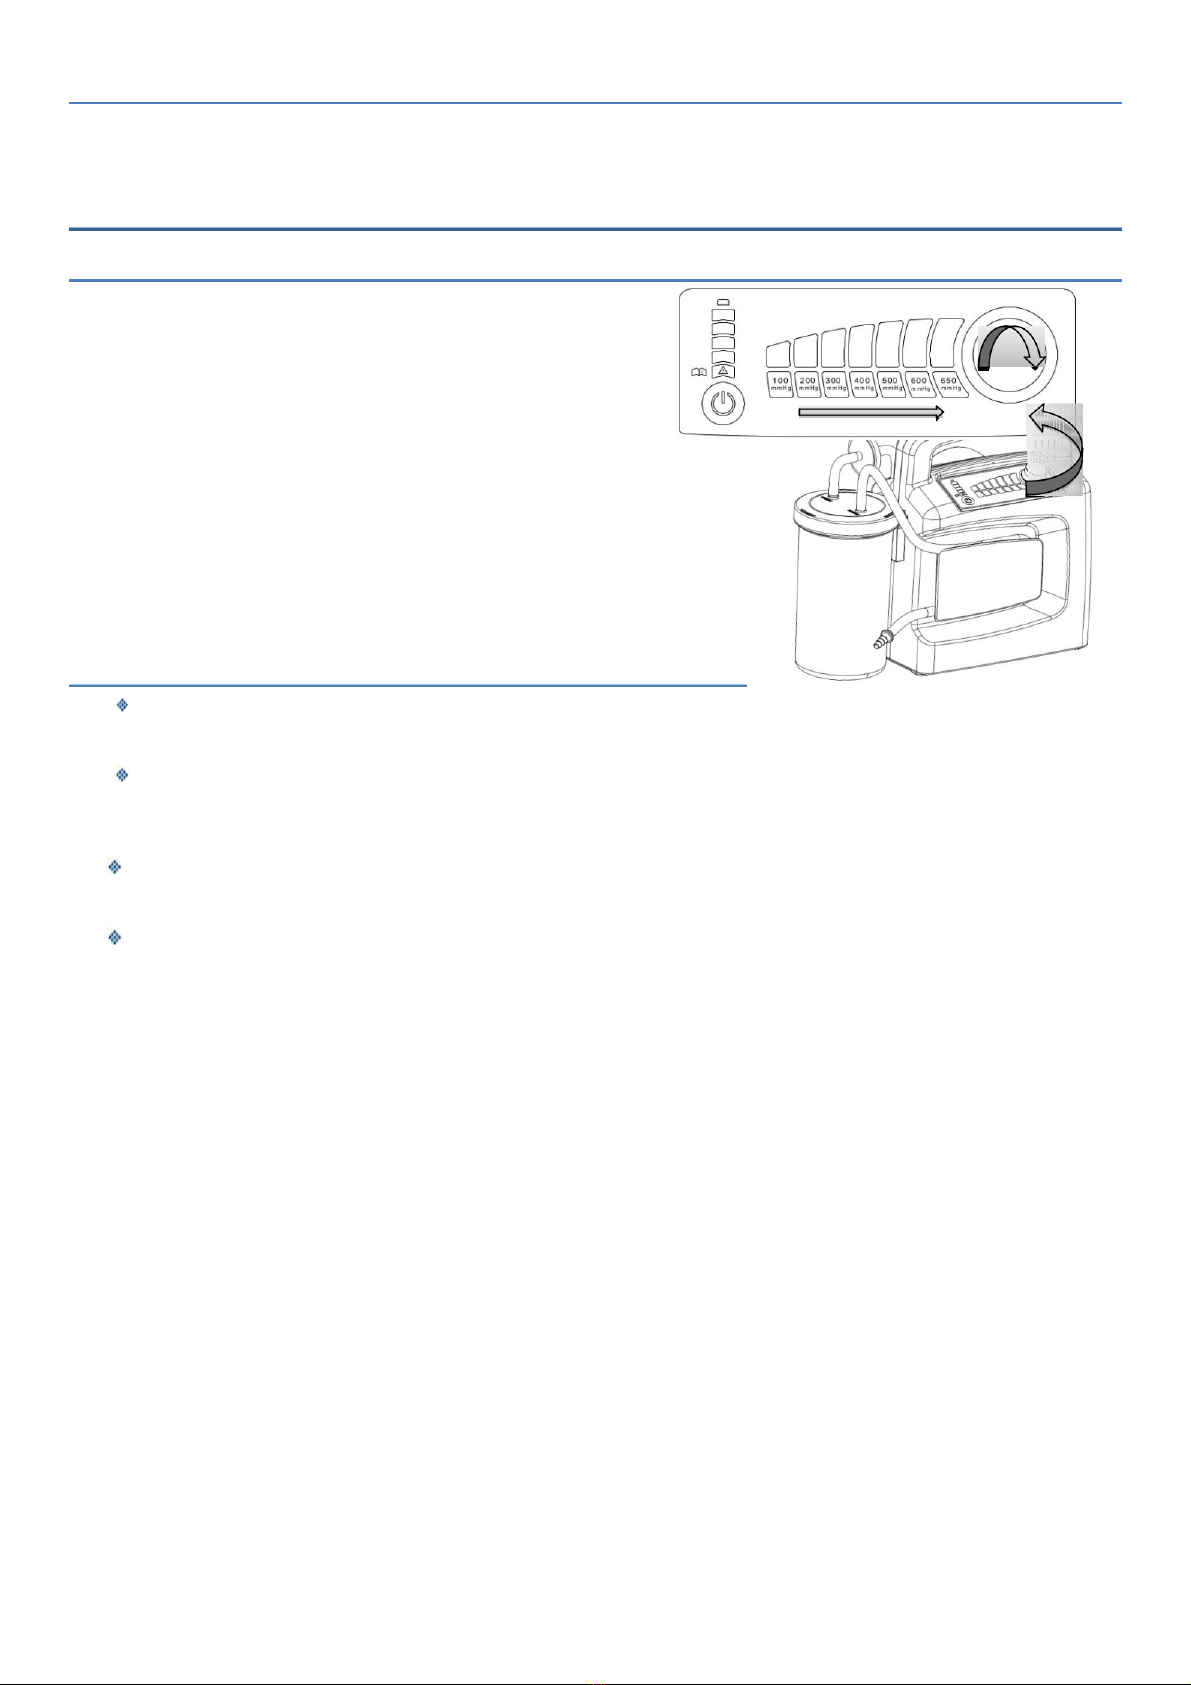
3. Press the O/I button. After the device is opened, it starts in the lowest vacuum
level.
4. Select the vacuum power by turning the switch button.
5. LIFETIME SA-PB is ready for operation now and you can start the aspiration
procedure.
5.2 Aspiration
During the aspiration process, be careful not to cause any injury to the patient's mouth and pharynx, especially mucous membranes.
When the device is fully charged it can operate in the highest level of vacuuming for minutes continuously. By shutting the device
down after a 45 minute of continual operation, you can avoid the overheating of the device. Please wait for at least 2 hours for cooling the
device.
Important!
When operating with the multi-use collecting container, the device must always stand upright, because otherwise the ball of the overfill
assembly cannot safely close the connection to the suction pump. As a result, secretions can enter the suction pump and damage the
pump.
If operated with a container used once, in order for avoiding the obstruction of the overflow valve integrated into suction bag by the
saliva, the device should always be standing vertically. If the fluid is scattered onto the overflow valve, it becomes air resistant and the
disposable aspiration bag should be changed.
Information! By monitoring the collecting container throughout the suction process,
Please check. Empty the collecting container at 950 ml level so that the overfill assembly does not get dirty and therefore does not need
to be cleaned.
If the overfill prevention device is activated before the filling limit is reached during aspiration application, you should take a short break
from the aspiration process and bleed the system.
Information! Please also regularly check the charging status of the battery pack during aspiration application. As soon as the red warning
LED lights up in the capacity indicator, aspiration application should be continued by using a backup device. If the battery pack continues to
discharge, the battery pack may be damaged by excessive discharge and a significant reduction in capacity may occur.
Discharging air from the system
1. The connection between the device and the collector is removed from the collector side.
2. Wait until the float of the overfill prevention device falls back.
3. The connection between the device and the container is reconnected. You can continue the aspiration procedure.
Emptying the reusable collection container
When the reusable collection container is filled to the fullness limit, you should stop the aspiration process and empty the collection
container.
Important! When removing and emptying the collection container, please be careful not to accidentally come out of the collection
container and not to spill the contents.
1. Loosen the aspiration tube from the hose wrap plate in order to remove the container more easily and prevent the secretion cap from
accidentally detaching.
2. Separate the container from the motor unit.
3. Carefully pull out the secretion cap.
4. Empty the container.
Important! For disposal please observe the relevant instructions.
5. Insert the secretion cap on the container again.
6. Hang the collector back onto the motor unit. Please make sure that the colelctor is pressed onto the motor unit and snaps into the
locking slot. Page 8/ 14

7. If removed, reinsert the aspiration hose into its place. You can continue the aspiration procedure.
5.3 Ending Aspiration
After ending the aspiration procedure:
1. By pressing the O/I button, shut LIFETIME SA-PB device down. When the device is off in the operating mode, if the device is needed
to be functioned again, the front panel lights are active for approximately 10 minutes in order to be easily found in a dark environment.
2. Empty the container (see the section "Discharging the container with multiple uses").
3. Clean LIFETIME SA-PB device (see the chapter "6. Hygenic Preparation")
5.4 Charging LIFETIME SA-PB
We recommend that you charge the LIFETIME SA-PB device before the capacity indicator drops to the lowest level. In this way, you
ensure that there is enough working time for the next use. The LIFETIME SA PB device has an intelligent charge control. This system
ensures that the battery pack is charged at the optimum speed and in slow charging mode, it is kept at full charge for an unlimited time
without damage. Thanks to the intelligent charging control, overcharging the battery pack and thus damaging it are completely prevented.
DC current of 12.0 V - 13.8 V and a maximum of 8 Amps is required to use the device for charging and during charging. It takes about 2
hours to fully charge the battery pack. As a source of charge current, the following can be used:
12V current provided by the vehicle electrical system.
Adapter/charger that can be purchased as accessory.
Warning! Take care that the polar connections of the vehicle socket be done correctly, otherwise LIFETIME SA-PB device might be
damaged.
Charging without wall stabilizer
1. Place the device socket of the connecting cable on the guide rail on the back of the device and push it into the back enclosure
plate. When doing this, make sure that the “+” and “-” ends of the cable are placed in accordance with the label on the device.
2. Switch on the voltage supply.
3. Charging starts automatically a few seconds after turning on the voltage supply. The charging process is indicated by the moving lights
on the LED indicator capacity band, and when the charging process ends, all the lights on the indicator band will light up steadily.
Charging with wall stabilizer
1. Connect LIFETIME SA-PB device to the wall stabilizer.
2. Charging starts automatically a few seconds after turning on the voltage supply. The charging process is indicated by the moving
lights on the LED indicator capacity band, and when the charging process ends, all the lights on the indicator band will light up steadily.
6. Hygienic Preparation
This product has once used parts. Disposable products are designed to be used only once. Therefore, use disposable products only once
and do not get them ready for use a second time. Making the disposable product reusable can jeopardize the functionality and safety of the
product and wear, wear, wear, thermal load, chemical impact processes, etc. can cause unpredictable reactions.
The LIFETIME SA-PB device and accessory parts must be hygienically prepared Daily and change before each patient.
Observe the operating instructions for the disinfectant used.
Never immerse the motor unit of LIFETIME SA-PB device into disinfection agent or another fluid. Only disinfect this piece by
washing. Otherwise, some damages might occur in the device, which causes risks for the operators and the patients, as well (see the chapter
"6.2 Cleansing, Disinfection and Sterilization"). Do the function checking for all the pieces after a hygienic preparation process (see the chapter
"7.2 Function Controlling").
6.1 Preparation
Important! When removing and emptying the reusable collection container, please be careful not to accidentally remove the
secretion cover from the collection container and not to spill the contents.
1. Loosen the aspiration tube from the hose wrap plate to make it easier to remove the cup and prevent the secretion cap from accidentally
detaching.
2. Separate the container from the motor unit. To remove the container, pull the lock part to the edges and then pull the container
upwards to remove it.
3. Remove the secretion cap.
4. Empty the collection container.
Important! Please consider the relevant instructions for disposal (see the chapter "3. Safety Information and Notices").
5. Remove the float from the overfill prevention assembly. Turn the float counter-clockwise to remove it.
6. Remove the gasket from its seat in the cap.
6.2 Cleansing, Disinfection and Sterilization
Page 9/ 14
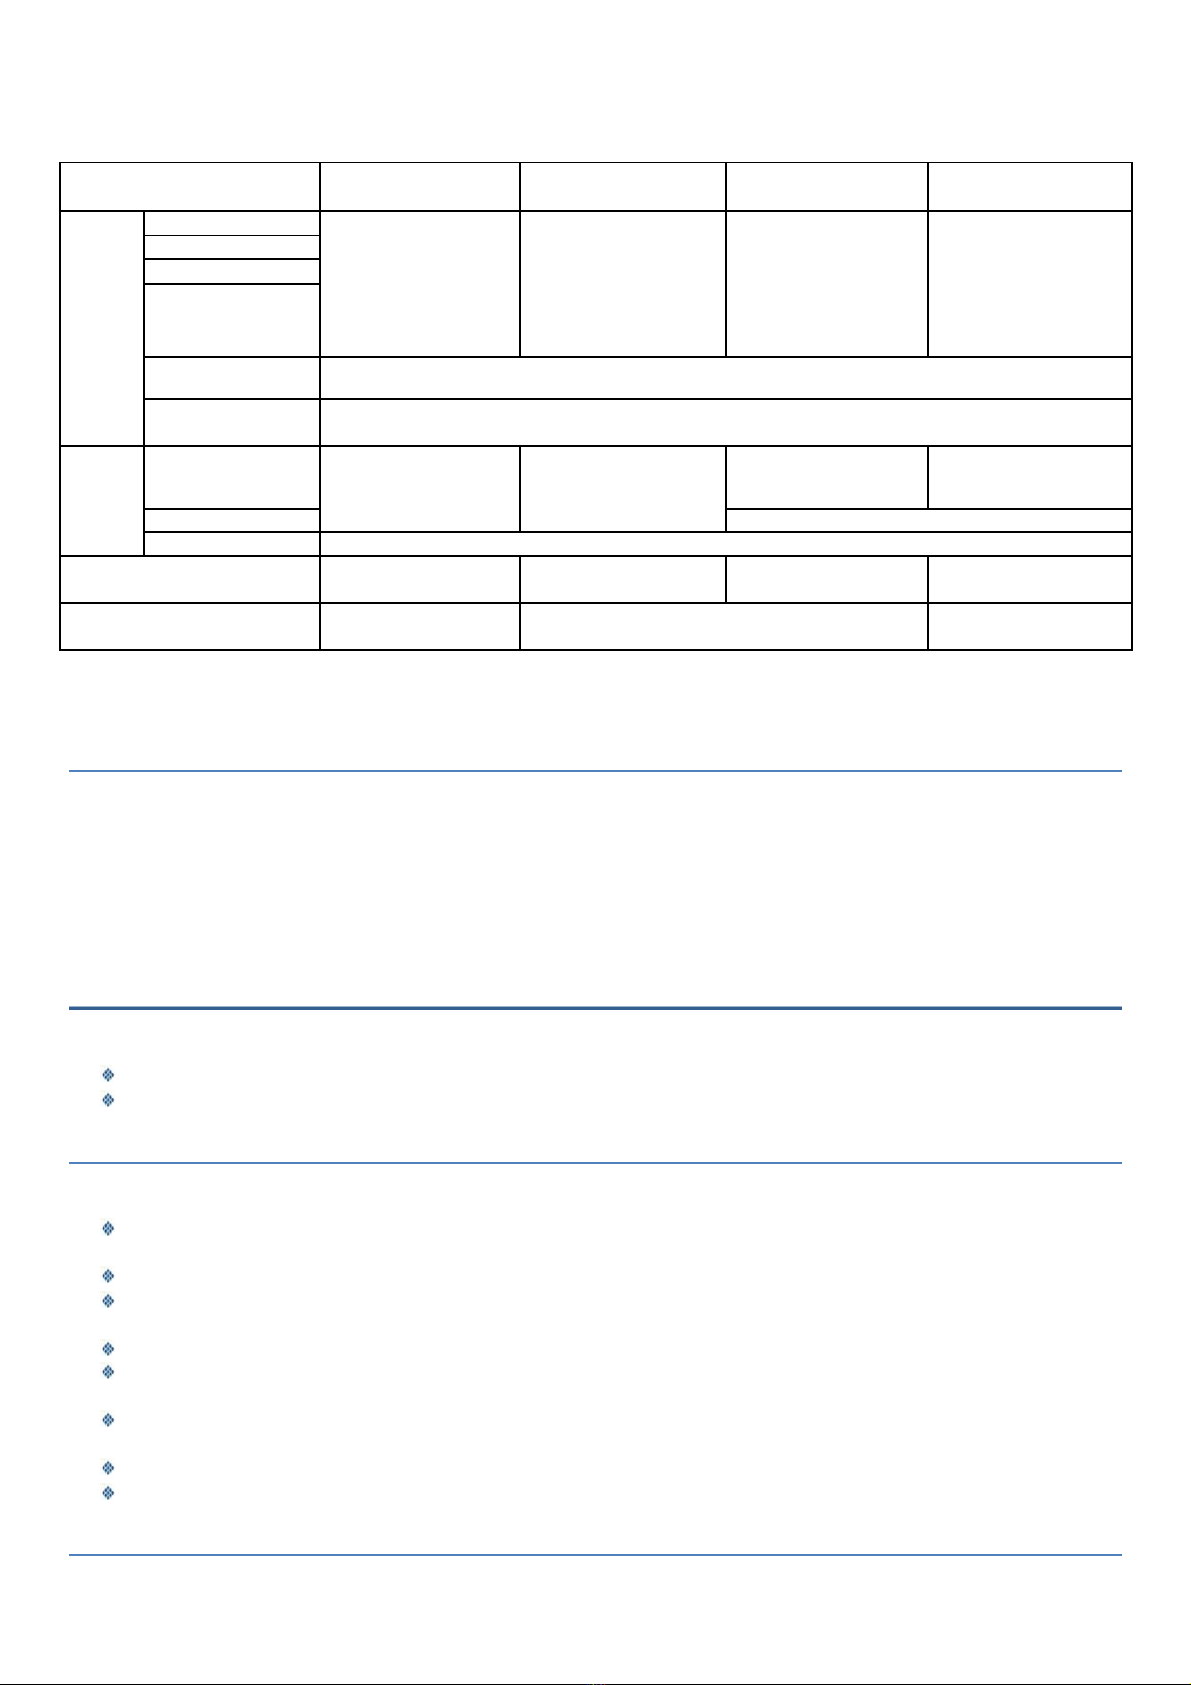
Do the hygienic preparation procedures for LIFETIME SA-PB device and the accessory parts as suggested in the following table. Observe
the operating instructions for the disinfectant used. It is recommended to use suitable gloves for the disinfection process, for example,
household gloves or disposable gloves.
Parts
Cleansing
Disinfection
Washing in the laundry
Sterilization
machine
uses
Container
Secration cap
In warm water with soft
multiple
Seal
Immersing in diluted
Washing procedure up
Steam sterilization up to
detergent
Buoy of the over
solvent (1)
to 95 °C
121 °C
(2)
filling prevention
with
assembly
Container
Filter
Disposable product, not allowed for reusing, it should be renewed for each patient.
Front part of catheter
Disposable product, not allowed for reusing, it should be renewed for each patient.
connection
Disposablecontai
ner
Container
In warm water with soft
Immersing in diluted
Washing procedure up
Steam sterilization up to
detergent
to 95 °C
121 °C
(2)
solvent (1)
Vacuum hose
Not allowed.
Aspiration hose
Disposable product, not allowed for reusing, it should be renewed for each patient.
Motor unit
Cleaning with a wet
Disinfection by washing
Not allowed.
cloth
Accessory bag
In warm water with soft
Immersing in diluted solvent (1)
Washing procedure up
detergent
to 40 °C
(2) After disinfection, rinse the parts thoroughly with distilled water and let them dry.
(3) Steam sterilization in 121 ºC for the devices with the standard EN 285, waiting period is 20 minutes.
6.3 Connecting Pieces
Following the cleaning, disinfection or sterilization procedures, connect the pieces as follows:
1. Screw the float of the overfill prevention device into the secretion cap clockwise.
2. Press the seal by fully inserting it into the secretion cap.
3. Put the secretion cap onto the container.
4. Assemble the aspiration hose.
5. Stabilize the container onto the body of the device.
7. Controlling Functions
During the function controlling, if you detect any fault or another value other than suggested, prior to ruling out the relevant fault, it
is forbidden to reuse LIFETIME SA-PB device. We recommend you to have the following parts additionally:
Single use front part
Bacteria filter
7.1 Periods
The following periods should be complied in order to operate LIFETIME SA-PB device without problems:
Before operating:
Do a functional control (see the chapter "7.2 Function Controlling")
After every use:
Clean, disinfect or sterilize the device and pieces of the device (see the chapter "6. Hygienic Preparation")
Do a functional control (see the chapter "7.2 Function Controlling" in page 10)
In every 6 weeks
Check the charge status of the battery pack. For this, open LIFETIME SA-PB device and check the capacity indicator. In
the event that the capacity is half or lower, charge the battery pack (see the chapter "5.4 Charging LIFETIME SA-PB")
At least in every 6 months
Do a functional control (see the chapter "7.2 Function Controlling")
After each repair
Clean, disinfect or sterilise the device and its parts (see the chapter "6. Hygienic Preparation")
Do a functional control (see the chapter "7.2 Function Controlling")
7.2 Function Controlling
Page 10 / 14

1. Check whether all the hoses, container, secretion cap and bacteria filter are in perfect status. Defected or torn parts should
be changed.
2. Check whether or not the hose connections are correct, and whether the secretion cap is inserted strongly and the container
is inserted into the motor unit correctly.
3. Operate LIFETIME SA-PB device. After the device is operated, it starts to function in the lowest vacuum level and shows the
current charge status. By visually checking the capacity indicator, control the charging status. If needed, charge the battery pack
(see the chapter "5.4. Charging LIFETIME SA-PB").
4. Close the suction piece of the front part with your thumb.
5. Operate the device and select -650 mmHg which is the maximum vacuum power. LIFETIME SA-PB device should reach this
vacuum power within approximately 10 seconds.
It is understood that the device has reached this vacuum power by applying the following steps:
All the LED lights from –100mmHg to –600mmHg become active stage by stage.
-650 mmHg LED lights flash on and off.
If the device reaches the set vacuum power for more than 10 seconds, it indicates that the suction power is low. Check for possible error
(See the chapter "8. Faults and Troubleshooting".
6. Open the finger check hole of the end piece.
7. Close LIFETIME SA-PB device again.
8. Faults and Troubleshooting
Description of Fault
Underlying Reason
Solution
Device not operating, O/I indicator and
capacity indicator band shows the device is
Pump fault
Enable the device to be repaired by the
ready for operation.
manufacturer or authorized specialist.
Fuse fault
Fuse fault in the vehicle socket
Battery group over discharged.
Repeat the charging and discharging
Device not operating, O/I indicator shows the
procedures for several times. If the result is
device is ready for operation.
the same, change the battery pack.
Polar connections in the vehicle socket are
Correct the incorrect polar connections and
reverse.
change the fuses if required.
Connection between circle plate and battery
Do the interconnection entirely.
group is not well inserted.
Device is not opened or closed.
Electronic circle fault
Make the device repaired.
There are leakages in the suctioning parts of
Check whether the hose connections, filter
The device cannot reach the maximum
cover and saliva cover be inserted
the device.
vacuum pressure of -650 mmHg for 10
appropriately or not.
seconds, but the capacity indicator band
Battery pack is not sufficiently charged.
Charge the battery pack.
shows the device is ready for operation.
Pump fault.
Make the device repaired by the
manufacturing plant or authorized specialist.
At the -400 mmHg suction level or higher
suction level LED light for -200 mmHg or -300
Bacteria filter is full.
Insert a new filter.
mmHg is continuously active.
Charging procedure is not performed.
External power feeding is so low.
External power feeding should be between
12.0 and 13.8V DC.
Battery pack overheated. Charging is
Make the temperature of the device lower
impossible in the temperatures more than
under +45°C.
+45°C.
Battery pack overcooled. Charging is
Make the temperature of the device higher
impossible in the temperatures less than
Charging procedure is not performed.
over +5°C.
+5°C.
100% LED light is not active when the
Fuses fault.
Make the device repaired by the
charging procedure is completed.
manufacturing plant or authorized specialist.
Fuse in the vehicle socket fault.
Change the fuse.
Connection between circle plate and battery
Do the connection thoroughly.
group is not correct and entire.
The charger does not have the required
Use the original adapter/charger and/or
features.
accessories.
The current supplied by the vehicle electric
Check the vehicle electric installation.
When the charging procedure is over 100%
installation is not between 12.0-13.8 VDC
LED light is not active.
Capacity counter setting is abnormal.
Discharge the device until it automatically
stops and charge it until it is fully filled without
Page 11 / 14
operating it, afterwards.
Due to over discharging, the battery pack
Repeat the charging and discharging
procedures for several times. If the result is
damaged.
the same, change the battery pack.
The battery pack has completed working life.
Repeat the charging and discharging
procedures for several times. If the result is
the same, change the battery pack.
8.1 Battery
LIFETIME SA-PB device is equipped with high quality nickel metal hydrate (Ni-MH) batteries.
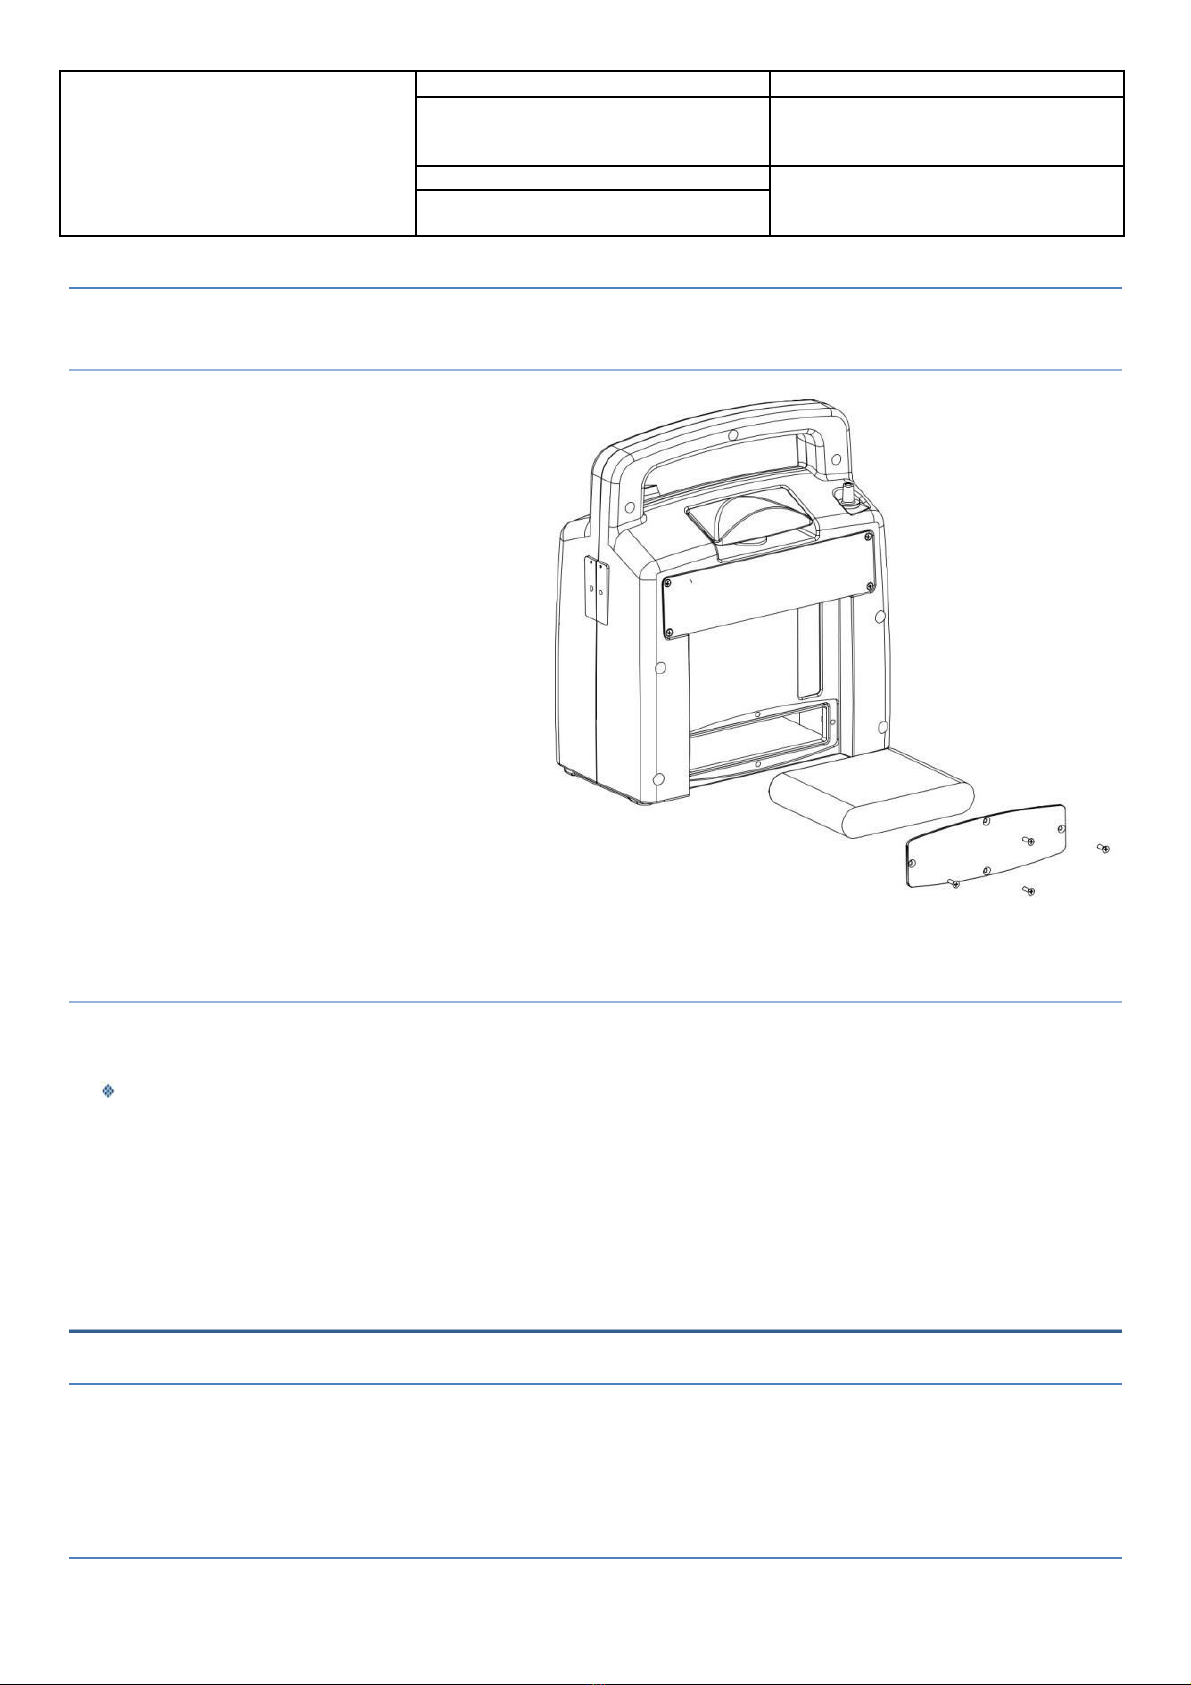
8.1. Changing battery group
Important! In order to avoid any possible damages on electronic circuit, do not touch the electronic board.
1. Shut LIFETIME SA-PB device down.
2. Remove the device from external supply voltage.
3. Remove the container and other accessories.
4. Unscrew 4 star-head screws on the battery chamber
cover on the back of the body.
5. Carefully disconnect the battery pack socket
connector.
6. Replace the flat battery pack.
7. Wait about half a minute before installing the new
battery pack. Thus, capacitors on the printed circuit board
are discharged.
8. Place the new battery pack into its slot.
9. Carefully insert the battery pack socket
connector.
10. Close the battery slot cover and tighten the screws.
11. Calibrate the device.
Unless the electronic control circuit is in sync with the
battery pack, the red LED of the capacity indicator flashes.
The LIFETIME SA-PB device is ready to run when the
battery pack is full, but the charge status of the battery pack
will not be displayed unless calibration is performed..
12. Do a functional check (see the chapter
"7.2 Function Controlling")
8.1.2 Calibrating capacity indicator
With the calibration procedure, the capacity indicator and energy amount of the battery pack become equal with each other.
The following condition require for the calibration:
After each battery pack replacament,
After each fuses changed,
Please follow those steps for calibration:
1. Discharge LIFETIME SA-PB device until it automatically stops.
2. For charging, connect LIFETIME SA-PB device to the external power. The charging procedure lasts for approximately 2.5 hours. During
discharging, due to the high residual capacity, it is possible for the battery pack to heat up if the pump runs for a long time. In this case,
charging starts when the temperature of the battery pack drops below 40 ° C. Depending on the capacity, this process can take up to 45
minutes.
9. Maintenance
9.1 Periods
LIFETIME SA-PB device does not need any maintenance. However, please consider the periods for the regular functions ("See the
section 7.1 Periods"). We recommend that you calibrate the battery pack every 8 weeks in accordance with section 8.1.2 to maintain the
battery pack operating mode and the lifespan of the battery pack. In this context, the battery group is discharged in a controlled manner and
then recharged. We recommend that you carry out maintenance work, such as inspection and repair, to the manufacturer company
ELMASLAR or a qualified specialist.
9.2 Disposal
Page 12 / 14

Do not dispose this device together with the domestic wastes. For the proper disposal of the device, please contact an authorized and
certified electronic waste collection point. You can find the addresses of these collection places from environmental authorities or the
municipality. The packaging of the device (cardboard box and support parts in the cardboard) can be disposed of as waste paper.
Disposing the batteries/battery sets
Do not dispose the used batteries/battery sets together with the domestic wastes. Please refer to ELMASLAR or public and/or
legal disposal authorities.
10. Delivery
10.1 1 Standard Delivery
LIFETIME SA-PB with reusable container
–LIFETIME SA-PB, main device
–Reusable container
–Connection cable
–Bacteria filter
–Set, wall mount
–Accessory Bag
11. Technical Values
LIFETIME SA-PB
Classification according to MDD
II a
93/42/EEC
Dimensions in mm (WxHxD)
375x290x140 (reusable container)
Weight
Around 4.5 kg
Volume of container
1000 ml
Absorption in 12 V free flow
>25 liters/minutes
Maximum vacuum pressure in 12 V
-650mmHg (in sea level)
Aspiration hose
Ø7/Ø12 mm, Length 1500 mm (reusable container)
Bacteria filter
Filter component of 1 μm
Motor power
55 W
Rated voltage
12 V
Maximum power
8 A (While being charged during operation)
Temperature range
–During operation
From –18 °C to +40 °C
–During charging
From +0 °C to +40 °C
–During storage
From –40 °C to +70 °C
Air moisture
% 30 –% 75 relative moisture
Electromagnetic compliance (EMC):
–Noise:
EN 60601-1-2
EN 55011
–Resistance against noise:
IEC 1000-4 Chapter 2–5 and 11
Classification according to EN 60601-1:
–Protection type against electrical shock: Protection class II
–Protection class against electrical shock: BF
–Protection class against water penetration: IPX 1 (dropping water)
Classification according to EN ISO 10079-1:
–high vacuum/high flow
Harmonized standards:
EN 60601-1
EN 60601-1-2
EN ISO 10079-1
EN 1789
Device socket fuse:
8 A
Internal fuse:
Feeding current 4A flow carriage capacity, low cut off capacity
complying with IEC 127, 5x20 mm sized glass based fuse
components
Internal fuse
Battery 4A flow carriage capacity, low cut off capacity complying
with IEC 127, 5x20 mm sized glass based fuse components
Battery pack
Nickel Metal Hydrate (Ni-MH) 4,5 Ah
Page 13 / 14

Charging current
Between 12,0 and 13,8 V
Operatin duration after 2 hours of
45 minutes, in the highest absorption phase
charging
Operating method
S2 60 minutes
Battery pack life
Around 500 charges and discharges within 3 years
Battery pack charging duration
2.5 hours
-650 mmHg pressure average sound
≤ 62 dB(A)
pressure level
Materials
Container
POLYCARBONATE
Cover
ABS
Cover Seal
Silicon
Hoses
Silicon
12. Warranty
ELMASLAR guarantees that the product is faultless for two years from the date of purchase, if the product is used properly and
properly. According to the related declaration or sign on the packaging, the warranty period expires at the end of the expiration
date stated on the package or in the manual for products with an expiration date of less than two years.
In order to claim warranty right, the purchase receipt or invoice with the seller and the date of purchase is required.
The following situations are not covered by the warranty:
–Use of the device without considering user manual,
–Misusing,
–Using and treating the device that are nor properly done,
–Unauthorized persons to interfere the device for repair.
–Force majeure such natural disasters as stroke of lighting etc.
–Transport damage caused by improper packaging when the device is returned
–Not performing the required or stipulated maintenance procedures,
–Normal erosion due to operating.
The following parts are under the scope of normal or operational erosion:
–Filter
–Batteries / Battery pack
–Disposable parts etc.
–Using the not-original spare parts
ELMASLAR does not undertake any responsibilities of the damaged products which were defected deliberately or severe
negligence, or such injuries associated with slight negligence.
ELMASLAR reserves the right to choose the desired solution among the options to eliminate the damage or deficiency in question,
to send a new product without a damaged product or to reduce the sales price of the damaged product accordingly.
If the warranty claim is rejected, we do not undertake the responsibility of charges arising from the cost of shipping the product and
returning it.
Legal warranty claim rights are not restricted by this warranty regulation.
13. Declaration of Conformity
ELMASLAR İmalat Tıbbi Cihaz İnşaat Taş. İth. İhr. San. Ve Tic. A.Ş. hereby declares that the medical device complies with
the requirements of the Council Directive 93/42/EEC.
Manufacturer: Elmaslar İmalat Tıbbi Cihazlar İnş.Taş.İth.İhr.San. ve Tic.A.Ş.
Address: 1.Organize Sanayi Bölgesi Babürşah Caddesi No:17 Sincan/Ankara Türkiye
Tel: +90 312-3948001 Fax: +90-312-3948004
www.elmaslarmedikal.com.tr
Page 14 / 14
This manual suits for next models
3
Table of contents
Other ELMASLAR Medical Equipment manuals

Popular Medical Equipment manuals by other brands


Getinge
Getinge Arjohuntleigh Nimbus 3 Professional Instructions for use

Mettler Electronics
Mettler Electronics Sonicator 730 Maintenance manual

Pressalit Care
Pressalit Care R1100 Mounting instruction

Denas MS
Denas MS DENAS-T operating manual

bort medical
bort medical ActiveColor quick guide

AccuVein
AccuVein AV400 user manual


