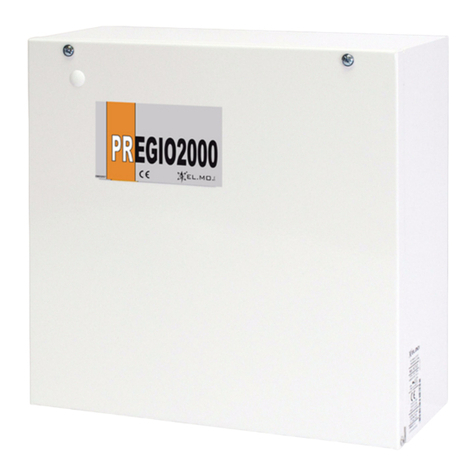
Elmo TITANIA User manual

TITANIA and TITANIAPLUS
Intrusion detection control unit with
embedded OS
090020692
USER MANUAL
IT08020000001624

2
090020692 - USER MANUAL - TITANIA v.6 series
international@elmospa.com
elmospa.com
DISPOSAL INSTRUCTIONS - USER INFORMATIONS
FOREWORD
FOR INSTALLERS
Please follow carefully the specifications about electric and security systems realization further to the manufacturer’s
prescriptions indicated in the manual provided.
Provide the user the necessary indication for use and system’s limitations, specifying that there exist precise specifications and
different safety performance levels that should be proportioned to the user needs. Have the user read carefully the instructions
provided in this document.
FOR USERS
Carefully check the system functionality at regular intervals making sure all enabling and disabling operations were made
correctly.
Have skilled personnel make the periodic system’s maintenance. Contact the installer to verify correct system operation in case
its conditions have changed (e.g.: variations in the areas to protect due to extension, change of the access modes, etc.)
......................................................
This device has been designed, assembled and tested with the maximum care, adopting control procedures in accordance with
the laws in force. The full correspondence to the functional characteristics is given exclusively when it is used for the purpose it
was projected for, which is as follows:
Intrusion detection control unit with embedded OS
Any use other than the one mentioned above has not been forecast and therefore it is not possible to guarantee the correct
functioning of the device. Similarly, any other use of this technical manual other than the one it has been compiled for - that is:
to illustrate the devices technical features and operating mode - is expressly prohibited.
The manufacturing process is carefully controlled in order to prevent defaults and bad functioning. Nevertheless, an extremely
low percentage of the components used is subjected to faults just as any other electronic or mechanic product.
As this item is meant to protect both property and people, we invite the user to proportion the level of protection that the system
offers to the actual risk (also taking into account the possibility that the system was operated in a degraded manner because of
faults and the like), as well reminding that there are precise laws for the design and assemblage of the systems destined to
these kind of applications.
The system’s operator is hereby advised to see regularly to the periodic maintenance of the system, at least in accordance with
the provisions of current legislation, as well as to carry out checks on the correct running of said system on as regular a basis
as the risk involved requires, with particular reference to the control unit, sensors, sounders, dialler(s) and any other device
connected. The user must let the installer know how well the system seems to be operating, based on the results of periodic
checks, without delay.
Design, installation and servicing of systems which include this product, should be made by skilled staff with the necessary
knowledge to operate in safe conditions in order to prevent accidents. These systems’ installation must be made in accordance
with the laws in force. Some equipment’s inner parts are connected to electric main and therefore electrocution may occur if
servicing was made before switching off the main and emergency power. Some products incorporate rechargeable or non
rechargeable batteries as emergency power supply. Their wrong connection may damage the product, properties and the
operator’s safety (burst and fire).
According to Directive 2012/19/EU on the Waste of Electric and Electronic Equipment
(WEEE), it is here specified that this Electrical-Electromechanical Device started to be
commercialized after 13th August 2005, and it shall be disposed of separately from or-
dinary waste products.
IT08020000001624

TITANIA v.6 series - USER MANUAL - 090020692
elmospa.com
1. GENERALS
The TITANIA series intrusion detection control units have been especially created for high quality intrusion detec-
tion systems suitable for large banks, postal offices, company sites and multi-plant applications; they feature a
high data processing power, paired with great usability and with up to 1024 inputs/outputs for the TITANIAPLUS
model.
Up to 256 different users can access the system using proximity keys (using the I66 or I8 proximity readers) or
6-digits codes (using the system keypads, e.g. METIS, NIRVA, TATTILO, TATTILOPLUS, ANIMA or MIDAS).
The system can be divided in 8 separate areas with 4 partialization sectors each, each identified by a customized
name.
Internal timers can activate or deactivate the various parts of the system at pre-defined times, following fixed,
mobile and personalized holidays and allowing users to request overtimes.
Alarms will activate optical/acoustic self-powered outdoor sirens or self-protected indoor ones, directly connect-
ed to the control unit, while networking and dialler systems (on both landlines and GSM connections) transmit
the alarm through primary and backup channels to control centres.
2. CONTROL DEVICES
2.1 Proximity key readers
The I66, I7 and I8 proximity key feature the following indications.

4
090020692 - USER MANUAL - TITANIA v.6 series
international@elmospa.com
elmospa.com
2.2 Keypads
Keypads feature an alphanumeric pad, a series of function buttons (labelled OK, STOP, arrow up and arrow
down), a series of sectorization buttons (labelled S1 to S4), a display for the visualization of system messages,
visualization LEDs and, in some models, an integrated proximity key reader.
Up to four other I66 or I7 proximity key readers can be connected directly to the keypad.
The following image shows the position of these elements on a NIRVA keypad:
The METIS series keypads have no integrated proximity reader and, since they have no backlit keys, they can not
be used as main system keypads.
The LEDs in the S area of a METIS keypad (see below) behave like the backlights under the S1-S4 keys of a
NIRVA keypad. The system LEDs, not available in other keypad models, are better detailed on the right.

TITANIA v.6 series - USER MANUAL - 090020692
elmospa.com
3. USER MANAGEMENT
Two user levels exist:
•User(Standard)
•Installer
3.1 User
Users are enabled to arm and disarm a specific subset of the system (one or more sectors).
Users can also be enabled for max security arming.
They can modify their own access code, which is not available to anybody else.
3.1.1 Administrator
Administrators are special users intended for some special circumstances, which are not detailed in this manual.
It might happen that the installer mistakenly activates this mode: users 001 to 003 are marked as administrators
and receive some of the features of the installer, including the possibility to deactivate the administrator mode
again. Instructions on how to do so are included in the technical manual.
3.2 Installer
The installer can configure the whole system. While he can access the configuration via keypad, the configuration
software provides for a quicker and finer programming.
By default, the installer can only access the control unit after a user authorizes the access. Once authorized, if
the system administrator agrees, the installer can disable the need for this authorization procedure.
3.3 Fixed codes
Each user is paired to a 3-digits code from 001 to 256. The installer is assigned to the 000 code.
The default passwords are:
• 888888 for the installer;
• 111111, 222222 and 333333 for the first three users;
• XXX000 for all other users, where XXX is their user number (e.g. user 074 has 074000).
3.4 Summary table for operations and authorizations
Operations User Installer
Arming/disarming Yes Yes [browser only]
Max Security arming Yes if enabled Yes [browser only]
Zone exclusion Yes if enabled Yes
Output activation No Yes [browser only]
Password change Own password only Own password only [keypad]
All [browser]
Change user properties No Yes
Reset user passwords No Yes
Add/delete users No Yes
Visualize user properties No Yes [browser only]
Visualize user passwords No No
Enable installer access Yes No
System lock No Yes

6
090020692 - USER MANUAL - TITANIA v.6 series
international@elmospa.com
elmospa.com
4. USER MANAGEMENT FROM THE KEYPAD
The installer can access the system and manage the users form the “Manage users” entry.
Once a user code has been selected, the following options are available:
• Access-enabled user: enables or disables a user.
• Change sectors: allows for changing the sectors assigned to the user.
• Disarming lock: disables the system disarming for the user.
• Access control: enables the user to Access Control.
• Do not send SMS: disables SMS sending when the user arms/disarms.
• EURO mode: activates the EURO mode.
• Max Security: enables the max security arming.
• Basic Maintenance: enables access to the Basic Maintenance menu.
• Reset password (user code): resets the password to the default for that user (six times the last digit of
the user code).
All users can change their own password by accessing the system and selecting the “Change Code” entry.

TITANIA v.6 series - USER MANUAL - 090020692
elmospa.com
5. USER INTERFACE
5.1 Initial definitions
If the “Timeout” function is active, keypads used for programming automatically exit the configuration menu after
30 seconds from the last button pressed / command given (except where otherwise stated).
The “PROMPT” or “WELCOME MESSAGE” is the standard screen shown on the display when the control unit is
idle and has no anomalies. The second row can be personalized with a message, usually the name of the installer
or the name of the plant:
5.2 LED indications
Example using the NIRVA keypad.
21/09/16 11:34
SMITH SECURITY

8
090020692 - USER MANUAL - TITANIA v.6 series
international@elmospa.com
elmospa.com
6. OPERATIVITY
Note: the examples below use the NIRVA keypad. The buttons are shaped differently on different keypads.
6.1 General indications

TITANIA v.6 series - USER MANUAL - 090020692
elmospa.com
6.2 User access
Despite there being 256 available users, only the first 3 are active after a factory reset.
New users have to be activated by the installer, using the configuration software.
User menus when the Basic Maintenance property is enabled.

10
090020692 - USER MANUAL - TITANIA v.6 series
international@elmospa.com
elmospa.com
6.3 System or area arming
Perform a login (see “User access” on page 9) or keep the proximity key near to the reader for a few seconds.
The arming procedure begins as soon as the sector lights start blinking fast.
Not pressing any button for 5 s will confirm your choices and arm the chosen areas/sectors.
You can now choose which sectors you want to arm. Sectors are assigned to the S1-S4 buttons.
Press a sector button to include it (light ON, arm) or to exclude it (light OFF, do not arm).
The LCD shows the name of the last sector pressed.
Keypads with backlit numeric keys can be multi-area keypads. Areas are assigned to the 1-8 buttons.
If you are authorized to at least two of the areas available on a keypad, those area buttons will also light up.
The first one will blink to indicate that this is the currently selected area, whose name appears on the display.
To include/exclude a sector, select its area by pressing the corresponding area button, then proceed as above.
After confirming your choices by waiting for 5 s, the keys will blink slowly to mark the duration of the Exit Time.
Leave the protected area. A confirmation signal sounds at the end of the Exit Time and all included sectors arm.
The area and sector light remain lit to indicate the armed status.
6.3.1 System or area arming with the automatic exclusion of zones
If the installer flagged some zones for automatic exclusion, the user will be able to arm the system/area even if
any of these zones is in anomaly condition. The affected zone will be excluded from the arming (therefore, it will
not cause an alarm) as long as the system/area is armed.
6.3.2 System or area arming with forced exclusion of zones
If the installer activated the forced arming option, you will be informed about the presence of system/zone faults
and anomalies.
After the area/sector selection (marked by fast blinking) ends, the LCD will show a sequence of all the zones that
block the arming. You have 30 s to solve these alarms.
If you manage to, the display changes to “Arming ready”, press OK to arm the system/area.
If any alarms are still there, you can either press OK to force the arming (resulting in the automatic exclusion of
the fault/anomaly zones), or wait for the Timeout (30 s) to cancel the arming procedure.
6.4 “MAX SECURITY” system arming
Users with the “Max security” property can perform a “Max security” arming: only users with the “Max security”
property will be able to disarm those sectors.
The process is the same as a normal arming (see “System or area arming” on page 10) but press # instead of
OK after typing the password.
6.5 System or area disarming
Perform a login (see “User access” on page 9) or keep the proximity key near to the reader for a few seconds:
the S1-S4 backlights for the sectors assigned to the user shut down, and a confirmation signal will sound.
Only users with the “Max security” property will be able to disarm areas armed in “Max security”.

TITANIA v.6 series - USER MANUAL - 090020692
elmospa.com
6.6 Basic Maintenance access
For users authorized to the Basic Maintenance, use this variation of the login procedure to access the Basic Main-
tenance menu.
Use the arrow buttons to cycle through the menu entries, press OK to enter one.
6.6.1 User password change
Browse to “Change code”, press OK and type a new password.
In order to be sure that you typed the new password as intended, the system will ask you to repeat it.
Once you type in the password correctly, a confirmation signal will sound.
Note: in case you lost the password, use your proximity key to enter the Basic Maintenance menu and choose
a new one:
- Get the key near to the reader.
- As soon as the S1-S4 backlights start blinking, press .
For more informations on the password change, see See “Change code” on page 13..
6.6.2 Visualize which zones are disabled (bypassed) / Enable/disable a zone
Browse to “Zone bypass” and press OK.
Type a zone number if you want to start with a specific one, or press OK to start from zone 1.
You are now inside a list of zones, positioned at the chosen one. Use the arrow keys to cycle through the list.
Press OK to bypass the currently shown zone or to include it again, then STOP to go back to the zone selection
screen, saving the changes.
From here, you can type a new zone or press OK to go back to the zone list, or STOP to go back to the menu.
6.6.3 Read the event log
Browse to “Event log” and press OK.
Press # to visualize the timestamp of the event.
Use the arrow keys to cycle through events, STOP to go back to the description of the currently selected event.
6.6.4 Clock setup
Browse to “Clock setup” and press OK.
Set the current time:
• Use the arrow keys to cycle through the date and time fields.
• Type digits to change the highlighted value.
Press OK to save, STOP to exit without saving.
6.6.5 Dialler telephone book
Browse to “Phone numbers” and press OK.
You are now inside a list of 24 telephone numbers (No. 20 to 23 are to be used only for the GSM backup line);
use the arrow keys to cycle through the list.
Press OK to modify the visualized number. Type the new number in, pressing the arrow buttons to move the cur-
sor and OK to save (a confirmation signal will sound), STOP to go back to the list without saving.
Press STOP to go back to the menu.

12
090020692 - USER MANUAL - TITANIA v.6 series
international@elmospa.com
elmospa.com
6.6.6 Zones test
Browse to “Zones test” and press OK.
If no zone is set to “walk test”, a message will appear: press STOP. Otherwise, press OK again to start the test.
Generate alarm conditions for each detector whose “walk test” checkbox in the configuration software has been
flagged by the installer. Every time you successfully generate an alarm condition, a confirmation signal will
sound.
The detectors that have not been successfully tested are listed in the LCD of the keypad. Use the arrow keys to
browse the list.
Once you have verified that all the detectors function properly, or that some are faulty, press STOP twice to exit.
A confirmation signal will sound.
Note: If the test is successful, a “Test done” message appears and the “Zones test OK” event is logged.
If you exit the zones test menu while some zones have yet to be tested, the “Zones test failed” event is logged.
6.6.7 Output test
Browse to “Output test” and press OK.
The “ALARM relay +” output is displayed. Press OK to activate it for ~6 s (press STOP to shorten this time).
The next outputs are shown, “TAMPER relay +” and “SOUNDER relay +”. Press OK as above.
After testing those, the display shows “Output n.---”, select the output you want to test or press STOP to exit.
Note: testing the sirens might generate public nuisance. Additionally, if any output is connected to devices that
signal the alarm to a control centre, warn them about the test.
6.6.8 Dialler test
Browse to “Dialler test” and press OK.
Press OK again: the control unit calls the first telephone number (a signal sounds and a message appears).
An error message appears if the dialler is not properly set or the first telephone number is empty.
Press STOP to exit.
Note: before testing the dialler, warn the owner of the called number.
Note: the test is not available unless at least one telephone number is saved to the control unit.
6.6.9 Battery test
Browse to “Dialler test” and press OK.
Press OK again to start the test. A progress bar will be displayed: [###### ].
Once the progress bar fills, wait at least 2 minutes and press OK to repeat the test, or press STOP to exit.
The results of the battery test can be seen in the Events Log (see “Read the event log” on page 11).
6.6.10 Weekly program
Browse to “weekly program” and press OK.
The display shows the date of tomorrow and the daily program currently set for tomorrow.
Press * or # to cycle through the different daily programs (i.e. holiday; weekday; half holiday A; half holiday B:
four different sets of activation and deactivation times that the installer memorized in the configuration software)
and stop on the daily program you want to use tomorrow.
Press the arrow keys to visualize a different day of the next week (e.g. if today is Friday, from tomorrow to next
Friday) and */# to change those daily programs as well.
Press OK to save the currently selected option for all seven days or STOP to exit without saving.

TITANIA v.6 series - USER MANUAL - 090020692
elmospa.com
6.6.11 Change code
See “User password change” on page 11.
The “Manage Users” entry in the maintenance menu includes a reset password function that allows to reset the
password to its default.
Example:
User 001, current password = 123456.
Enter the RESET PASSWORD menu and press OK:
User 001, current password = default password = 111111 (six times 1).
6.6.12 Granting access to the installer
Browse to “Enablings” and press OK.
The menu shows the current installer authorization (authorized or not), press OK again to change it.
A confirmation signal sounds and the menu closes automatically.
6.6.13 Overtime request
For this menu to be available, at least one arming program has to be active and the user has to be enabled to the
areas and sectors associated to that program.
Browse to “Overtime” and press OK.
Use the arrow keys to cycle through the available programs and stop on the one you want to extend.
Press * once to delay the arming by one hour. Any further pressure of * delays the arming by a time set by the
installer, up to a maximum delay that has also been set by the installer. Press # to reset the delay.
Press OK to save and STOP to exit.
Note: an error message appears if no time schedule...
•isactive
• is set to perform the arming event
• arms a sector authorized to this keypad and this user
• performs the arming event soon enough (as defined by the Max. Advance Time parameter set by the
installer)
6.6.14 GSM maintenance
Browse to “GSM” and press OK.
The first row shows the telephone company, the second row has a bar showing the strength of the signal:
[###### ]
Press “Arrow up” to see the credit balance for prepaid cards. Pay-as-you-go cards show “not defined” instead.
Press STOP to go back to the menu.
6.7 Simplified codes mode
If this mode is active, the control unit stops requiring the user number and the access is made by entering the
6-digits user code (password) only.
This means that no two passwords can be the same: when activating this mode, duplicated passwords are reset.
Initially, only the installer and the first three users are activated, and their default code/password is 888888,
111111, 222222 and 333333 respectively.
Warning: This mode lowers the security level of the control unit.

14
090020692 - USER MANUAL - TITANIA v.6 series
international@elmospa.com
elmospa.com
7. SYSTEM TEST
The security system supervisor has to run periodical tests to ensure that the system works properly.
The control unit has an internal reminder timer that can be set to 4 to 52 weeks but can not be deactivated.
When the timer ends, the system anomaly LED activates.
A user enabled to Basic Maintenance has to run the zones, outputs and dialler tests (see page 12).
The control unit anomalies menu shows an anomaly for each test that has yet to be passed.
Once all tests have been successfully run, the system anomaly LED turns off.
Note: the installer shall modify the ‘System test’ timer only if the user requires it and only after he detailed him
the consequences of this operation and after a formal assumption of responsibilities.
7.1 Automatic battery test
The control unit runs a battery test every 23 hours by applying a specific load to the battery for a duration of
around 30 seconds. A failed test generates the appropriate anomalies.
If the test would happen during a mains fault, it is postponed by 23 hours.
When a low battery status is detected, the test is postponed to 30 minutes after the re-arm.

TITANIA v.6 series - USER MANUAL - 090020692
elmospa.com
8. TABLE OF CONTENTS
1. GENERALS . . . . . . . . . . . . . . . . . . . . . . . . . . . . . . . . . . . . . . . . . . . . . . . . . . . . . . . . . . . . . . . . . . . . . . . . . 3
2. CONTROL DEVICES . . . . . . . . . . . . . . . . . . . . . . . . . . . . . . . . . . . . . . . . . . . . . . . . . . . . . . . . . . . . . . . . . . 3
2.1.Proximity key readers . . . . . . . . . . . . . . . . . . . . . . . . . . . . . . . . . . . . . . . . . . . . . . . . . . . . . . . . . . . . . 3
2.2.Keypads . . . . . . . . . . . . . . . . . . . . . . . . . . . . . . . . . . . . . . . . . . . . . . . . . . . . . . . . . . . . . . . . . . . . . . . . 4
3. USER MANAGEMENT . . . . . . . . . . . . . . . . . . . . . . . . . . . . . . . . . . . . . . . . . . . . . . . . . . . . . . . . . . . . . . . . . 5
3.1.User . . . . . . . . . . . . . . . . . . . . . . . . . . . . . . . . . . . . . . . . . . . . . . . . . . . . . . . . . . . . . . . . . . . . . . . . . . . 5
3.1.1. Administrator . . . . . . . . . . . . . . . . . . . . . . . . . . . . . . . . . . . . . . . . . . . . . . . . . . . . . . . . . . . . . . . . . . . . 5
3.2.Installer . . . . . . . . . . . . . . . . . . . . . . . . . . . . . . . . . . . . . . . . . . . . . . . . . . . . . . . . . . . . . . . . . . . . . . . . . 5
3.3.Fixed codes . . . . . . . . . . . . . . . . . . . . . . . . . . . . . . . . . . . . . . . . . . . . . . . . . . . . . . . . . . . . . . . . . . . . . 5
3.4.Summary table for operations and authorizations . . . . . . . . . . . . . . . . . . . . . . . . . . . . . . . . . . . . . . .5
4. user management from the keypad . . . . . . . . . . . . . . . . . . . . . . . . . . . . . . . . . . . . . . . . . . . . . . . . . . . . . . 6
5. USER INTERFACE . . . . . . . . . . . . . . . . . . . . . . . . . . . . . . . . . . . . . . . . . . . . . . . . . . . . . . . . . . . . . . . . . . . . 7
5.1.Initial definitions . . . . . . . . . . . . . . . . . . . . . . . . . . . . . . . . . . . . . . . . . . . . . . . . . . . . . . . . . . . . . . . . . . 7
5.2.LED indications . . . . . . . . . . . . . . . . . . . . . . . . . . . . . . . . . . . . . . . . . . . . . . . . . . . . . . . . . . . . . . . . . . 7
6. OPERATIVITY . . . . . . . . . . . . . . . . . . . . . . . . . . . . . . . . . . . . . . . . . . . . . . . . . . . . . . . . . . . . . . . . . . . . . . . 8
6.1.General indications . . . . . . . . . . . . . . . . . . . . . . . . . . . . . . . . . . . . . . . . . . . . . . . . . . . . . . . . . . . . . . . 8
6.2.User access . . . . . . . . . . . . . . . . . . . . . . . . . . . . . . . . . . . . . . . . . . . . . . . . . . . . . . . . . . . . . . . . . . . . . 9
6.3.System or area arming . . . . . . . . . . . . . . . . . . . . . . . . . . . . . . . . . . . . . . . . . . . . . . . . . . . . . . . . . . . . 10
6.3.1. System or area arming with automatic exclusion of alarmed zones . . . . . . . . . . . . . . . . . . . . . . . 10
6.3.2. System or area arming with forced exclusion of alarmed zones . . . . . . . . . . . . . . . . . . . . . . . . . . 10
6.4.“MAX SECURITY” system arming . . . . . . . . . . . . . . . . . . . . . . . . . . . . . . . . . . . . . . . . . . . . . . . . . . . 10
6.5.System or area disarming . . . . . . . . . . . . . . . . . . . . . . . . . . . . . . . . . . . . . . . . . . . . . . . . . . . . . . . . . 10
6.6.Basic Maintenance access . . . . . . . . . . . . . . . . . . . . . . . . . . . . . . . . . . . . . . . . . . . . . . . . . . . . . . . . 11
6.6.1. User password change . . . . . . . . . . . . . . . . . . . . . . . . . . . . . . . . . . . . . . . . . . . . . . . . . . . . . . . . . . . 11
6.6.2. Visualize which zones are disabled (bypassed) / Enable/disable a zone . . . . . . . . . . . . . . . . . . . 11
6.6.3. Read the event log . . . . . . . . . . . . . . . . . . . . . . . . . . . . . . . . . . . . . . . . . . . . . . . . . . . . . . . . . . . . . . 11
6.6.4. Clock setup . . . . . . . . . . . . . . . . . . . . . . . . . . . . . . . . . . . . . . . . . . . . . . . . . . . . . . . . . . . . . . . . . . . . 11
6.6.5. Dialler telephone book . . . . . . . . . . . . . . . . . . . . . . . . . . . . . . . . . . . . . . . . . . . . . . . . . . . . . . . . . . . 11
6.6.6. Zones test . . . . . . . . . . . . . . . . . . . . . . . . . . . . . . . . . . . . . . . . . . . . . . . . . . . . . . . . . . . . . . . . . . . . . 12
6.6.7. Output test . . . . . . . . . . . . . . . . . . . . . . . . . . . . . . . . . . . . . . . . . . . . . . . . . . . . . . . . . . . . . . . . . . . . . 12
6.6.8. Dialler test . . . . . . . . . . . . . . . . . . . . . . . . . . . . . . . . . . . . . . . . . . . . . . . . . . . . . . . . . . . . . . . . . . . . . 12
6.6.9. Battery test . . . . . . . . . . . . . . . . . . . . . . . . . . . . . . . . . . . . . . . . . . . . . . . . . . . . . . . . . . . . . . . . . . . . 12
6.6.10. Weekly program . . . . . . . . . . . . . . . . . . . . . . . . . . . . . . . . . . . . . . . . . . . . . . . . . . . . . . . . . . . . . . . 12
6.6.11. Change code . . . . . . . . . . . . . . . . . . . . . . . . . . . . . . . . . . . . . . . . . . . . . . . . . . . . . . . . . . . . . . . . . . 13
6.6.12. Granting access to the installer . . . . . . . . . . . . . . . . . . . . . . . . . . . . . . . . . . . . . . . . . . . . . . . . . . . 13
6.6.13. Overtime request . . . . . . . . . . . . . . . . . . . . . . . . . . . . . . . . . . . . . . . . . . . . . . . . . . . . . . . . . . . . . . . 13
6.6.14. GSM maintenance . . . . . . . . . . . . . . . . . . . . . . . . . . . . . . . . . . . . . . . . . . . . . . . . . . . . . . . . . . . . . . 13
6.7.Simplified codes mode . . . . . . . . . . . . . . . . . . . . . . . . . . . . . . . . . . . . . . . . . . . . . . . . . . . . . . . . . . . 13
7. SYSTEM TEST . . . . . . . . . . . . . . . . . . . . . . . . . . . . . . . . . . . . . . . . . . . . . . . . . . . . . . . . . . . . . . . . . . . . . . 14
7.1.Automatic battery test . . . . . . . . . . . . . . . . . . . . . . . . . . . . . . . . . . . . . . . . . . . . . . . . . . . . . . . . . . . . 14
8. TABLE OF CONTENTS . . . . . . . . . . . . . . . . . . . . . . . . . . . . . . . . . . . . . . . . . . . . . . . . . . . . . . . . . . . . . . . 15

Intrusion detection control unit with embedded OS - TITANIA and TITANIAPLUS v.6 - USER MANUAL
October 2017 edition 090020692
The information and product features herein are not binding and may be changed without prior notice.
EL.MO. SpA Via Pontarola, 70 - 35011 Campodarsego (PD) - Italy
Tel. +390499203333 - Fax +390499200306 - Help desk +390499200426 - www.elmospa.com - inte[email protected]
This manual suits for next models
1
Table of contents
Other Elmo Control Unit manuals
Popular Control Unit manuals by other brands

Burkert
Burkert 219639 operating instructions

3M
3M RTE6701-OEM Integration manual

Kermi
Kermi x-net connect installation instructions

Pentair
Pentair FLECK 4600 SXT user guide

Burkert
Burkert 6511 operating instructions

Conbraco Industries
Conbraco Industries Apollo 70-600 Series Installation, operation and maintenance guide