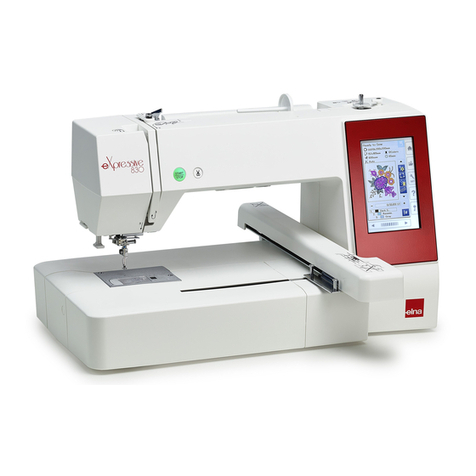
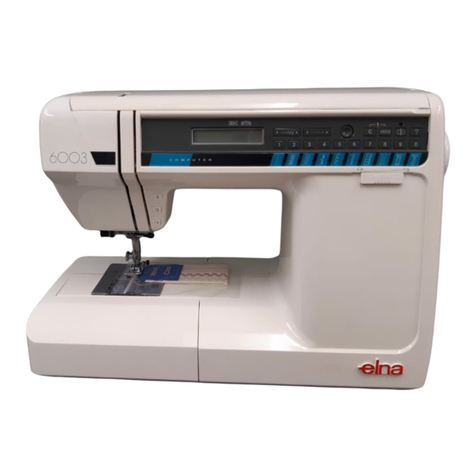
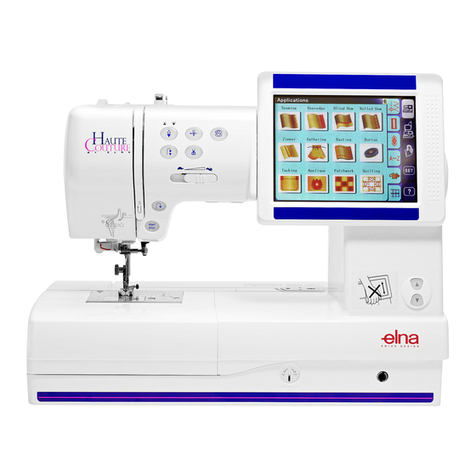
ELNA eXplore 320 User manual

SERVICE MANUAL
MODEL: 320

CONTENTS
SERVICE ACCESS (1) FACE PLATE ................................................................................................ 1
SERVICE ACCESS (2) BASE COVER .............................................................................................. 2
SERVICE ACCESS (3) FRONT COVER ........................................................................................... 3
SERVICE ACCESS (4) REAR COVER ............................................................................................. 4
MECHANICAL ADJUSTMENT .......................................................................................................... 5
ADJUSTING PRESSR FOOT HEIGHT AND ALIGNMENT............................................................... 6
ADJUSTING NEEDLE SWING..........................................................................................................7
ADJUSTING NEEDLE DROP POSITION ......................................................................................... 8
ADJUSTING NEEDLE TO HOOK TIMING ........................................................................................ 9
ADJUSTING NEEDLE BAR HEIGHT .............................................................................................. 10
ADJUSTING CLEARANECE BETWEEN NEEDLE AND HOOK POINT......................................... 11
ADJUSTING BACKLASH BETWEEN HOOK DRIVE GEAR AND LOWER SHAFT GEAR ............ 12
ADJUSTING FEED DOG HEIGHT .................................................................................................. 13
ADJUSTING FEED BALANCE ........................................................................................................ 14
ADJUSTING BUTTONHOLE FEED BALANCE............................................................................... 15
ADJUSTING BUTTONHOLE ZERO FEED ..................................................................................... 16
MECHANICAL ADJUSTMENT ........................................................................................................ 17
REPLACING MOTOR AND ADJUSTING MOTOR BELT TENSION ............................................... 18
REPLACING AND ADJUSTINGTHREADER ................................................................................. 19
PARTSLIST................................................................................................................................ 20~41

1
Service Access (1)
FACE PLATE
<TO REMOVE>
Remove the cap and setscrew. Remove the face plate.
<TO ATTACH>
Attach the face plate with the setscrew. Attach the cap.
Setscrew
Face plate
Cap

2
Service Access (2)
BASE COVER
<TO REMOVE>
1Loosen setscrews.
2. Take the base cover out.
<TO ATTACH>
3Follow the above procedure in reverse.
Setscrew
Setscrew
Setscrew
Base cover
Setscrew
Setscrew
Setscrew
Feed dog drop le-
ver

3
Service Access (3)
FRONT COVER
<TO REMOVE>
1 Remove the face cover and the base cover (see page 1, 2).
2Remove dials (A), (B).
3 Loosen setscrews (A), (B), (C).
4 Unhook the tabs and remove the front cover.
<TO ATTACH>
5Reverse the procedure above.
Dial (A)
Dial (B)
Tab
Setscrew(A)
(B)
Front cover
Tab
Setscrew (C)
Tab

4
Rear cover
(C)
(B)
(D)
Setscrew (A)
(B)
Presser lifter
(1) (2)
(3)
Service access (4)
Rear cover
<TO REMOVE>
1Remove the face cover and front cover (see page 1~3).
2 Remove setscrews (A), (B), (C) and (D).
Lower the presser foot.
Remove the rear cover from the part (1), (2) to (3) in order.
<TO ATTACH>
3 Mount the rear cover in reverse procedure of the removing.

5
Mechanical adjustment
TOP TENSION
NEEDLE BAR HEIGHT
TO CHECK:
When the tip of shuttle hook meets the left side of the needle in ascending travel of the
needle from its left and lowest position, the distance between the top of the needle eye and
the tip of the shuttle hook should be in the range of 2.9-3.5 mm.
ADJUSTMENT PROCEDURE:
1Remove the face cover. (See page 4.)
2 Set the pattern selector dial at " ".
3Open the shuttle cover.
4Remove the shuttle race ring.
5 Turn the handwheel toward you until the tip of the shuttle hook meets the left side of the
needle.
6Loosen the lower shaft crank arm setscrews (A).
7 Adjust the height of the needle bar by moving the needle bar upward or downward
without turning it.
8 Tighten the setscrew (A).
9Attach the shuttle race ring.
C
E
D
B

6
Presser foot lifter
Setscrew A
6 mm
Presser foot alignment
Presser foot should
be parallel to the feed
dog slots.
Adjusting Presser Foot Height and Alignment
The distance between the bottom of the presser foot in up position and the needle plate
should be 6.0 mm.
<TO ADJUST>
1Remove the face plate (see page 1) and needle.
2 Lower the feed dog below the needle plate. Place a block 6 mm thick under the presser foot
and lower
the presser foot lifter.
3 Loosen the setscrew (A). Raise the presser foot lifter and tighten the setscrew (A) firmly.
4Attach the needle and face plate.
NOTE:
Make sure that the presser foot should be parallel to the feed dog slots (B) in the needle plate.
Presser foot height
Presser foot
Needle plate
Feed dog

7
Adjusting Needle Swing
If the needle swing when it is still in the fabric, correct it as follows.
<TO ADJUST>
1Remove the front cover (see page 3).
2 Select the zigzag stitch ( ) and set the stitch width dial at 5.
3 Loosen the setscrews on the worm.
4 While holding the worm as not to rotate, turn the handwheel to adjust the needle bar swing
so that the needle starts to swing 2 - 3 mm above the needle plate in the right outflow.
5Tighten the setscrews on the worm securely.
6Attach the front cover.
NOTE:
The upper shaft should turn smoothly without an excessive backlash between the worm
and gear.
Upper shaft
Setscrew
Worm
Needle plate
2 to 3mm
Backlash in-
creases Backlash
decreases
Note:
Make sure the worm does not
move sideways when turning the
handwheel, otherwise the
backlash will change.

8
Adjusting Needle Drop Position
The clearance between the needle and side edges of the needle hole should be 0.2
mm or more when the maximum width zigzag stitch ( ) is selecte. And the neddle
should drop in the center of the needle hole when the straight stitch is selected.
<TO ADJUST>
1Remove the face plate (see page 1).
2Select the straight stitch ( ) and set the stitch width dial at 5.
3 Loosen the setscrew.
4 Move the needle bar supporter so that the needle drops in the center of the needle hole.
5Tighten the setscrew.
6 Select the zigzag stitch ( ) and set the stitch width dial at 5.0 to check the clearance
between needle and side edges of the needle hole.
7 Attach the face plate.
AB
Setscrew
Needle hole
A=B
Needle bar supporter

9
Adjusting Needle to HookTiming
The amount of ascending travel of the needle in the maximum width
zigzag stitch ( ) from the right lowest to where the hook point meets
the right side of the needle position should be 1.4 to 2.0 mm.
<TO ADJUST>
1 Select the maximum width zigzag stitch ( ) and set the stitch width dial at 5.
2Remove the base cover (see page 2).
3Remove the needle plate and bobbin holder.
4 Loosen the setscrews on the lower shaft gear.
5 Turn the handwheel toward you to bring the needle to the right lowest position. Then
raise the needle 1.7mm from the lowest position.
6 While holding the handwheel as not to move the needle bar, rotate the hook race until
the hook point meets the right side of the needle.
7Tighten the setscrews.
8Attach the bobbin holder and needle plate.
9 Attach the base cover.
NOTE:
Before performing this adjustment, be sure to check the needle bar height.
Needle plate
Bobbin holder
Lower shaft gear
Setscrews
(2 off)
1.4 - 2.0 mm
Lowest position
of the needle
Hook point meets the right
side of the needle.
Needle in right position
Setscrew

10
Adjusting Needle Bar Height
The standard distance between the upper edge of the needle eye and the upper surface
of the hook race should be in the range of 3.0 - 3.6 mm when the hook point meets the
right side of the needle in its ascending travel from the right lowest position of the
maximum width zigzag stitch ( ).
<TO ADJUST>
1 Select the zigzag stitch ( ) and set the stitch width dial at 5, then bring the needle to the
right lowest position.
2Remove the face plate (see page 1).
3Remove the needle plate and bobbin holder.
4 Turn the handwheel toward you until the hook point meets the right side of the needle.
5 Loosen the setscrew and move the needle bar up or down to adjust the needle bar height.
NOTE: Be careful not to rotate the needle bar.
6Tighten the setscrew.
7 Attach the bobbin holder, needle plate and face plate.
NOTE:
Before performing this adjustment, check the needle to hook timing.
Setscrew
Needle Alignment
3.0 - 3.6mm
Upper edge of
needle eye
Hook race unit
Needle plate
Bobbin holder
Upper surface of hook race
Setscrew

11
Adjusting Clearance between Needle and Hook Point
The standard clearance between the needle and hook point should be -0.10 to +0.05 mm.
<TO ADJUST>
1 Select the zigzag stitch ( ) and set the stitch dial at 5.
2 Remove the base cover (see page 2). Remove the needle plate and bobbin holder.
3 Replace the needle with the test pin. Loosen the setscrews (B) and (C). Slightly loosen
the setscrew (A).
4 Turn the handwheel toward you to bring the hook point behind the test pin.
5 Adjust the clearance to -0.1 to +0.05 mm by moving the hook base plate up or down.
6Tighten the setscrews (A), (B) and (C) securely.
7 Check the backlash of the hook drive gear and lower shaft gear.
NOTE:
Adjust the backlash if necessary (see page 12).
8 Attach the base cover.
9Replace the test pin with the needle. Attach the bobbin holder and needle plate.
Needle plate
Bobbin holder
Test pin
Hook point
Setscrew (A)
Setscrew (B)
Setscrew (C)
–0.1 to +0.05mm
Setscrew
Hook base palte

12
Adjusting Backlash between Hook Drive Gear
and Lower Shaft Gear
The rotary play should be 0.8 mm or less when the hook point is within the span of the feed
dog, and the
gears should turn smoothly.
<TO ADJUST>
1Remove the base cover (see page 2).
2 Loosen the setscrews.
3If the play is too big, turn the lower shaft bushing in the direction (B).
If the gear engagement is too tight, turn the lower shaft bushing in the direction (A).
4 Tighten the setscrews and attach the base cover.
NOTE:
Be sure to check and adjust the needle to hook timing and feed dog height if necessary, after
performing this adjustment.
A
B
A
B
Span of feed dog
Hook point
Check rotary play.
Lower shaft bushing
Hook drive gear
Lower shaft bushing
Lower shaft gear

13
Adjusting Feed Dog Height
The distance between the lowered presser foot and needle plate should be 0.75 to 0.85 mm
when the feed dog is in its highest position.
<TO ADJUST>
1Select the straight stitch ( ) and set the stitch length dial at "4".
2 Lower the presser foot. Turn the handwheel to bring the feed dog to its highest position.
3Remove the base cover (see page 2).
4 Loosen the setscrew (A) and nut.
5 Turn the adjusting screw to set the feed dog height to 0.8 mm.
6 Tighten the nut and setscrew (A).
7 Attach the base cover.
Presser foot
0.75 to 0.85mm
Needle plate
Feed dog
To raise
To lower
Adjusting screw
Nut
Setscrew (A)

14
Adjusting Feed Balance
The forward feeding (A) and backward feeding (B) should be equal when sewing stretch stitch
pattern.
<TO ADJUST>
1Select the straight stretch stitch ( ) and set the stitch length dial at S.S.
2 Place a piece of paper under the foot. Turn the handwheel to check the needle marks.
3 If the forward feeding (A) is longer than backward feeding (B), turn the adjusting screw in the
direction (C).
4 If the forward feeding (A) is shorter than backward feeding (B), turn the adjusting screw in
the direction (D).
A
AB
1
23
A
A
1
23B
A
A
1
23B
ABABAB
(D) (C)
Adjusting screw

15
Adjusting Buttonhole Feed Balance
When sewing a buttonhole, the stitches on each side of the buttonhole should be the same
density.
The range of 9 to 12 stitches in the right side row against 10 stitches in the left side row is
considered acceptable.
<TO ADJUST>
1 Sew a test buttonhole and count the stitches on each side.
2 Remove the cap to access the adjusting screw.
3 If the left row is denser (A), turn the adjusting screw in the direction (C).
4 If the right row is denser (B), turn the adjusting screw in the direction (D).
5Attach the cap.
AB
Cap
Adjusting screw
(C)
(D)

16
Adjusting Buttonhole Zero Feed
If the fabric is fed when sewing a bartack of the buttonhole, correct it as follows:
<TO ADJUST>
1Sew a test buttonhole to check if the fabric is fed while sewing the bartacks.
2 Remove the cap to access the adjusting screw.
3 If the fabric is fed forward (A), turn the adjusting screw in the direction (C).
If the fabric is fed backward (B), turn the adjusting screw in the direction (D).
4Attach the cap.
Bartack
Bartack
Cap
Adjusting screw
Adjusting screw
(B)
(A)
Stitch length dial
(D) (C)

17
Mechanical Adjustment
TO CHECK:
If the material is feed forward or backward when sewing bartack on buttonhole, make an
adjustment as follows:
ADJUSTMENT PROCEDURE:
1. Set the pattern selector control at " " and the stitch length control at "4".
2. Remove the front cover. (See page 5.)
3. Place a piece of paper under the foot and turn the handwheel.
If the paper is fed forward, turn the adjusting screw in the direction of (C).
If the paper is fed backward, turn the adjusting screw in the direction of (D).
4. Attach the front cover.
FORWARD FEEDING
BACKWARD FEEDING
(D) (C)
ADJUSTING SCREW

18
Replacing Motor and Adjusting Motor BeltTension
<TO REPLACE THE MOTOR>
1 Remove the face plate, base cover, front cover and rear cover (see pages 1 to 4).
2Remove the setscrews (A) and machine socket. Remove the setscrews (B) and machine
socket lid.
3Remove the nuts and disconnect the motor cords.
4Remove the setscrews (C) and motor.
5 To attach the motor, follow the above procedure in reverse.
<TO ADJUST THE MOTOR BELT TENSION>
1Slightly loosen the setscrews (C).
2 While pushing the middle of the motor belt with a 300 grams load, move the motor up or
down so that the belt deflects 7 to 9 mm.
3Tighten the setscrews (C) securely.
Setscrew (A)
Setscrew (B)
Setscrew (C)
Machine socket
Machine socket lid
7 to 9mm
300 grams load
240V
Setscrew (A)
Lamp cords
Motor cords
Nut
120V
Lamp cords
Motor cords
Nut
Other manuals for eXplore 320
2
This manual suits for next models
1
Table of contents
Other ELNA Sewing Machine manuals

ELNA
ELNA eXcellence 760 User manual

ELNA
ELNA eXplore 220 User manual

ELNA
ELNA eXplore 320 User manual

ELNA
ELNA 9500 - LEAFLET User manual

ELNA
ELNA eXplore 240 User manual

ELNA
ELNA 8100 - LEAFLET User manual

ELNA
ELNA Elnita User manual

ELNA
ELNA XPRESSIVE 2 User manual

ELNA
ELNA eXtend covermax User manual

ELNA
ELNA eXplore 150 User manual

ELNA
ELNA eXplore 120 User manual

ELNA
ELNA 3004 User manual

ELNA
ELNA 6003 - LEAFLET User manual

ELNA
ELNA eXcellence 760 PRO User manual

ELNA
ELNA Lock L4 User manual

ELNA
ELNA 3210 User manual

ELNA
ELNA Sew Fun User manual

ELNA
ELNA eXcellence 680+ User manual

ELNA
ELNA eXplore 120 User manual

ELNA
ELNA 3210 User manual