12 13
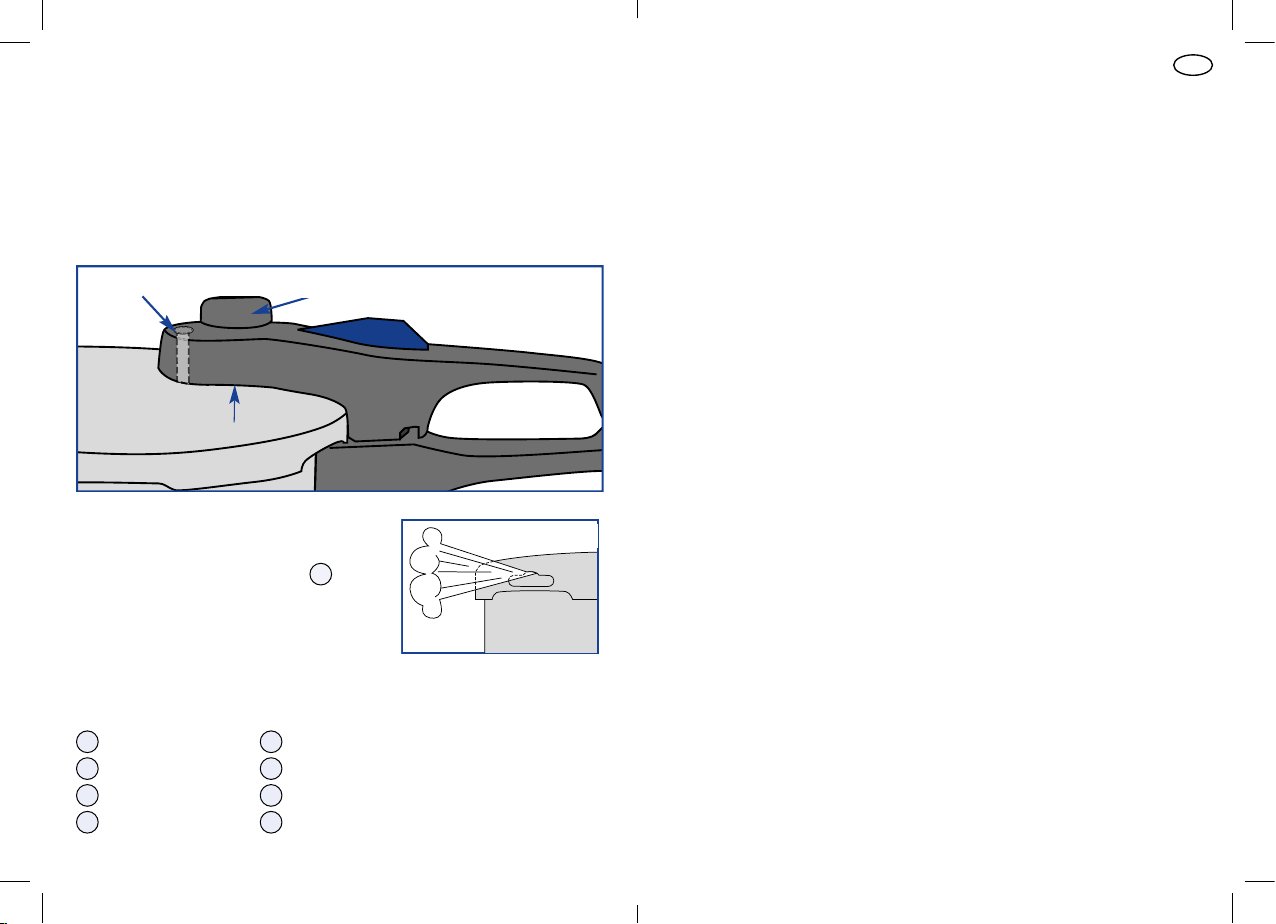
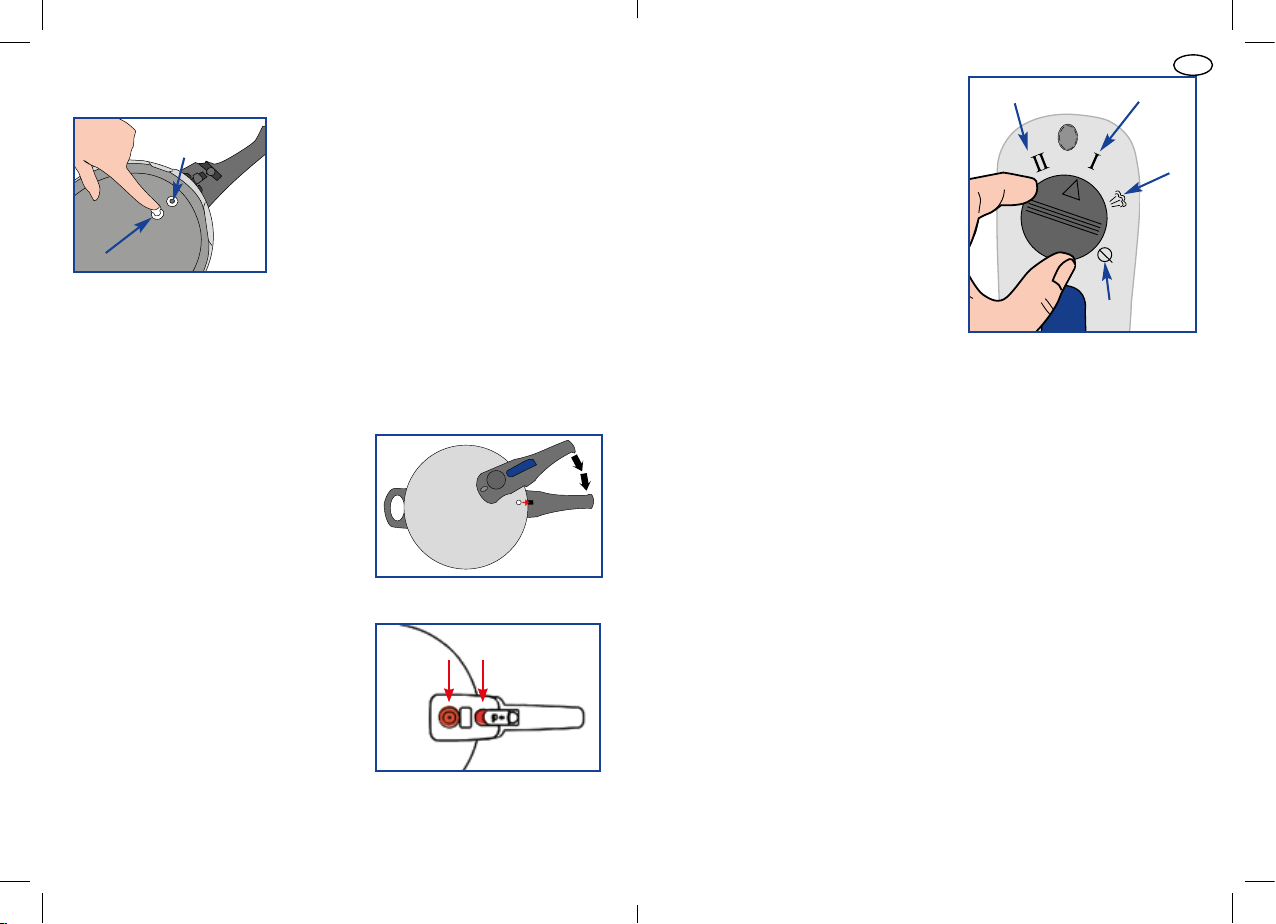
Herausnehmen und Reinigen des Druckregelungsventils
Um den Silikondichtungsring zu reinigen, entnehmen Sie bitte das Druckrege-
lungsventil. Stellen Sie dazu das Dreieckssymbol am Druckregelungsventil auf
das Symbol Ø(siehe Abb. 7, Seite 9). Das Ventil lässt sich nach oben abnehmen.
Pflege und Instandhaltung
ReinigenSieIhren Schnellkochtopf(optional:Einsatz undStandfuß)nachjedem
Gebrauch mit heißem Wasser und einem nicht scheuernden Spülmittel. Deckel
und Gummidichtung dürfen nicht in der Spülmaschine gereinigt werden. Bei
stärkeren, hartnäckigen Verschmutzungen empfiehlt es sich, diese eine Zeit
lang einzuweichen. Verwenden Sie zur Reinigung keine scharfen oder spitzen
Gegenstände, auch nicht bei starker Verschmutzung. Kalkrückstände mit Essig
entfernen. Die Gummidichtung darf nicht mit Spülmittel gereinigt werden.
Aufbewahrung
Nach dem Spülen sind Topf und Deckel gut abzutrocknen und mit umgestülp-
tem Deckel aufzubewahren. Der Topf darf nicht mit geschlossenem Deckel weg-
gestellt werden, da dies vorzeitige Materialermüdung des Gummis bewirkt!
Allgemeine Hinweise
Geschraubte Beschläge können sich mit der Zeit lösen, sind aber mit einem
handelsüblichen Schraubendreher leicht wieder anzuziehen. Summgeräusche
können beim Kochen auf Induktionsherden auftreten. Diese sind technisch
bedingt und kein Anzeichen für einen Fehler des Kochgeschirrs. Der Boden-
durchmesser des Topfes und Kochfeldgröße müssen übereinstimmen, da sonst,
besonders bei kleinerem Bodendurchmesser die Möglichkeit besteht, dass das
Kochfeld (Magnetfeld) auf den Topfboden nicht anspricht. Heizen Sie Koch-
geschirre aufmaximalmittlererStufevor. Besondersauf Induktionskochfeldern
erreichen Geschirre ohne Koch- und Bratgut in kürzester Zeit Temperaturen von
bis zu 500 °C.
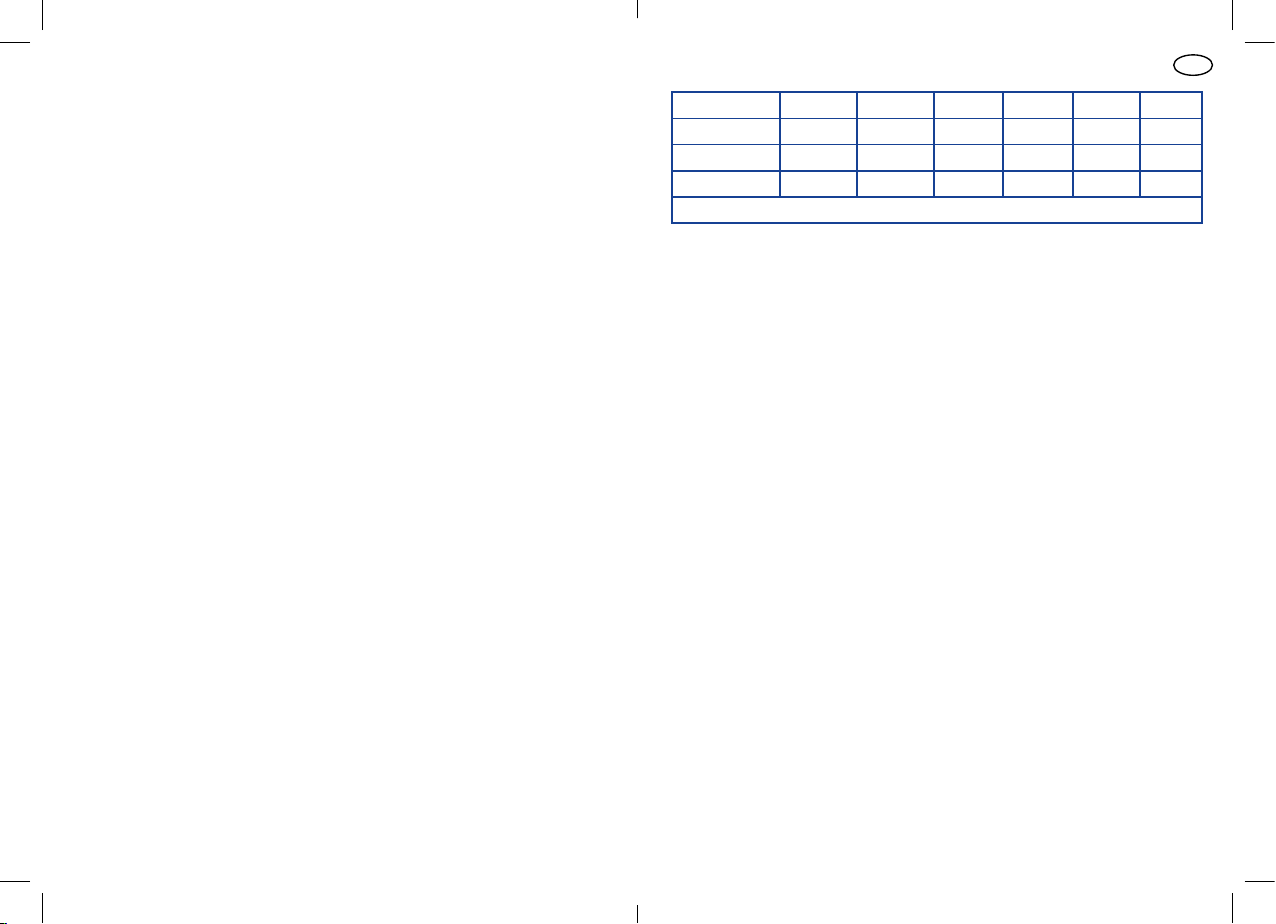
Modellnummer
ASC18-2.7
ASC18-3.2 ASC22-3 ASC22-4 ASC22-6
ASC22-7
Durchmesser Ø 18 cm Ø 18 cm Ø 22 cm Ø 22 cm Ø 22 cm Ø 22 cm
Nennvolumen 2,7 L 3,2 L 3,0 L 4,0 L 6 L
7L
Max. Füllmenge 1,8L 2,1L 2,0L 2,7L 4,0L
4,7L
Arbeitsdruck I 60Kpa II 100Kpa
Gesundheitshinweis
Bitte beachten Sie, dass es bei Menschen mit Nickelallergie beim Gebrauch von
Edelstahl-Töpfen unter Umständen zu allergischen Reaktionen kommen kann.
WARNHINWEISE
Die Reparatur des Dampfdruckkochtopfs darf nur von einem autorisierten
Fachpersonal durchgeführt werden.
Was tun wenn...
... Dampf zwischen Deckel und Topf entweicht?
Dann ist die Gummidichtung defekt oder der Topf ist nicht richtig geschlos-
sen. Ersetzen Sie eine defekte Gummidichtung. Schließen Sie den Topf korrekt
(s. Kap. „Topf schließen“). Sollte die Gummidichtung nur verschmutzt sein, ist
sie zu reinigen.
... kein Dampf aus dem Druckregelungsventil entweicht?
Dann ist der Topf nicht richtig abgedichtet und muss dahin gehend überprüft
werden. Zu überprüfen ist auch, ob genügend Flüssigkeit im Topf ist. Mög-
licherweise ist zu wenig Druck im Topf vorhanden. Regeln Sie die Energiezu-
fuhr vorsichtig / entsprechend nach. Sollte die Gummidichtung verschmutzt
oder defekt sein, ist sie zu reinigen oder zu ersetzen. Einmal im Jahr sollte die
Gummidichtung erneuert werden.